

CHINE-COLLÉ GOES ON WITH ITS LIFE OR – ABOUT THE CONSERVATION OF TWO PRINTS IN THIS TECHNIQUE AT THE KANUT AND THE CONSERVATOR’S CONTACTS WITH THE ARTIST
Autor:
Maris Allik
Number:
Anno 2019/2020
Category:
Conservation
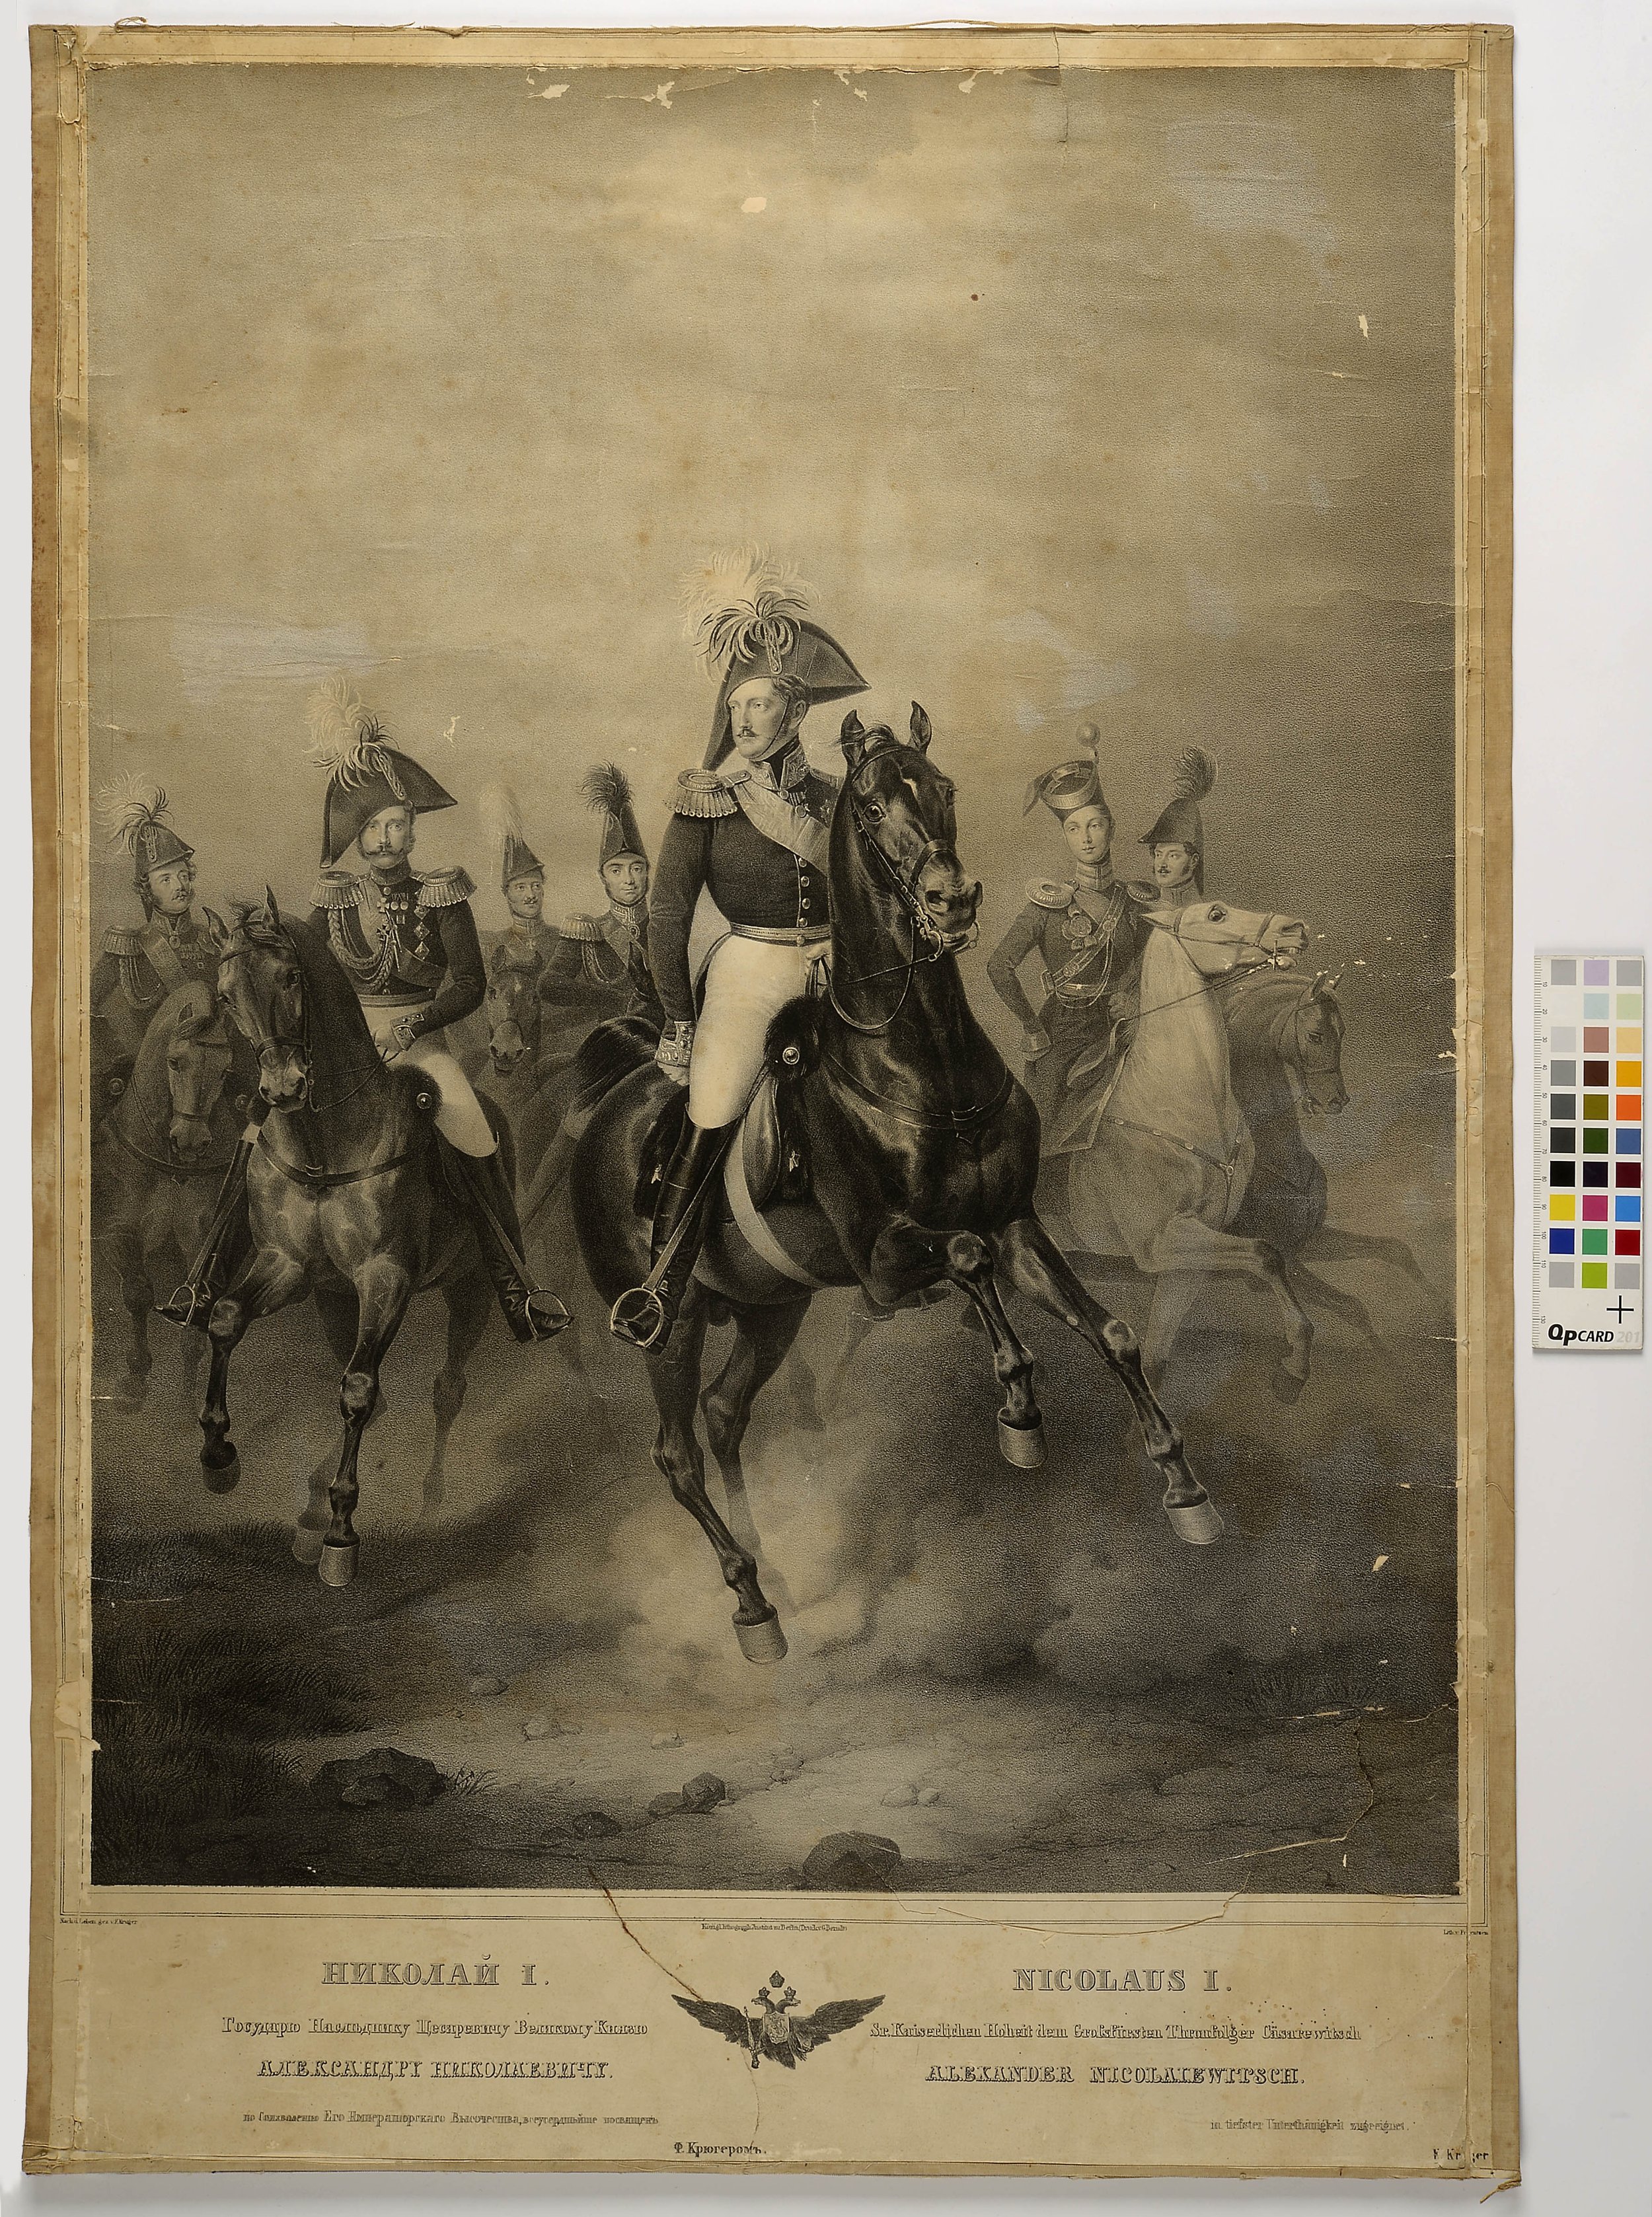
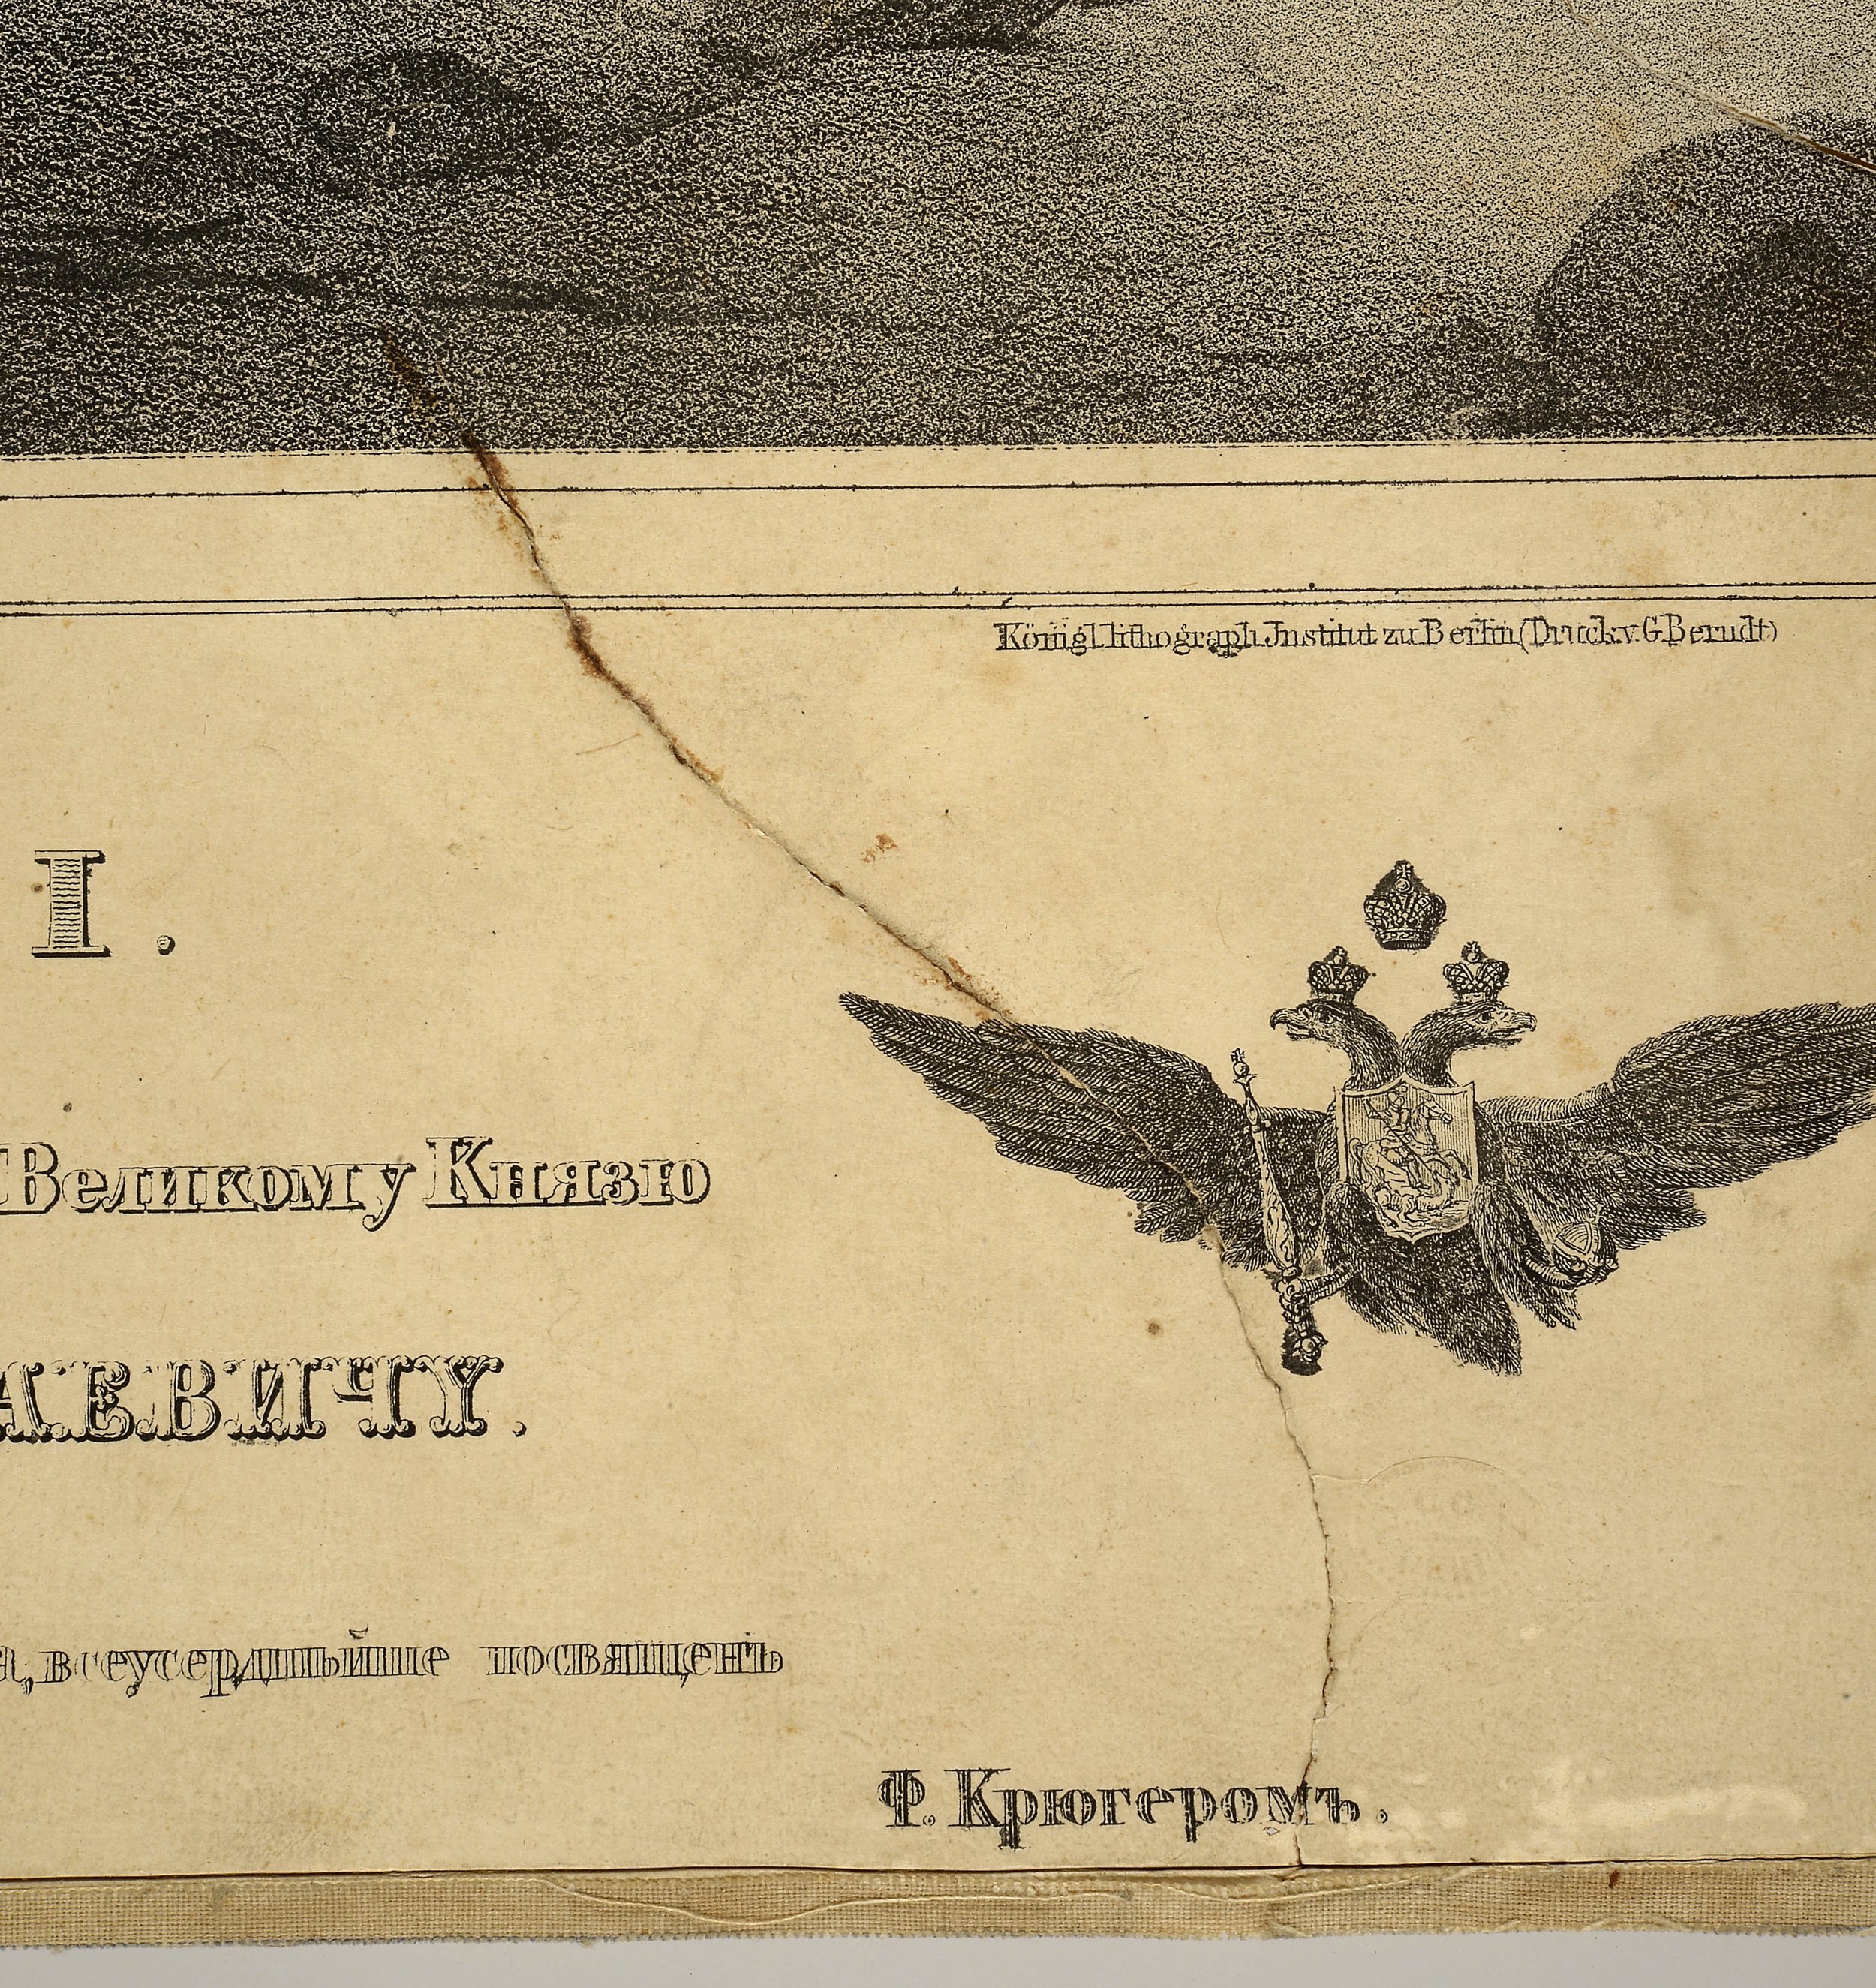


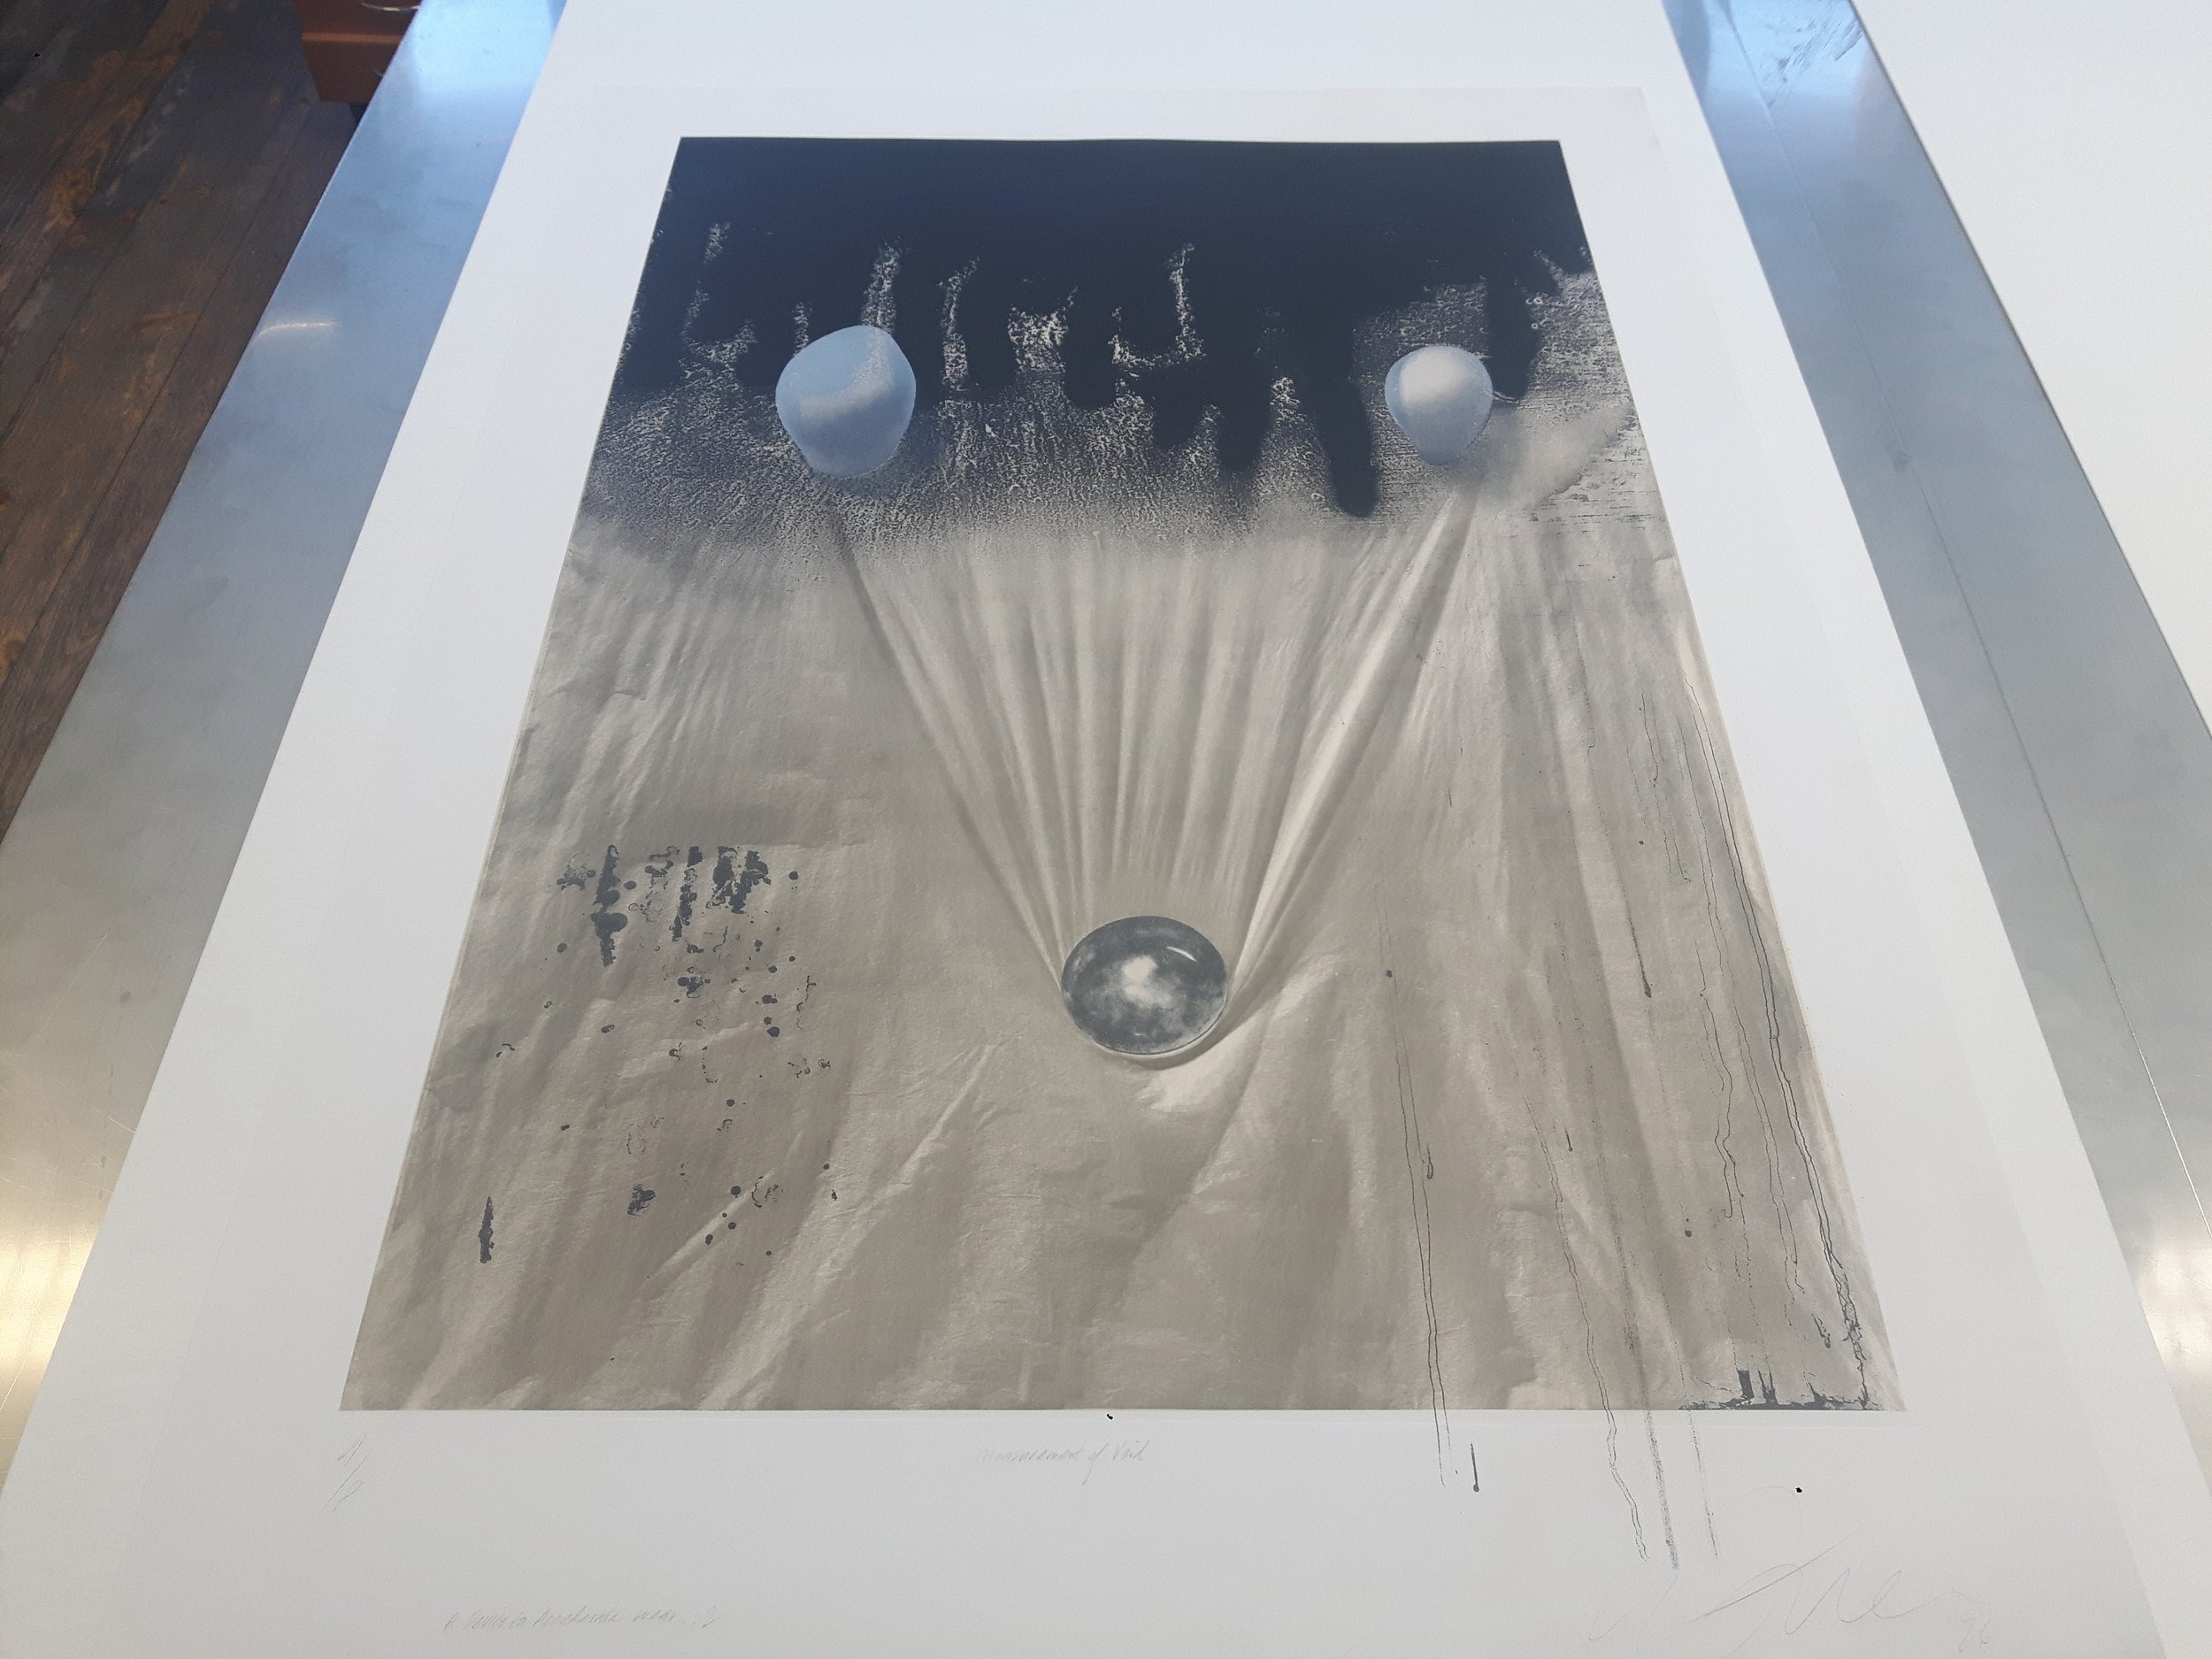
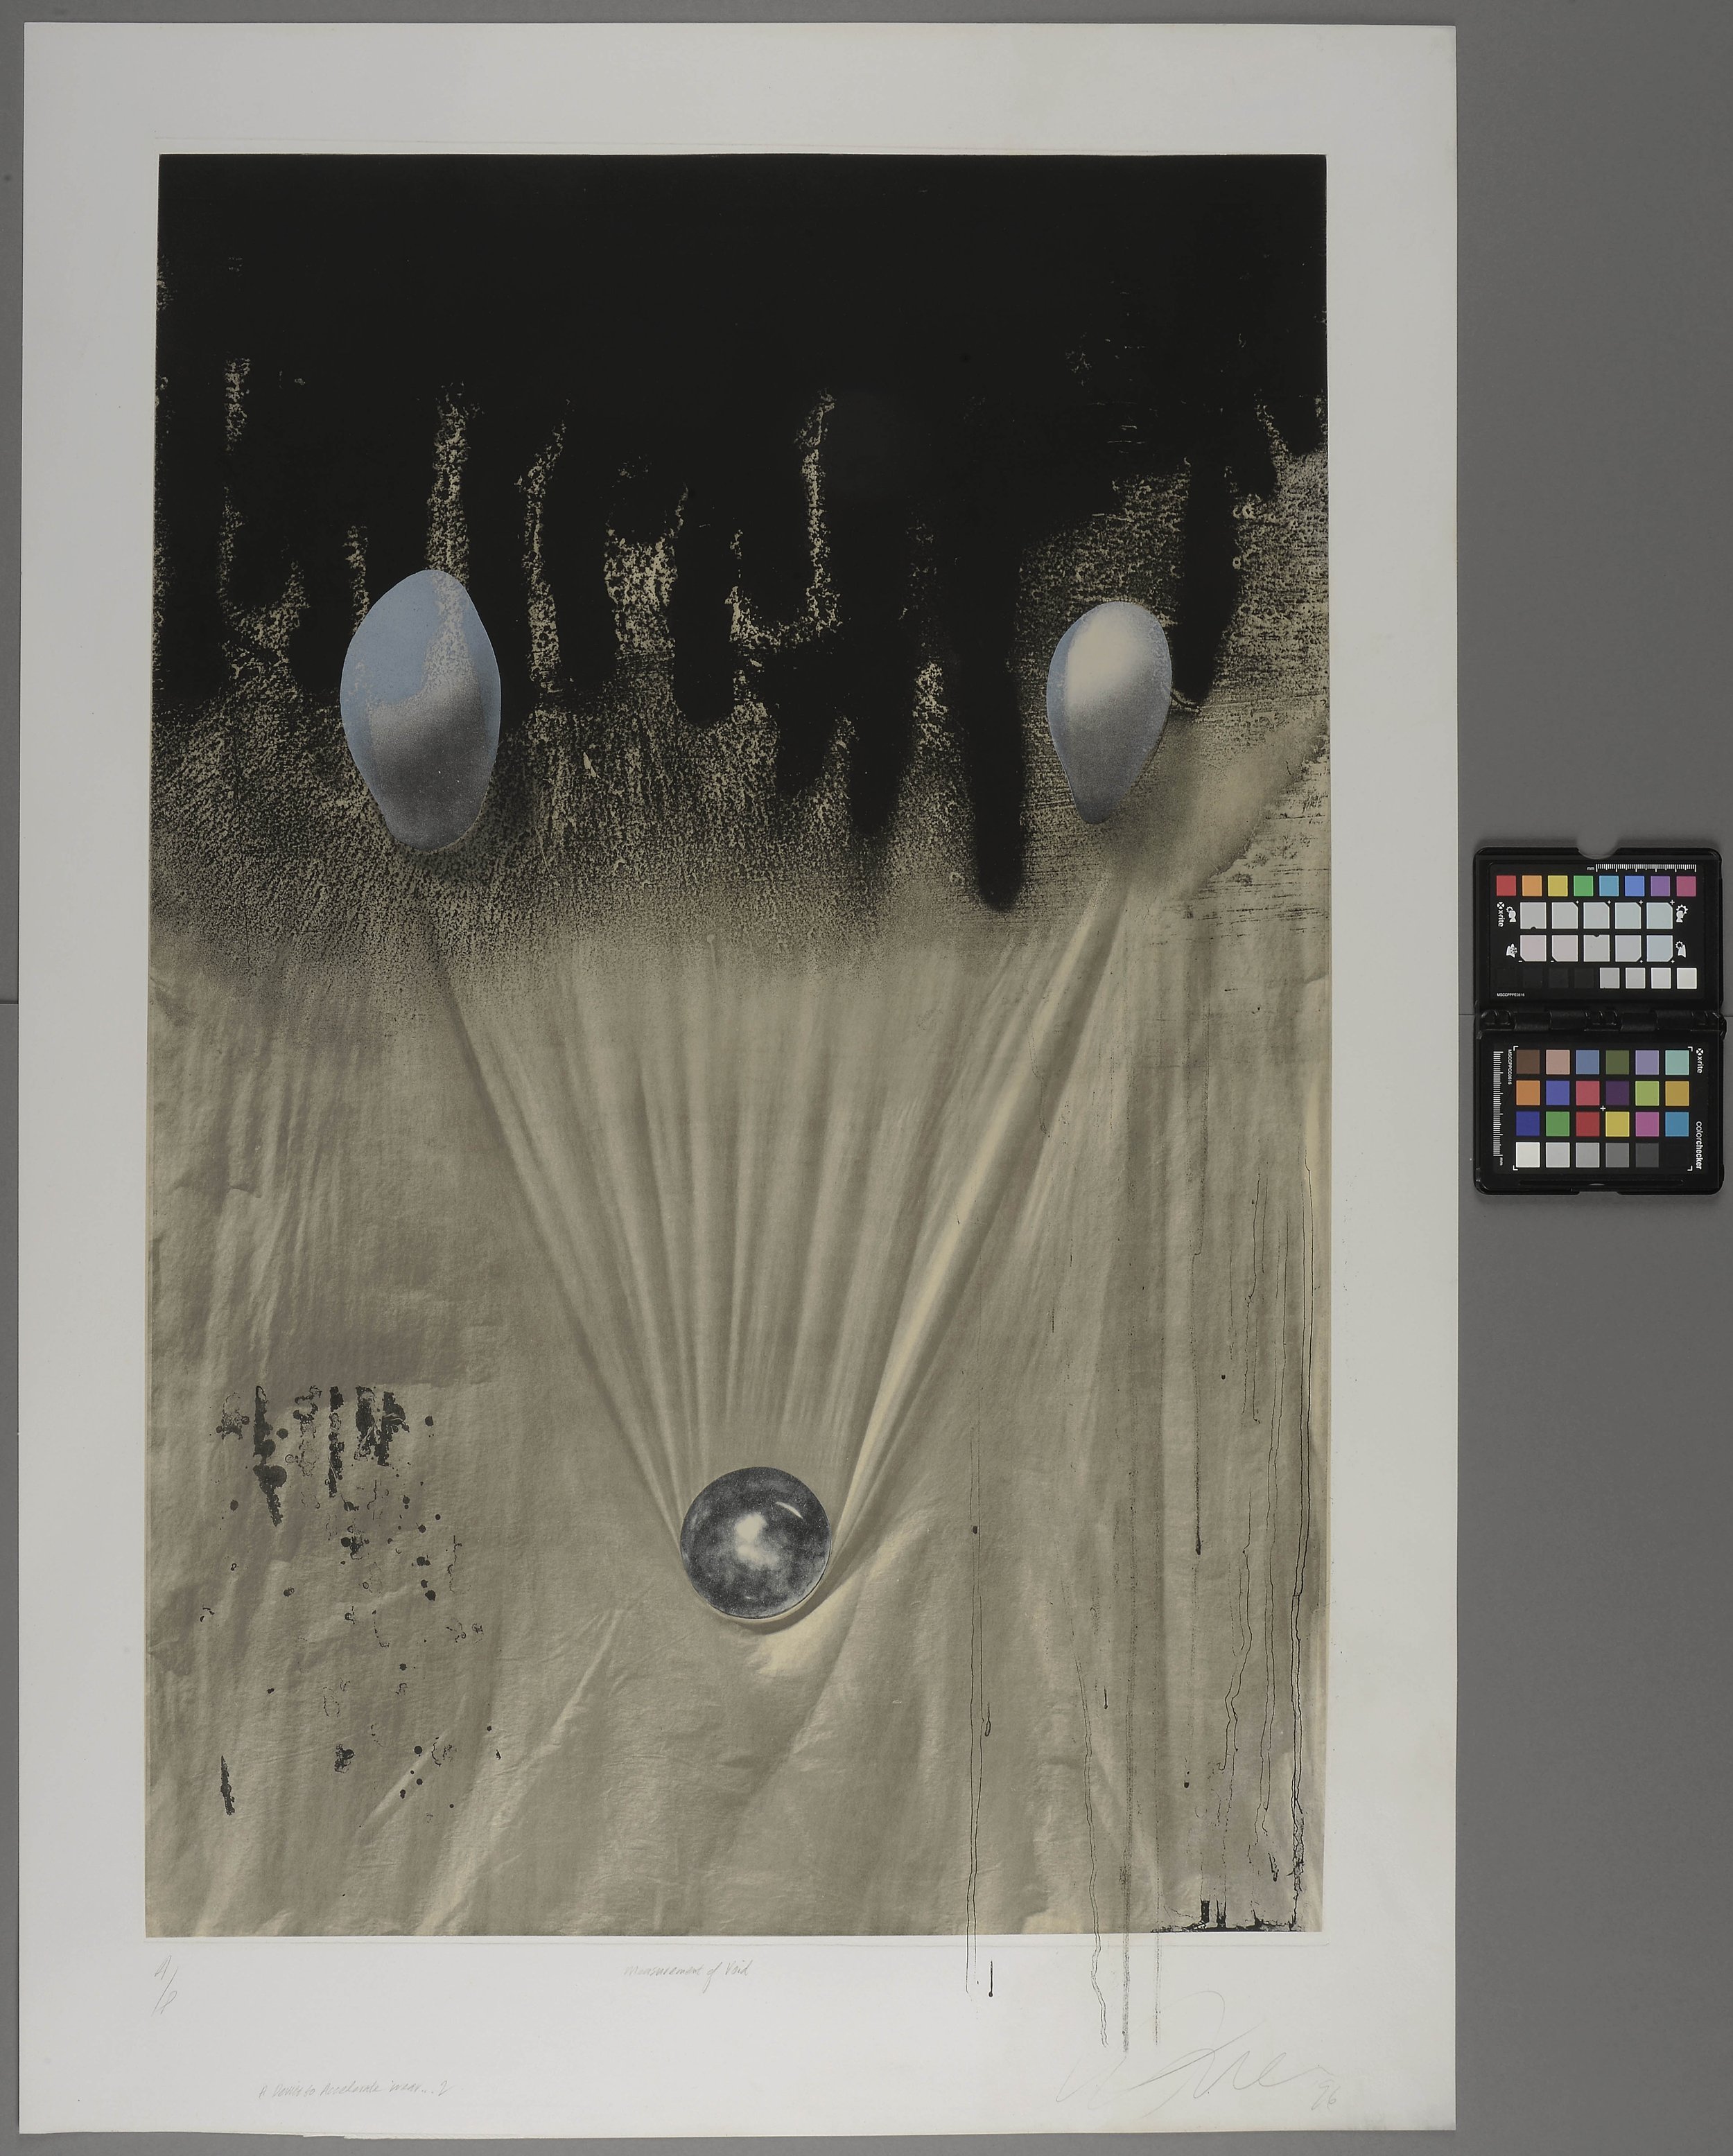
For me everything started in 2017 when a lithograph in a really problematic condition had been brought to the Kanut for conservation. F. Krüger’s work – Nicolaus I, Köningl. litograph.institut, zu Berlin had fragmentised and its technique – Chine-collé – complicated the solution for conservation even more. A colleague with similar experience warned me that a work in this technique may ‘awaken’ after being moistened and that I should expect the unexpected. My experience gained with this work occurred to be advantageous – a year later, I was standing face to face with another Chine-collé. This time it was a print in mixed technique by a contemporary author – Walter Jule’s Measurement of Void – A Device to Accelerate Wear, dating from 1996. This work became an especially interesting assignment, above all, because I was lucky to get into contact with the author for more information. Hereby, I should mention that in this case it was not easy to immediately ascertain the print technique but thanks to my recent experience I was able to determine it before launching into actual conservation.
Chine-collé technique
The so-called China paper for intaglio printing and lithography has been used in Europe since the early 19th century. The notion China paper in the context of printing history means using thin sheets of printing paper when the artist is striving for an especially detailed image. They were made of kozo, gampi, or some other this kind of fibre of eastern origin, in Europe also of flax. viide1 ⁽¹⁾ In case this kind of paper is independently used, the technique is called Chine volant. When it is backed with a thicker and more solid paper the technique is Chine appliqué or Chine-collé.
For Chine-collé the image is applied on thin paper, as intaglio print will be considerably finer on delicate oriental paper. The delicate sheet is backed with a more substantial sheet already during the printing process. Another purpose to use just this technique might be to make the image richer in colour, as the backing paper in various shades shimmers through the thin upper layer.
Usually, in the case Chine-collé technique, ink is first spread on the printing plate. Then, a thin moistened sheet of paper cut precisely to match the size of the image and the reverse side of which has been covered with glue is placed on the plate. The printing plate with a thin sheet on it that is covered with glue, is fitted on the thicker previously dampened sheet and then the whole package will go through the press. This way the image will be on the thin sheet that will simultaneously be backed with a thicker one. For the other technique of the Chine-collé the dry sheet of thin paper is cut according to the size of the printing plate, covered with paste and left to dry. This makes it possible for the artist to prepare and store several sheets of printing paper. When the artist is ready for printing, the paper is moistened for activating the glue and placed on the printing plate covered with paints, the glued side up. Then the thicker and moistened sheet is placed on the reverse side of the thin one and pressing may begin. This method allows the thin sheet not to stretch too much compared to the thicker one, as it could contract when it was drying after the printing process.
In addition to the traditionally prepared paste (made of wheat or rice starch), stronger glues like synthetic polymer-based PVA are used today as well.
Sometimes dry flour or starch is spread on the moist paper before pressing. At times, however, artists do not use any adhesive, expecting the fibres to bond in a moist environment, due to their chemical and physical properties (hydrogen ties, cohesion). viide 2 ⁽²⁾ However, in this case a persisting result is not granted, however.
Several storing and conservation problems may occur with prints made in the Chine-collé technique. In addition to the durability of the bond between the sheets, we have to take into consideration stretching and contracting of different paper and the quality changes that vary due to different properties of fibres. Meaning, earlier lower-quality paper was used for backing the Chine-collé technique pieces and this kind of paper yellows with age much more than the paper of the upper layer made of bass fibre. The discoloration of the backing paper has often been unevenly transferred onto the better-quality sheet with the image on it. This may cause changes in colour or tidelines on the image.
In the conservation of yellowed paper better results can be achieved by washing in running water but the aqueous treatment should be used only when the object has been individually estimated. So we may say there is no “one good” method for treating the Chine-collé technique.
The earlier conservation experience at the Kanut in 2010 allowed lithographs in this technique to be washed by soaking. viide 3 ⁽³⁾ The present article, however, deals with objects that could not be washed at all, as the upper layer was too fragile and torn. viide 4 ⁽⁴⁾
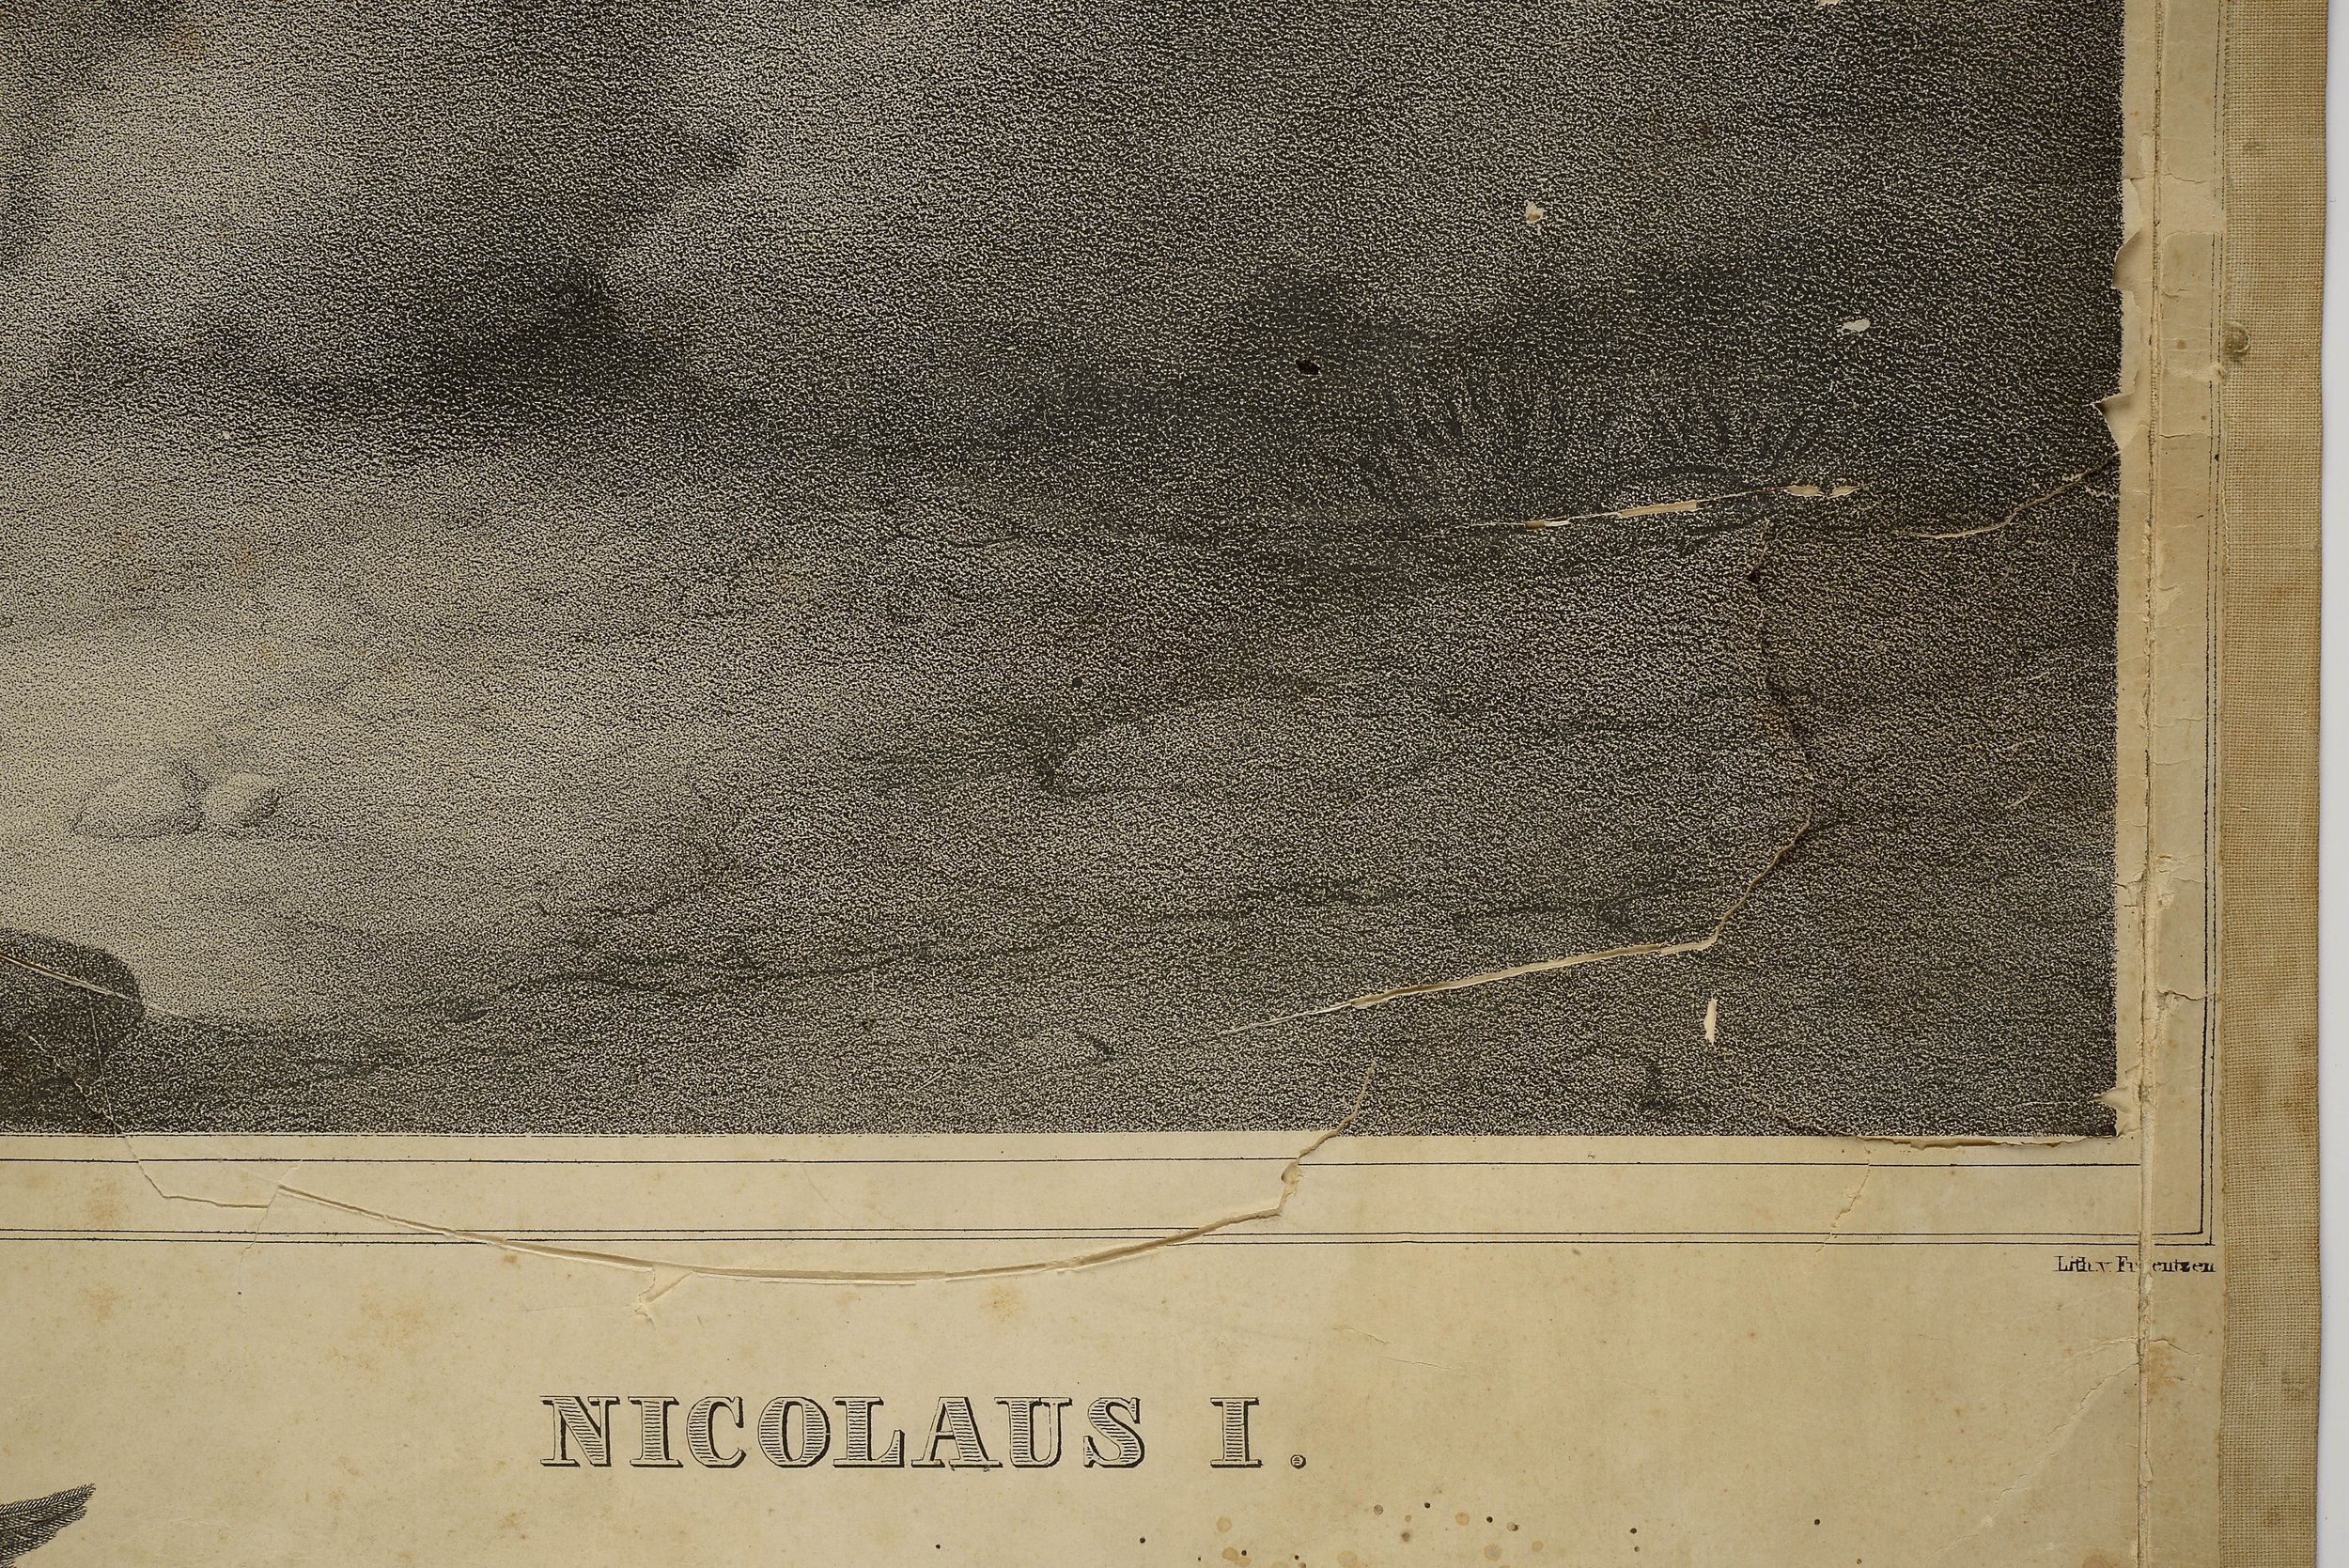
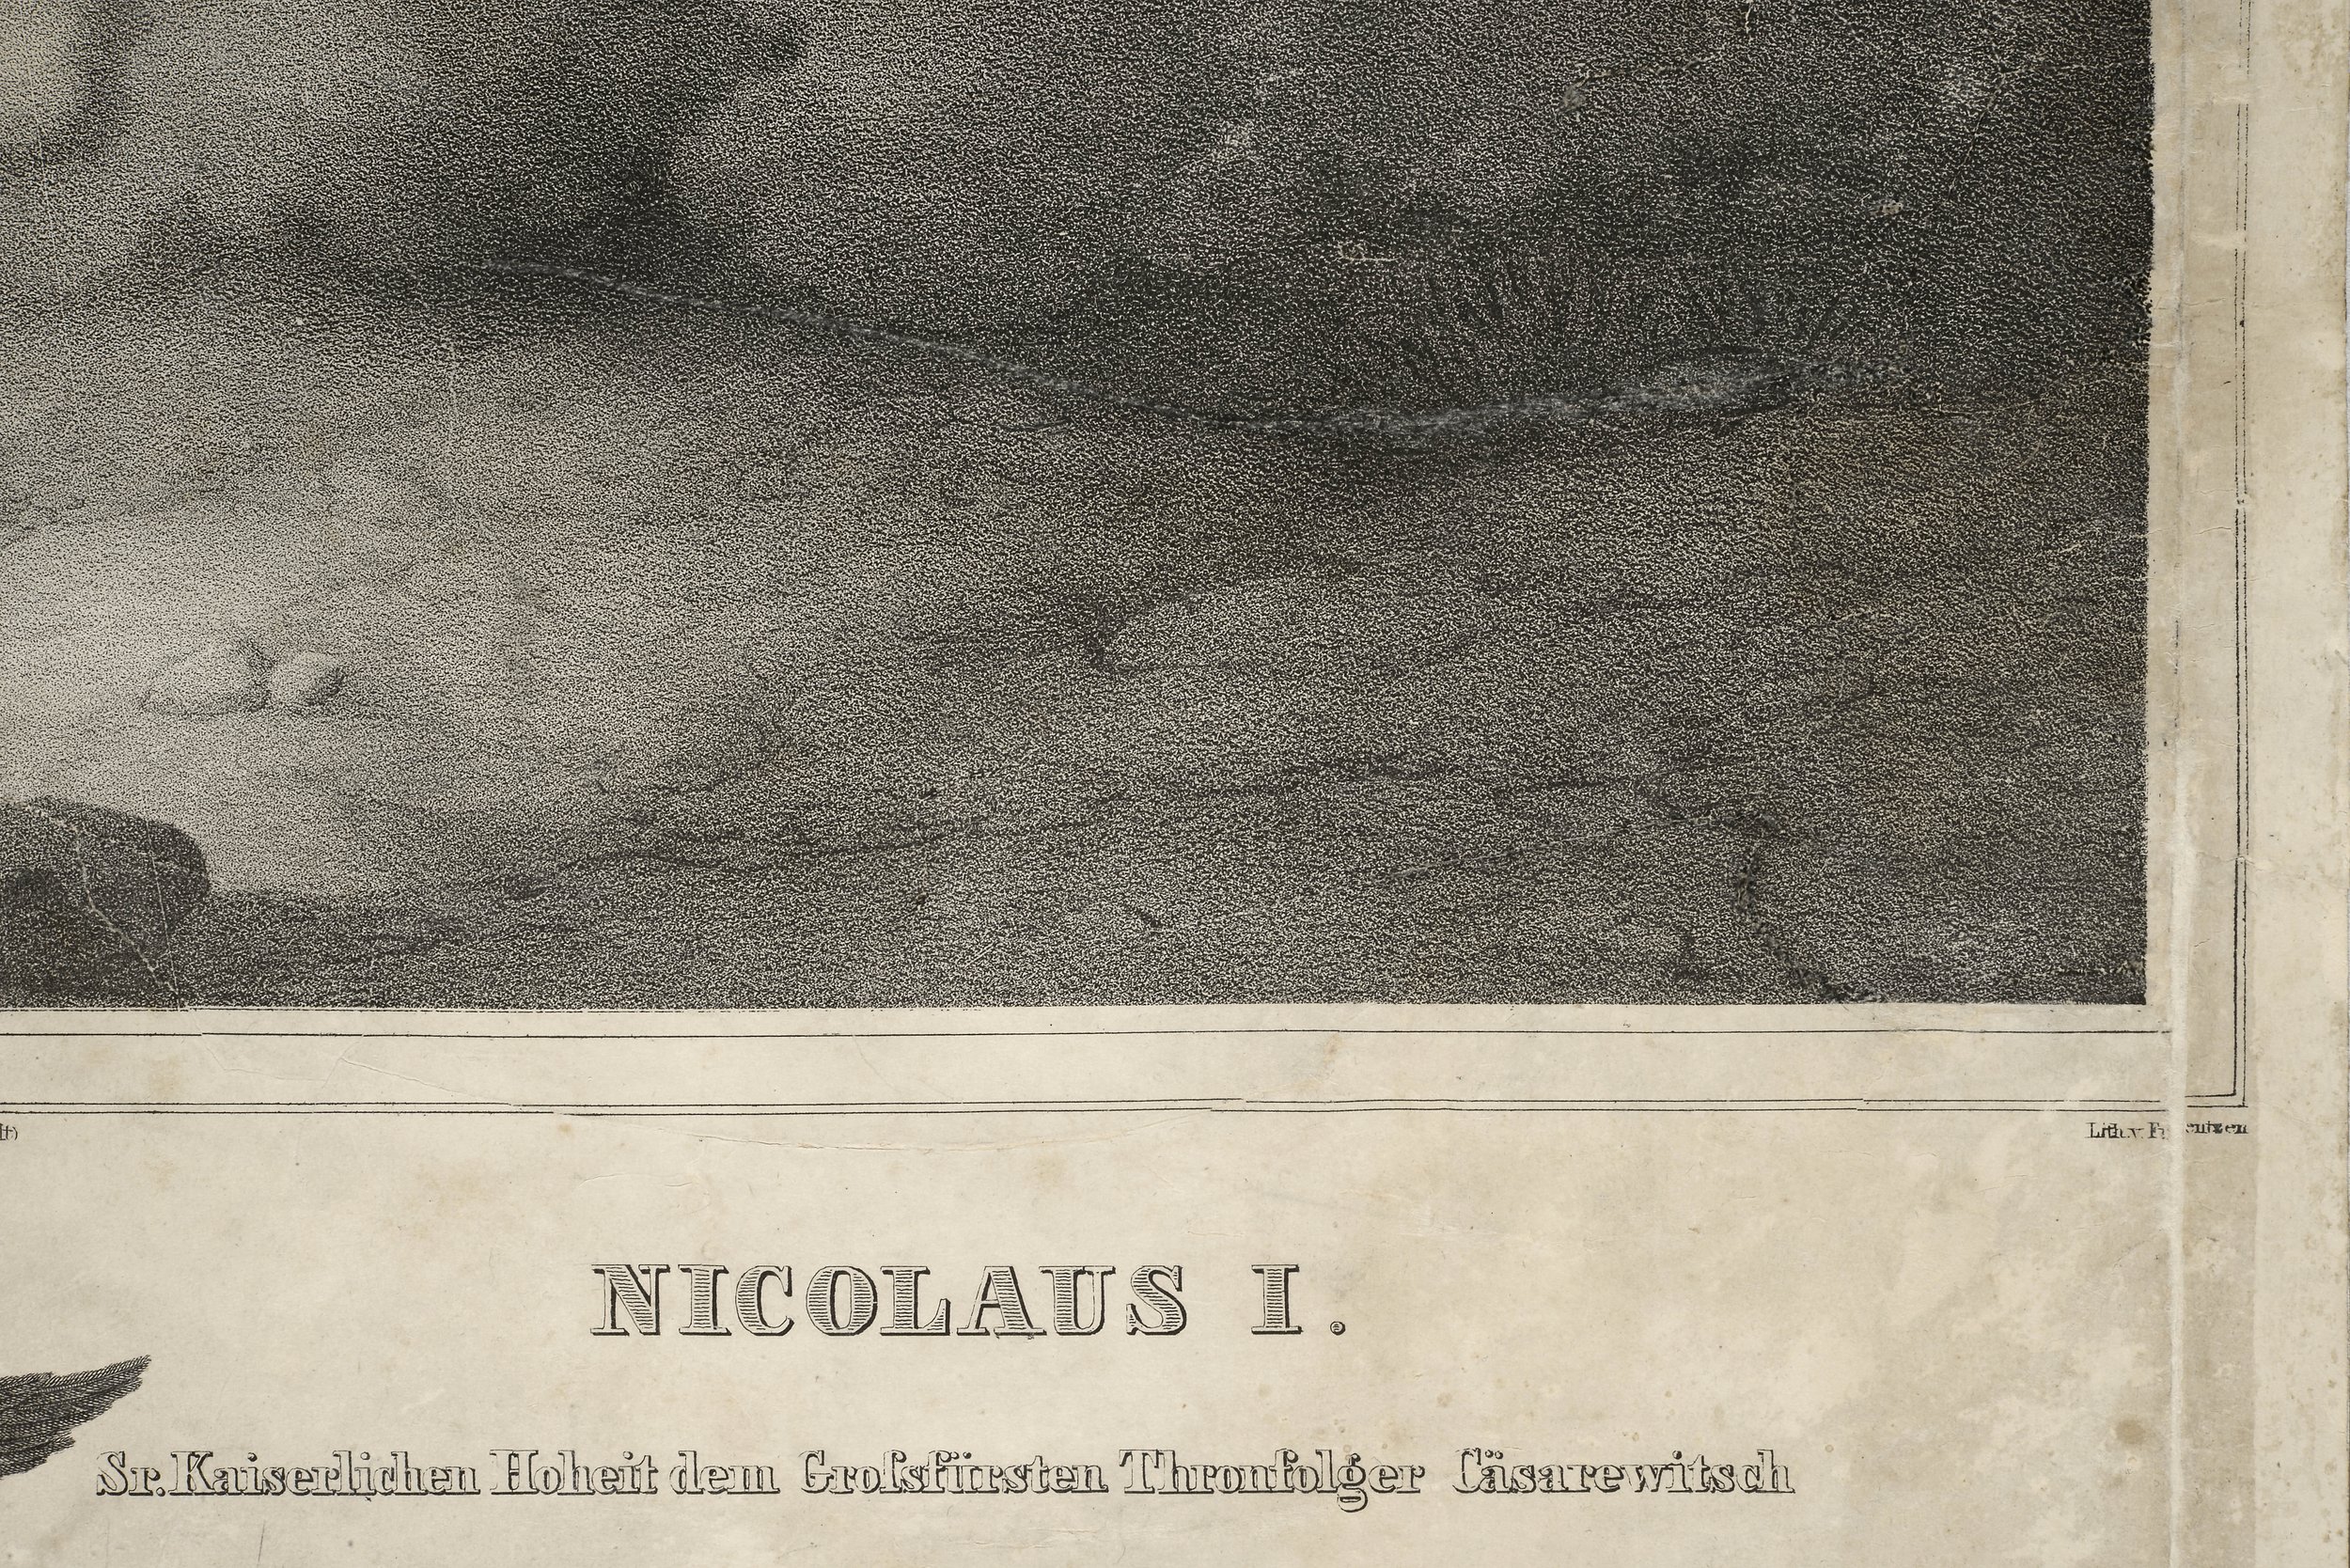
Conservation of F. Krüger’s lithograph Nicolaus I viide 5 ⁽⁵⁾
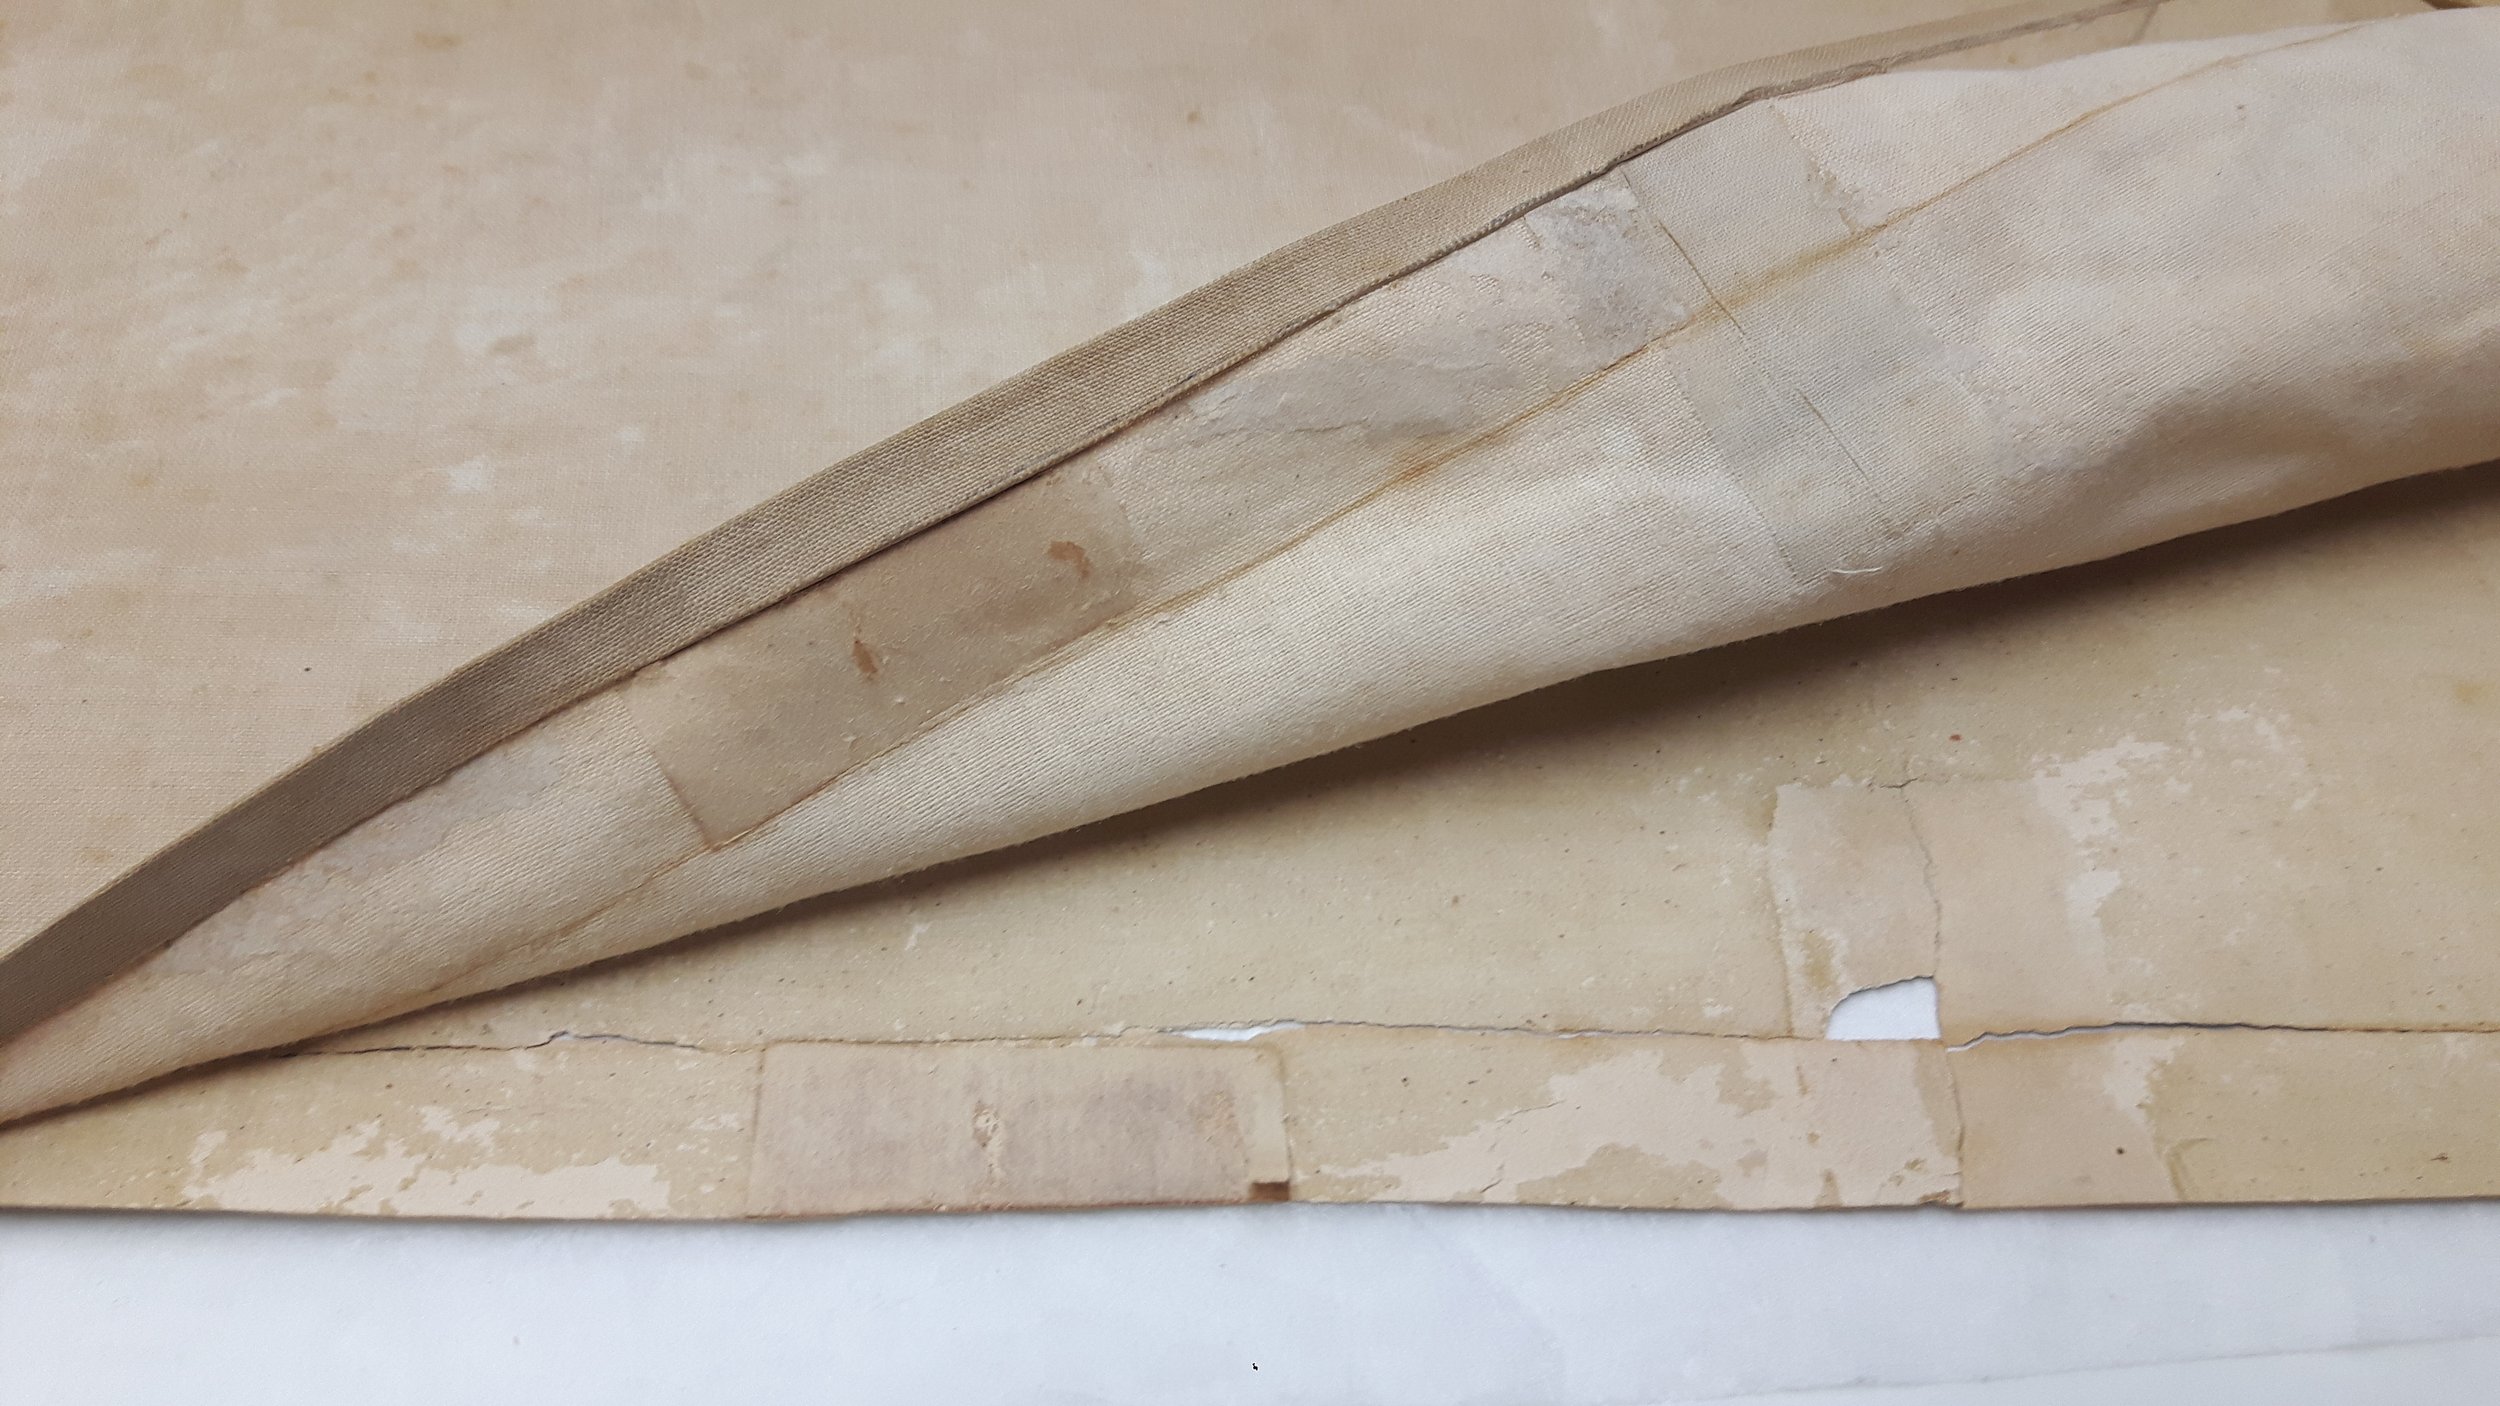
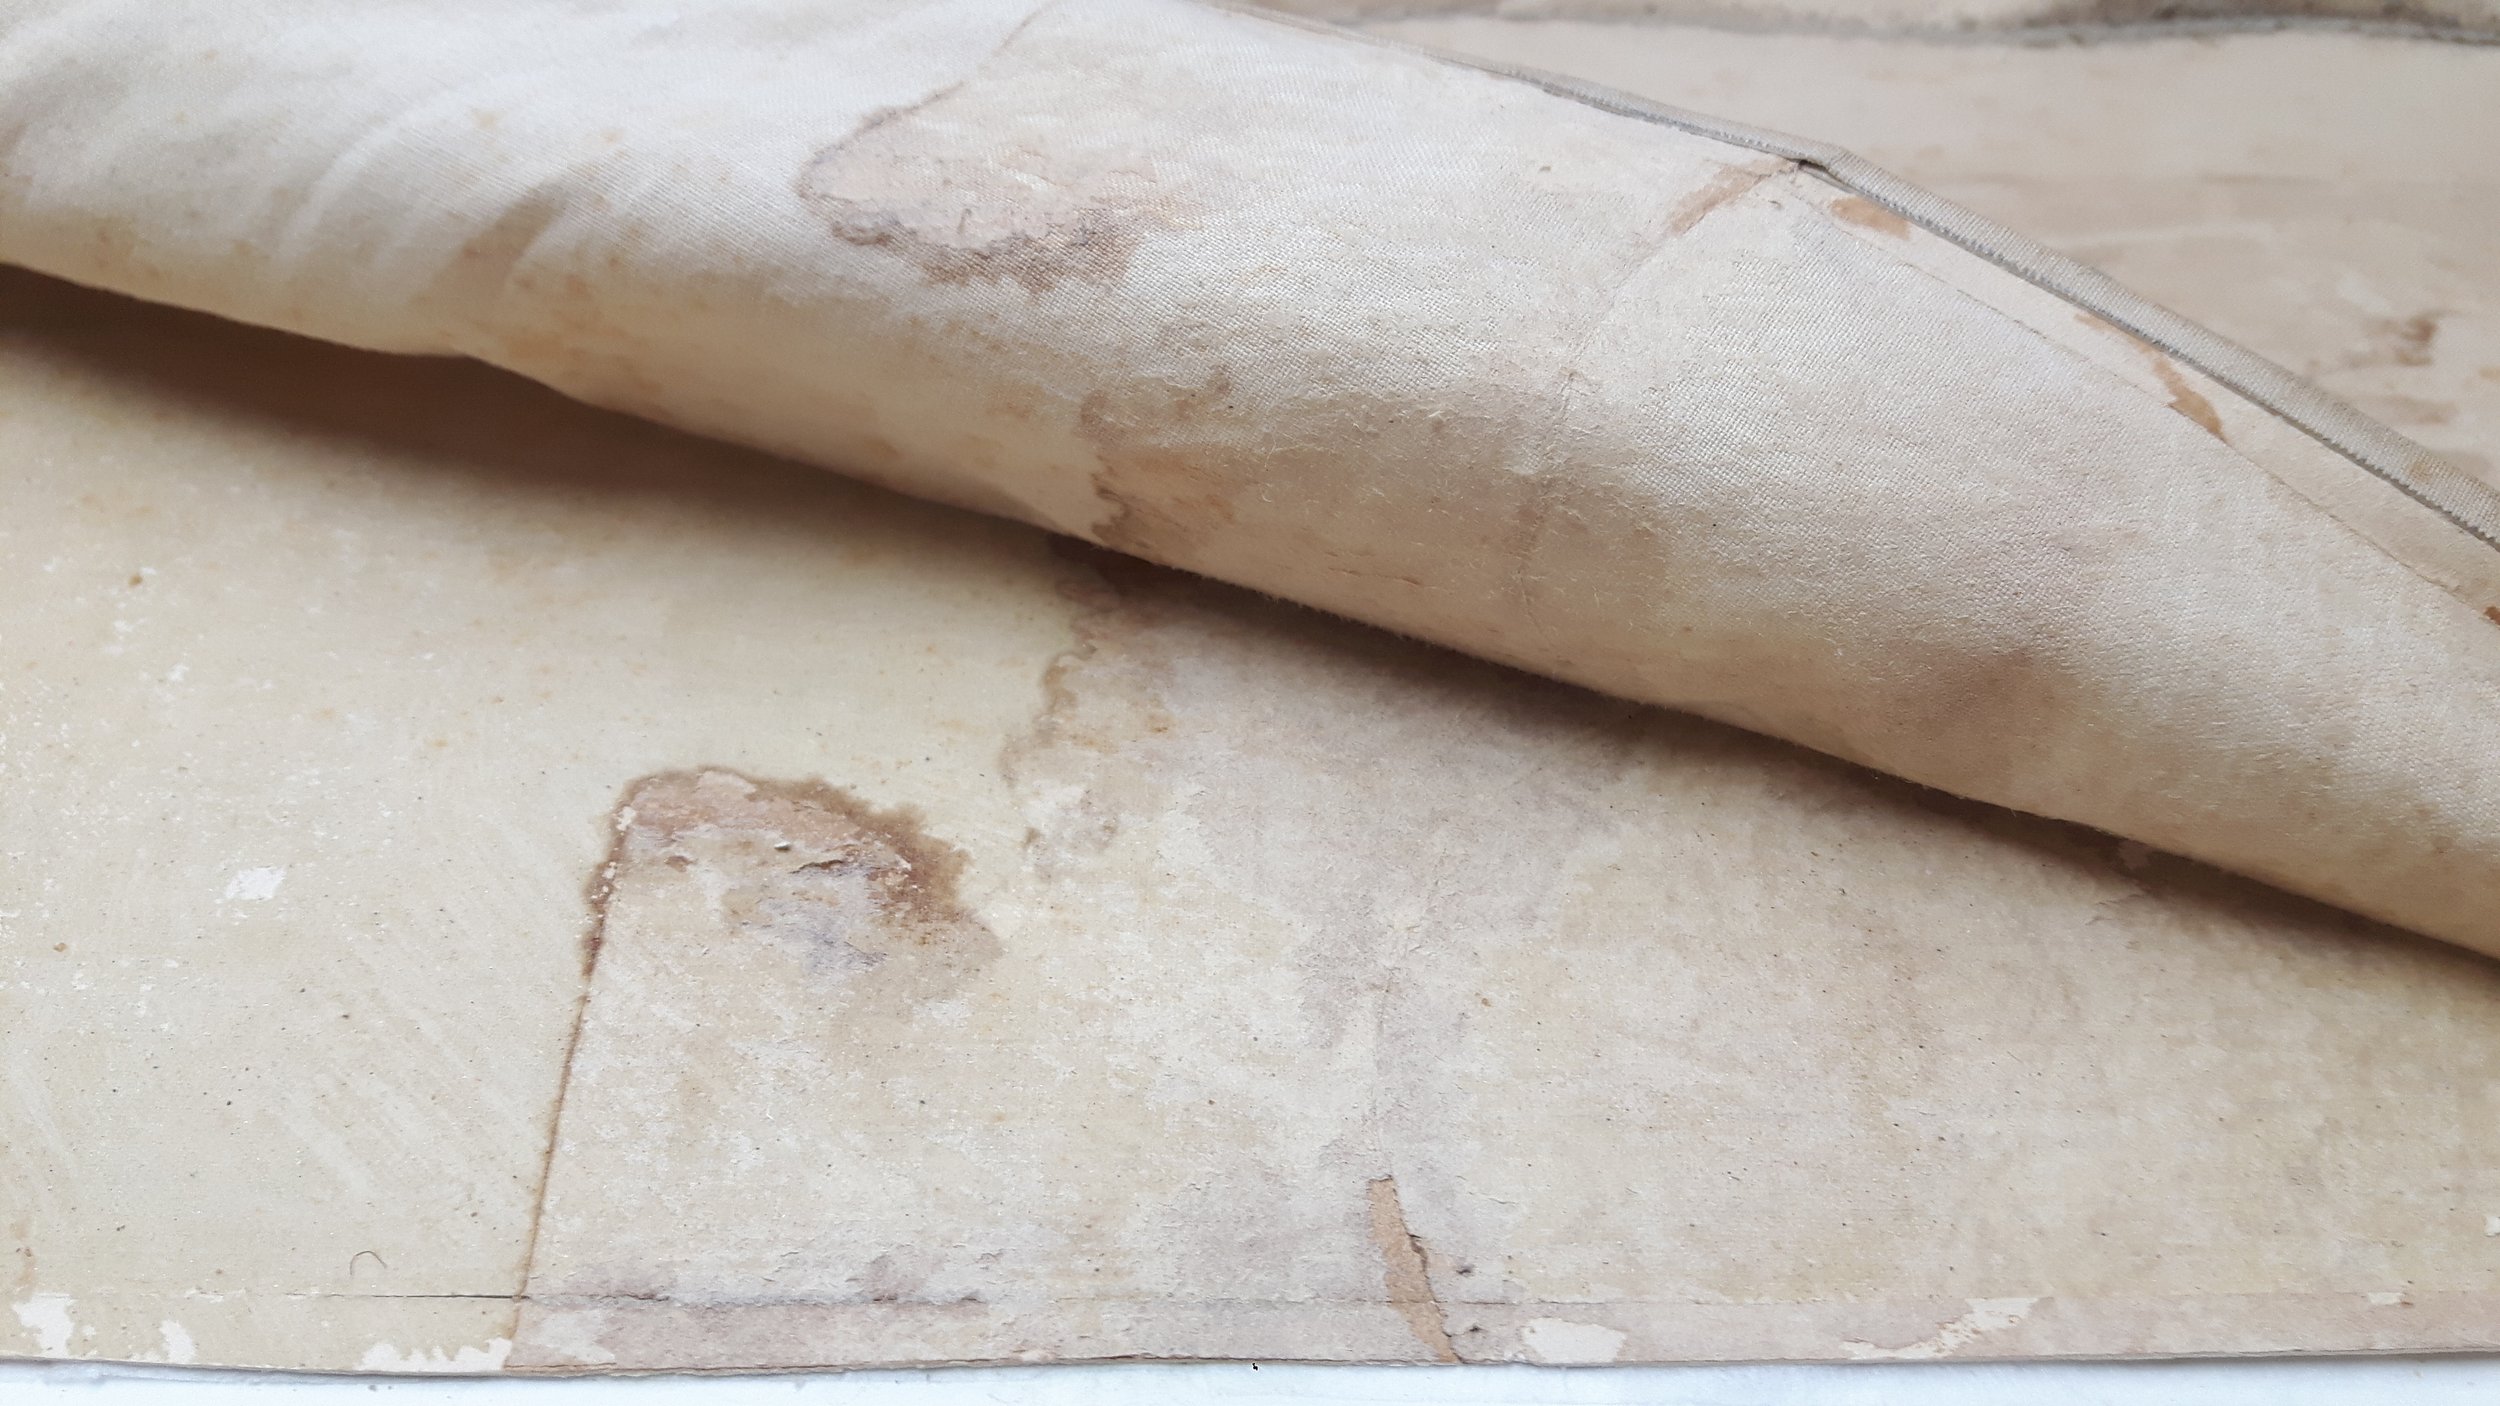
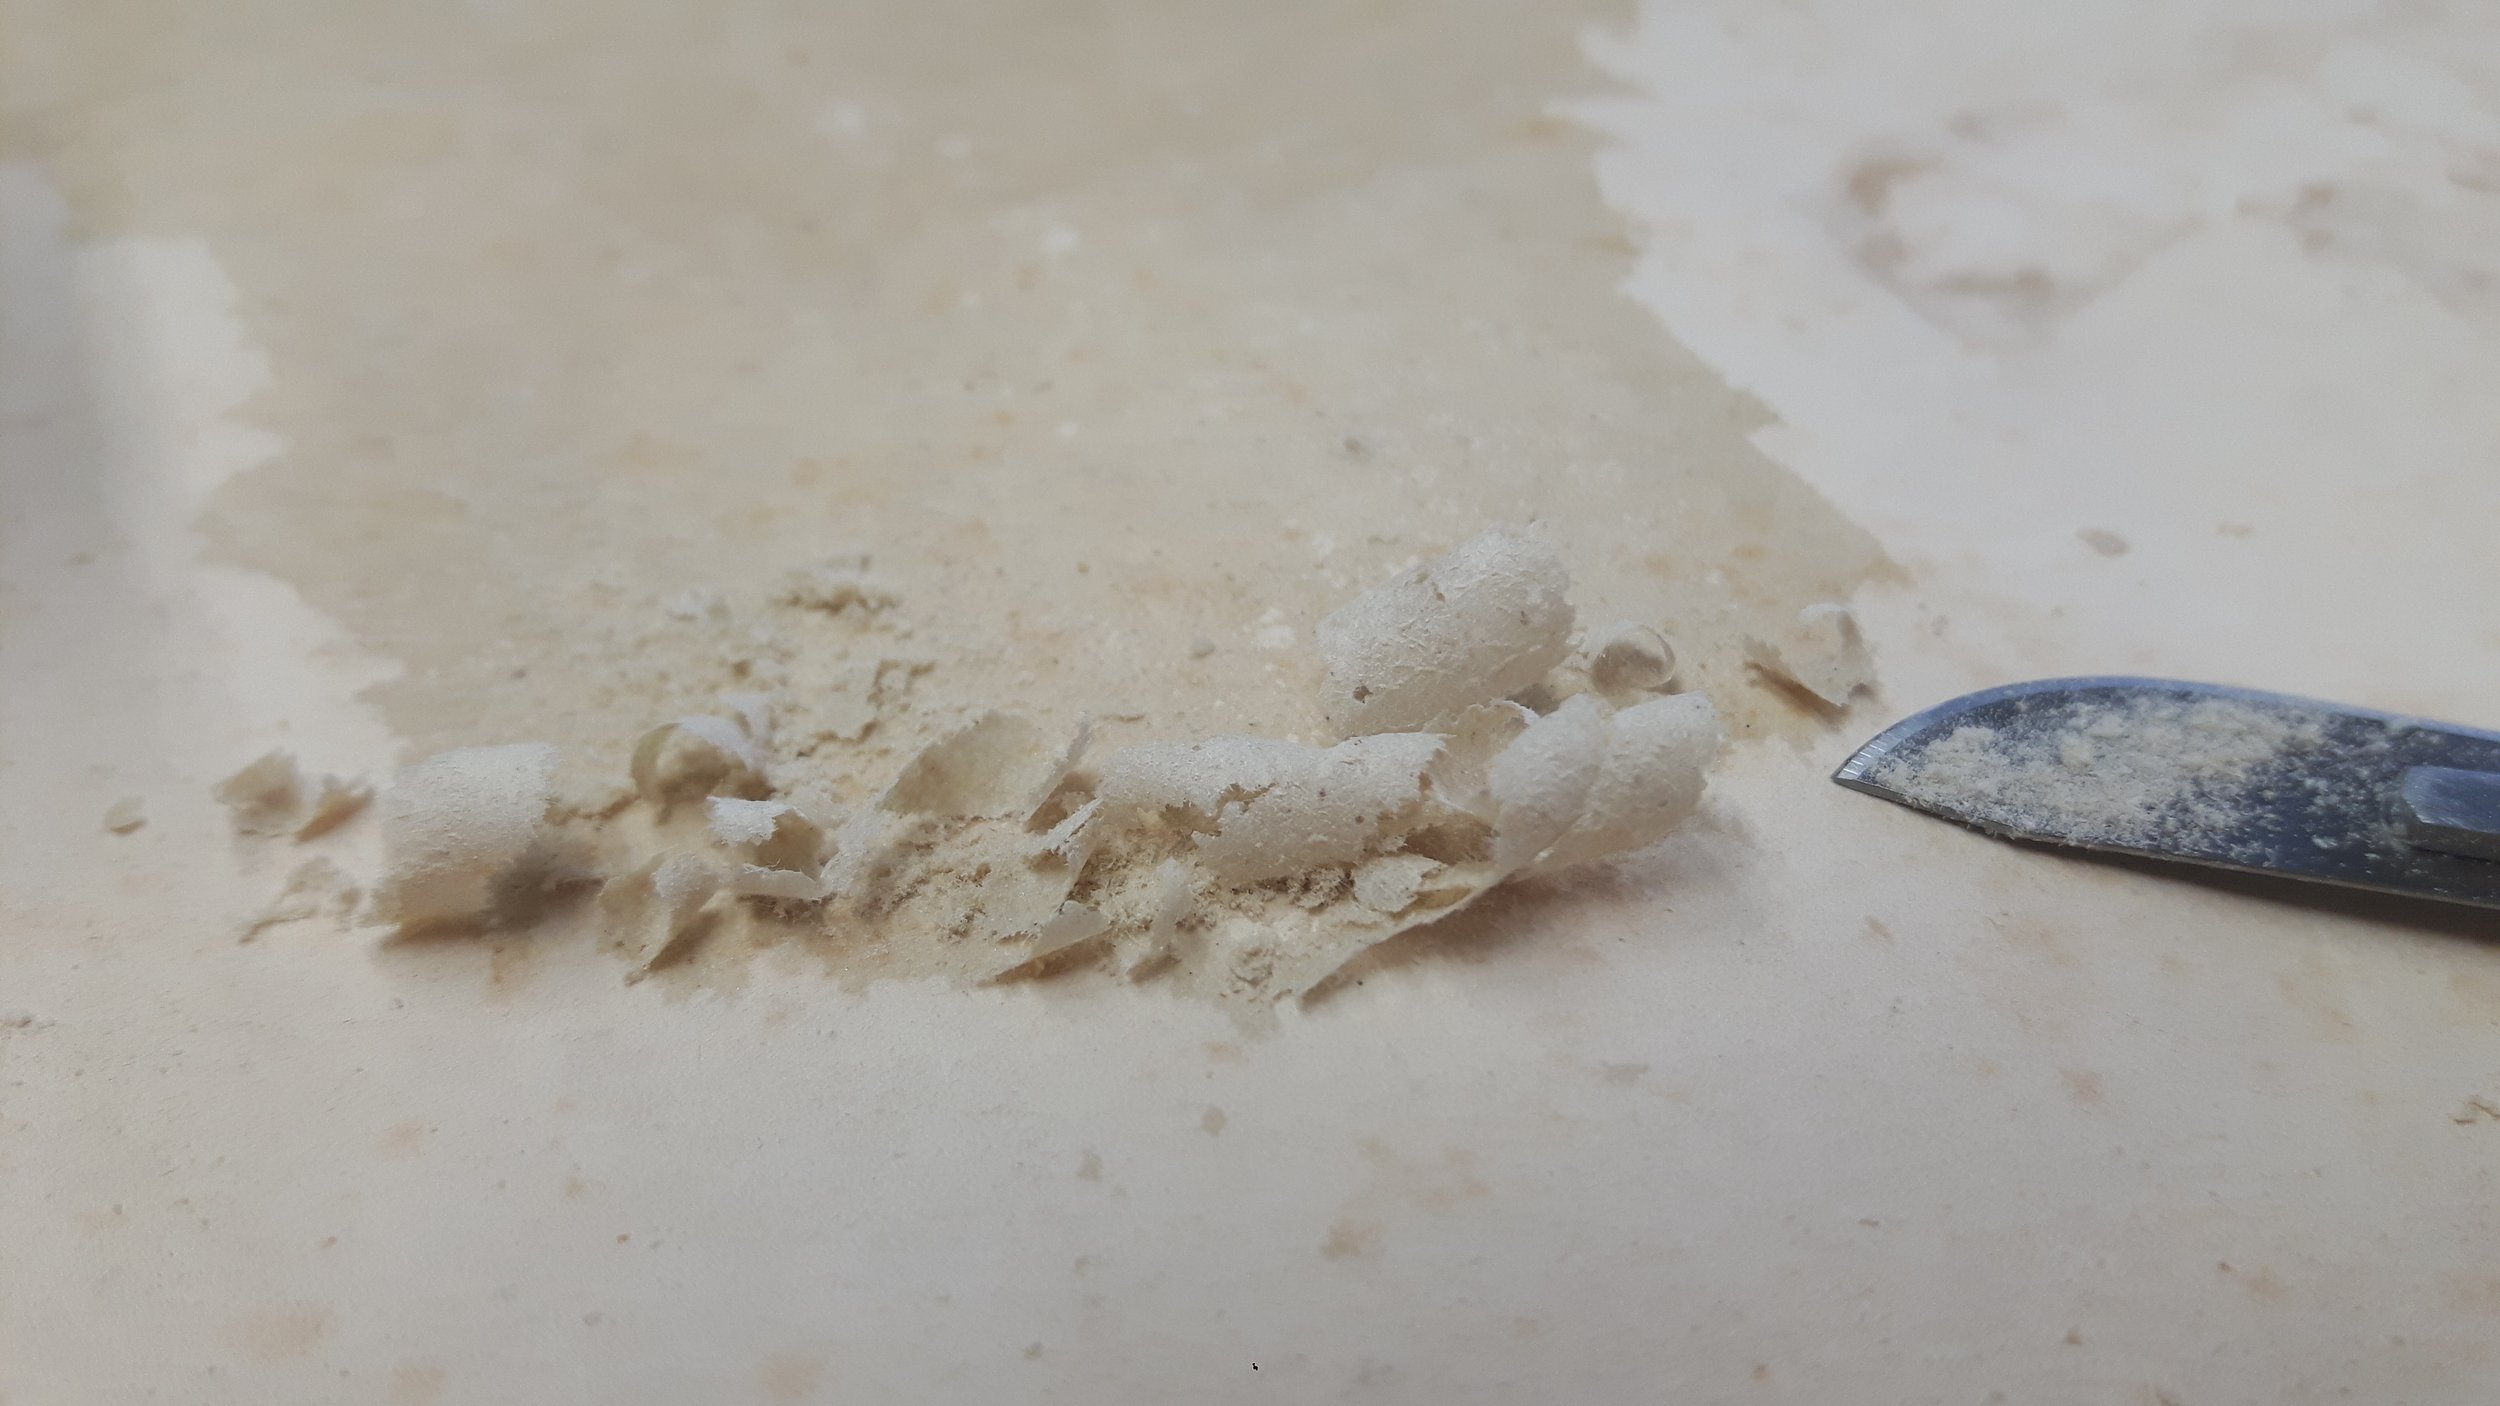
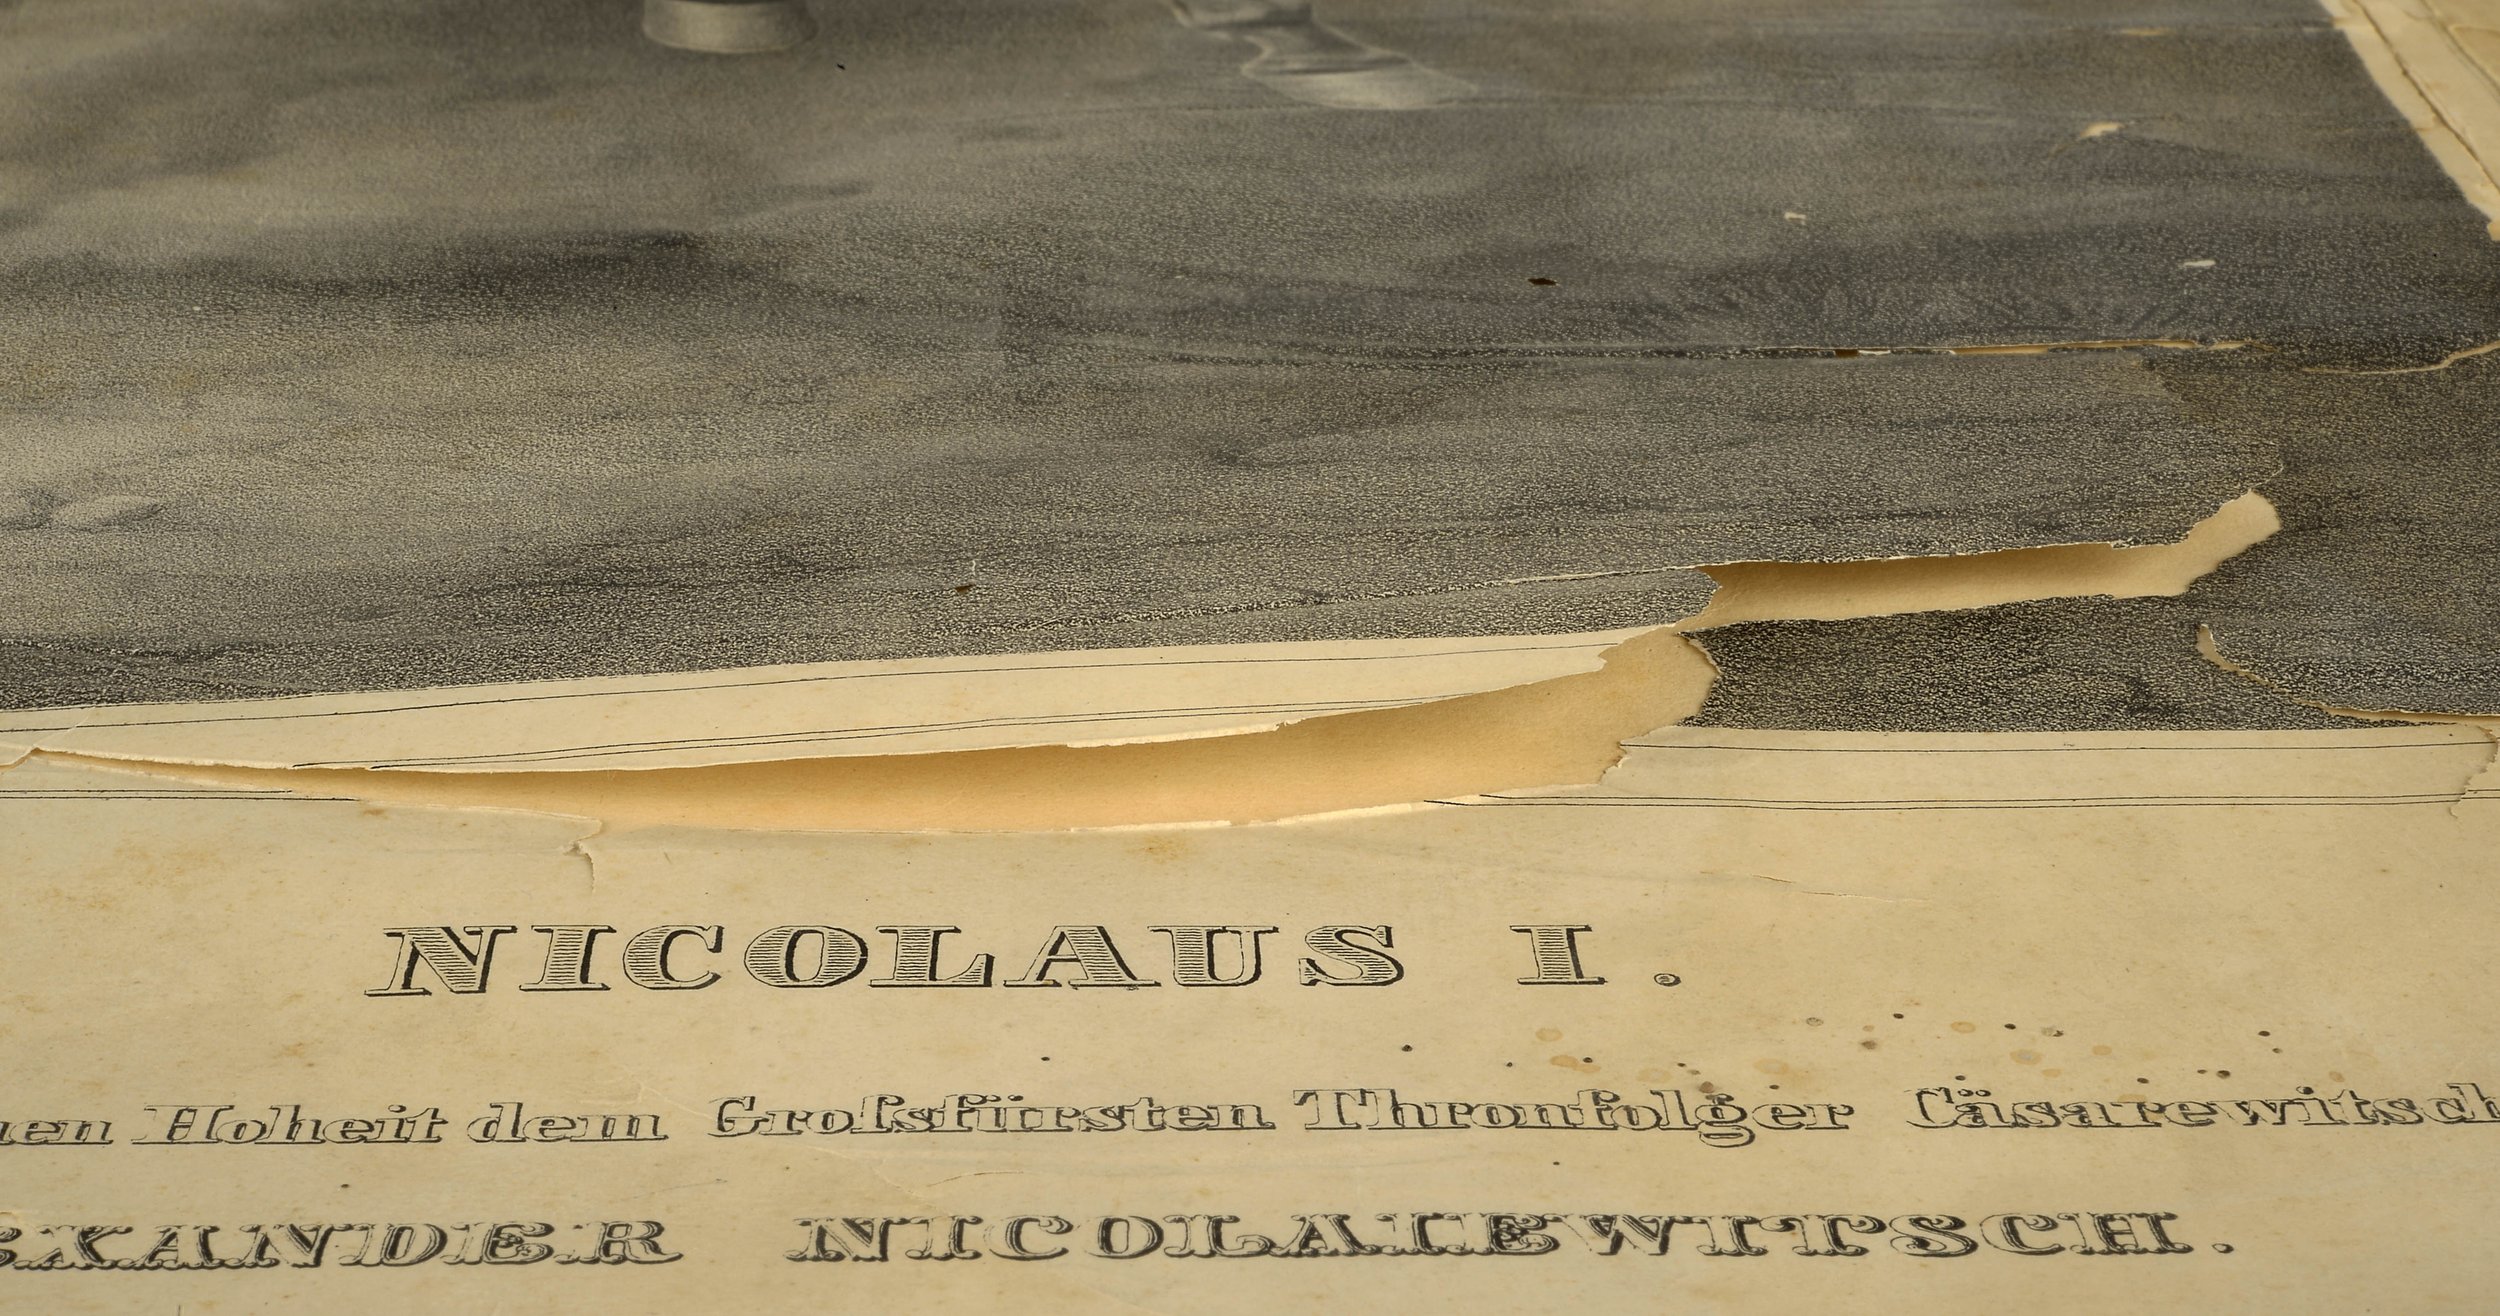
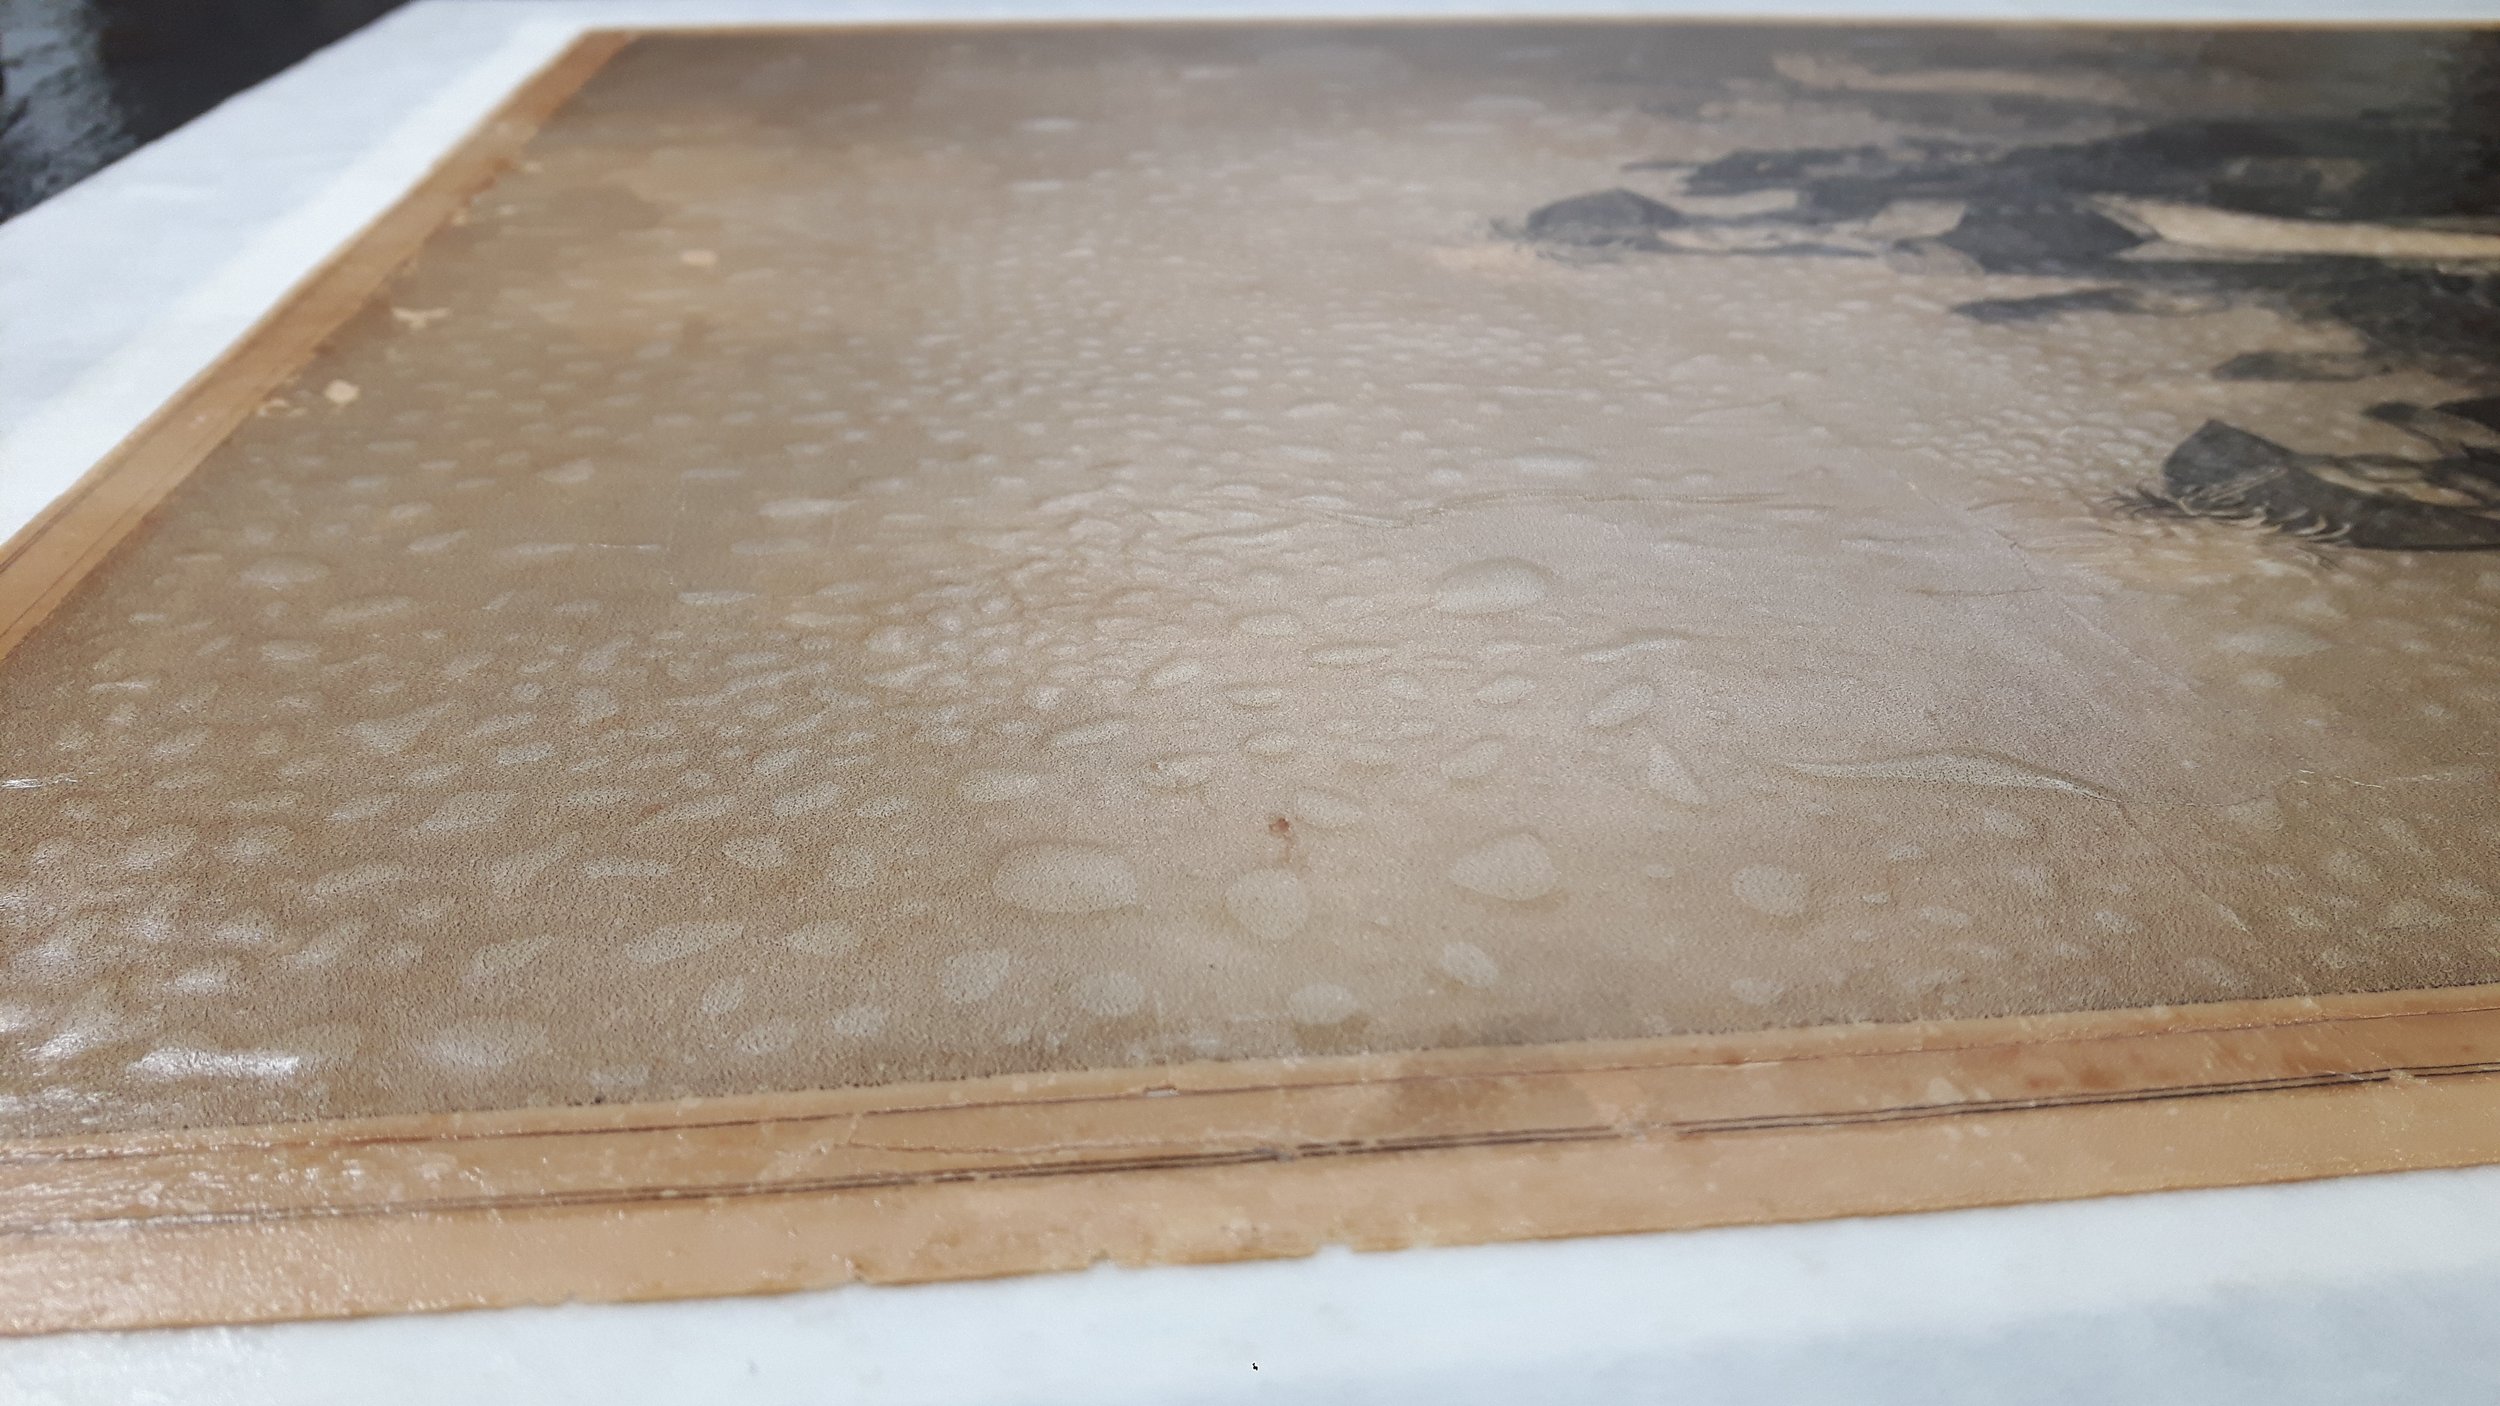
The double-layered print in the Chine-collé technique had been backed with textile. It could not be the original execution, as the tears in paper – 5cm up and 15cm down – went through the two layers of paper and had already been patched with rather robust rag-paper on the reverse. The whole backing showed that it had been added later. The mending had obviously been done at different times, as different glues had been used – the paste used for both patches was dark and that on the backing textile was light, thick and crystallised. [ill 1], [ill 2], [ill3], [ill 4], [ill 5]
The wood-cellulose backing paper was considerably yellowed. The upper fine layer was lighter but due to water-damage the discoloration had penetrated onto its surface forming tidelines. Some tiny dark-brown spots were also visible.
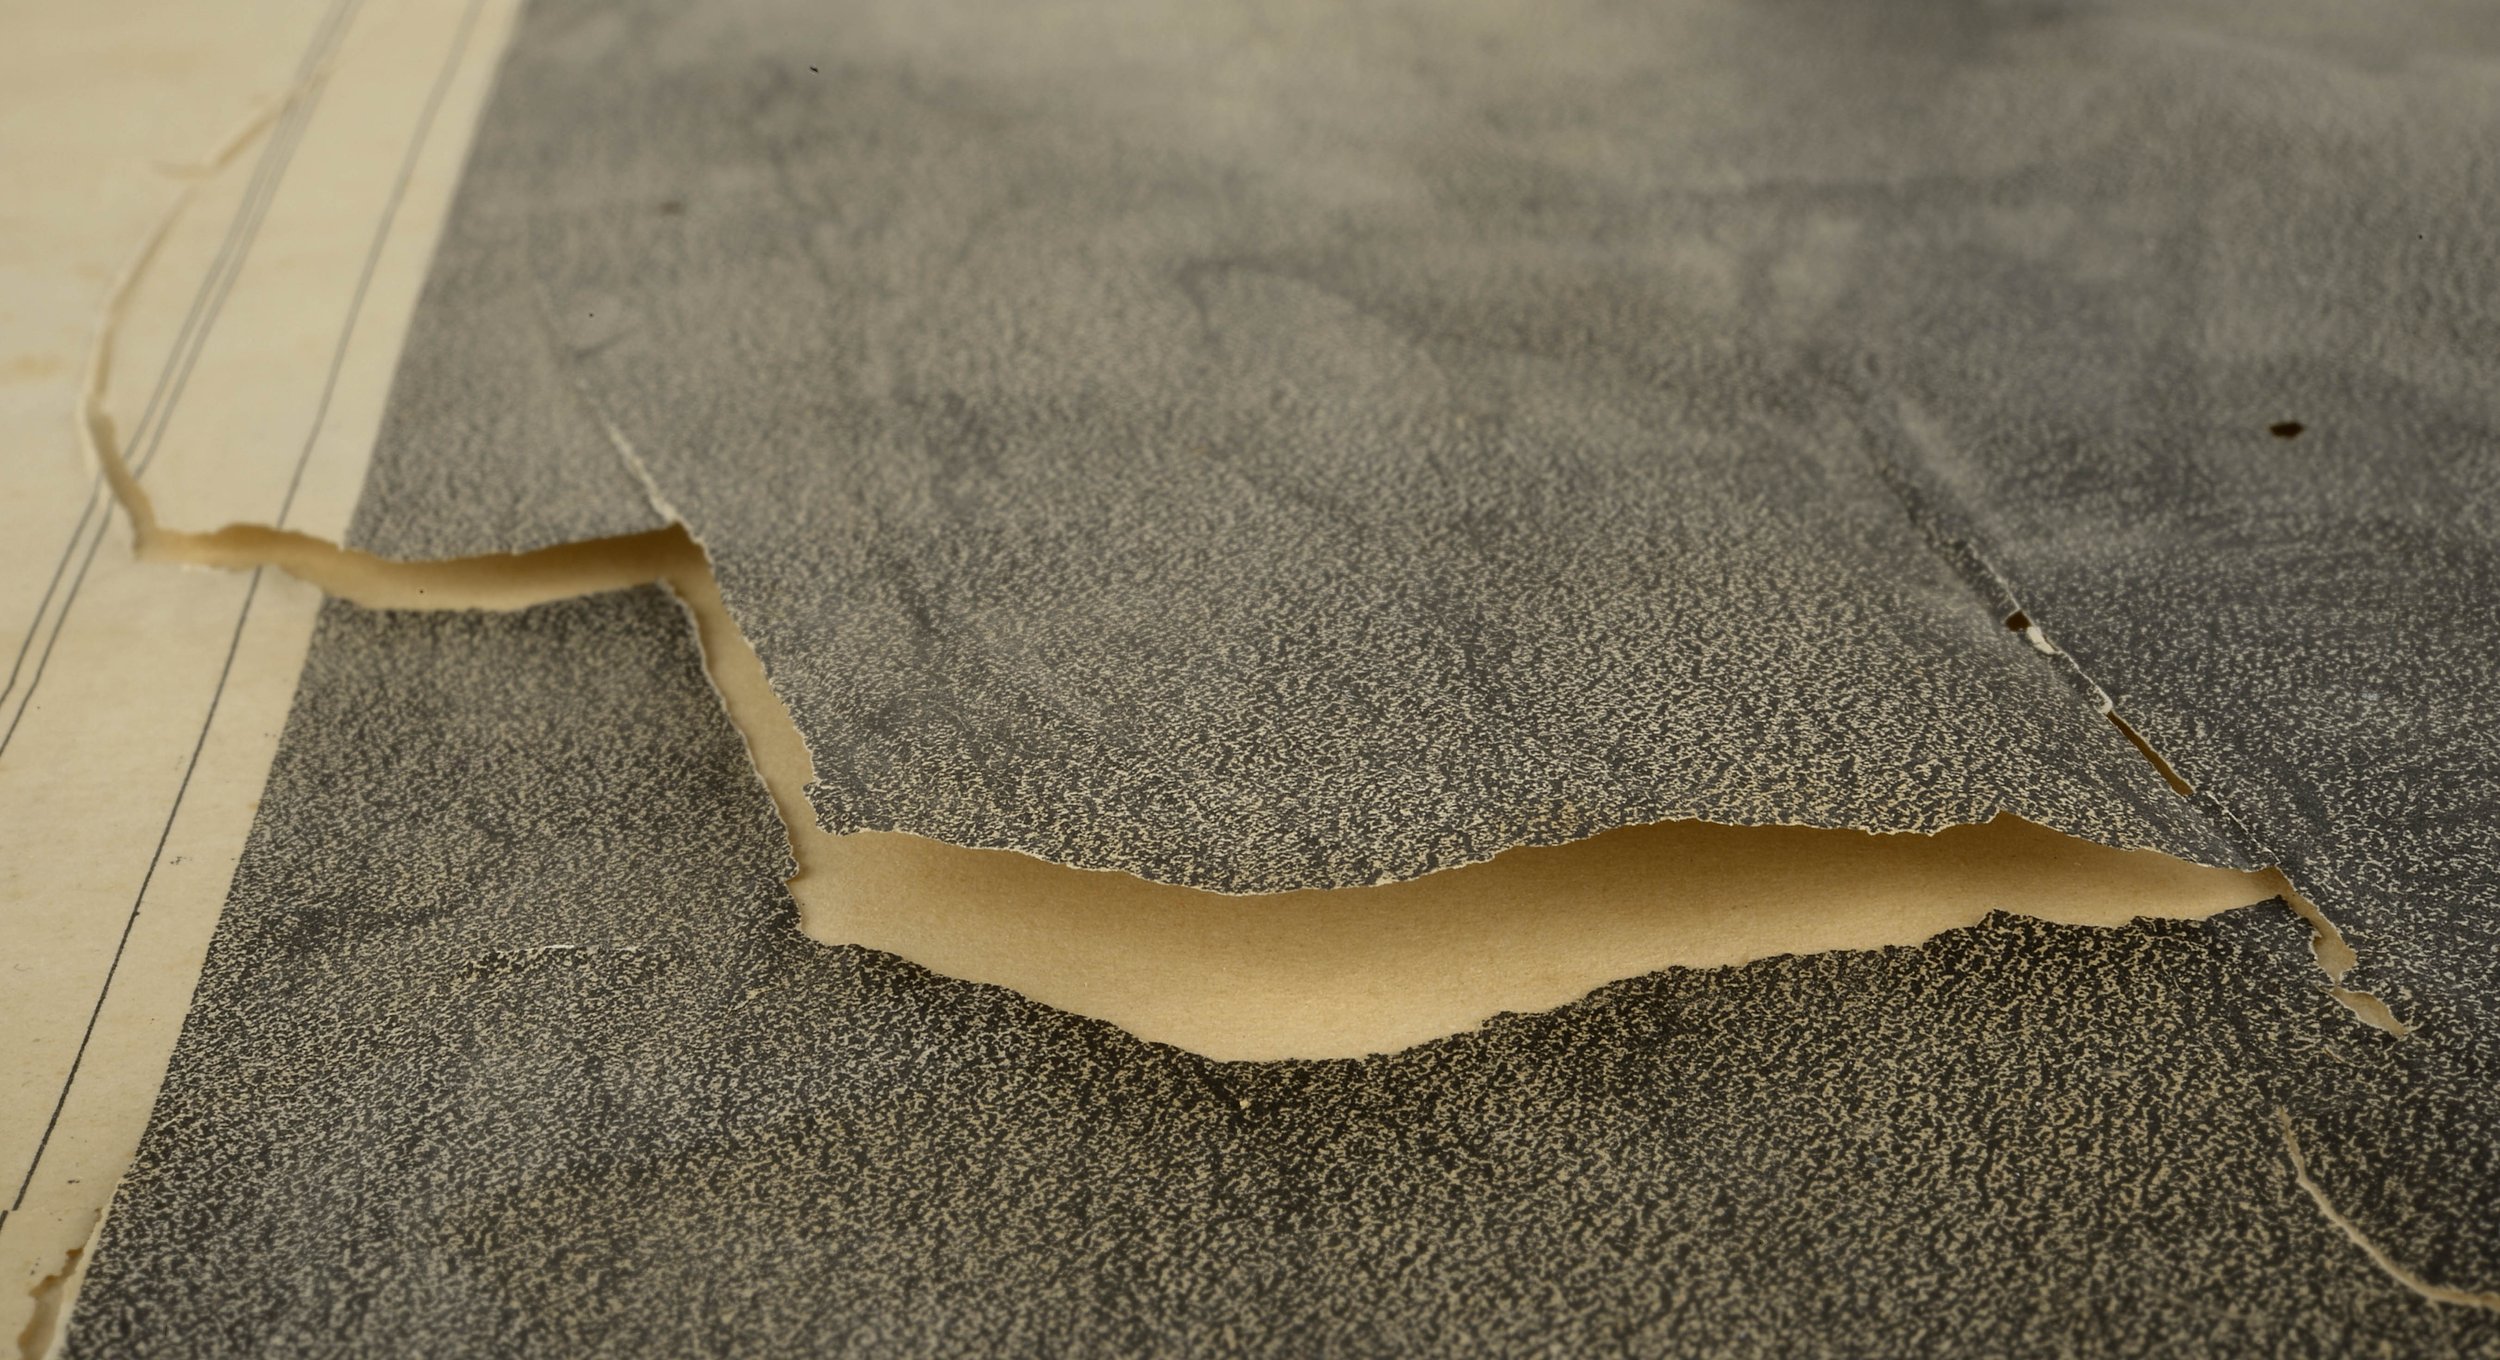
The weak contact between the paper layers and their disparate deformation had caused the most problematic damage. The paper in the upper thin layer was much more sensitive, stretching due to slightest dampening and contracting considerably more than the lower layer when drying. There were several tears and even losses in the upper sheet, obviously caused by the humidity fluctuations. The bond between the two layers had disappeared in more than 50% of the surface. [ill 6] Bigger tears were just on the non-attached surface, as the thinner paper had contracted more and faster than the lower when drying. Tears were the reason for losses. Thin paper is fragile and easily breakable, thus losses may occur again at the least physical intervention even. [ill 7]
It was decided to cleanse the paper, to wash it if possible and restore the connection between the two layers, then mend the tears, fill the losses and retouch the mended patches in the area of the image. As the textile backing was not original anyhow, it was replaced with Japanese paper in expectation to avoid future deformations caused by different properties of paper and textile.
Practical process
In the process of conservation the textile backing was removed first – it could be achieved mechanically and without moisturising. Dry-cleaning of paper surfaces and measuring the pH of both sheets followed suit. The wood-cellulose paper’s was 3.9 and that of the thin lithograph paper 4.6.
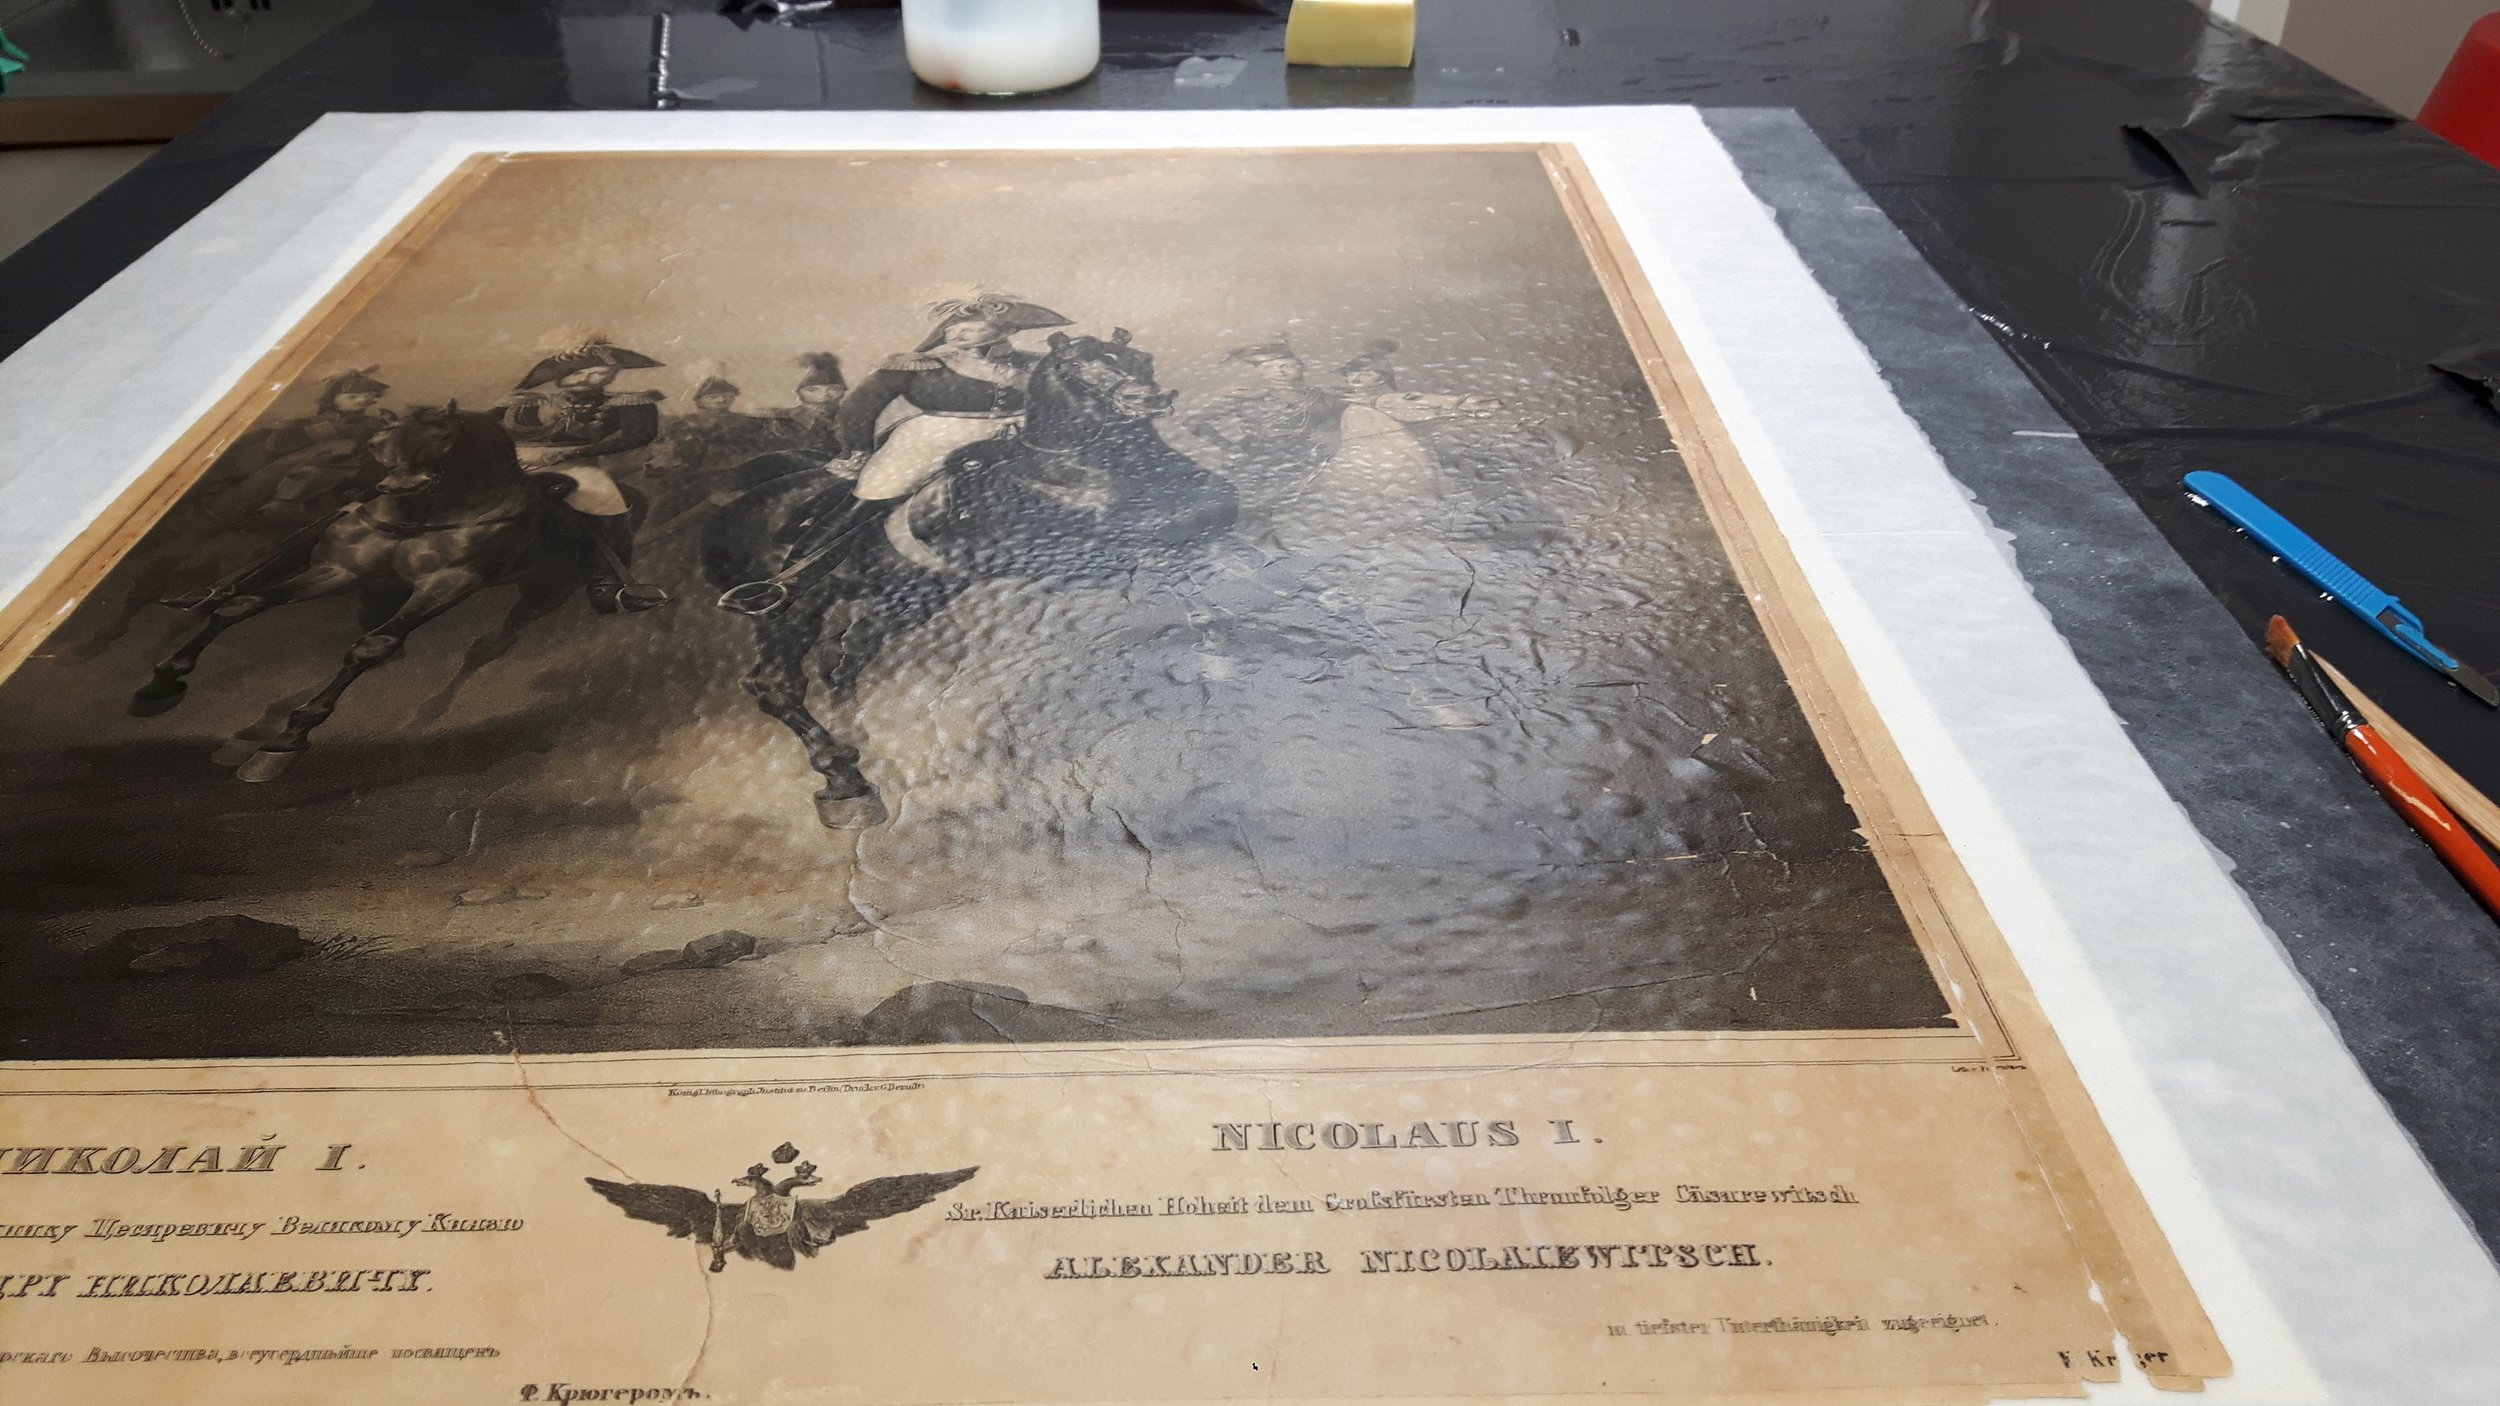
The necessity to decrease the high acidity, flood-lines and yellowing brought about the decision to wash the piece in running water. It was not possible to do it by soaking, as we had to avoid the separation of the layers and new losses in the thin paper. The alternative was to use the vacuum-table that enables to fix the sheet on the table with suction when it is washed in running water.
For the process the print had to be moisturised on Sympatex. viide 6 ⁽⁶⁾ Pre-dampening would grant an equable but also delicate relaxing of paper before processing it with suction, avoiding cockling that may appear during it. [ill 8], [ill 9]
The pH of the first water was raised by adding ammonium hydroxide, after that the object was rinsed in running water on the vacuum-table. The last phase of the process was sizing the surface of the image with 1.5 % MC glue in the hope to re-activate the glue-contact between the two sheets. It was supposed that the bigger concentration of the glue (commonly 0.5 %) could strengthen the contact, as the numerous tears in paper allowed the glue to penetrate in between the layers. The image was covered with a facing tissue to protect the torn patches when drying in case the connection between the sheets could not be totally restored.
Backing the print with Japanese paper was planned as a separate process after the bond between the two layers had been restored and losses in the upper layer filled. The purpose of backing was to keep the tensions in different materials under control and synchronised.
Washing removed lots of the discoloration, tidelines diminished and the image improved considerably. Acidity improved as well – pH after washing was 4.3 on the wood-cellulose paper and 5.7 on the lithograph paper. The majority of moisture was drenched away on the vacuum-table, after that the washed and supported (with facing) original was dried in press, first between felts and then between filter cardboard sheets. All in all, the process took a whole week. [ill 10]
After drying it was obvious that MC-gluing was not sufficient to restore the bond between the sheets. Evidently, adhesive had not initially been used at all or it had disappeared in ageing. Simultaneously, with filling the losses we decided to add glue locally to the detached areas. For that wheat-paste was used and the spots were fastened with local weights. As this procedure took more time than foreseen it was decided to fasten the print according to the karibari method onto the Japanese paper backing on a drying board. This assisted in making surface repairs and filling the losses simultaneously with the drying process. viide 7 ⁽⁷⁾ Facing was removed when the backed original was still damp and already fastened on the drying board.
It should be mentioned that the process of gluing beneath the thin and badly damaged graphic paper and the local flattening of the fragile material was quite a nerve-wracking job. The karibari method made the job a bit easier, as the base paper was firmly fastened on the edges and stayed smooth. 1:1 mixture of wheat-starch paste of cream-like fluidity and 2.5% MC glue with 0.2 parts of ethanol added was used for gluing.
The missing fragments were filled with 9gsm Japanese paper and the areas around the image that did not need retouching were covered with 5gsm gampi paper. The aim was to achieve tonality as close as possible to the original, as well as to get a smooth and glossy surface. In the area of the image the differences in the surface texture were retouched. Patching was retouched with Lyra Rembrandt Polycolor black pencil and Windsor & Newton black watercolour. [ill 11], [ill 12], [ill 13]
Walter Jule and his print in mixed technique
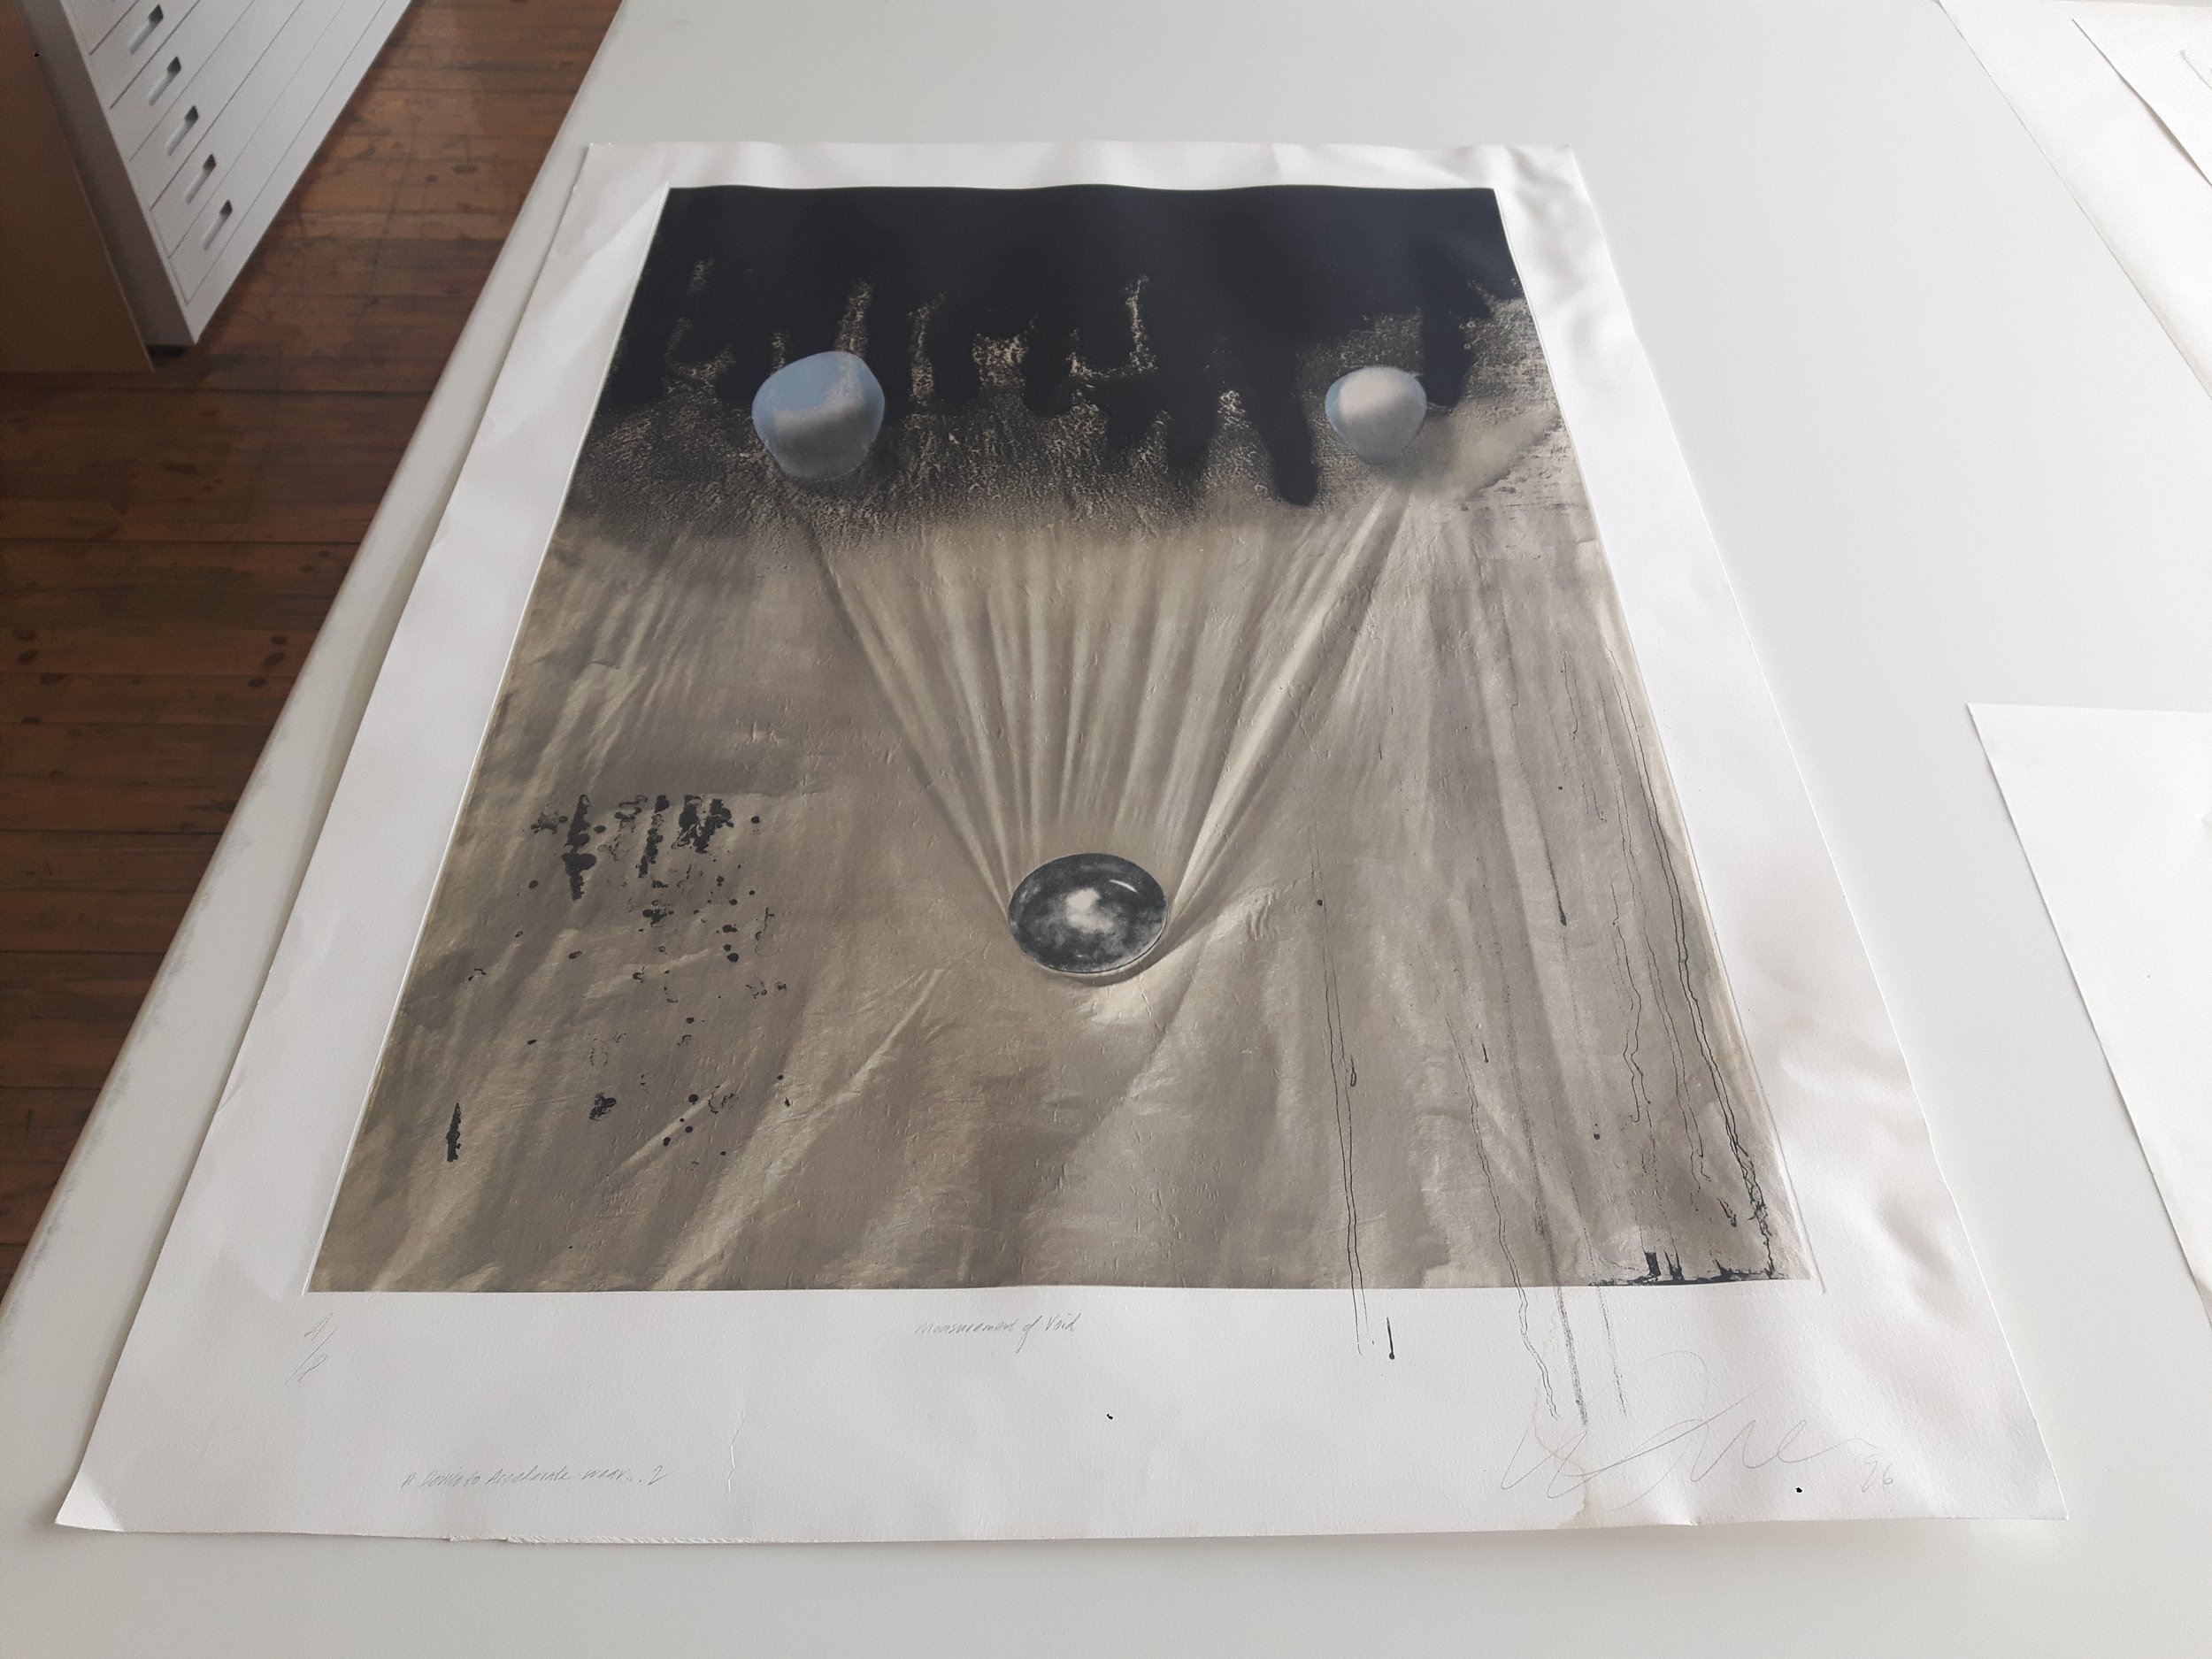
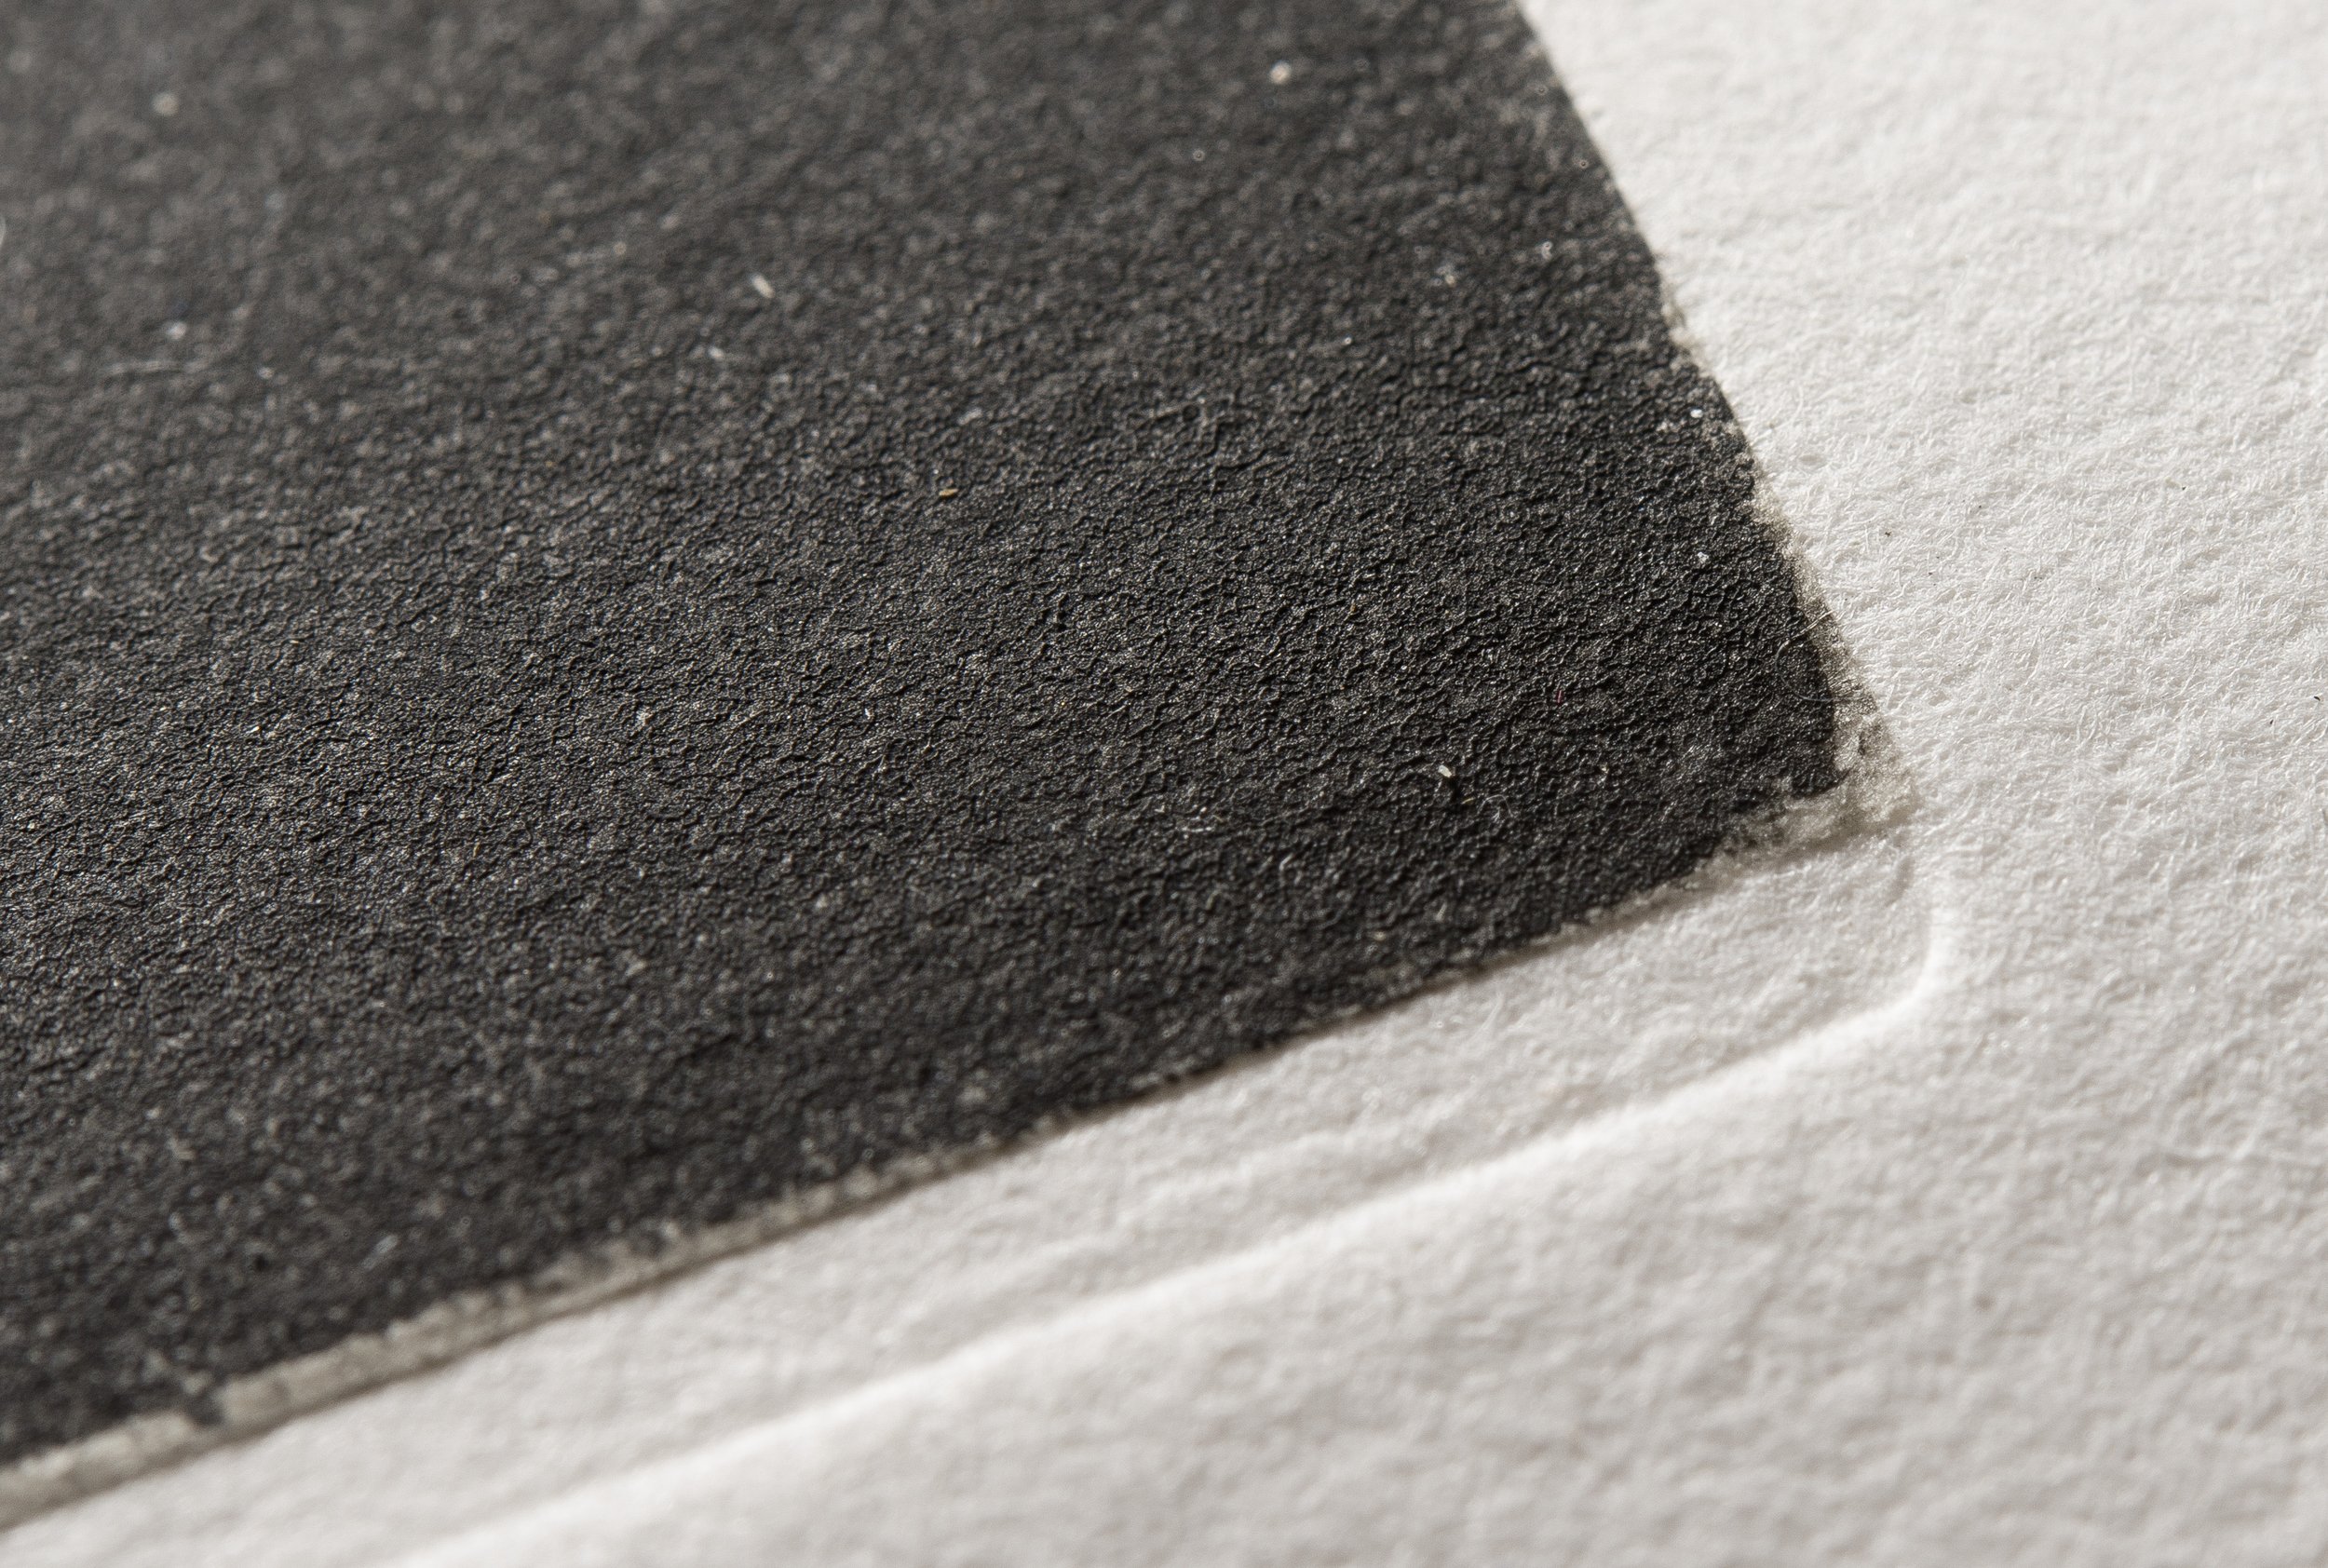
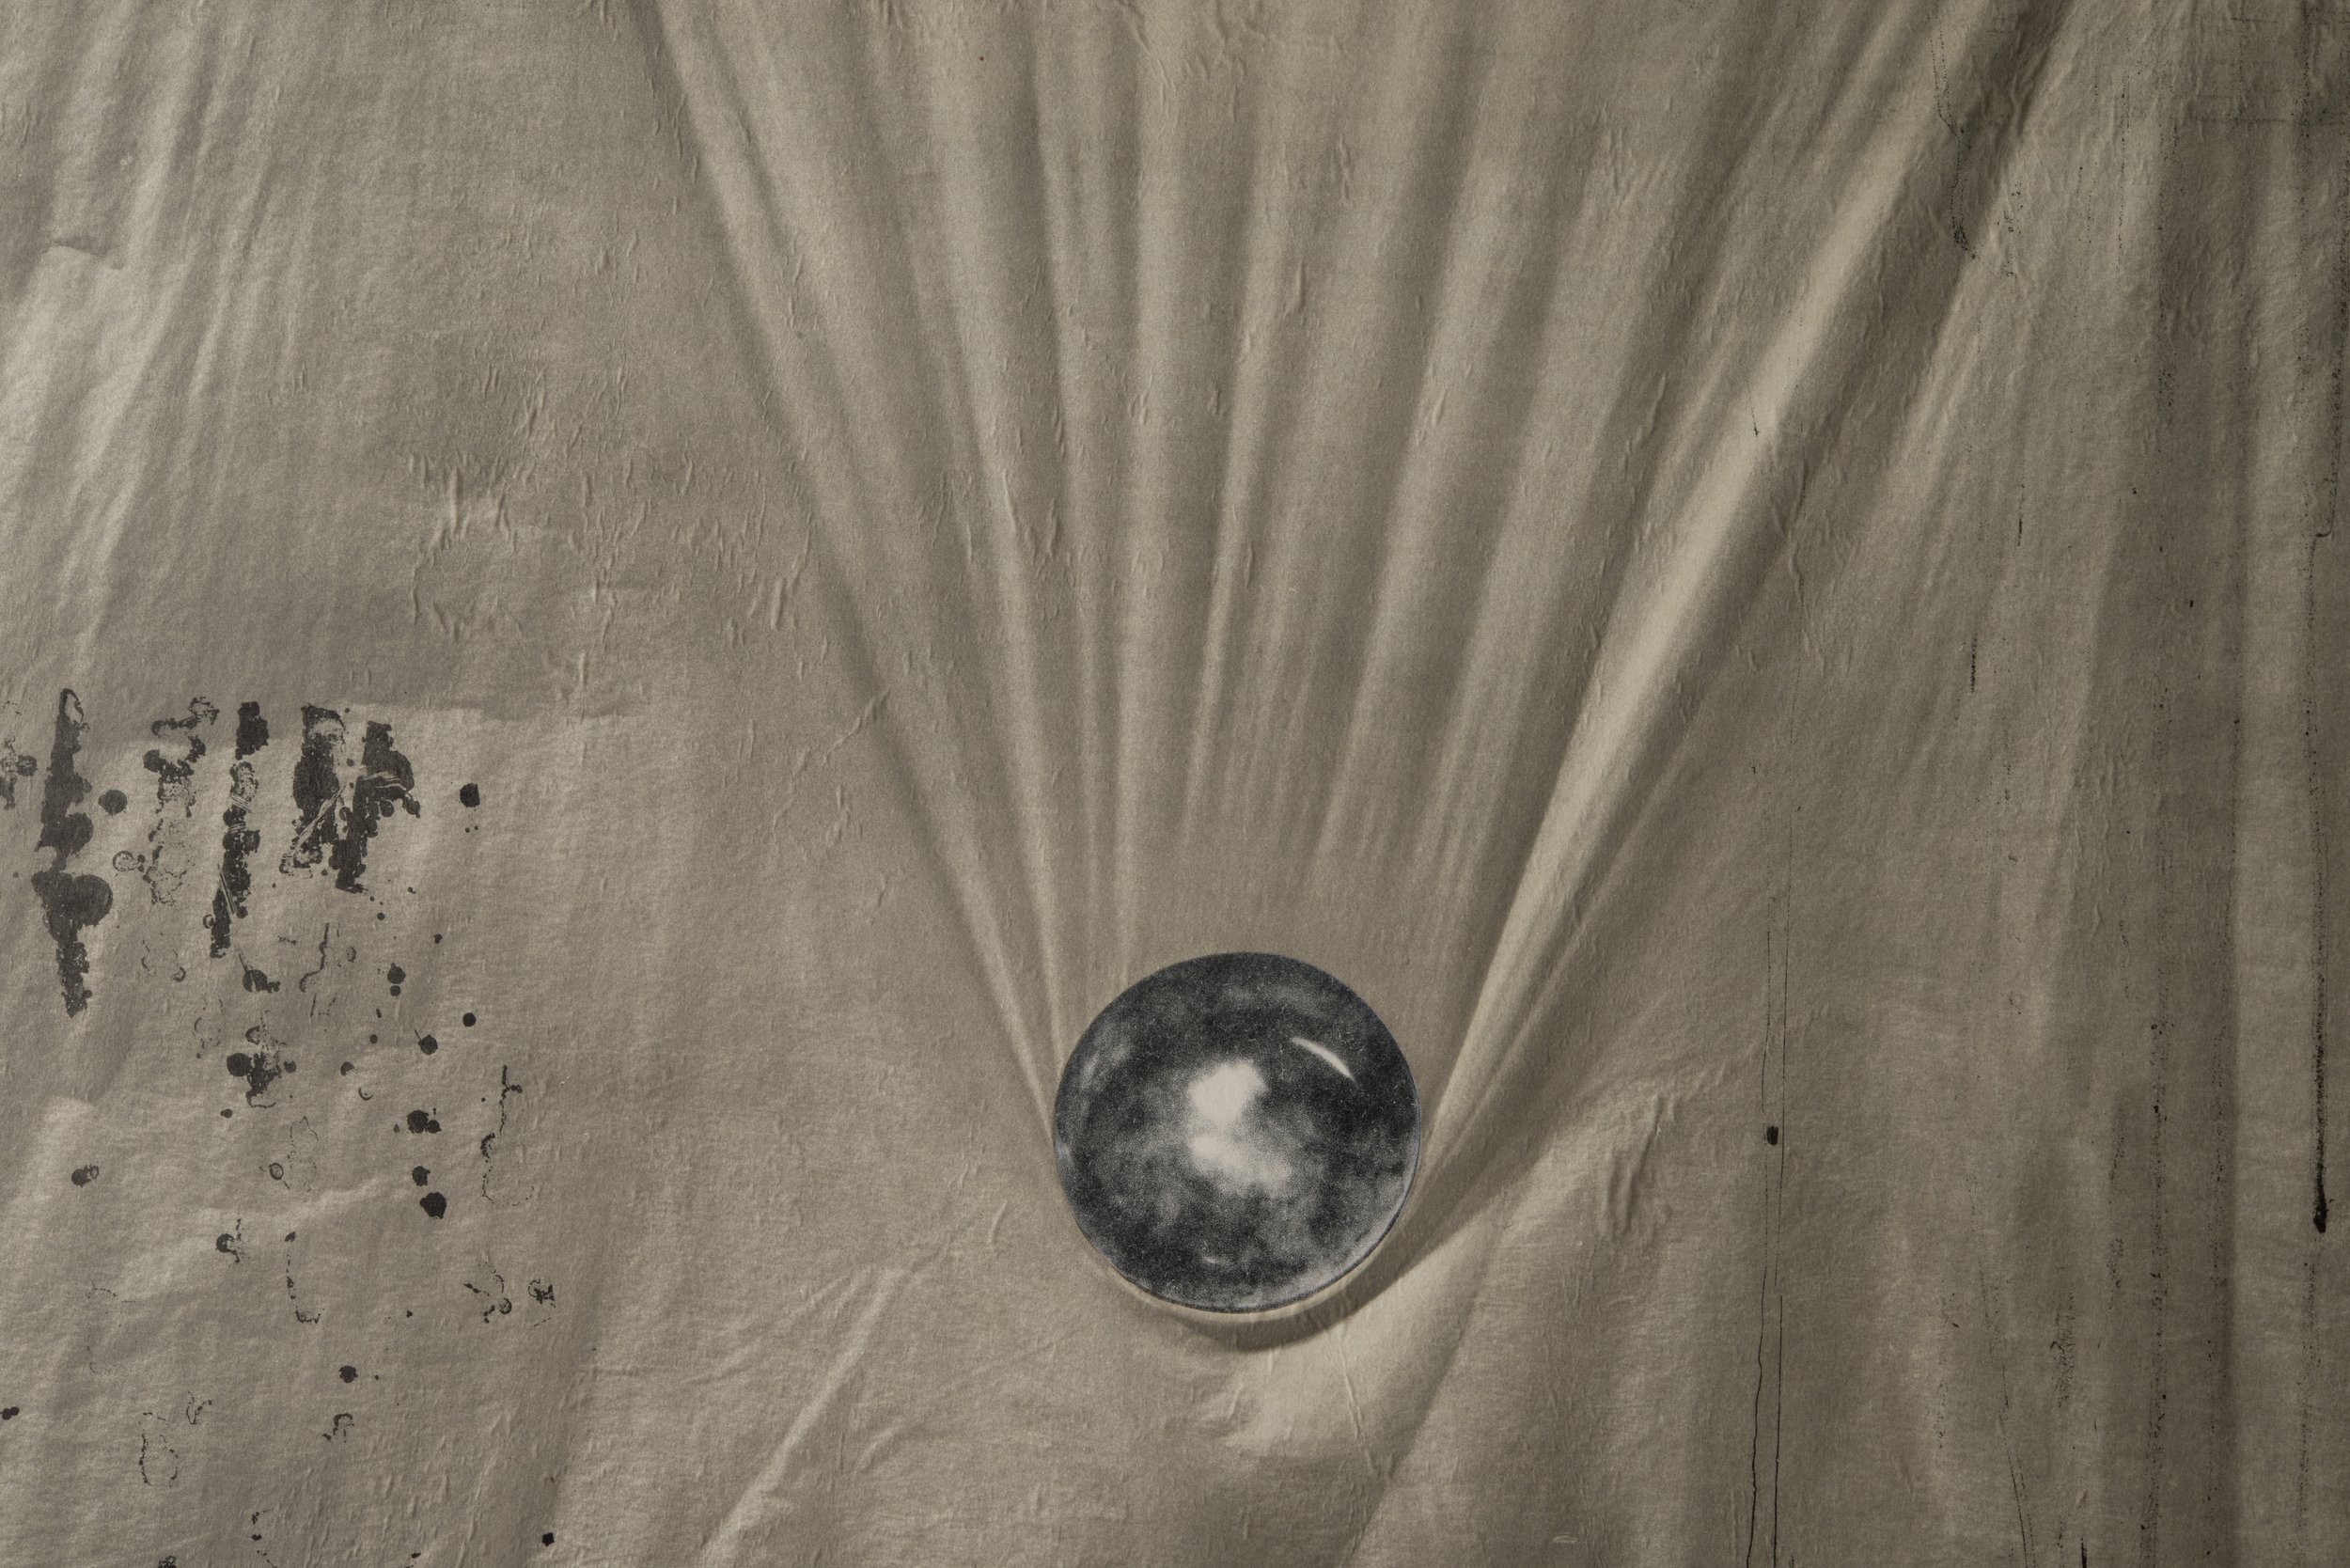
A year later, in 2018 a few prints that had been damaged in a water accident were brought to the Kanut for restoration. Observation showed that one of them was again on a double-layered paper – non-sized rag-paper (Arches 88) carried mixed graphics in the Chine-collé technique. [ill 14], [ill 15]
The graphic image was mostly on yellowish gampi paper viide 8 ⁽⁸⁾ but a few of its details were outside that area, i.e. on the backing rag-paper.
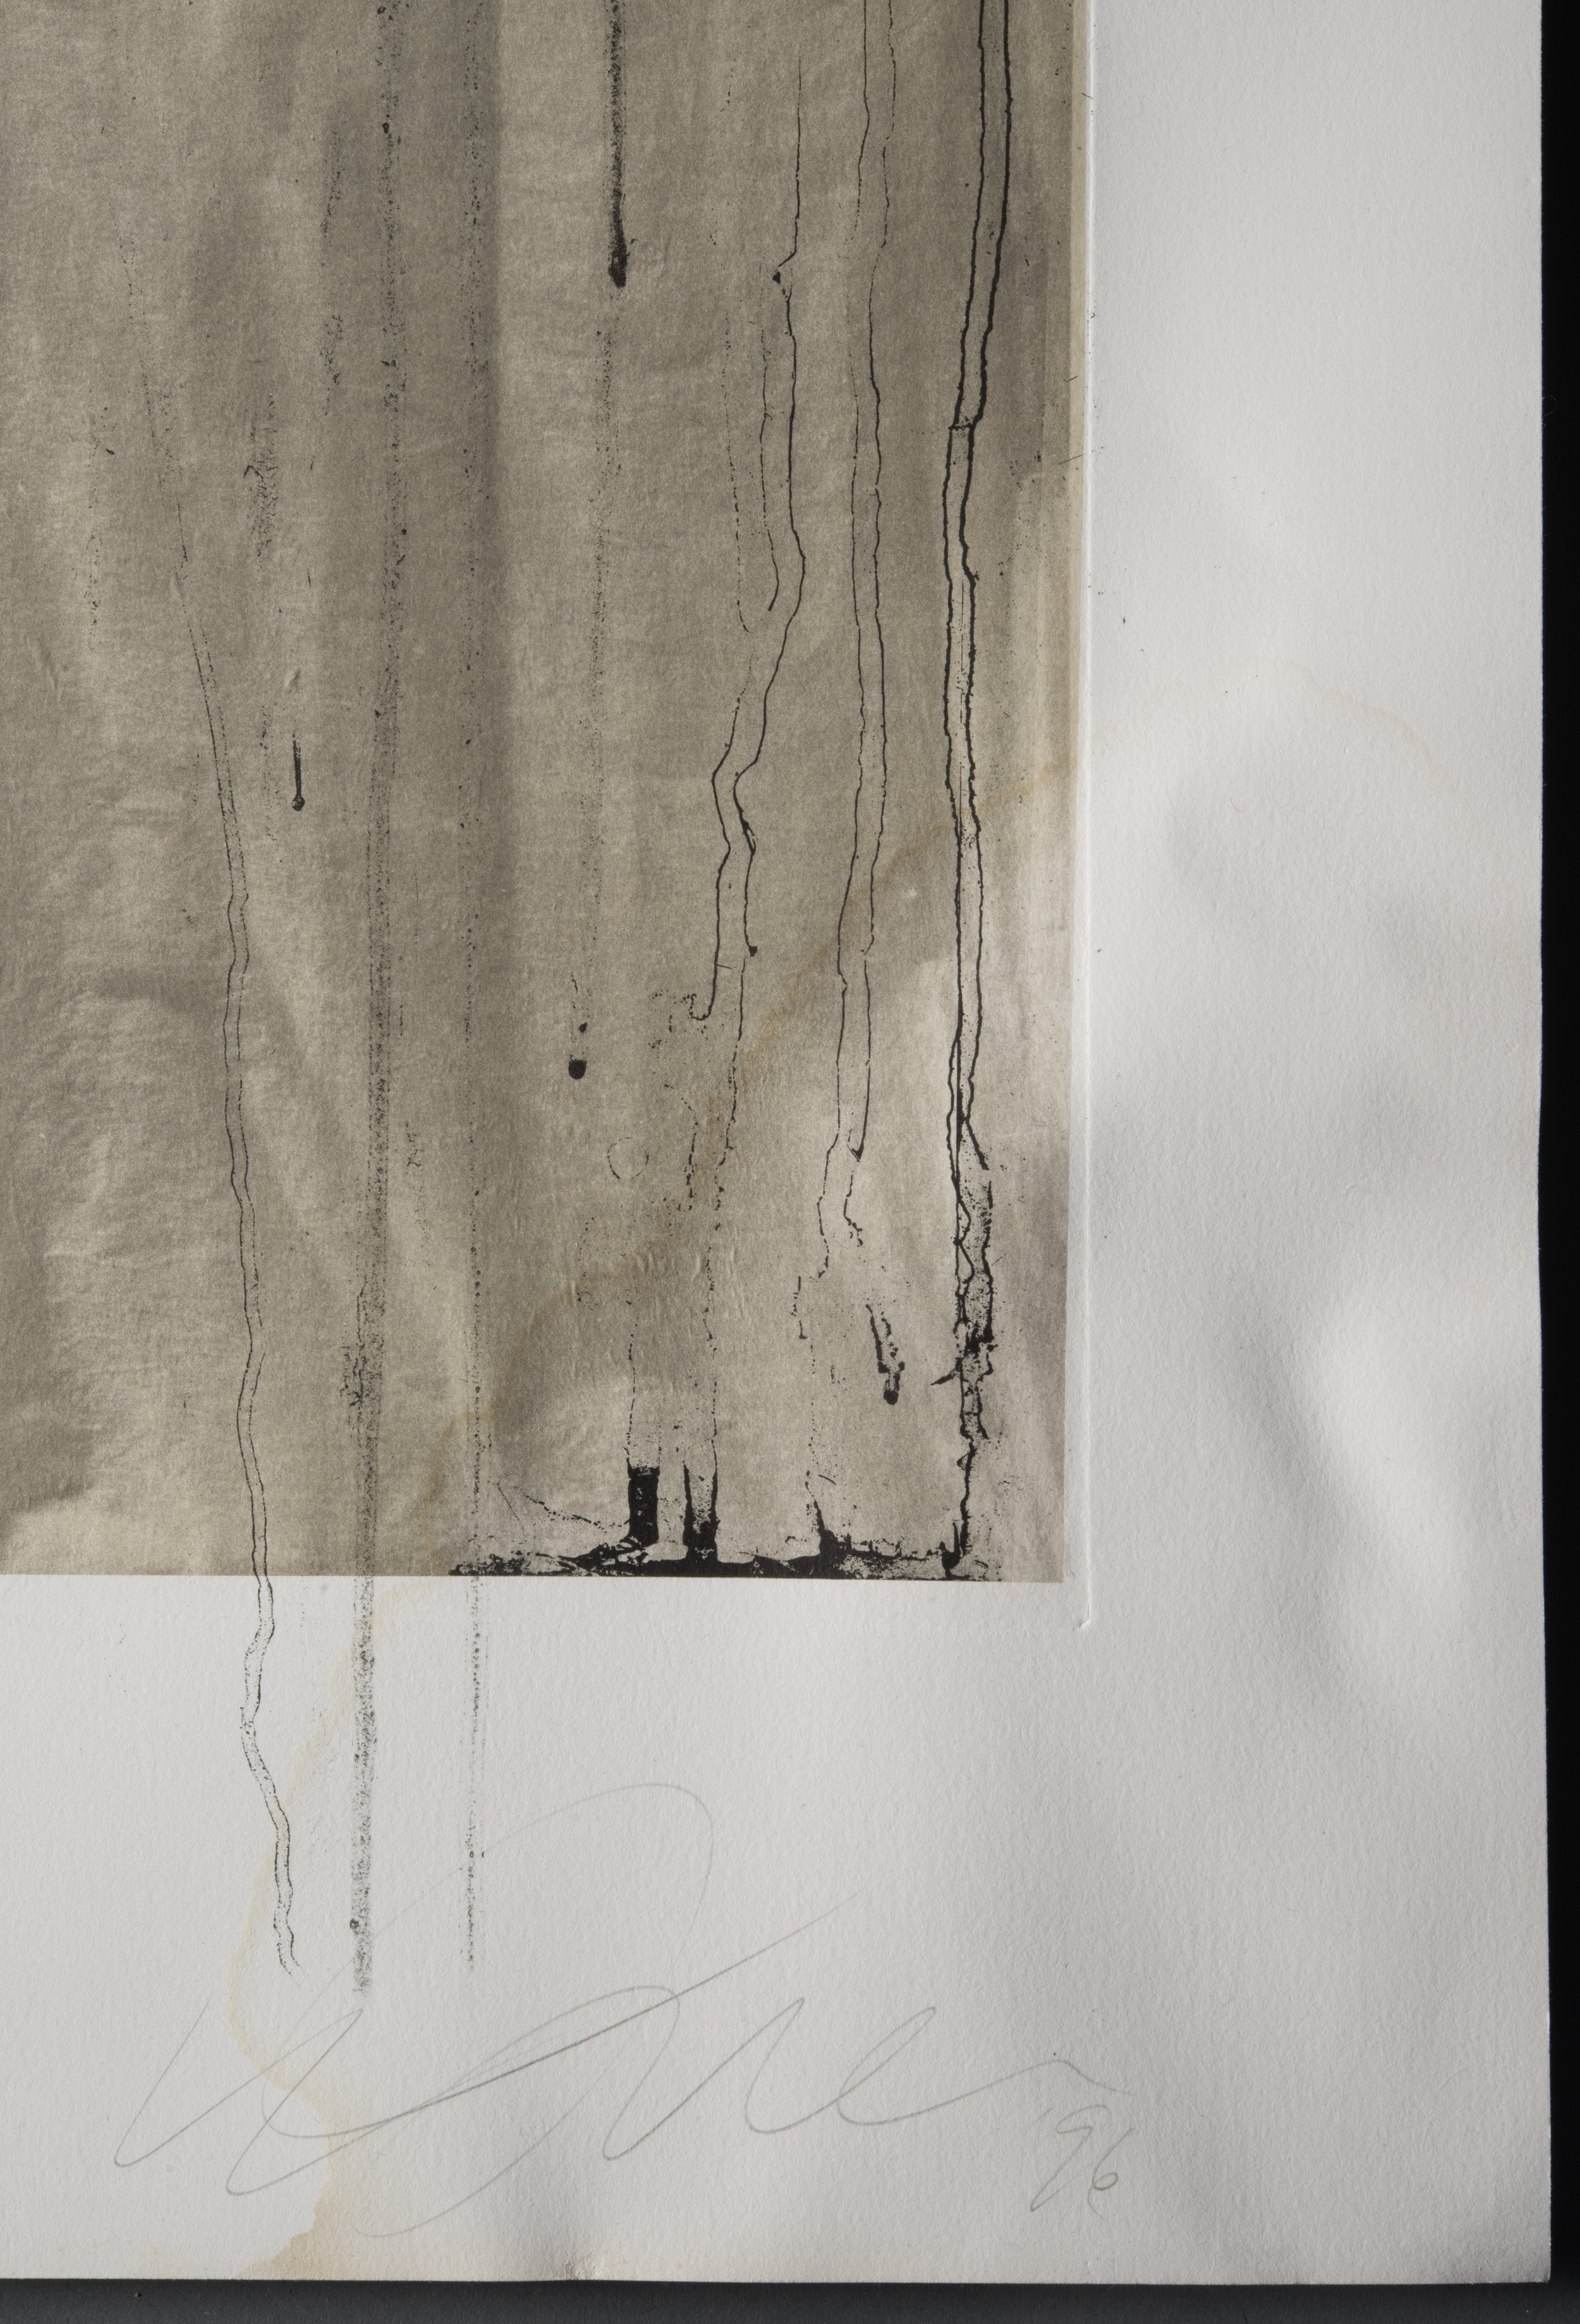
The whole print was cockling due to water-damage, the worst damage appeared on tidelines. The right-hand upper and lower corners of the print had serious water-damage and the yellow tidelines dominating in the corners of the rag-paper, and diagonally across the gampi paper corners as well. The background of the image was a bit lighter in the areas of tidelines that led to the conclusion about the tidelines having been caused by glue or the yellowish pigment discharging from the gampi paper.
Moisture had also damaged the bond between the two paper sheets – the surface of the gampi paper had tiny fine creases that had been invisible at first and the upper layer that was cockling and had expanded was separated from the lower one. [ill 16] Some air-sacks between the layers were noticeable on the surface, too, and under any pressure they could have caused further damage to the image. [ill 17]
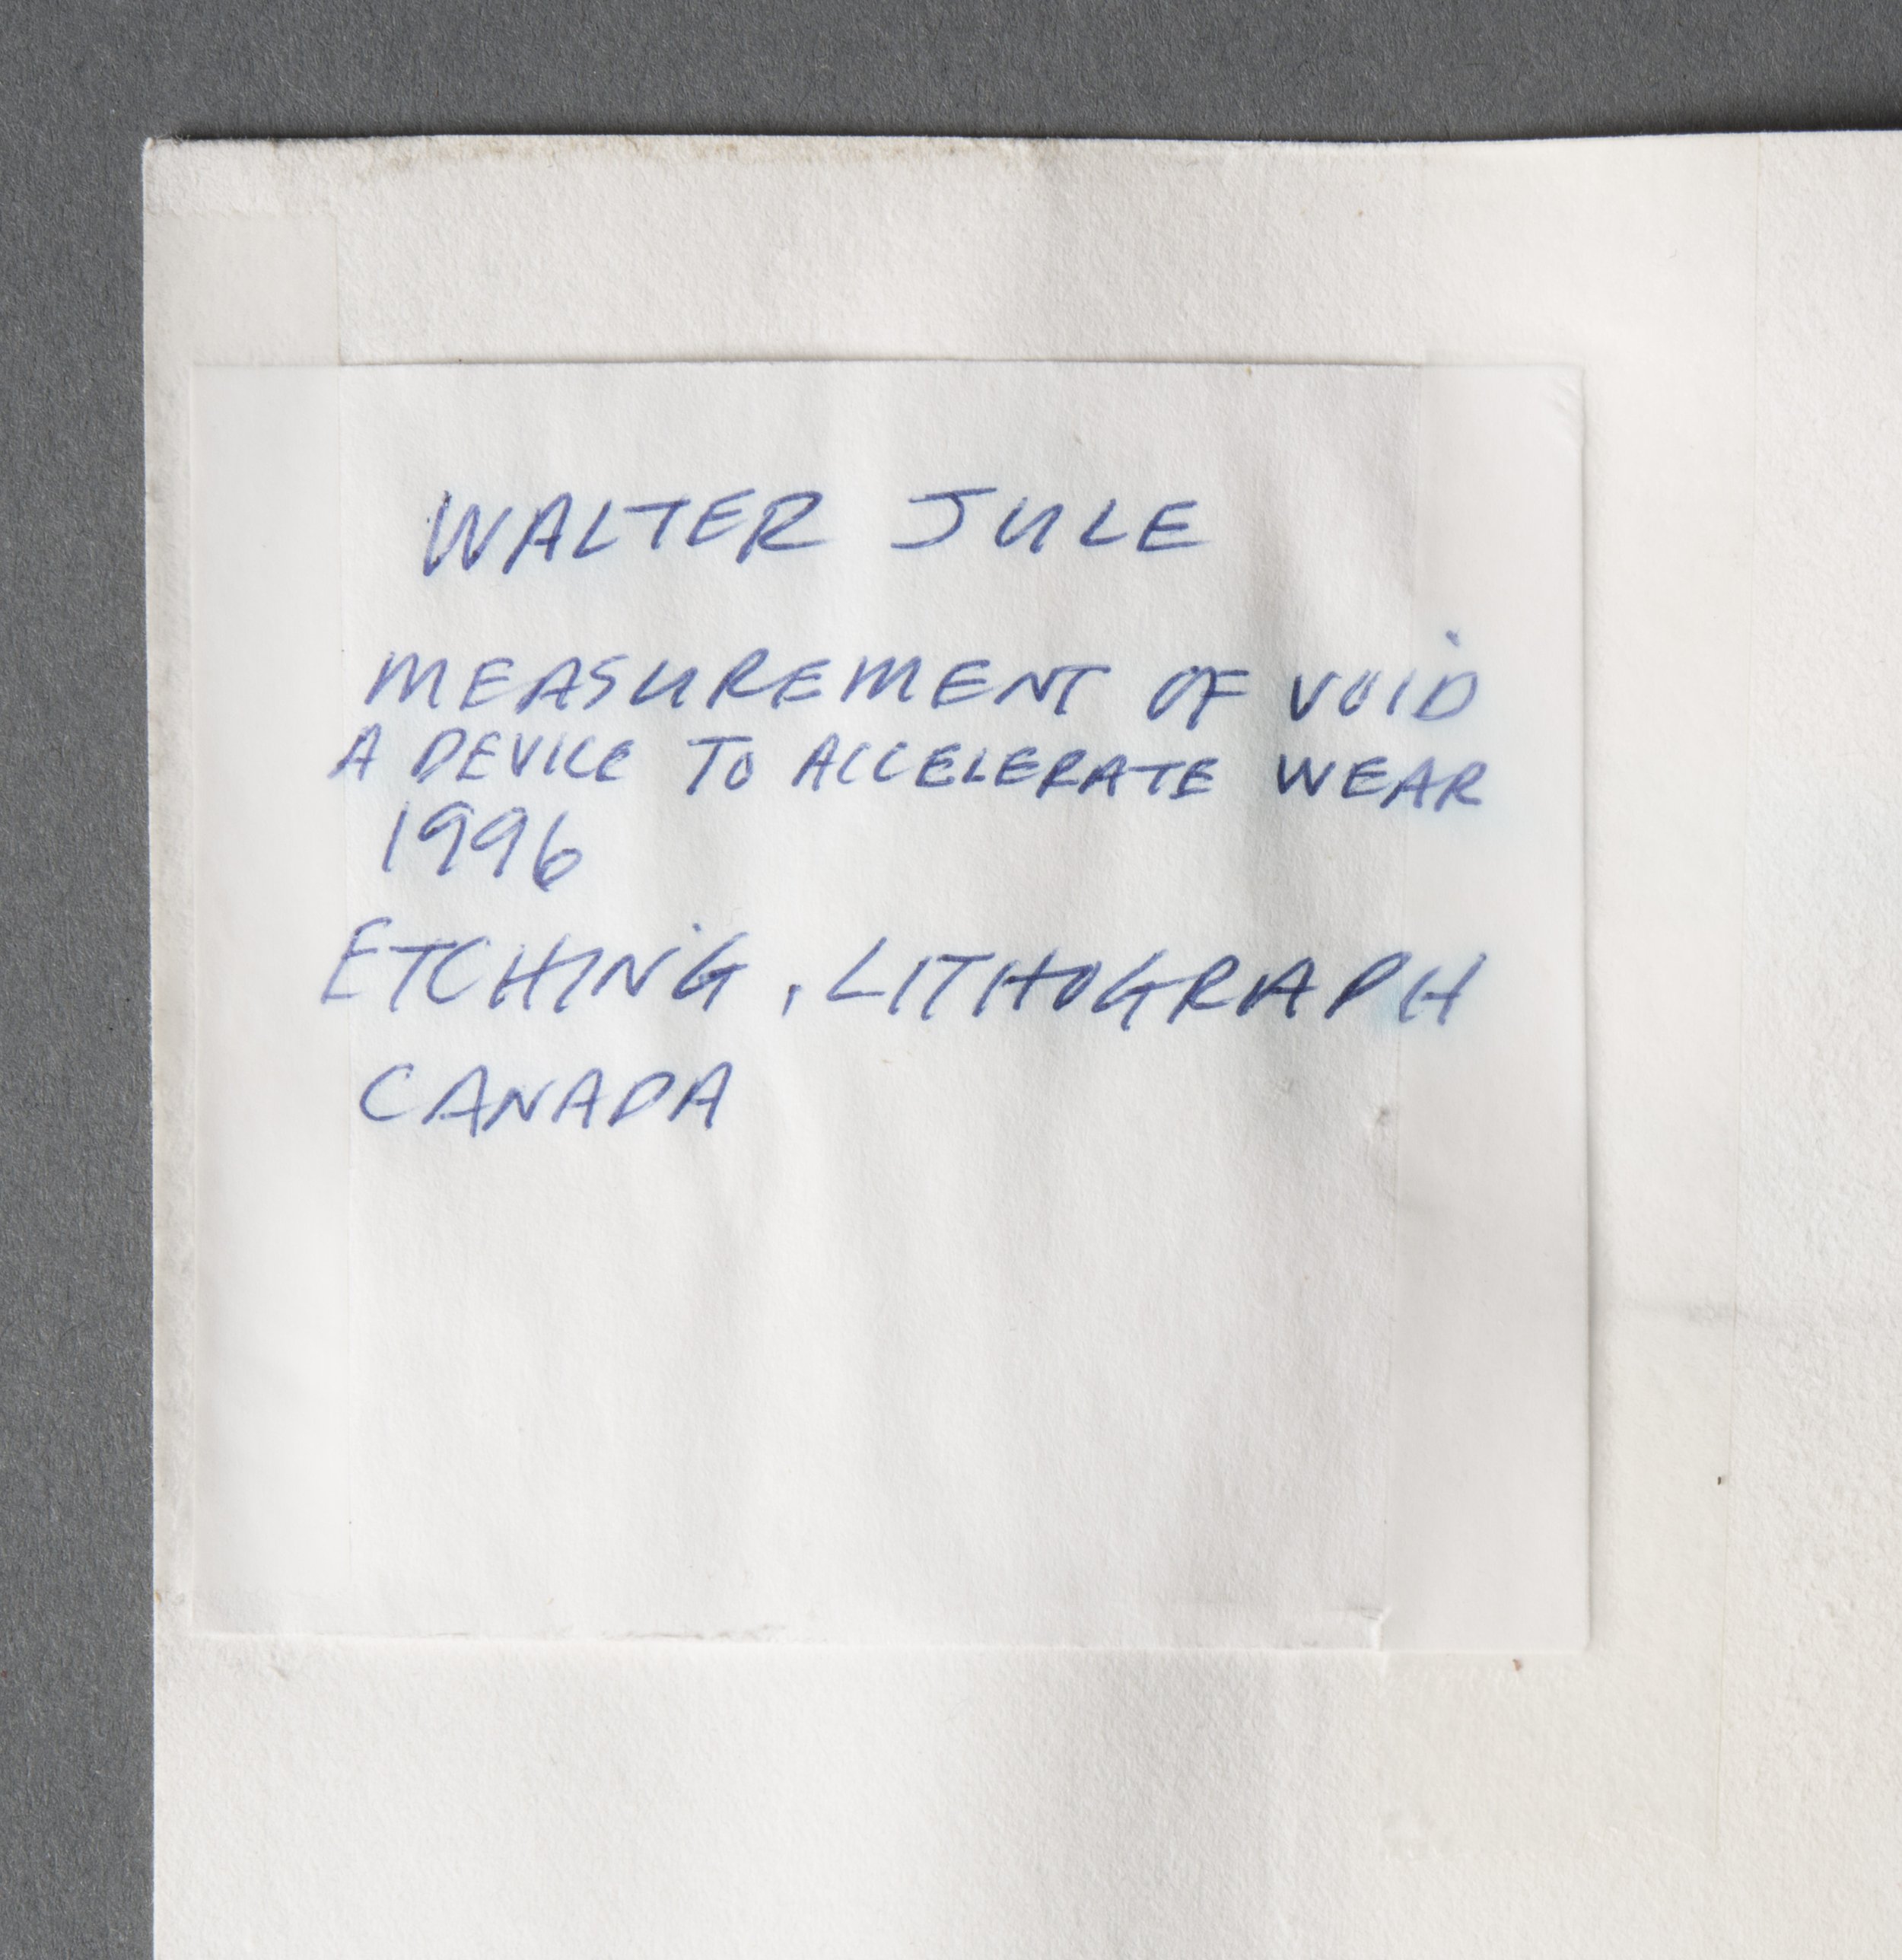
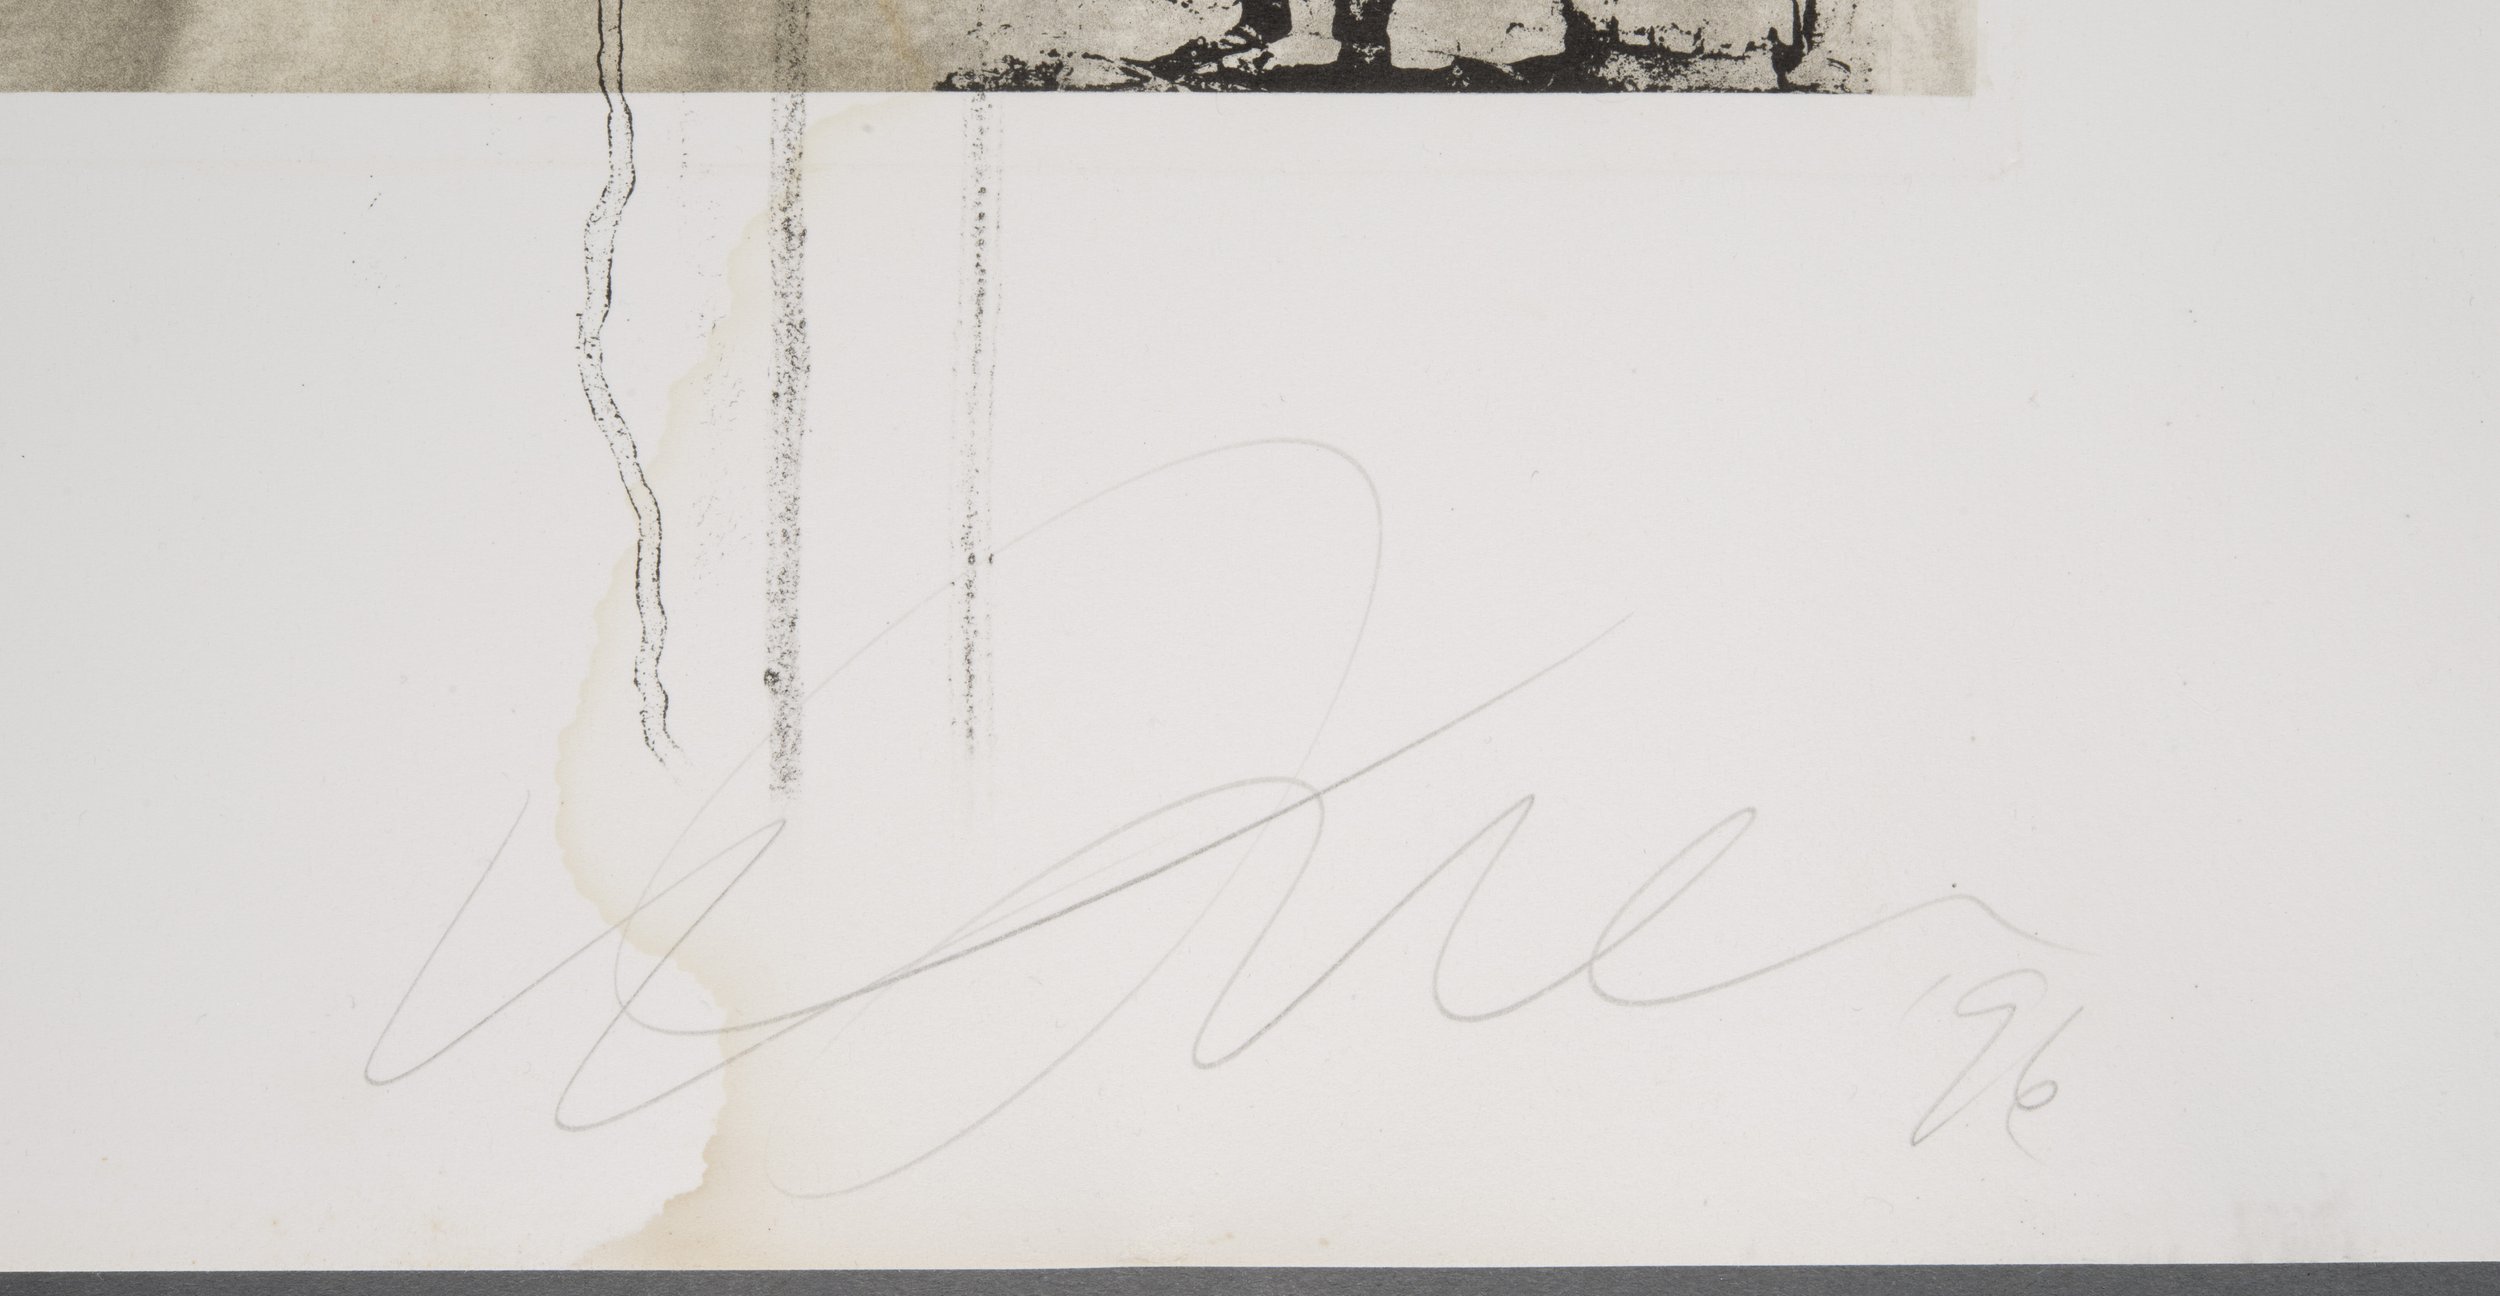
A label with the title of the print had been glued on the reverse side. viide 9 ⁽⁹⁾ Owing to moisture the text written in blue ink had imbued into the paper of the label as well as into the rag-paper. [ill 18] Due to water damage, the wooden frame had leaked and dark dirt spots were visible on the edges of the print and in the area of tidelines.
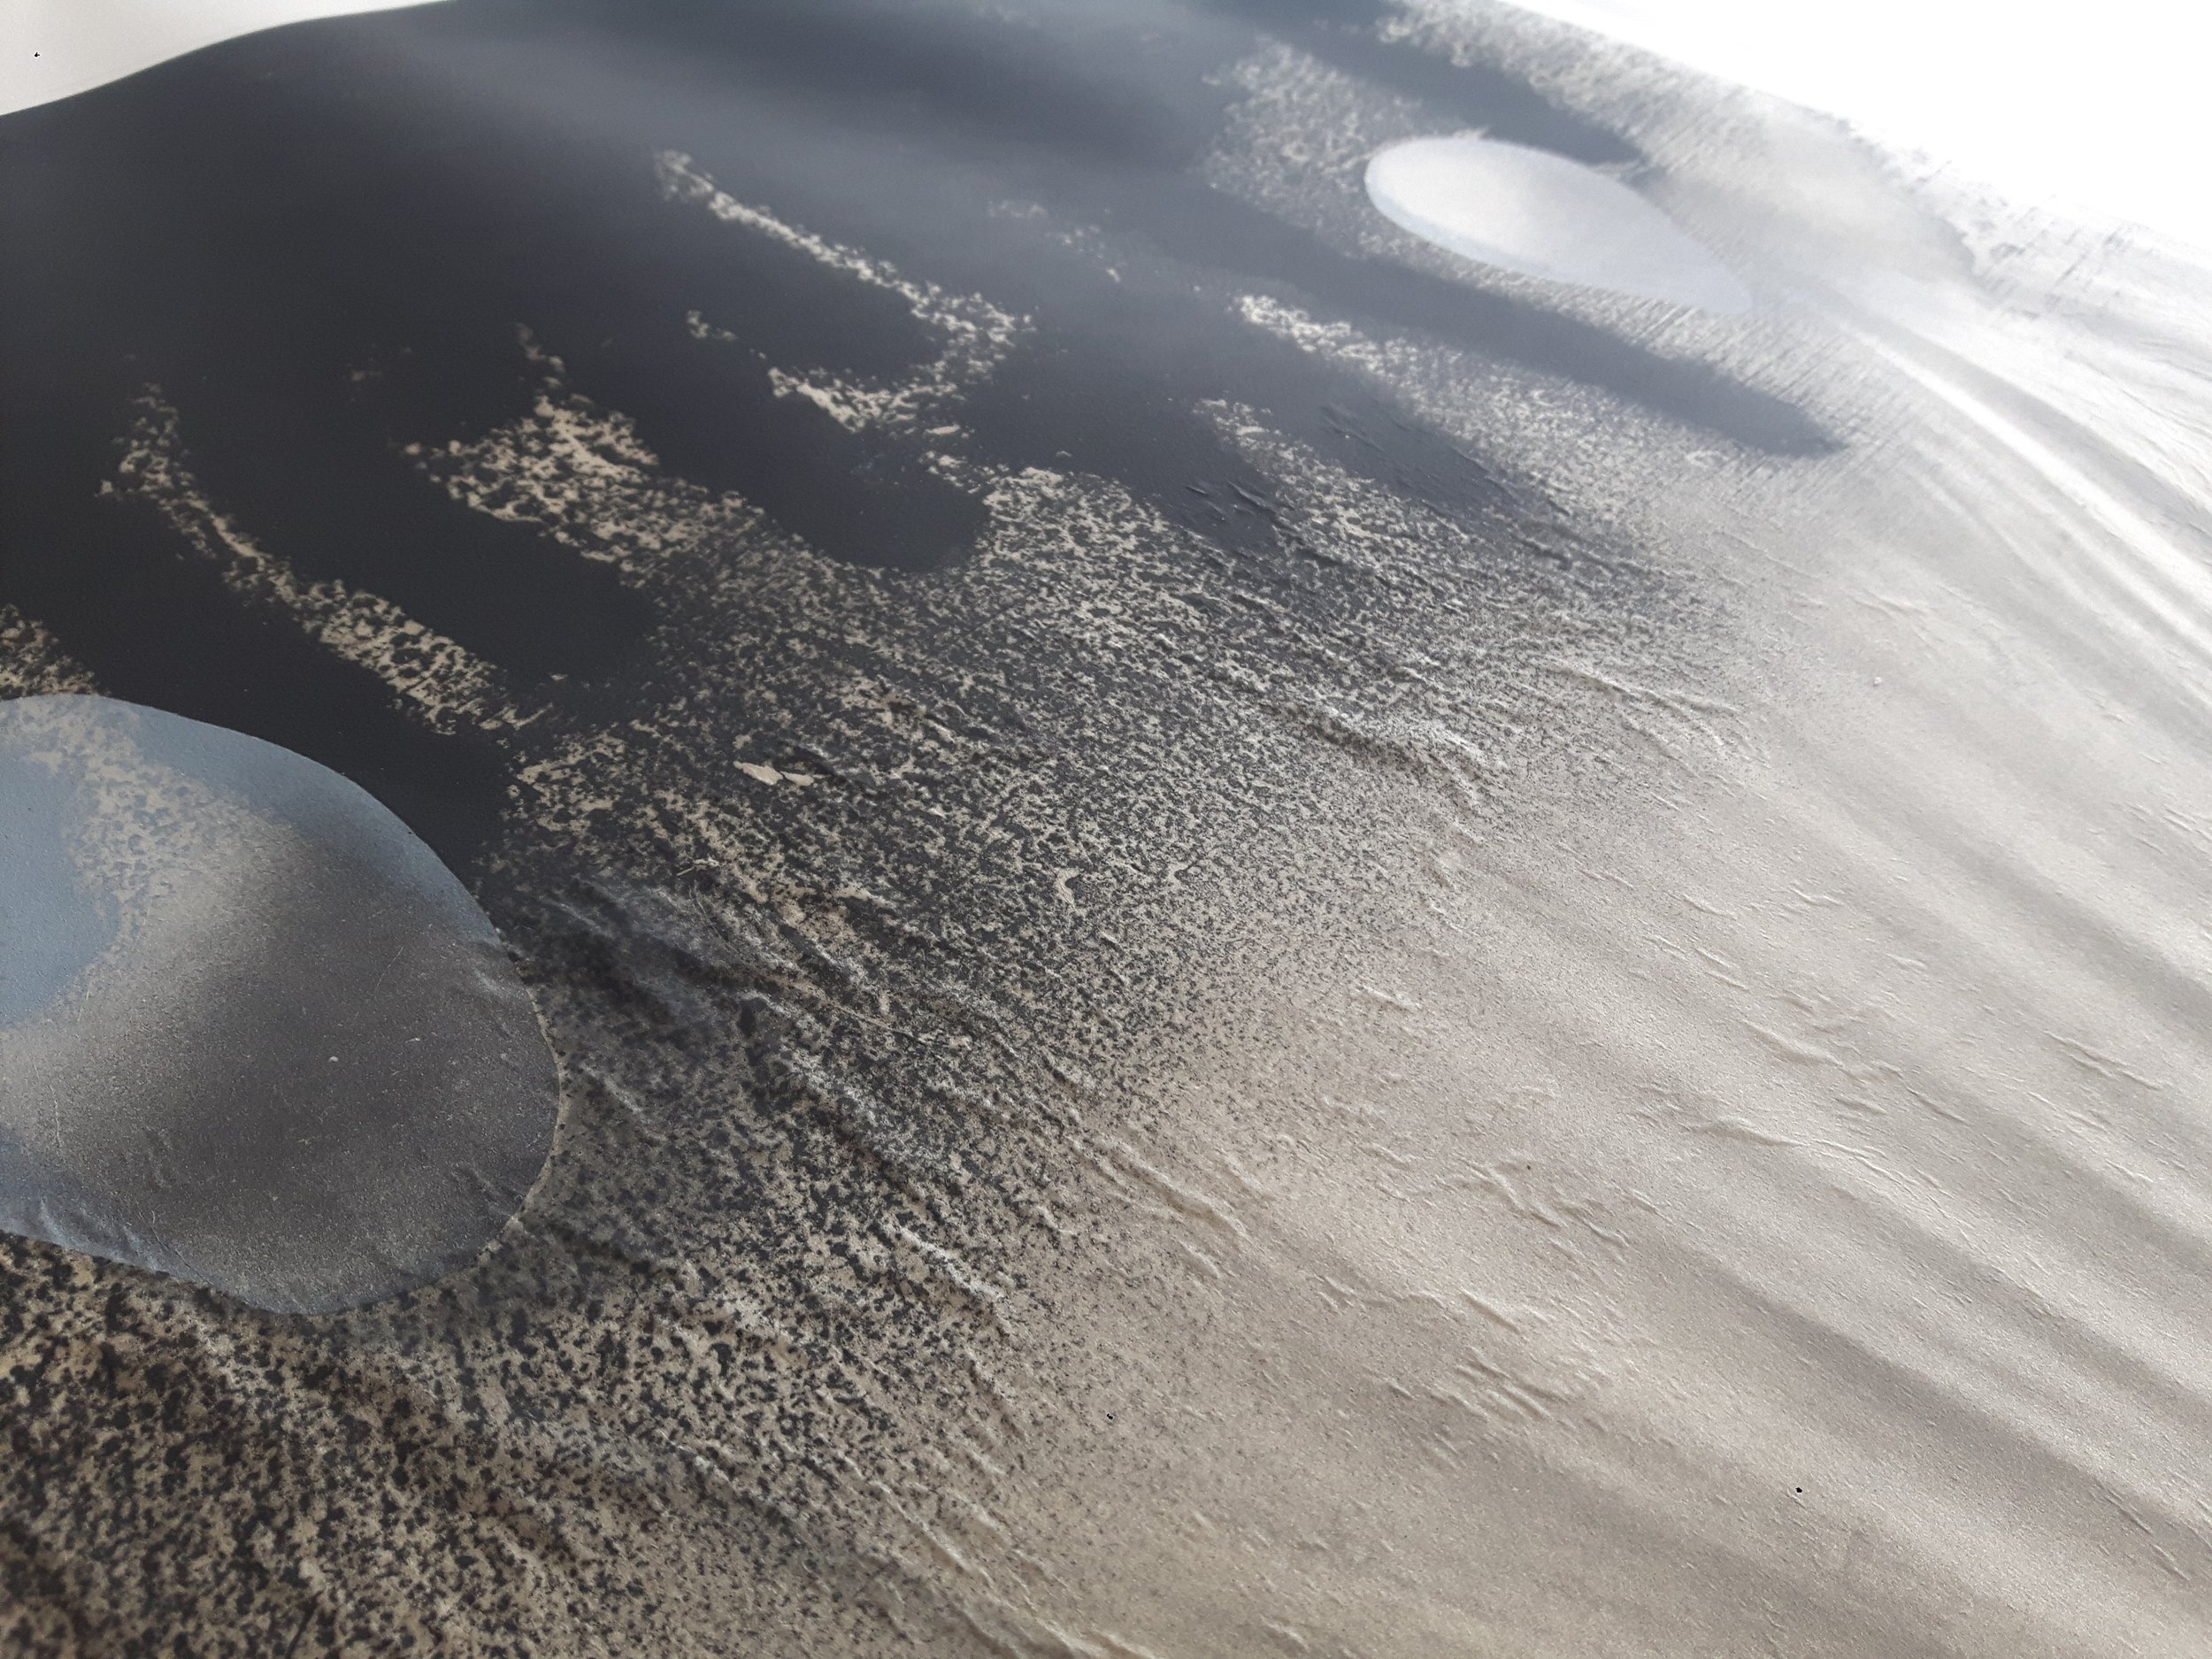
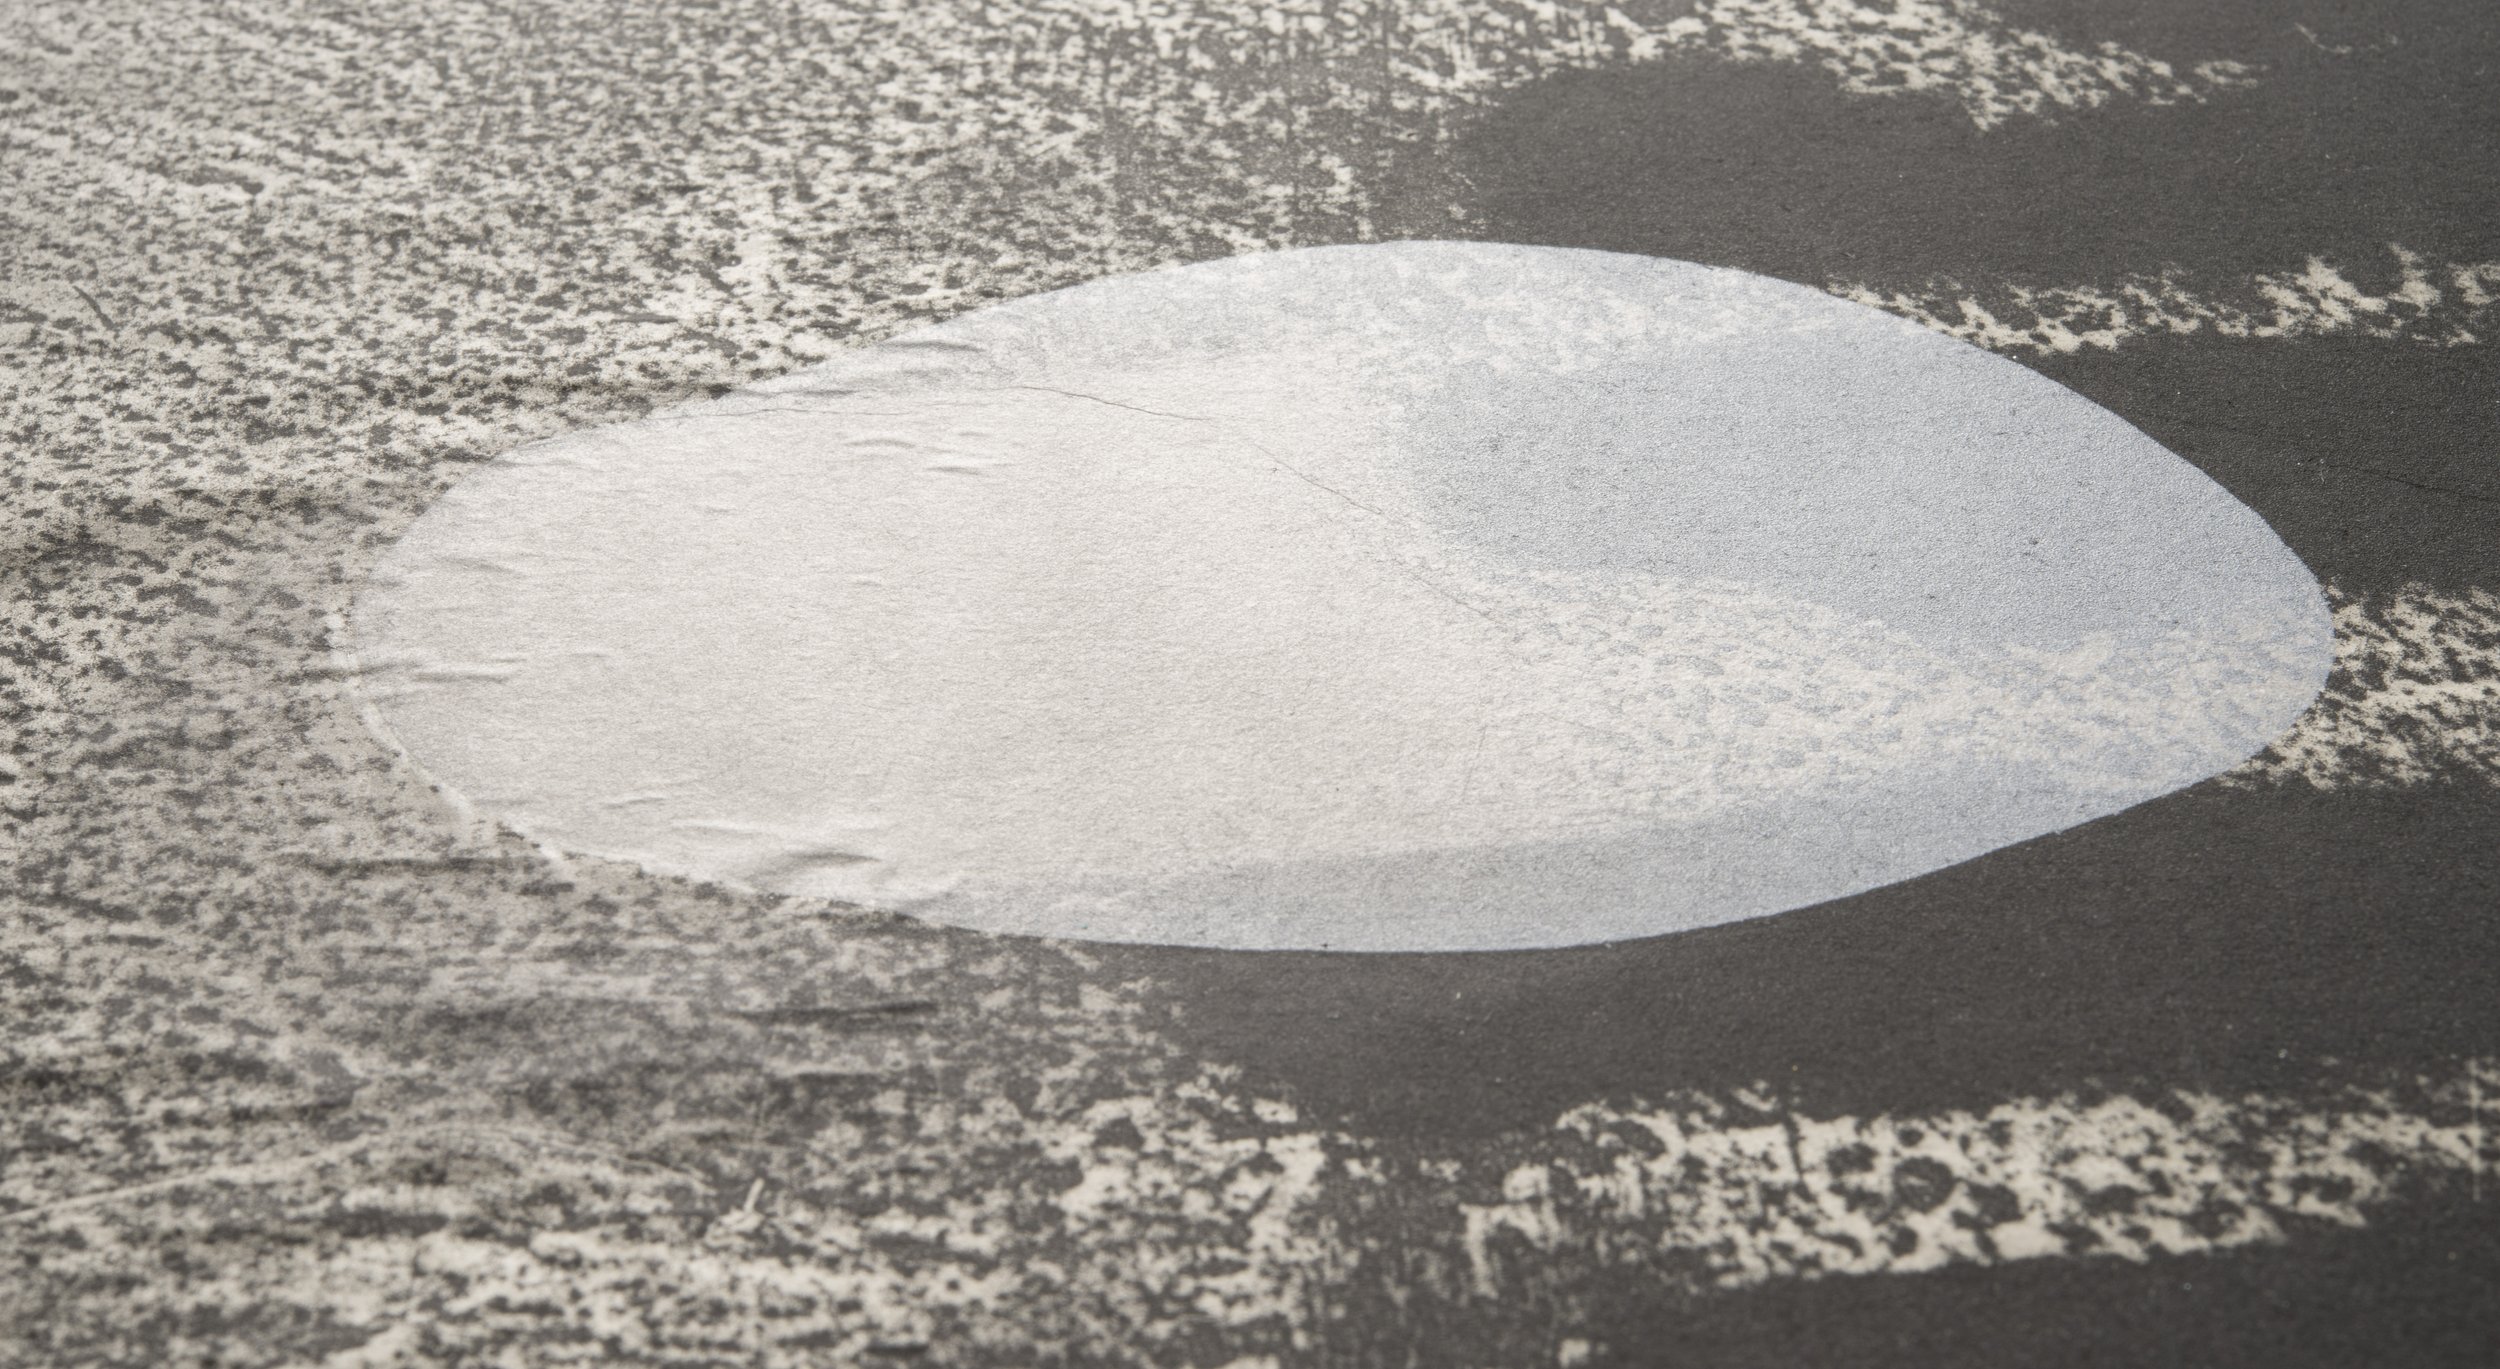
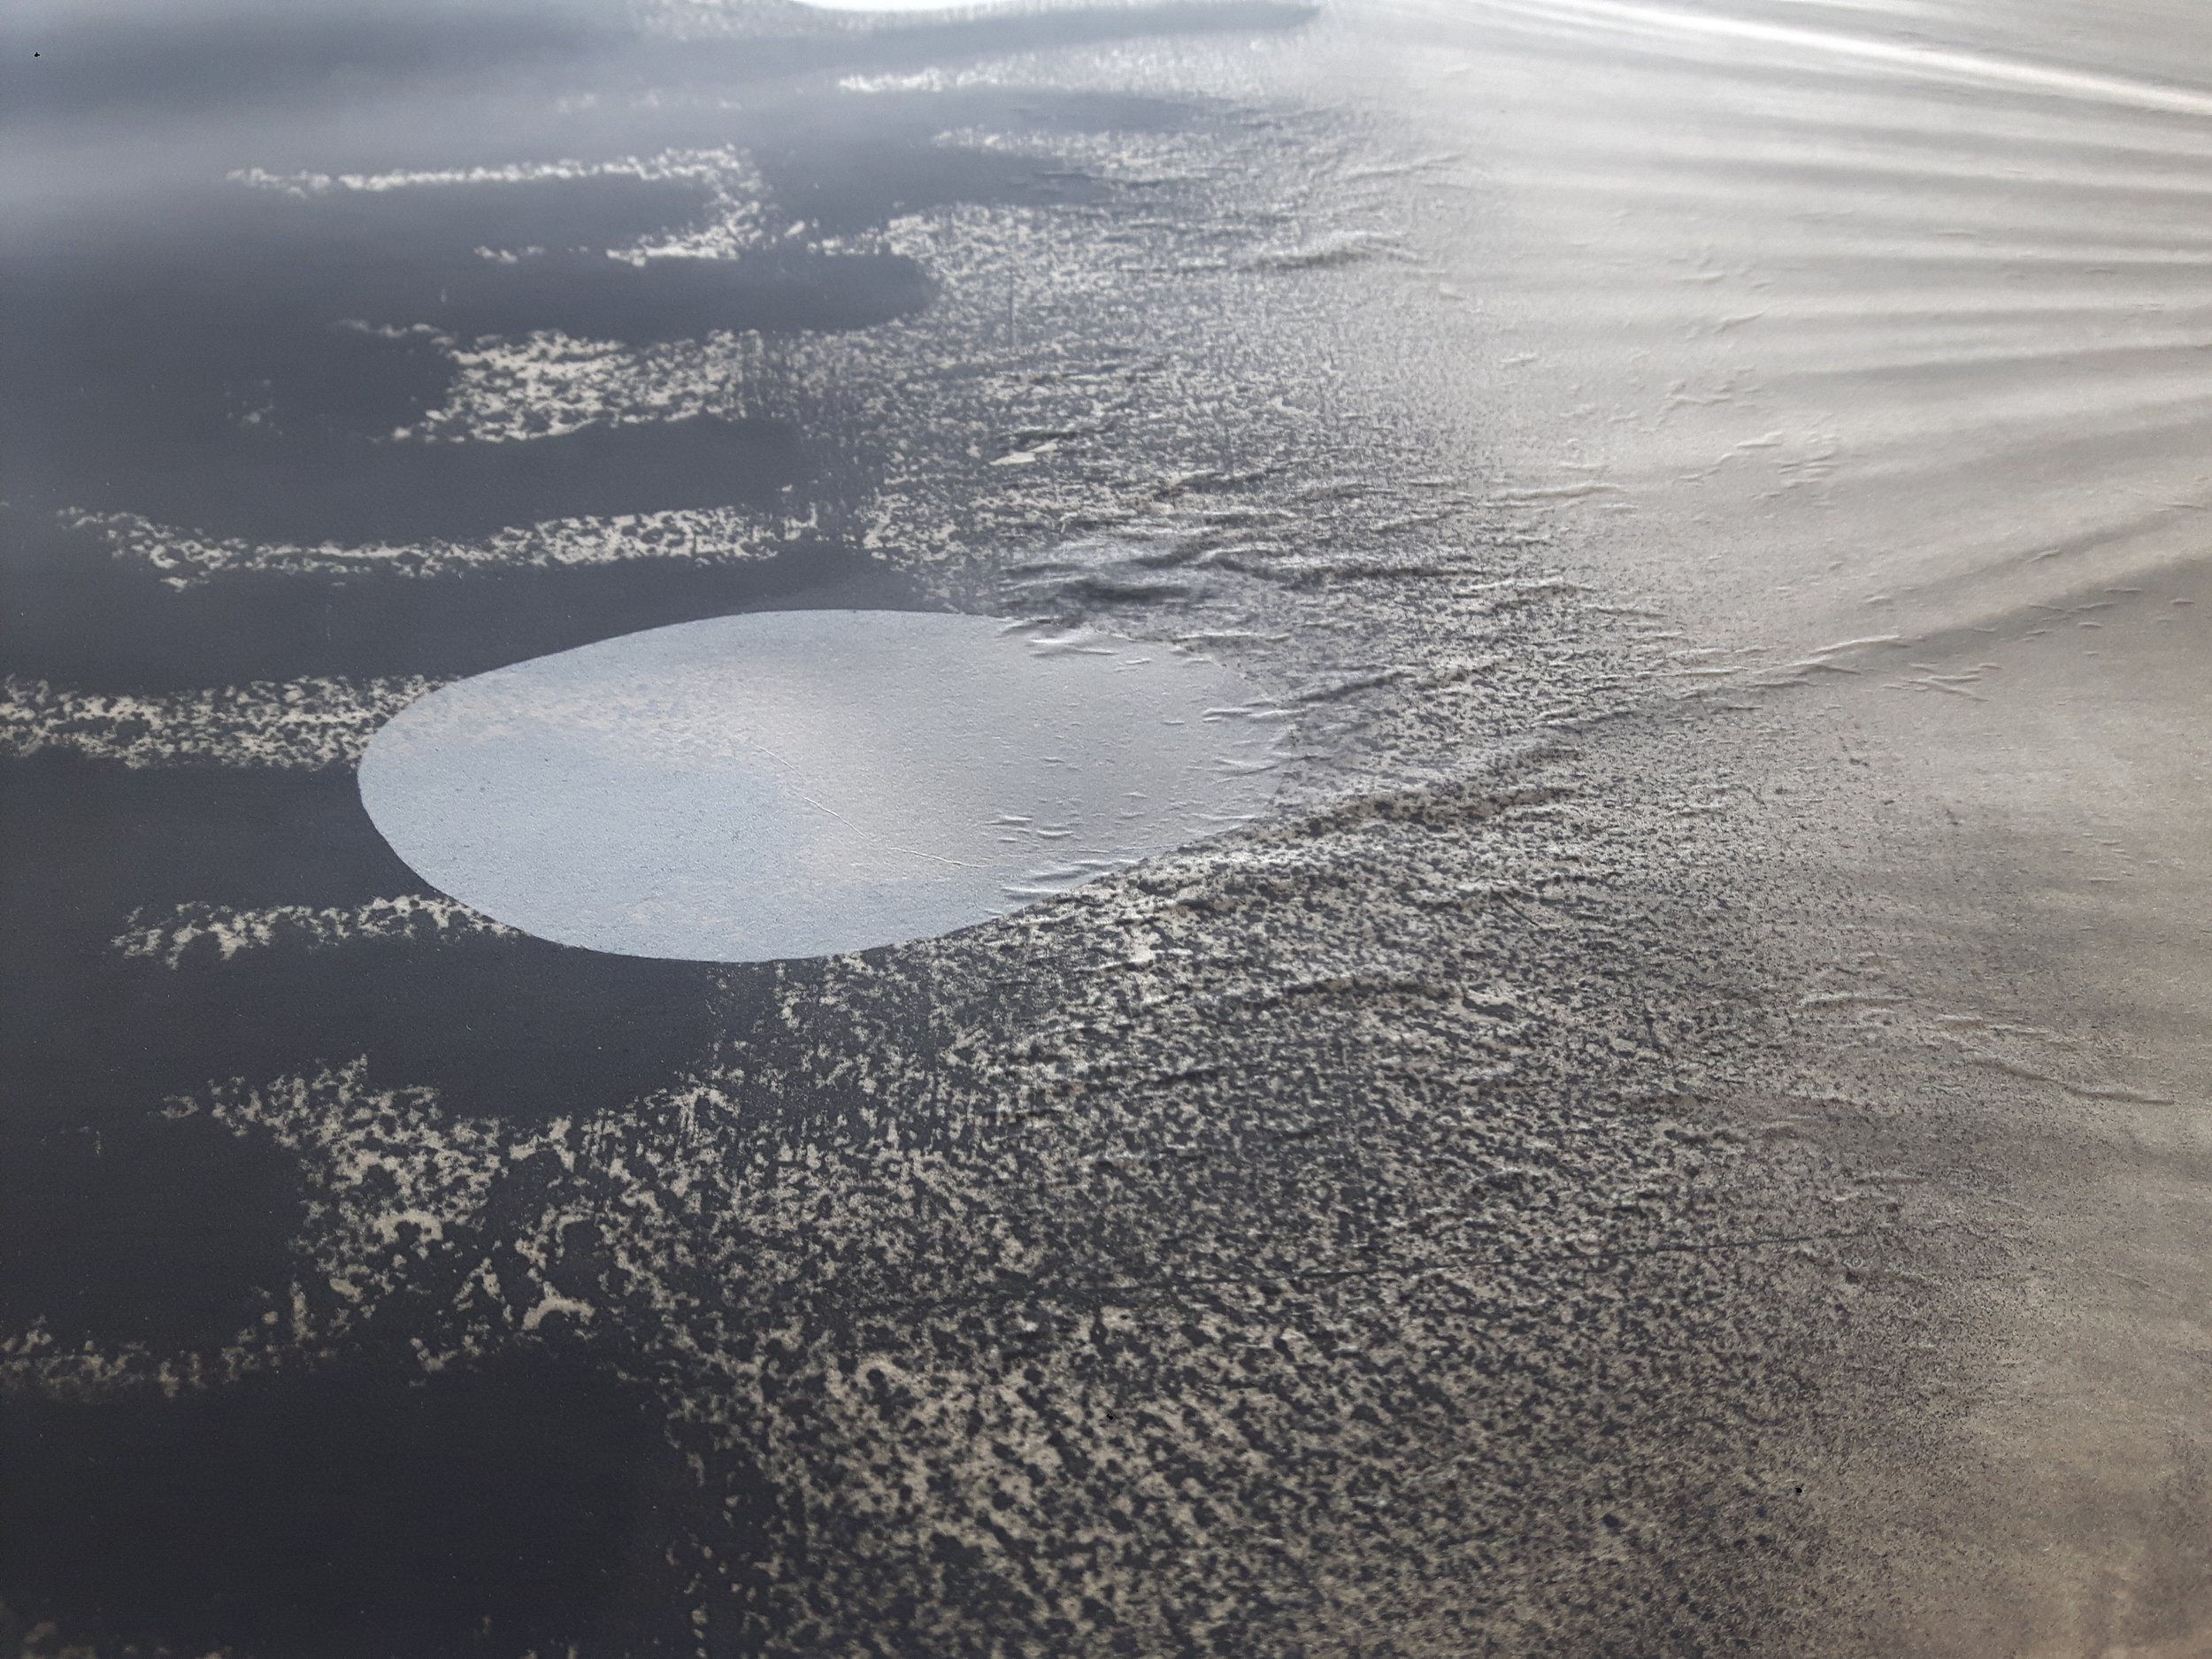
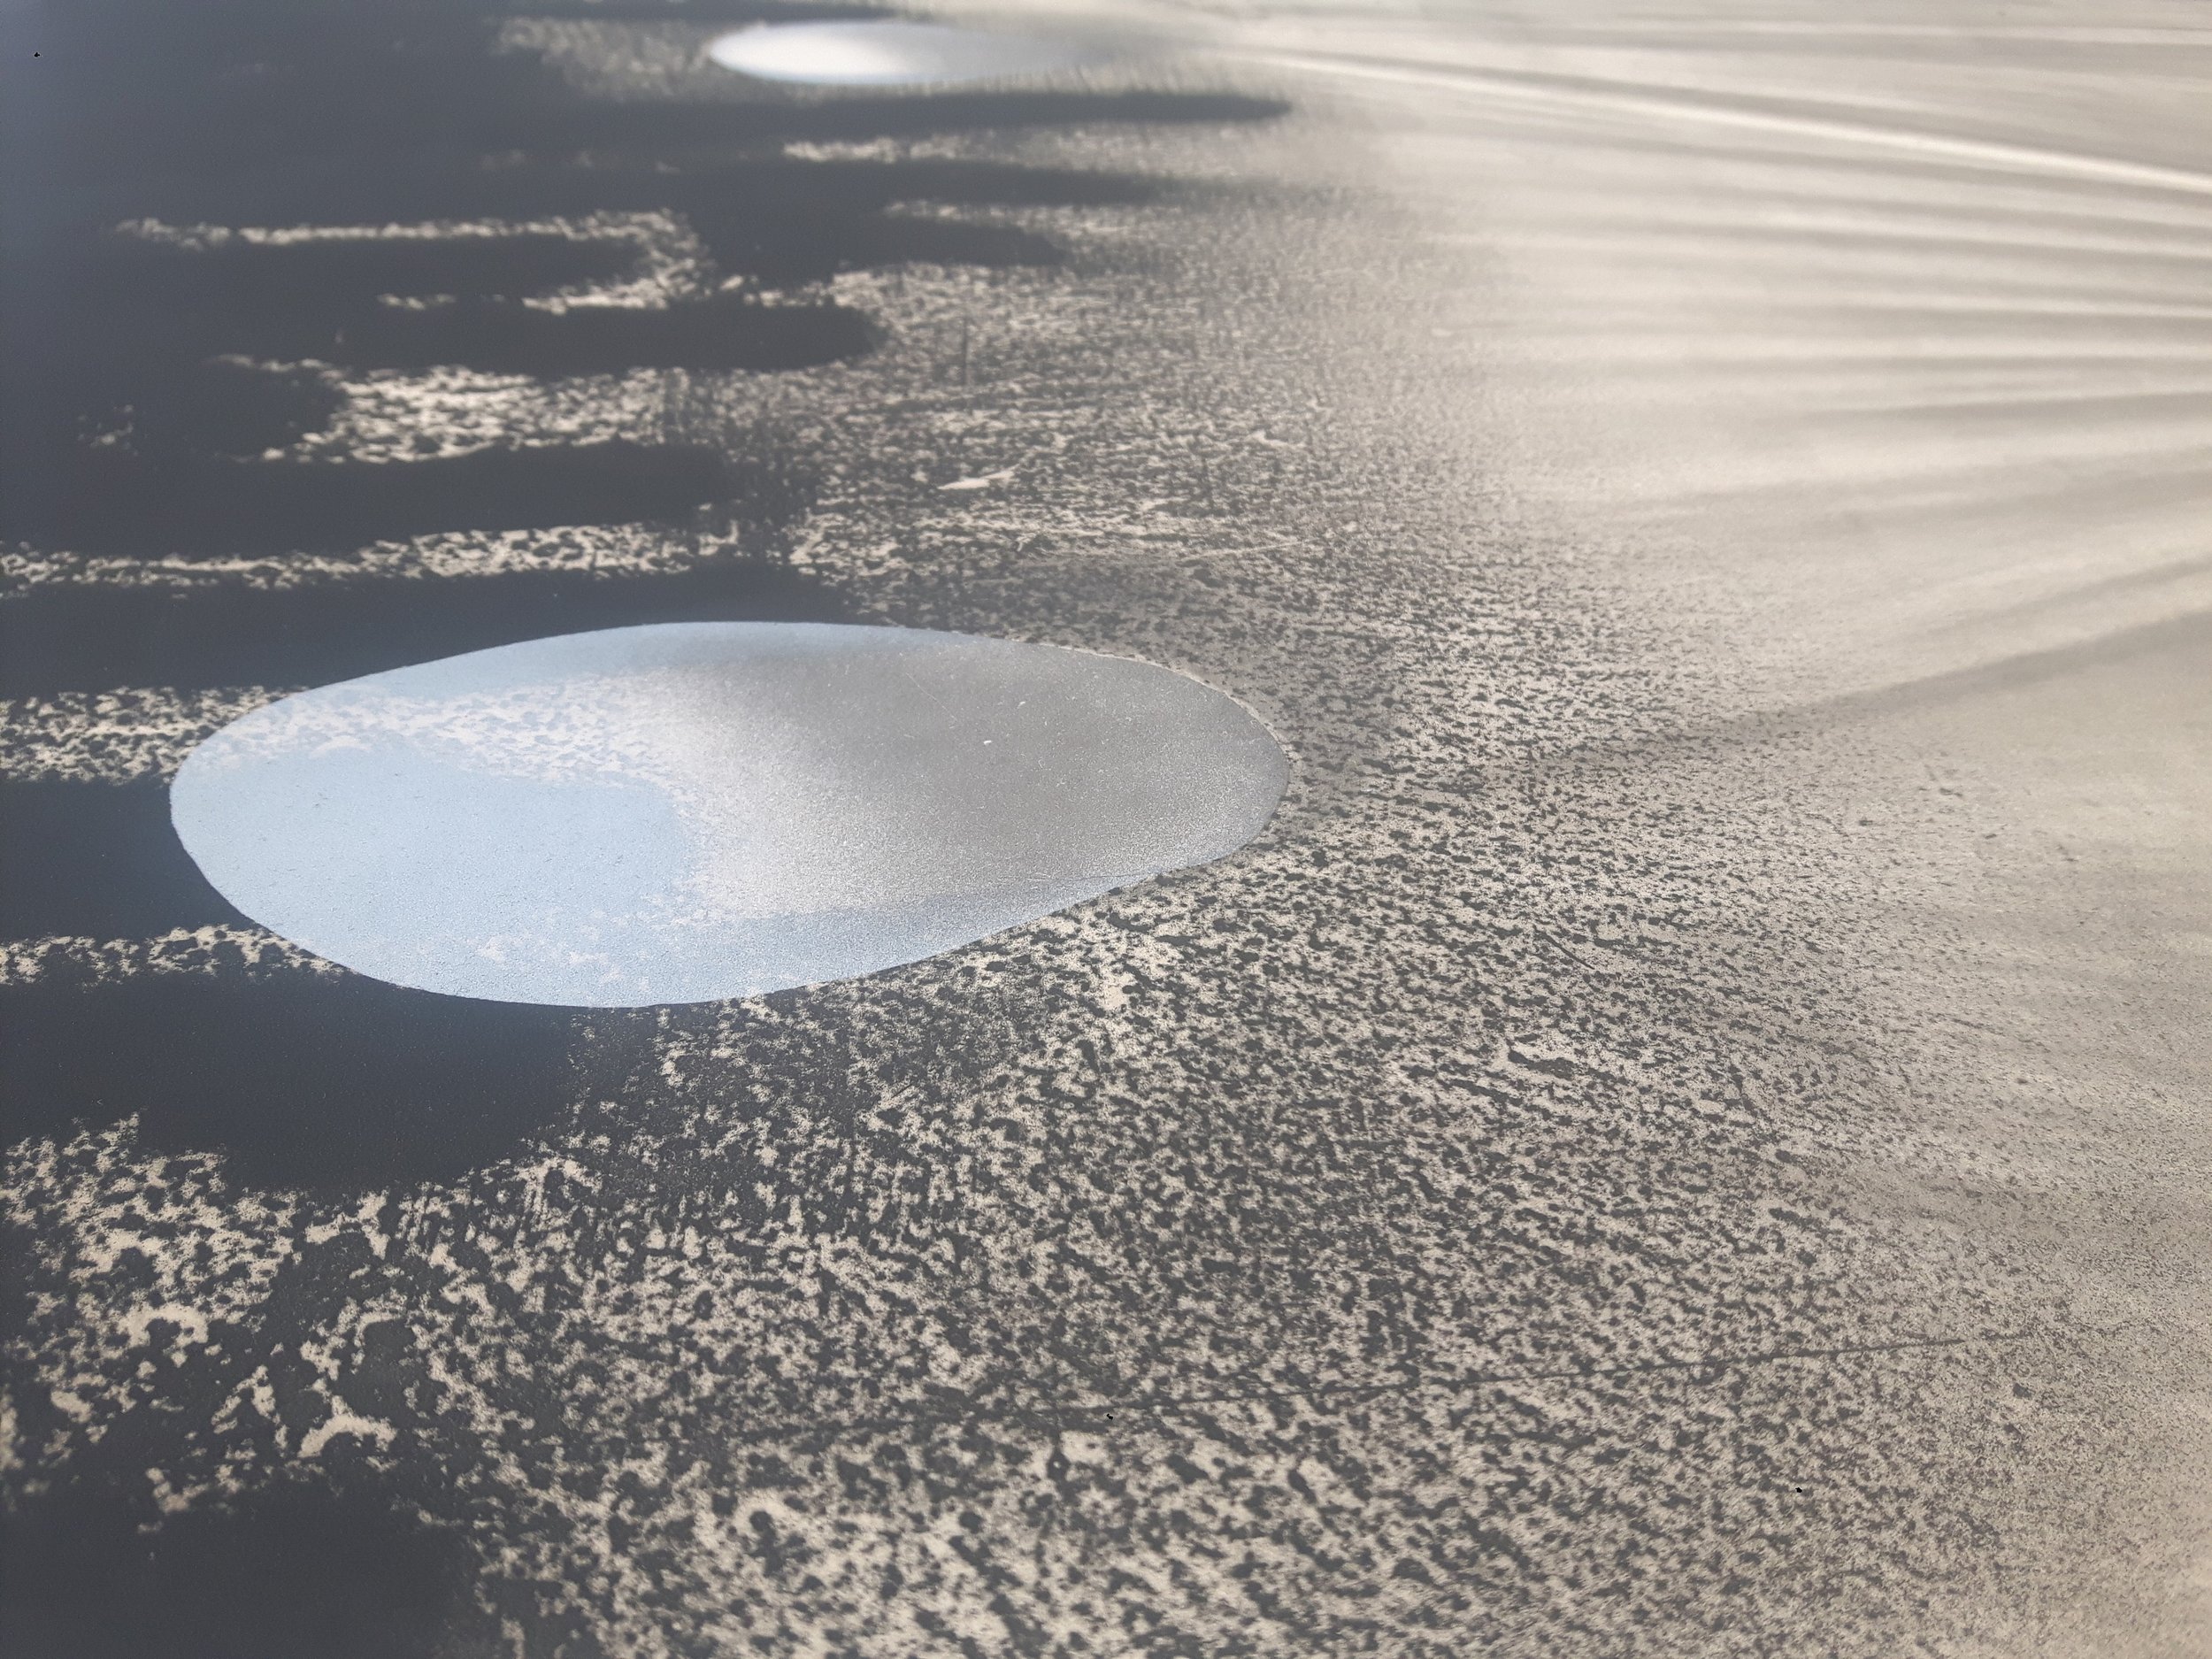
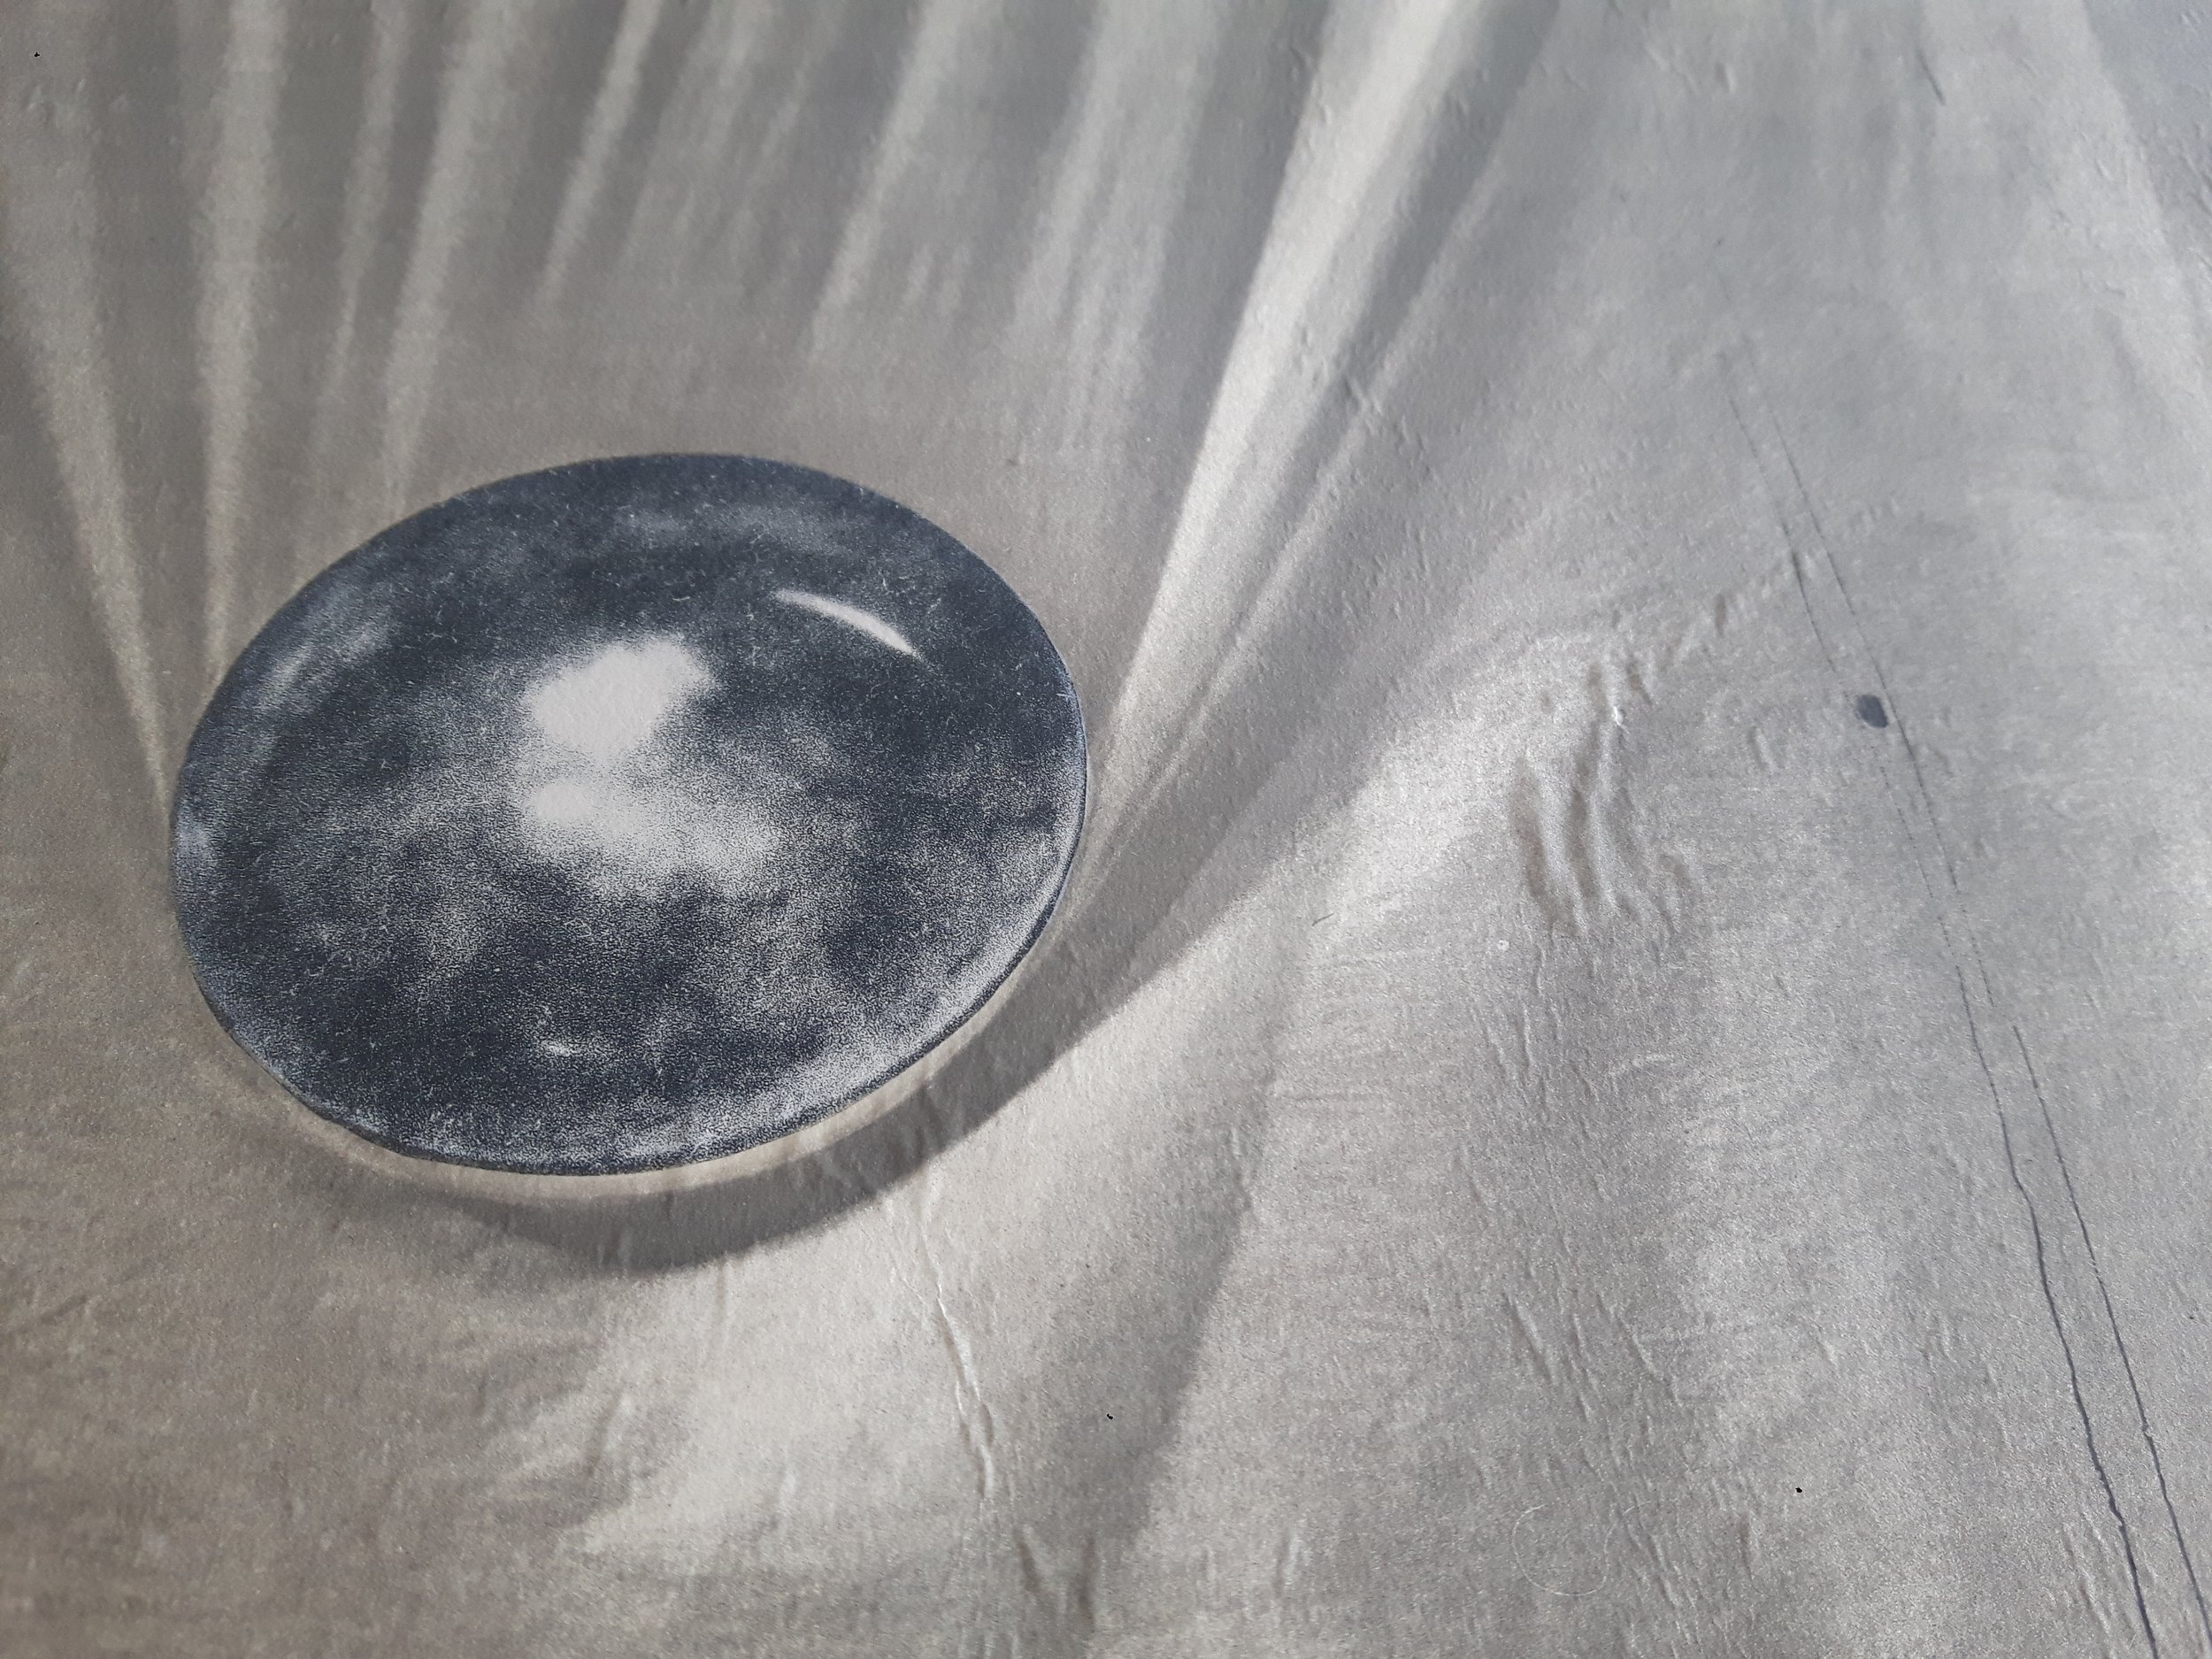
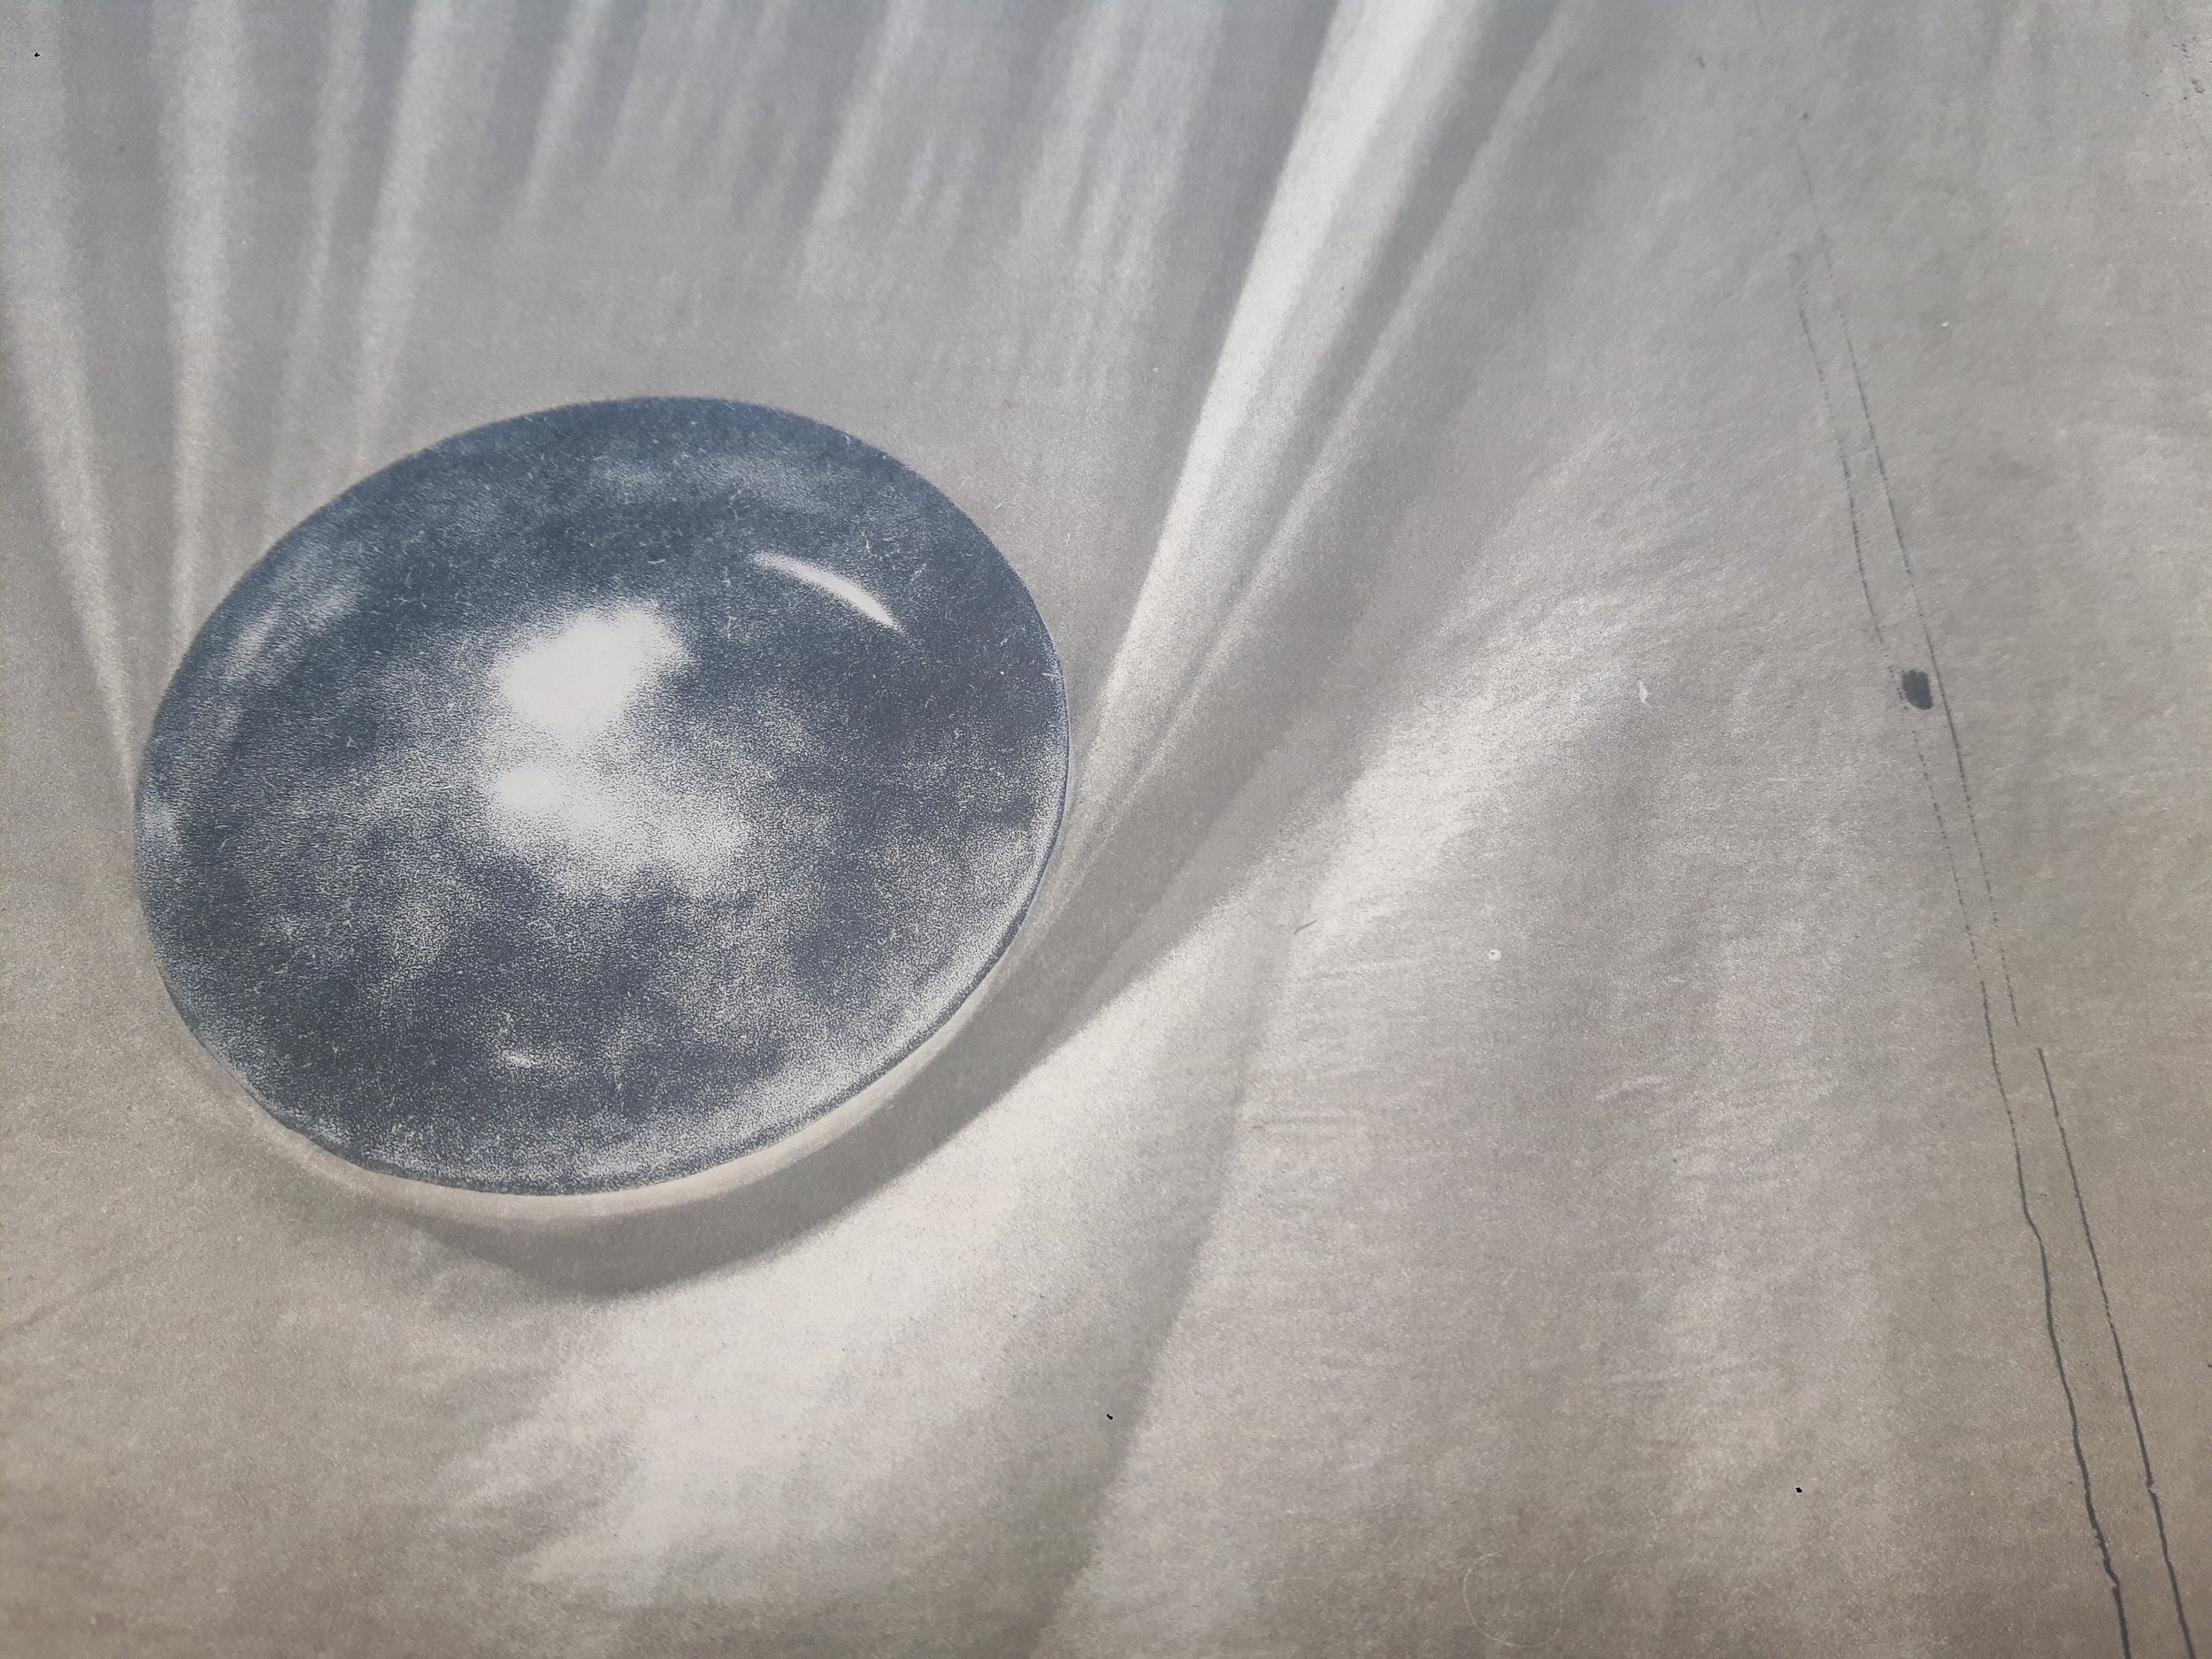
The most amazing thing concerning the print was the damage that seemed to have been hidden inside the image. Finer creases were at the place where the artist had depicted wrinkled paper and at the first glance the damage was not even visible. [ill 19] The bigger flood-lines on rag-paper were almost parallel to the wavy lines of the print. [ill 20], [ill 21] Having got better acquainted with the artist’s work it became clear that he had depicted the most obvious physical properties like damp paper drying on various objects or surface cockling in drying. This seemed intentional to the conservator. Although the yellow tidelines and noticeable undulation of the paper were undoubtedly water-damage, the curious coincidence between the image and other cockled areas awoke doubt could these be deliberate.
Artist Walter Jule
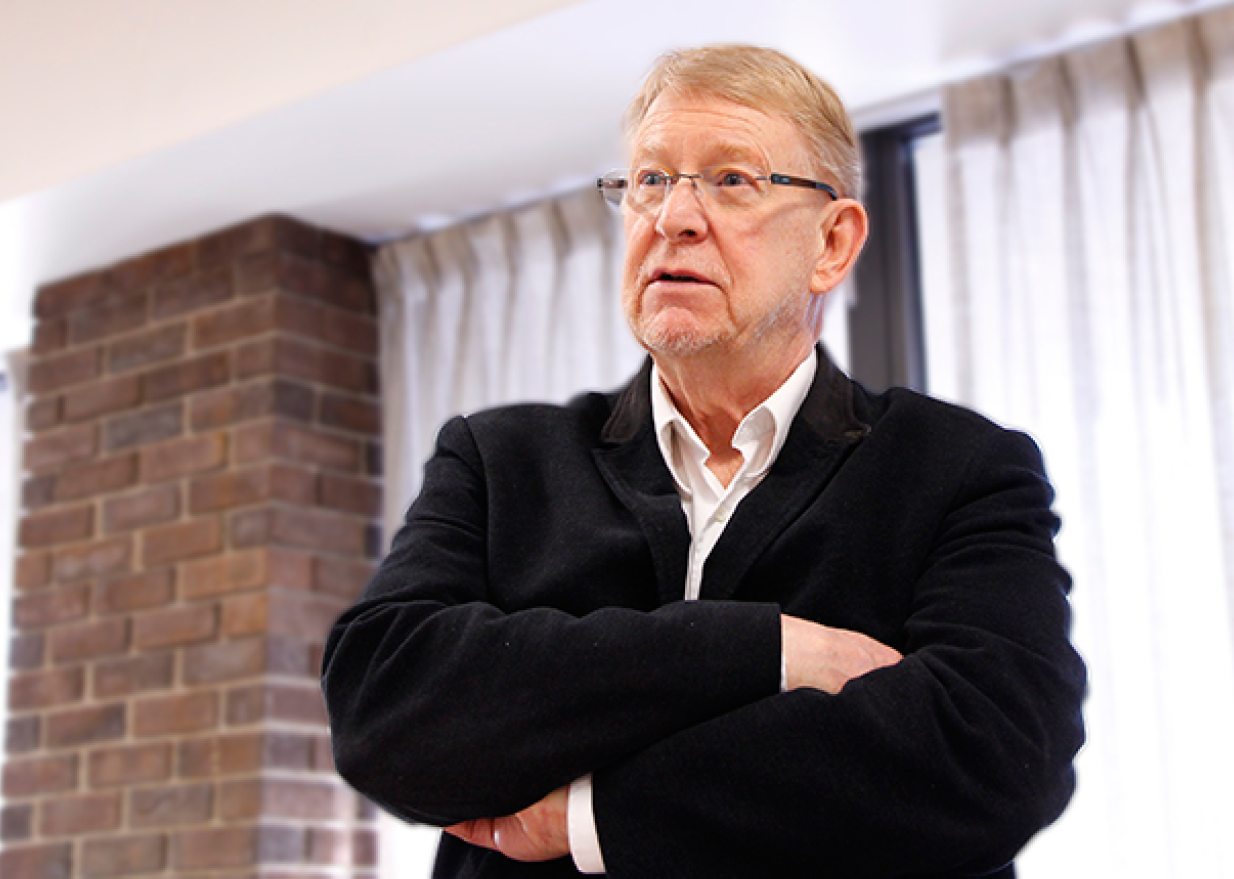
Walter Jule (born in 1940) is an internationally acknowledged artist and professor of art at the University of Alberta, Canada. [ill 22] Now Professor-Emeritus (since 2006), he lives nearby Edmonton and dedicates his time to art and traditional Zen-practices.
He compares printmaking with jazz.
[...] The best jazz musicians have a command of their instruments, but technique isn’t the point, it’s the confidence that allows dexterity, spontaneity and freedom. Visual artists can learn a lot from musicians and actors, who are very aware of the need to integrate the head, heart and hands. viide 10 ⁽¹⁰⁾
Walter Jule mainly works with photo etching and photo lithography, supplementing these with mixed techniques like printing on Plexiglass, as well as with video and installations. His work is amazing due to its simplicity. Unlike many other graphic artists W. Jule’s print-runs are not extensive and every work of his is the result of a complicated process. Happenstance plays a significant role in the process, making every print unique.
Recently I've been making paper collages and wetting the paper that has been attached at points to my studio wall. When the paper dries it shrinks, and slowly all these tensioned structures begin to emerge. I manipulate the wet paper by hand while it's drying and can influence the configuration of the wrinkles to a certain degree. While this is going on, I'm watching for something unexpected and taking photographs, changing the lights around madly. It's kind of passive and frantic at the same time.
I select photographs to enlarge and transfer to copper etching plates, which I then work by hand, adding and subtracting until I find a kind of open-ended quality. Then I edition the etching on Japanese Gampi Washi (paper) and paste each impression to a backing sheet. At this point additional images, stones, balloons and various stains and drips are added with lithography to punctuate or "riff" off the structures formed by the image of stretched paper.
All this technical process is a way for me to become more intimate with ideas about light, transience, cause and effect, what is predicted and what is recognized and, hopefully, through the invention of symbolic structures, produce work that encourages specific psychological states. viide 11 ⁽¹¹⁾
Conservation of Walter Jule’s print
A lot of deliberation was needed when estimating the present condition of the print and its original creation. As it was the work of a contemporary, active artist, I decided to drop all the deliberations and contact the author. [ill 23].
I sent a mail to the University of Alberta in April 2018. Fortunately, my request for information was forwarded to the artist who responded and agreed to hear me out. I described the situation about one of his prints having reached the conservation centre due to a water-accident. I described its condition in detail, emphasising that the damage seemed to have a life of its own. Having included a photo I asked whether the fine cockling of the paper might have been intentional. I also asked information about the materials and methods – what sort of glue had been used and what was the amount of moisturising and stretching in the course of execution.
The reply came already the next day with the most important piece of information that the author had not intended cockling. viide 12 ⁽¹²⁾ I thanked the artist for his answer and asked some more questions but as he was on his way to jury the International Print Biennial in Taiwan, he could not reply immediately. I had a deadline to meet – the conservation had to be completed by a fixed term. I launched into work.
Knowing that W. Jule uses traditional Oriental methods and reversible glues I supposed that the tidelines were caused by the glue that had reactivated due to the time the print was wet. This, in its turn, had affected the yellow colour characteristic of Gampi paper and when the paper was drying unevenly, the yellowing had moved into the edges of the moist area. It was clear that the glue could re-activate again when moistened and so the bond between the papers could be restored. On the other hand, it showed that total moisturising should be avoided as the pigment of Gampi paper in combination with glue is sensitive to water and so every wetting increases the danger of making the paper lighter or transfer the yellowing into the snow-white base paper. Thus a limited moisturising on Sympatex and local procession of flood-lines were chosen.
A dry-cleaning of the surface was carried out first and the label taped to the reverse side was removed mechanically. After that local moisturizing on tidelines was accomplished with capillary washing – the tideline was treated alternately with MC-gel and alcohol. The tideline was covered with MC-gel that was left on it for a few minutes and then wiped off with cotton wool dampened in ethanol solution. The surface activity of the MC-gel imbibed the yellow residual substance when the gel-like consistence diminished the dampness of the paper. The alcohol enabled to wipe the gel saturated with residual substance off the surface and force the yellowing still in the paper to move into the filter cardboard beneath the print. The filters were exchanged for dry ones according to them staining. For the procedure on the front side Holytex was used.
Local wetting demands a smooth diffusion between the damp and dry areas that helps to avoid additional deformation and/or aureoles.
On the reverse side of the print the yellow tidelines remained slightly visible but the front of the print was mostly freed from them. Local moisturizing should be carried out in a limited time, depending on the properties of the paper – the fibres in the wett area may swell differently and too big a difference compared to dry paper can cause deformation. In the present case continuing local treatment might have caused further damage, i.e. making the pigment of the Gampi paper lighter had to be avoided.
The black (from the colour of the frame) and blue (ink on the label) colour changes on the edges of the paper did not diminish much during the process but they are not very heavy and will be hidden by the passe-partout.
In addition to the tidelines there were damages of various deformations like general cockling and puckering with air bubbles due to the separation of the two paper layers. Flattening and restoration of the bond between the sheets was done as one procedure that started with moisturising on a Sympatex pad.
When the sheet was damp, both layers loosened up equally and flattening in press became possible. In order to preserve the mark of the printing plate a sheet in the exact size of the plate was cut out of blotter-cardboard and, before putting it into press, it was placed onto the image. Woollen felts were used at the first pressing, then they were replaced by blotting cardboard.
Correspondence with the author
A month later, when the conservation had almost been completed and the retouched work in the press was successfully stabilising, I received another letter from the author. viide 13 ⁽¹³⁾ In this he acquainted me in greater detail with the process and the techniques he had used.
[...] To your questions: the print "Measurement of Void' is a combination of photo-etching, which I print on Japanese gampi-washi and then chine-colle to a rag paper backing, either a Hannemuhle (special run paper without internal sizing which I had made especially) or Arches 88 (a "waterleaf" paper also without sizing as you know). The paste I use is a combination of rice paste, book binders glue and a special adhesive which is no longer made. The chine-colle is done using an etching press.The print is then dried by taping (3M fiber tape) the edge of the paper to a "frame" of board (with an open rectangle in the centre to allow the air to dry both sides of the print together) this drying method helps avoid cockling when the work travels from low to high humidity. Then, after the print is stretched and dry, I use a hand operated offset litho. press to print additional images on top of the print. In this work, the ballon-like forms, shadows and drips are in litho. From the photo you sent, it is evident the work has come in contact with quite a bit of moisture.The little separations are not intentional of course and the general cockling of the backing sheet is extreme. It is possible to "back-soak" the print and re-chine-colle but this method takes several days and the handling of the gampi as it is removed from the backing sheet is a VERY delicate and risky procedure since the areas impregnated with intaglio ink do not stretch as much as the thinly-printed passages. Having said all that and taking into consideration your depth of expertise in conservation, I would like to make a suggestion for your consideration. Would it be possible, with the preparation of the appropriate loan agreements from the museum, to return the print to me (rolled image out in a 12 cm diameter tube) by regular air post labelled "printed matter-no commercial value"? Then, with the promissory note, I will re-mount the work and return it to the museum at my expense. There is only one print from this edition remaining unsold and the current price is $5000.00 (Can.). I would hate to see the piece lost! I would be willing to document the procedure for your information and believe there is a 90% chance of successful remounting. I am particularly concerned that exposure to moisture may have initiated a foxing process which can be substantially reduced ONLY if a successful re-mounting procedure can be undertaken soon.
Please let me know what you think. Walter Jule
The artist’s offer was intriguing, although in this case it would have been impossible to make use of it. The print was not a museum piece, but in private possession and its conservation was tied up with insurance. Besides, conservation had been successfully completed, the general cockling removed and the bond between the sheets correctly restored. The only damage that had left a slight trace on the reverse side was a yellow tideline the artist was worried about. In theory it might have been possible to wash it totally out if re-mounting the base sheet but in case of Gampi paper it also could have caused changes in colour. The glue and water damage together had already affected the pigment during the accident and the lower right corner of the image was already lighter. The option offered by the artist would have been most interesting, especially if the conservator could have attended the proceedings.
This time the mail exchange with the artist concluded the case, the client was pleased with the result and got a recommendation to commission our good partner, the framing workshop Cadre Ltd next.(viide 14) ⁽¹⁴⁾ [ill 24], [ill 25], [ill 26], [ill 27], [ill 28], [ill 29].
The conservators today have perpetual questions about the most suitable solution for conservation and about the materials used. It was a privilege to communicate with the artist who readily described his techniques. Moreover, he understands his materials and prefers to use the best, considering the storage and preservation.
The drying process described by W. Jule resembles that of karibari. Thanks to that, as well as to the artist’s choice of paper, the differences in tension of various sheets were decreased during the accident and the conservation.
Viited
Dard Hunter, Papermaking: The History and Technique of an Ancient Craft, NY, 1947 ↩︎
Carlo James & Marjorie B. Cohn, Old Master Prints and Drawings: A Guide to Preservation and Conservation, Amsterdam University Press, 1997 ↩︎
Anne Arus, Vilja Sillamaa, Tartu Ülikooli kunstimuuseumi litograafiate konserveerimisest (Conservation of lithographs belonging to the art museum of University of Tartu), Renovatum Anno 2012 https://evm.ee/uploads/files/renovatum 2012 a.pdf ↩︎
Tatyaba Petukhova, Conservation Department of Cornell University Libraries, Ithaca, New York, AIC has described alternative methods of treating prints in Chine-collé in 1987 https://cool.conservation-us.org/coolaic/sg/bpg/annual/v06/bp06-12.html (viewed 10.03.2019) ↩︎
Documentation of conservation. EK-2015-139 P-012 Digi-archive of Kanut (Pildipank) ↩︎
Sympatex is synthetic felt covered with membrane that lets moisture through only in one direction and only as steam. This makes it possible to moisturise sensitive materials without using liquids. (Preservation Equipment LTD.) ↩︎
Flattening on a karibari board makes it possible to observe and give finishing touches to the backed material at once and throughout the drying process. It is especially convenient in case of large and problematic objects. Paper flattens when fibres contract, thus the sheet diminishes. Using this method the paper should not be excessively moisturised, as while drying, contact between fibres may break up and cause tears in the paper. That is why any stretching of the moist material when lifting or smoothing it should be avoided. Better let the damp original fixed on the base be loose and cockle a little than carefully smoothed out, as the sheet fixed on its edges would tear itself when drying fibres contract. https://renovatum.ee/autor/haruldane-leid-eestis-19-sajandi-tapeedi-koserveerimise-lugu ↩︎
Gampi is traditional Japanese tissue-paper. It has been called the king of papers, as it is considered the most solid and finest paper. The thin Gampi paper has silky texture and it is used in Japan for mending art on paper. It is also widely used in Japanese intaglio print. Owing to its smooth surface and fine texture really fine details could be preserved on it. The slightly yellowish shade adds to the background of the print. Aquatint and mezzotint techniques are fine indeed on Gampi. Black-and-white prints become effective on specially toned Japanese paper. As Gampi is extremely thin, it cannot be used independently for printing and should be glued onto a more solid base like much-appreciated Arches 88 and Hahnemühle paper. Gampi-collé paper gives best results in comparison with plain printing paper. For printing the printing-plate covered with paint is placed in water, a sheet of Gampi paper goes into water, too. The latter is lifted out of water with the help of the printing plate beneath it. Excessive water is removed with filter paper or felt. The loosened sheet of Gampi is covered with a layer of glue – Yamato paste is thin but still viscose enough to be brushed evenly on the moist paper. The glue is brushed on beginning from the centre and moving towards the edges. Superfluous paste is removed, the edges of the sheet extending over the plate are trimmed, the print paper is placed on top and the whole package goes into the printing press. http://www.washiarts.com/chine-colle-1/ (viewed 10.03.2019) ↩︎
Walter Jule, Measurement of Void. A Device to Accelerate Wear, 1996. Etching, Litograph. Canada ↩︎
http://www.gallerieswest.ca/magazine/stories/walter-jule%3A-visual-jazz](http://www.gallerieswest.ca/magazine/stories/walter-jule%3A-visual-jazz) (viewed 10.03.2019) ↩︎
ditto ↩︎
[Thu, 19 April 2018] Dear Maris, Thank you for your detailed letter and photographs. I appreciate your comments about my work since you are exactly correct… I want to show cause and effect… stretched paper on paper… and remain anonymous. And, yes! I can see that the work has been in contact with quite a bit of water (not in the way I intended however) and there is some separation between the Gampi and backing sheet. As it happens, I am just leaving to jury the International Print Biennial in Taiwan and ask that you give me a few days to think about this matter before getting back to you.The print will be O.K as long as it is stored without heavy weights on top. I appreciate the work you are doing. I studied paper making in Japan many years ago and was introduced to Chine-colle by woodcut artist Junichiro Sekino.With thanks, Walter Jule ↩︎
e-mail 12 June 2018 ↩︎
e-mail 14 June 2018, Dear Maris Allik, Thank you for the delicate work you have undertaken to repair my print! The "humidity chamber“ sounds very interesting. From the images you sent, it seems to be in good shape again. Very pleased everything has seemed to have worked out. ↩︎