

UNIQUE FIND AND CONSERVATION STORY OF A 19TH CENTURY WALLPAPER IN ESTONIA
Autor:
Maris Allik, Grete Ots, Tea Šumanov
Year:
Anno 2017/2018
Category:
Conservation
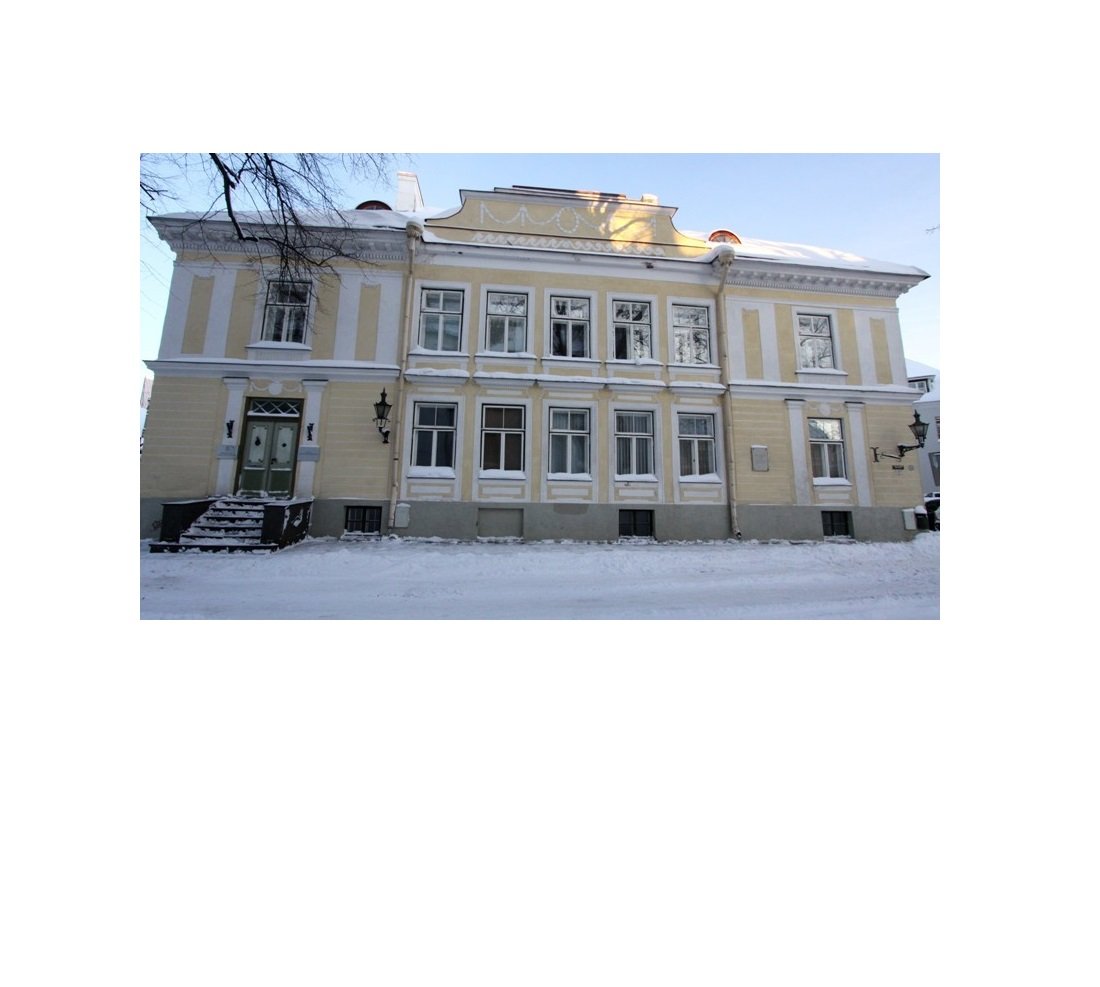
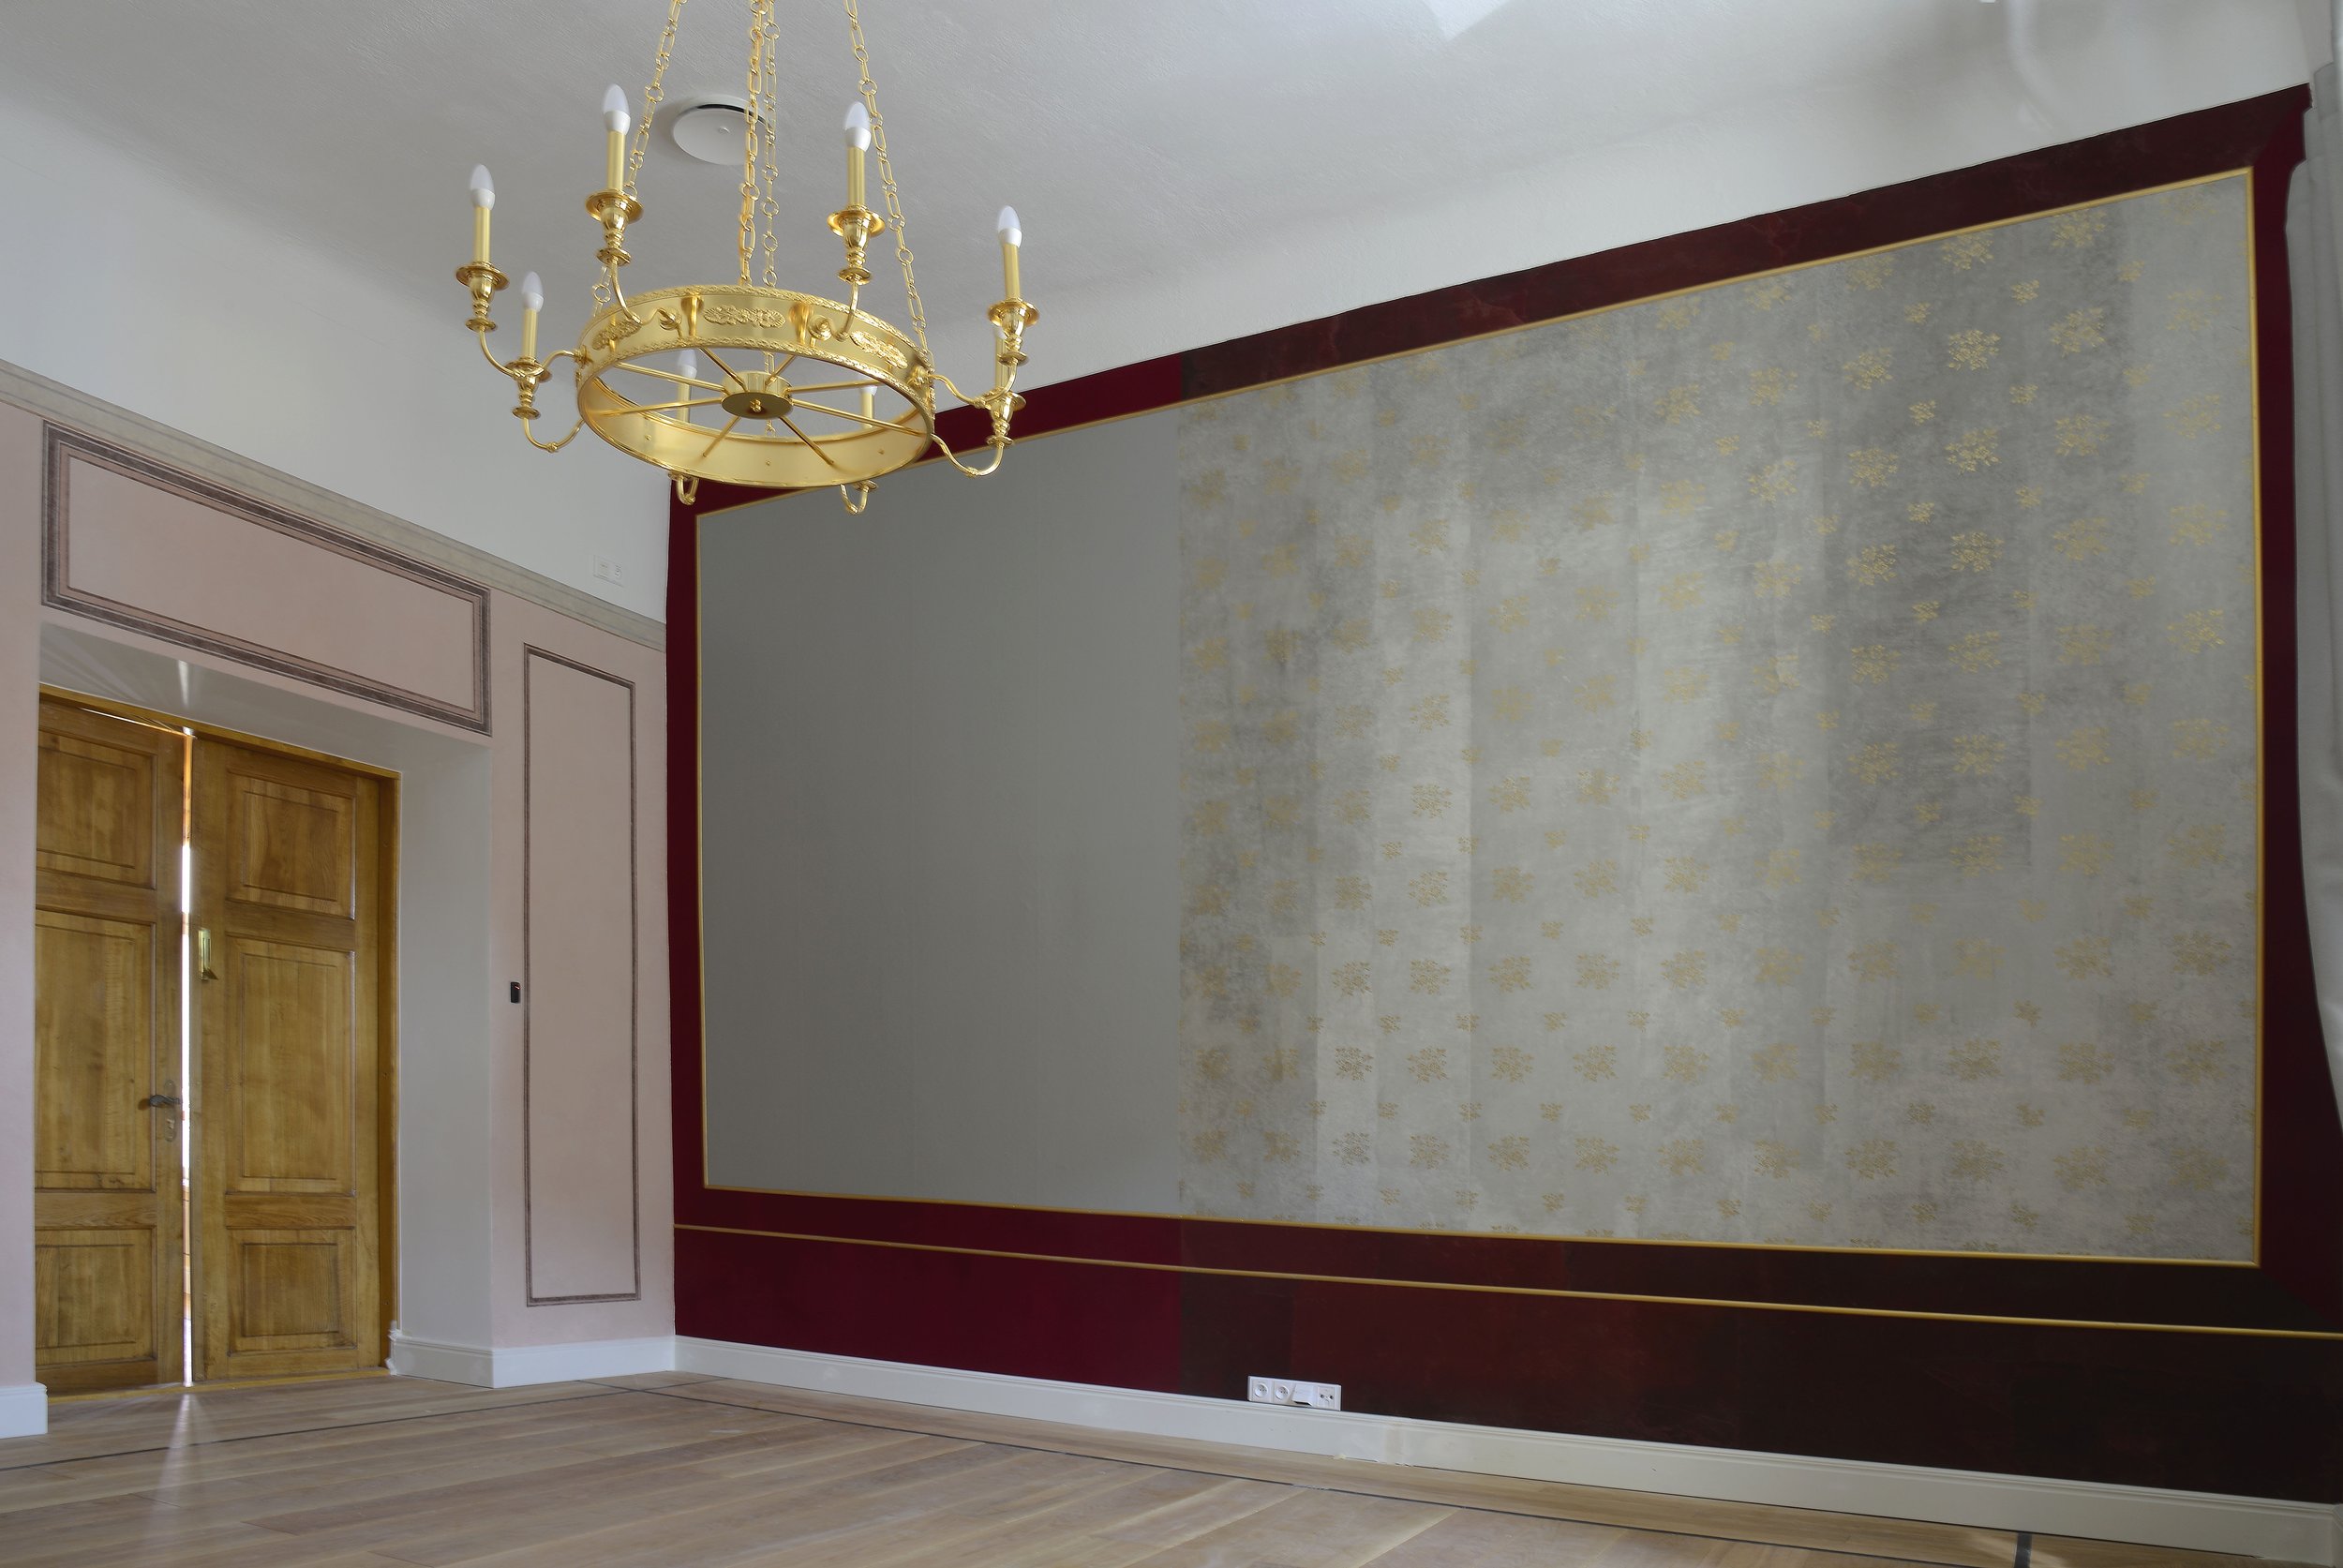


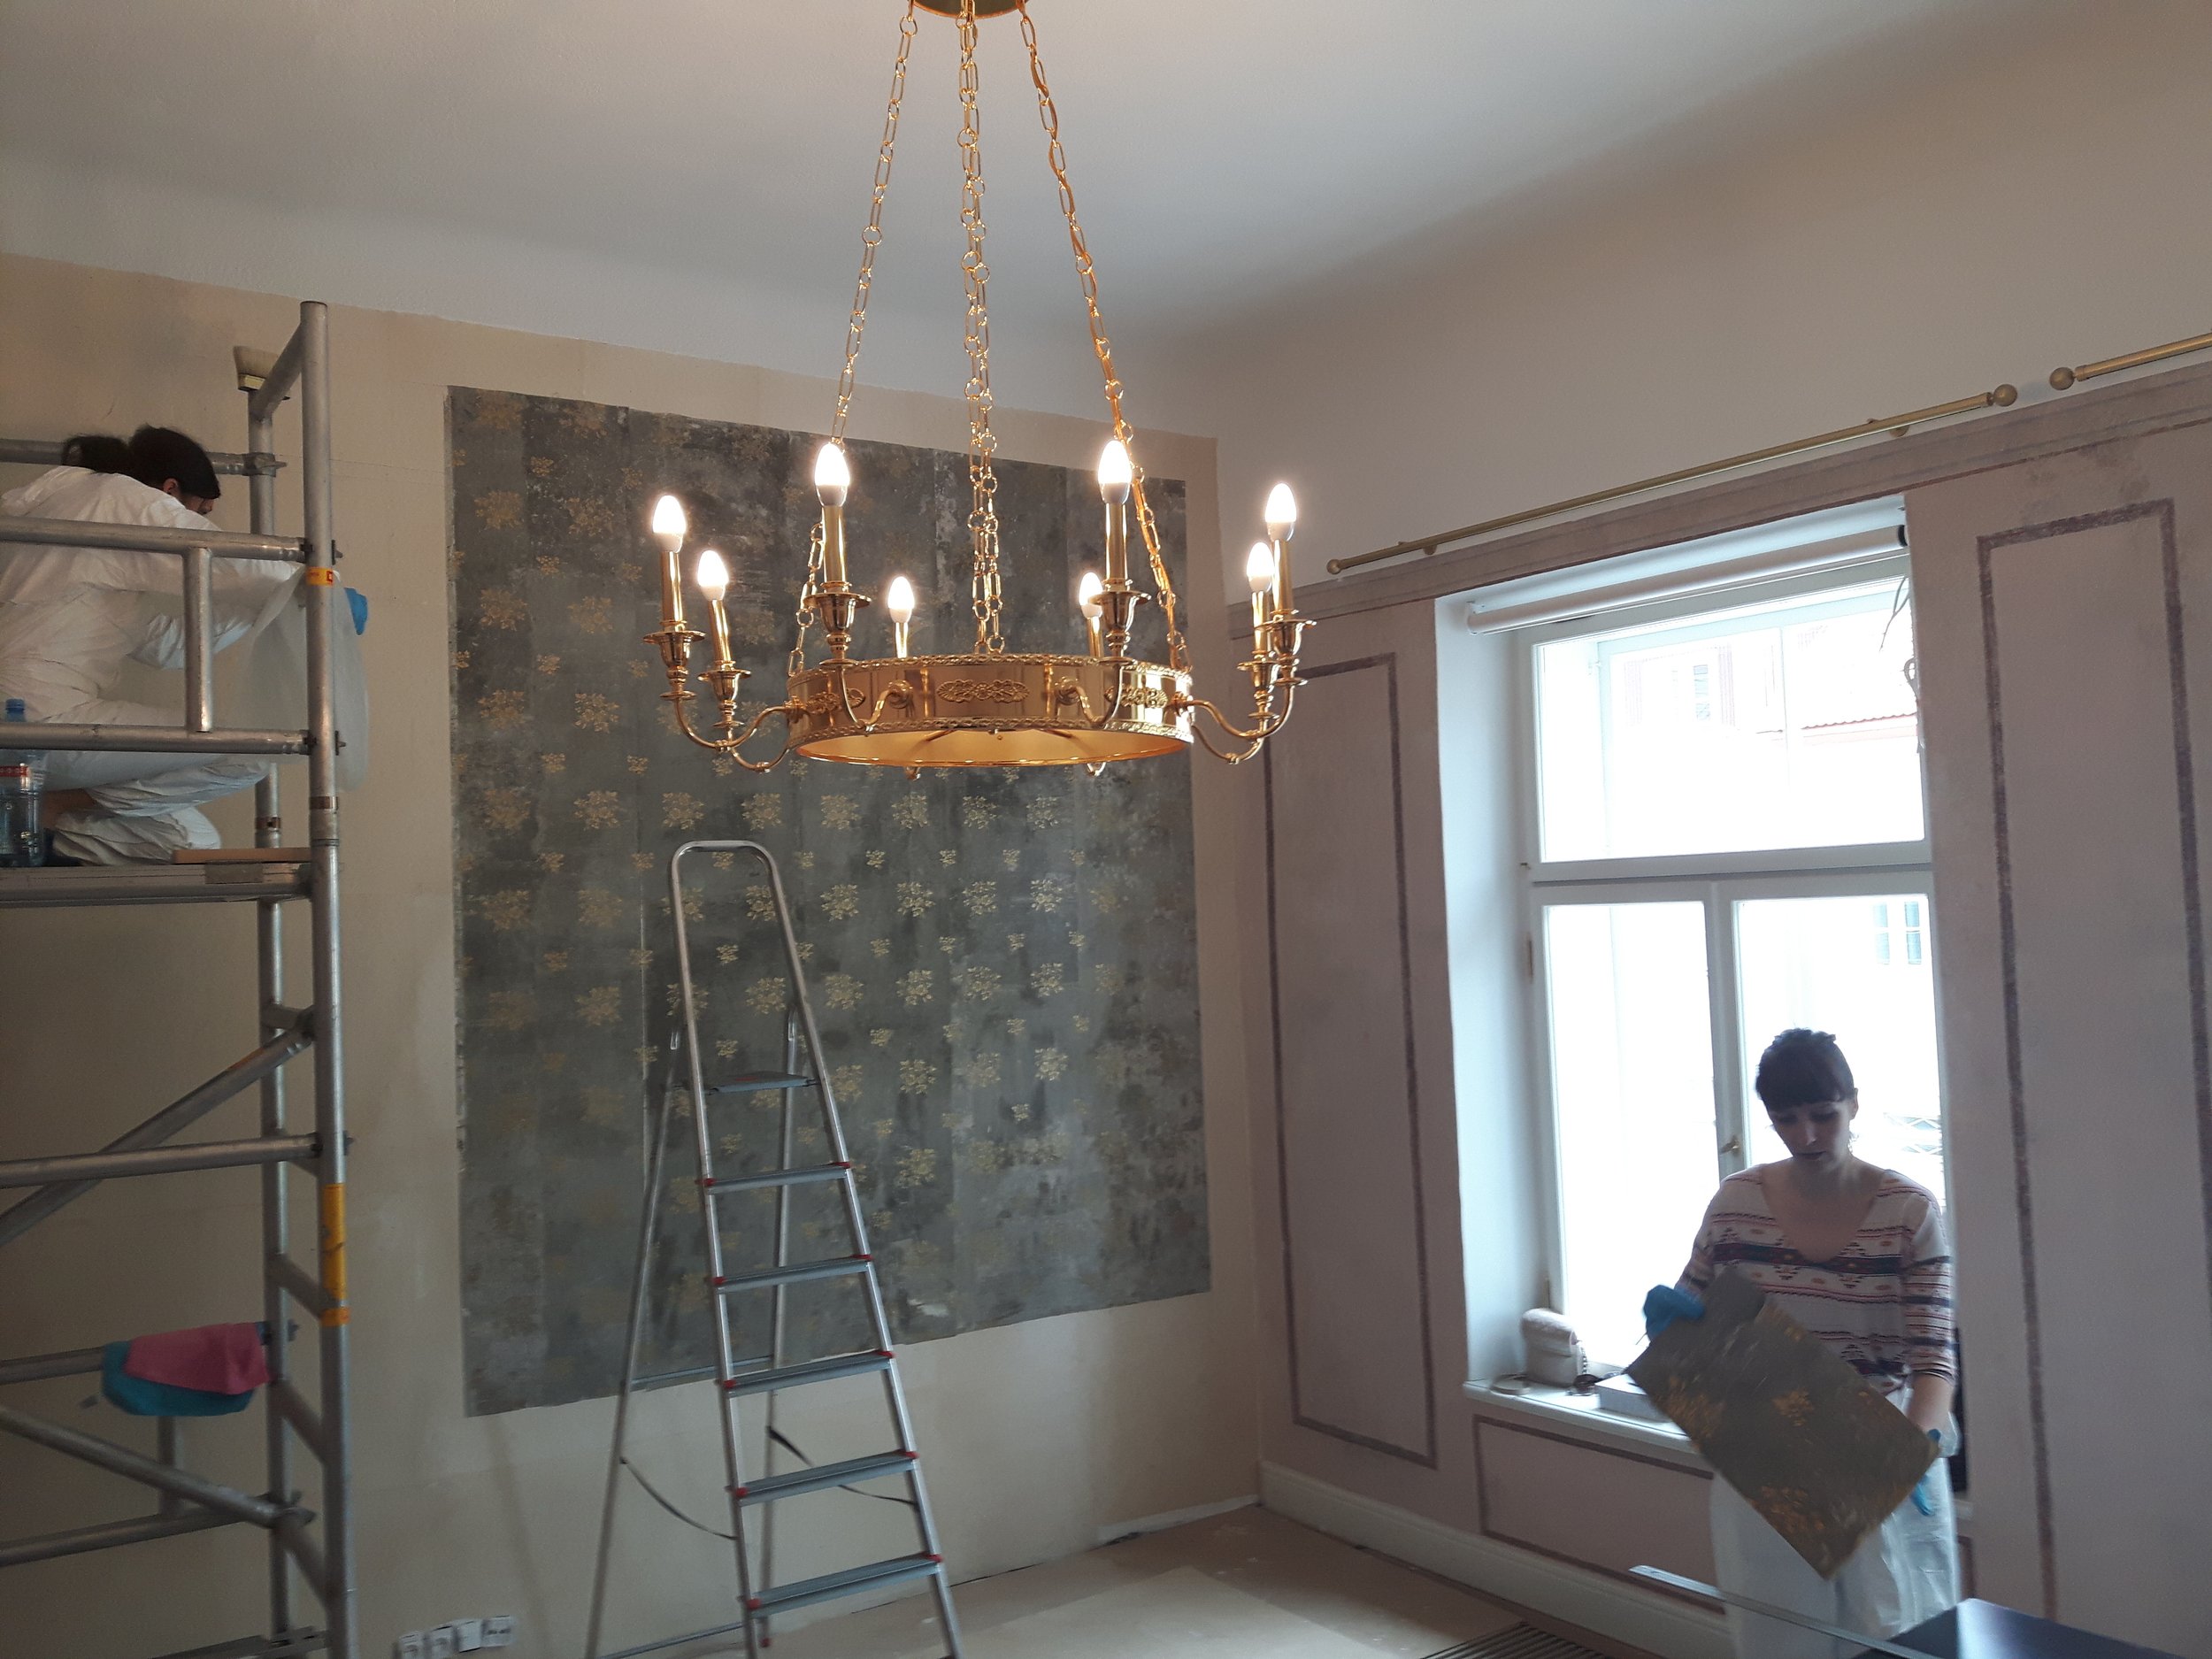
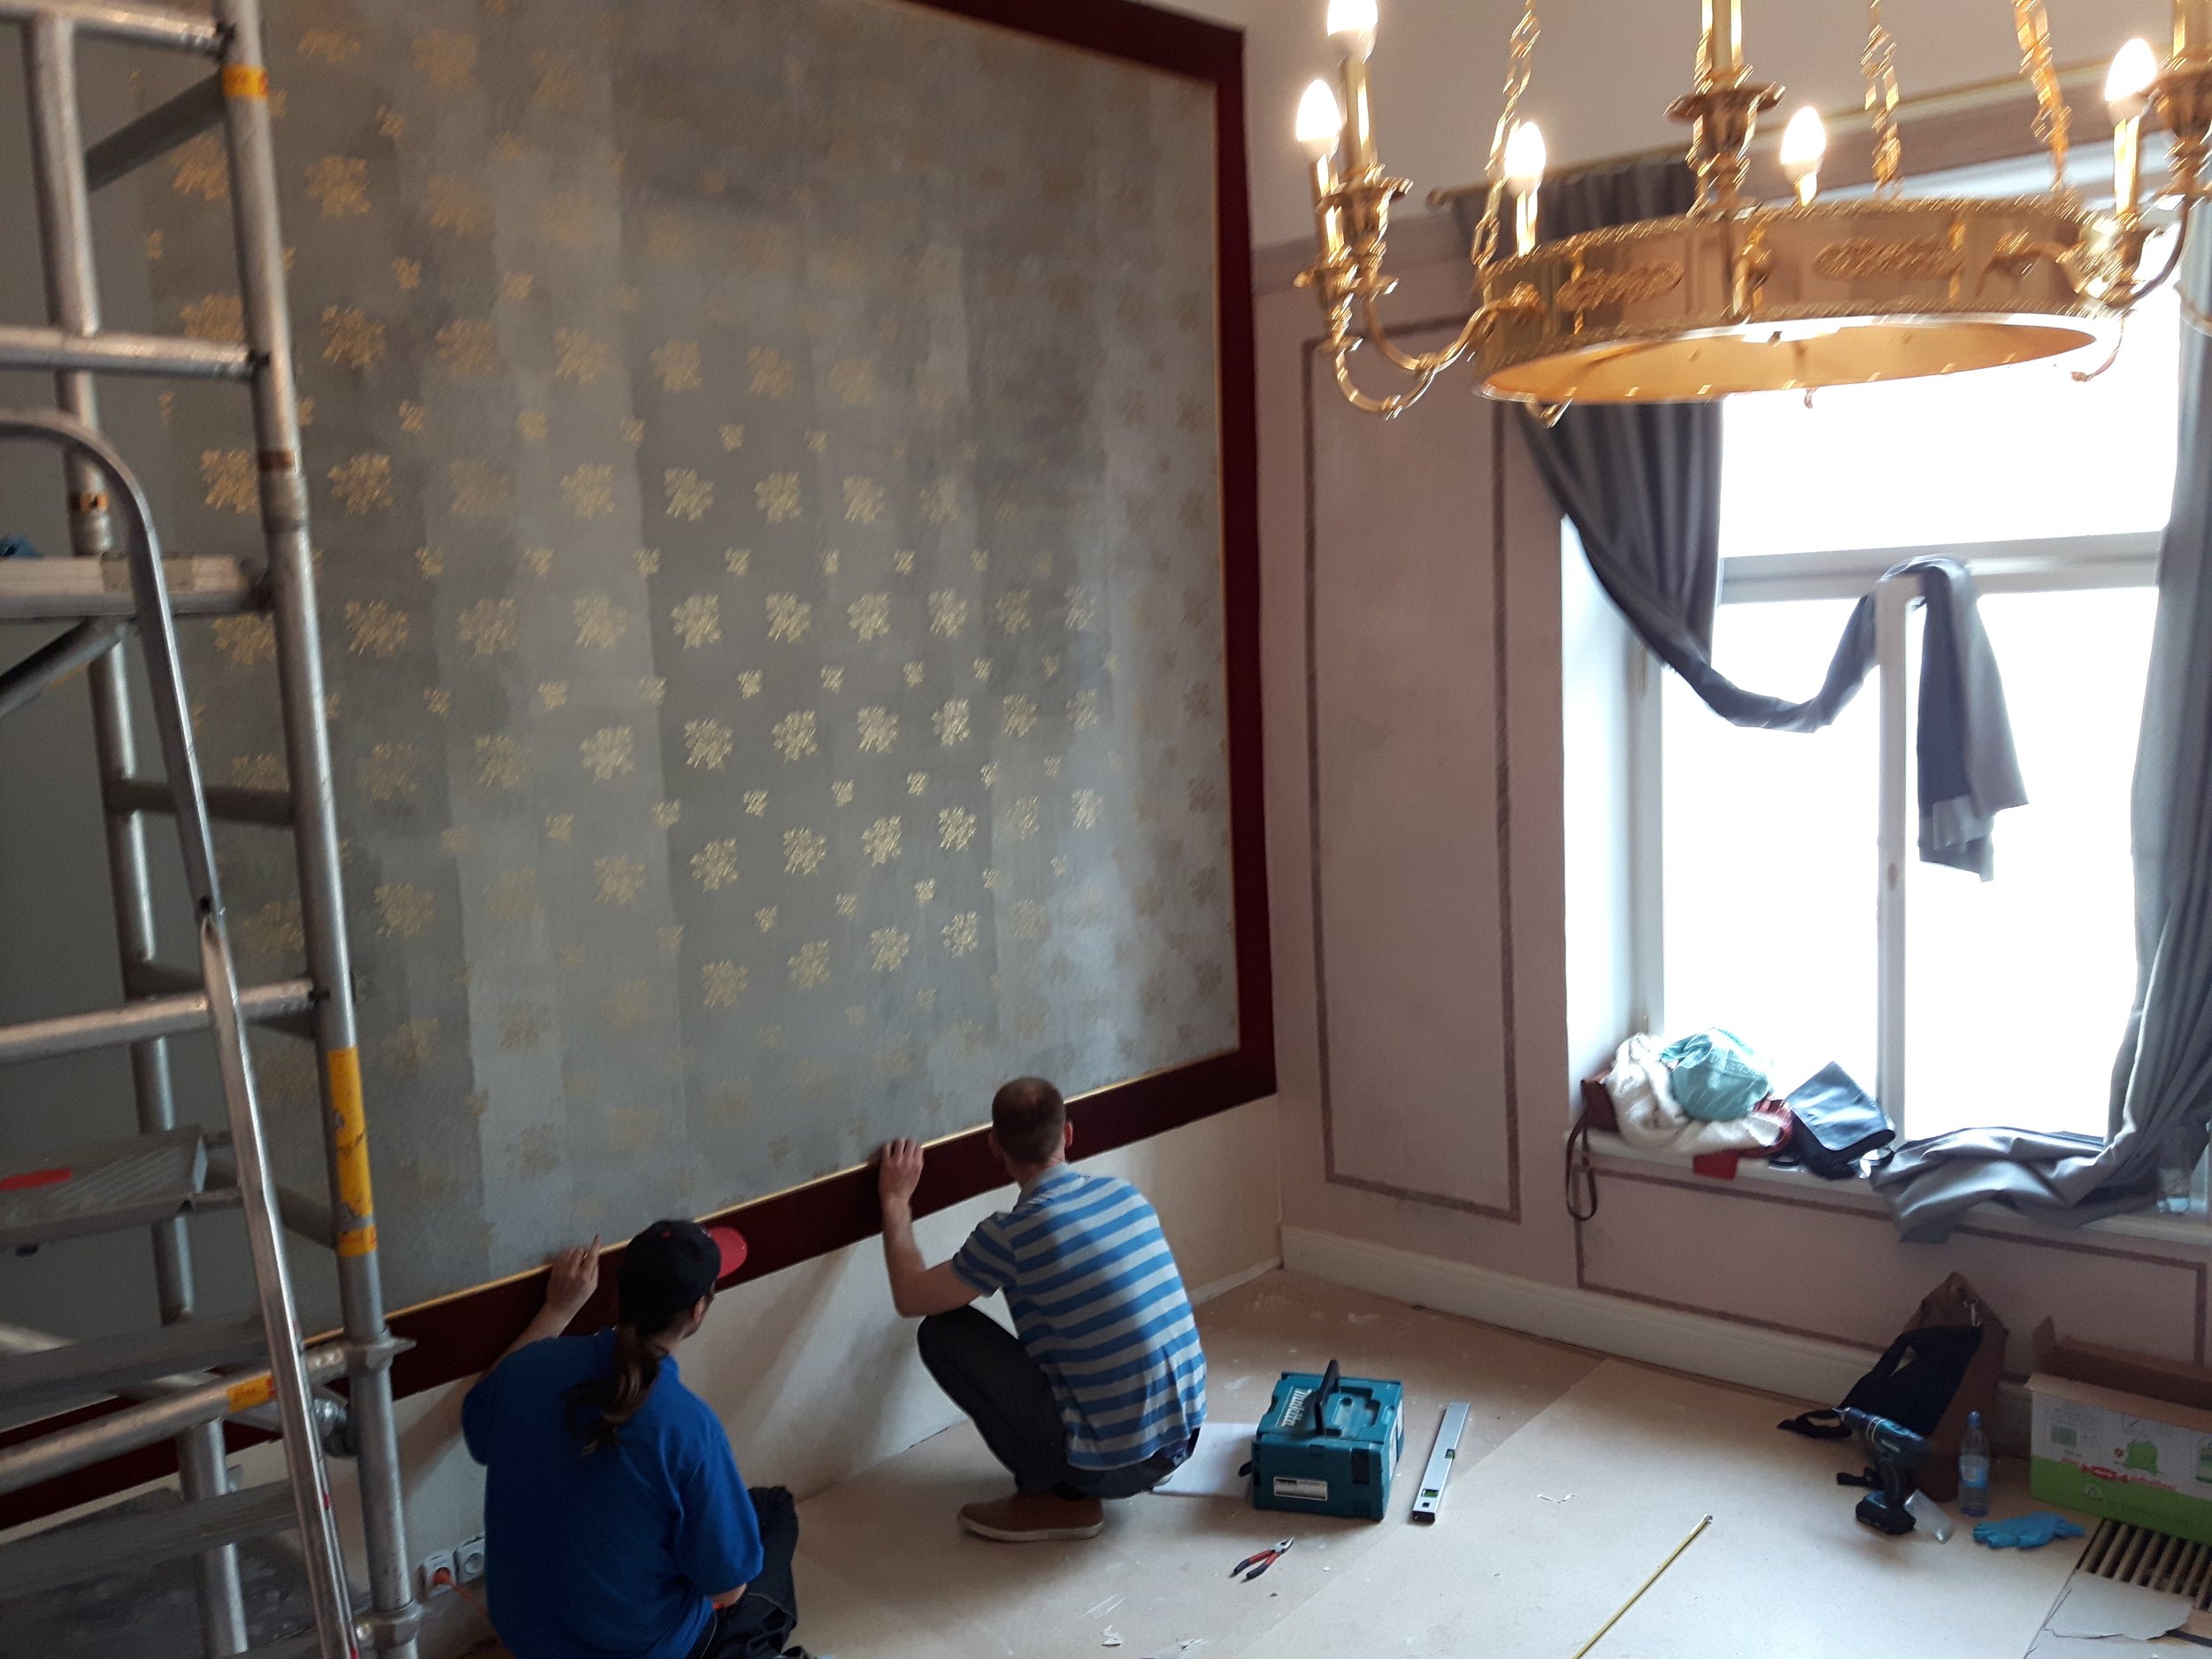
Renovating the 18th-19th-century building at 2/4, Kiriku Street in Tallinn, Toompea in the summer of 2015, workmen discovered a papered wall. The building had been a nobleman’s town residence, a mansion. Relaying on the architectural history review by the Special Conditions of National Heritage we assume that the interior design of the wallpapered parlour, room No. 201 on the second floor dates back to the 1880s. The mansion belonged to the family von Rosen, the owner at the time being Baroness Marie von Korff (nèe von Rosen). The baroness used the room in question as a parlour (salon). The historic 19th century wallpapers were preserved in a uniquely large scale. [fig.1], [fig.2]
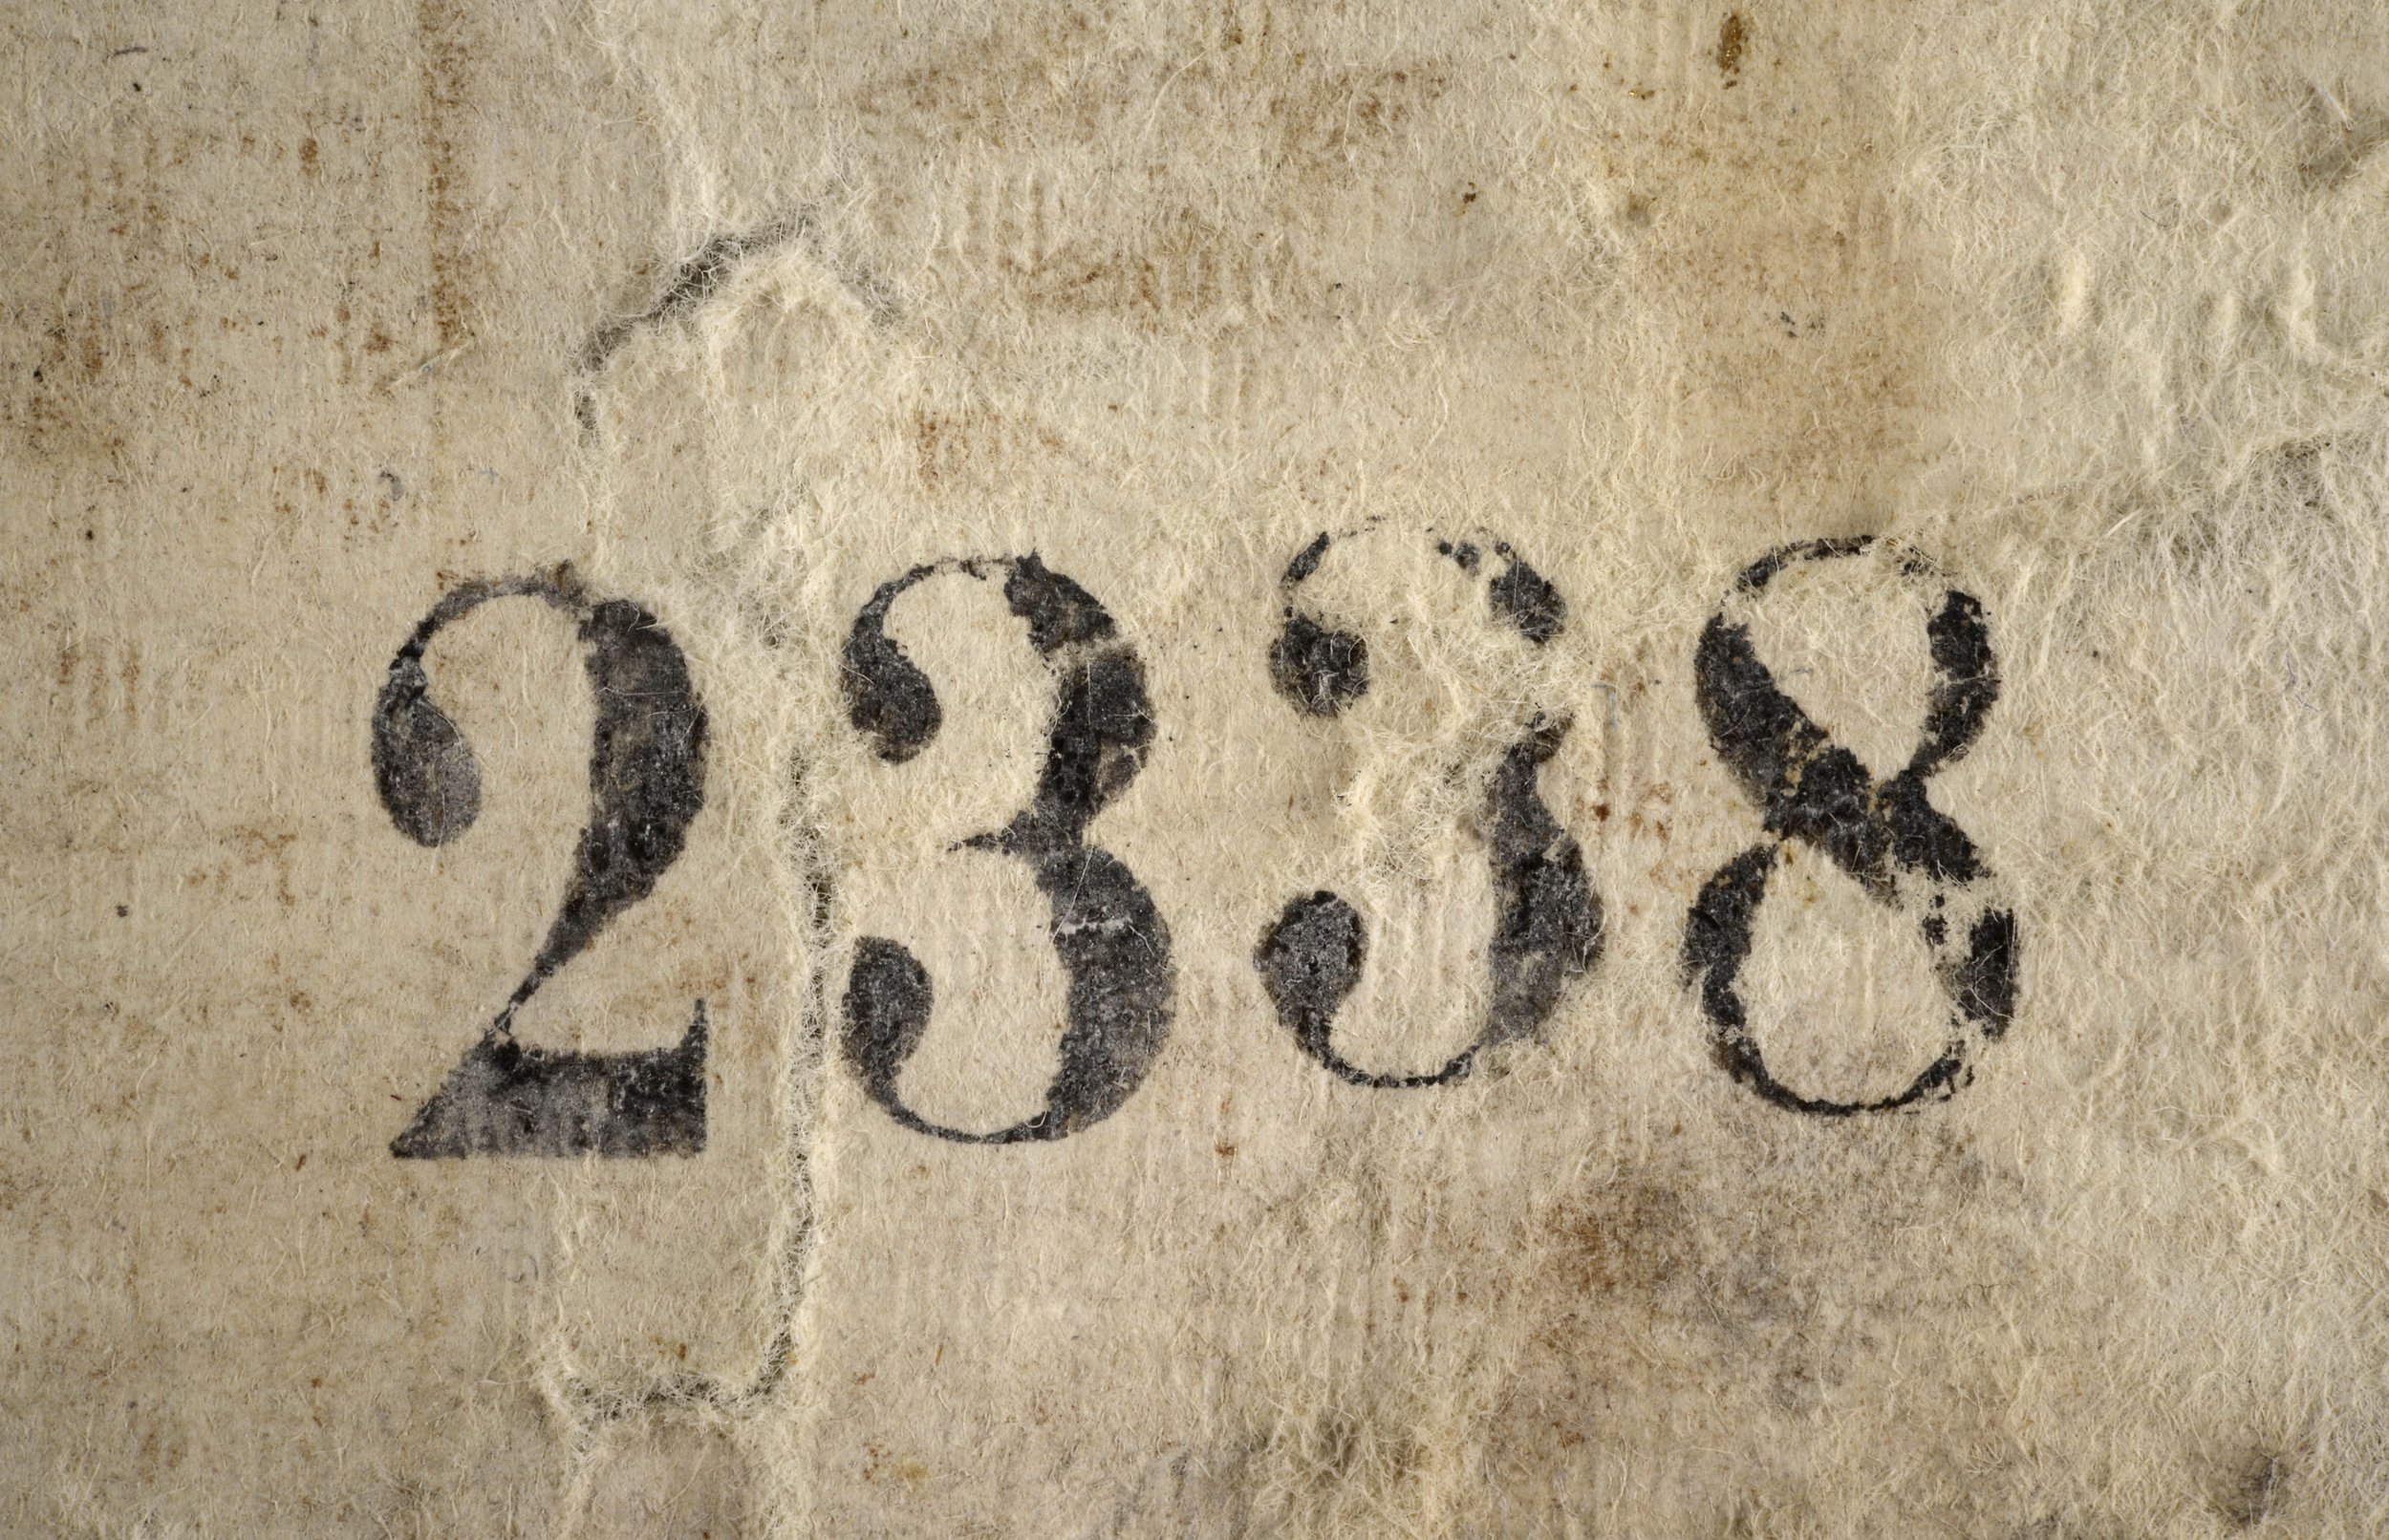
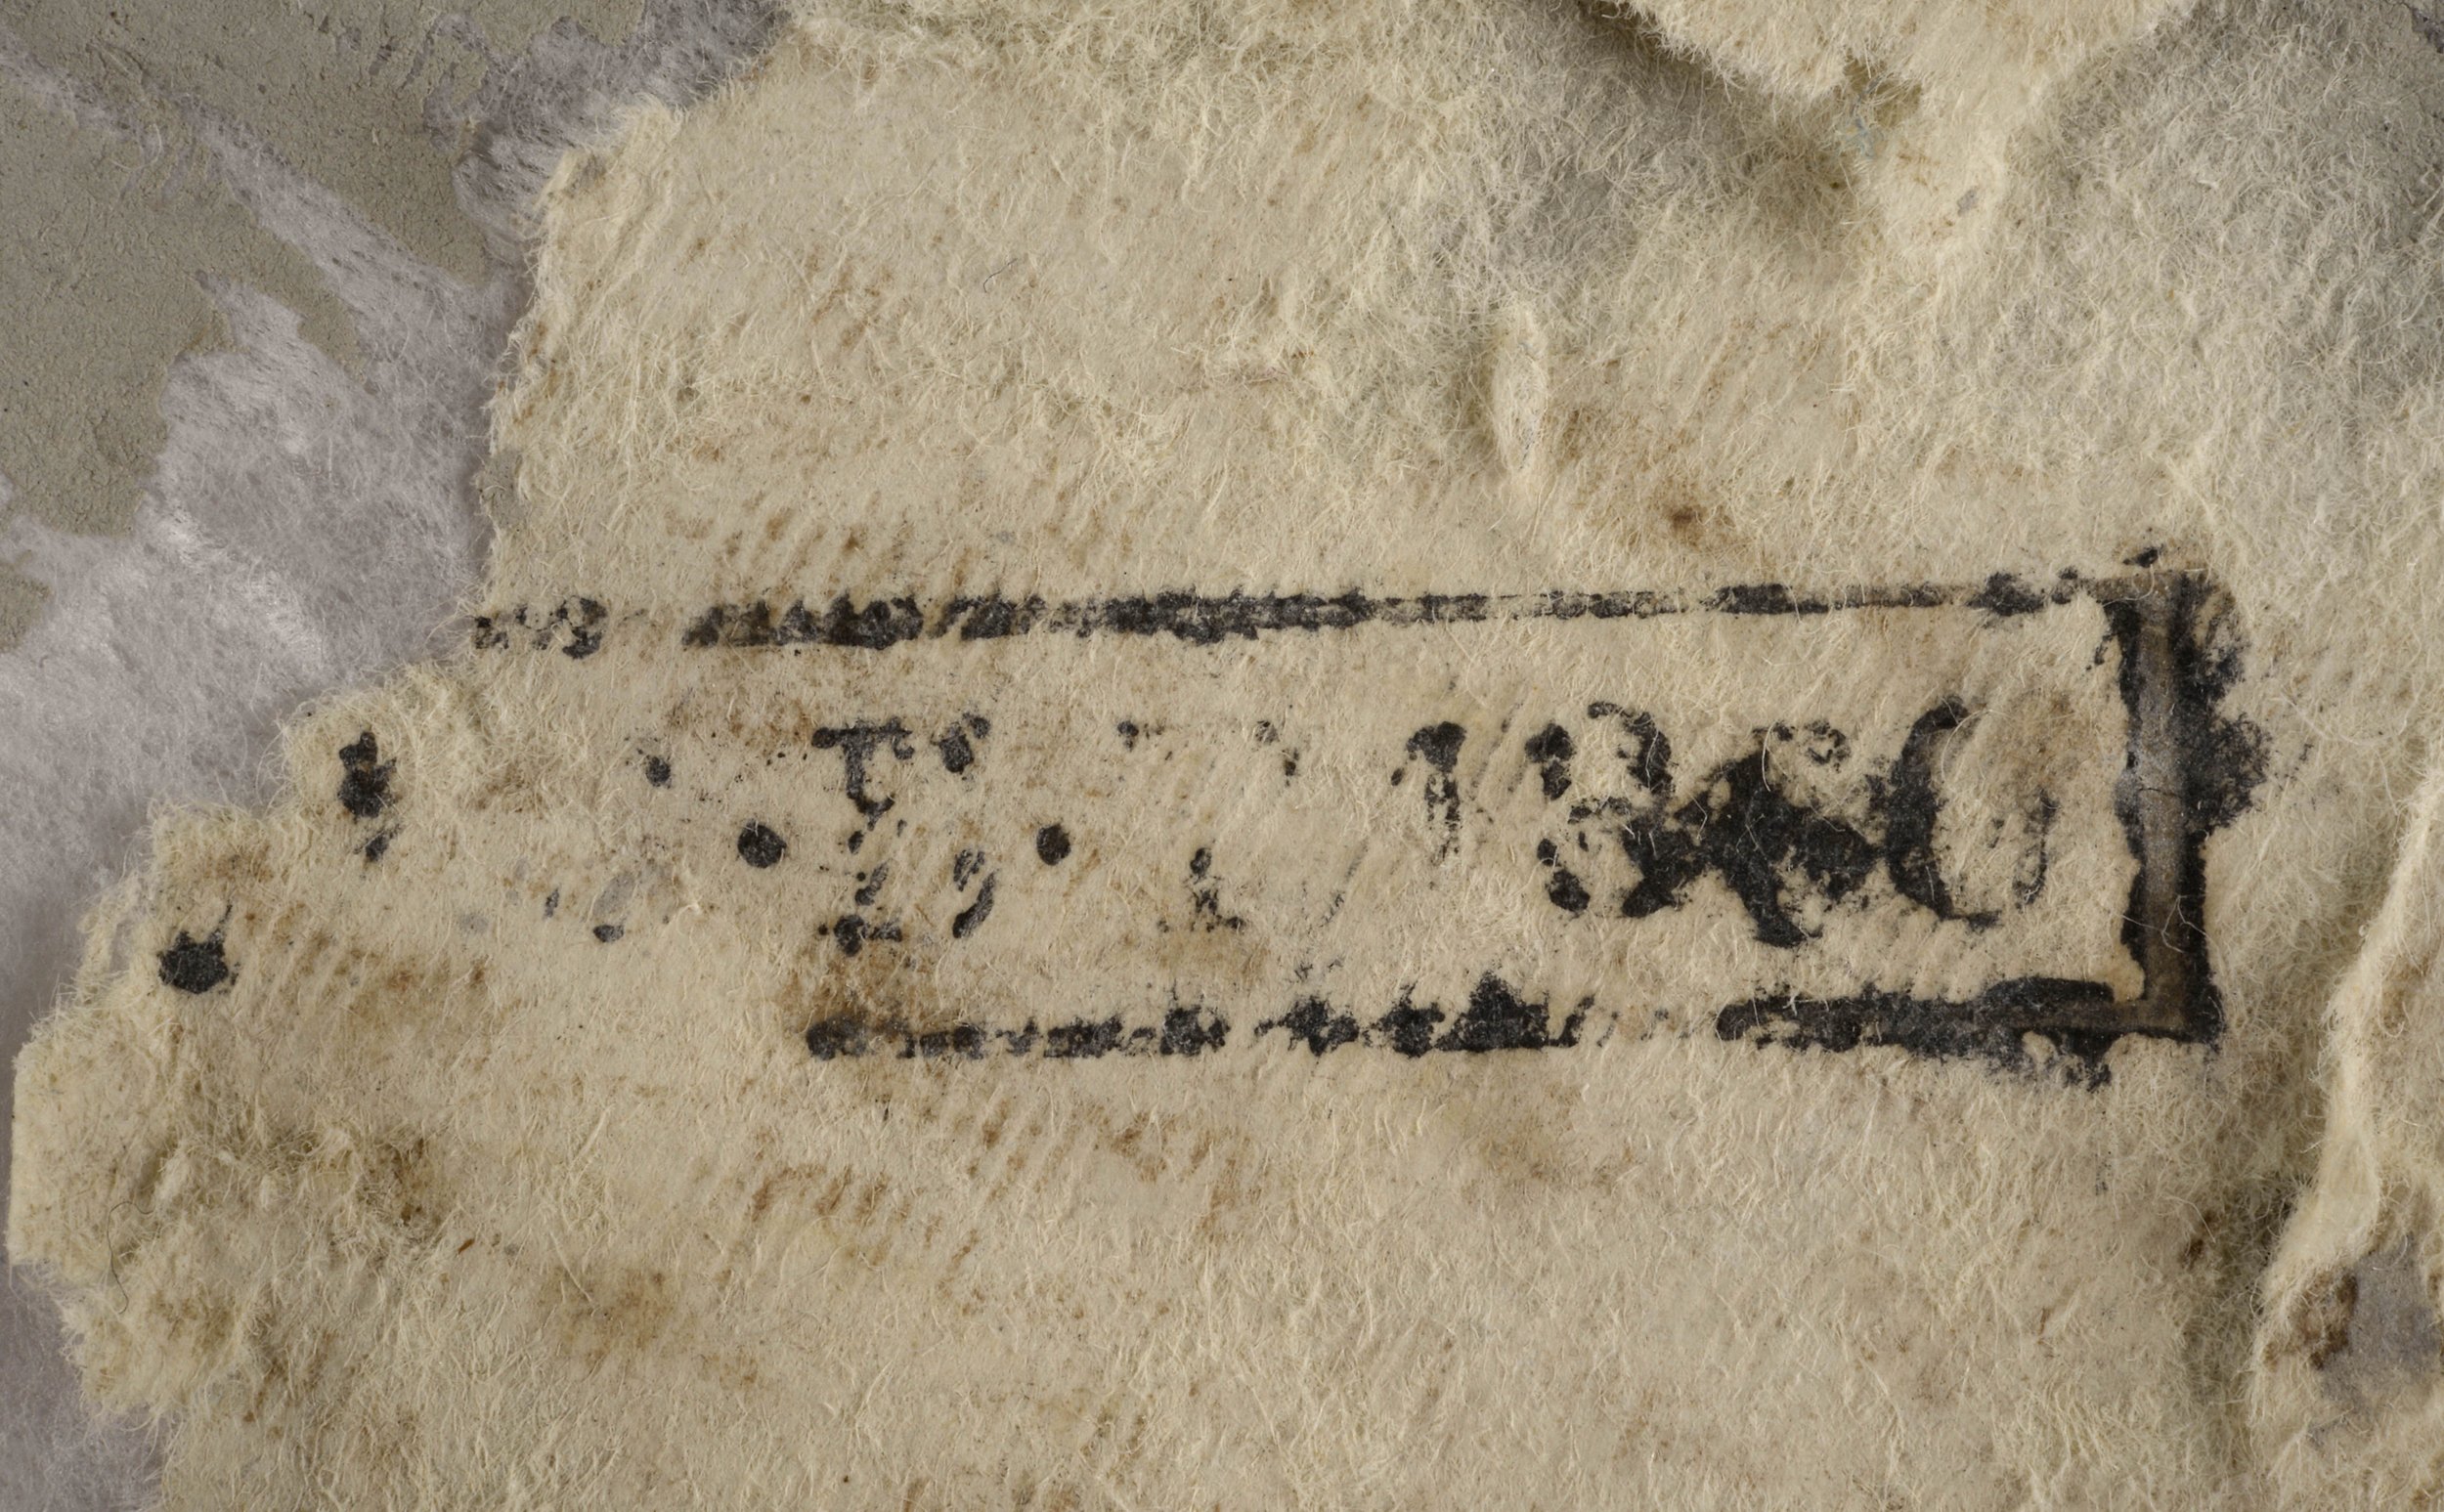
During the removing of wallpapers a manufacturer's stamp was found and serial number 2338. The factory label is, unfortunately, difficult to read. Vääna mansion porch wallpapers (in Harju county near Tallinn) imitating heraldic wall panels are the product of the same factory, behind which a factory stamp is clearly visible. "С.П.Б.П. Т. 1880 ". [fig.3], [fig.4] The analogue of the mentioned flock wallpaper is located in a dignified building on a wall of an important room - the office of Nicholas II in Tsarskoye Selo, Alexandrovsky.
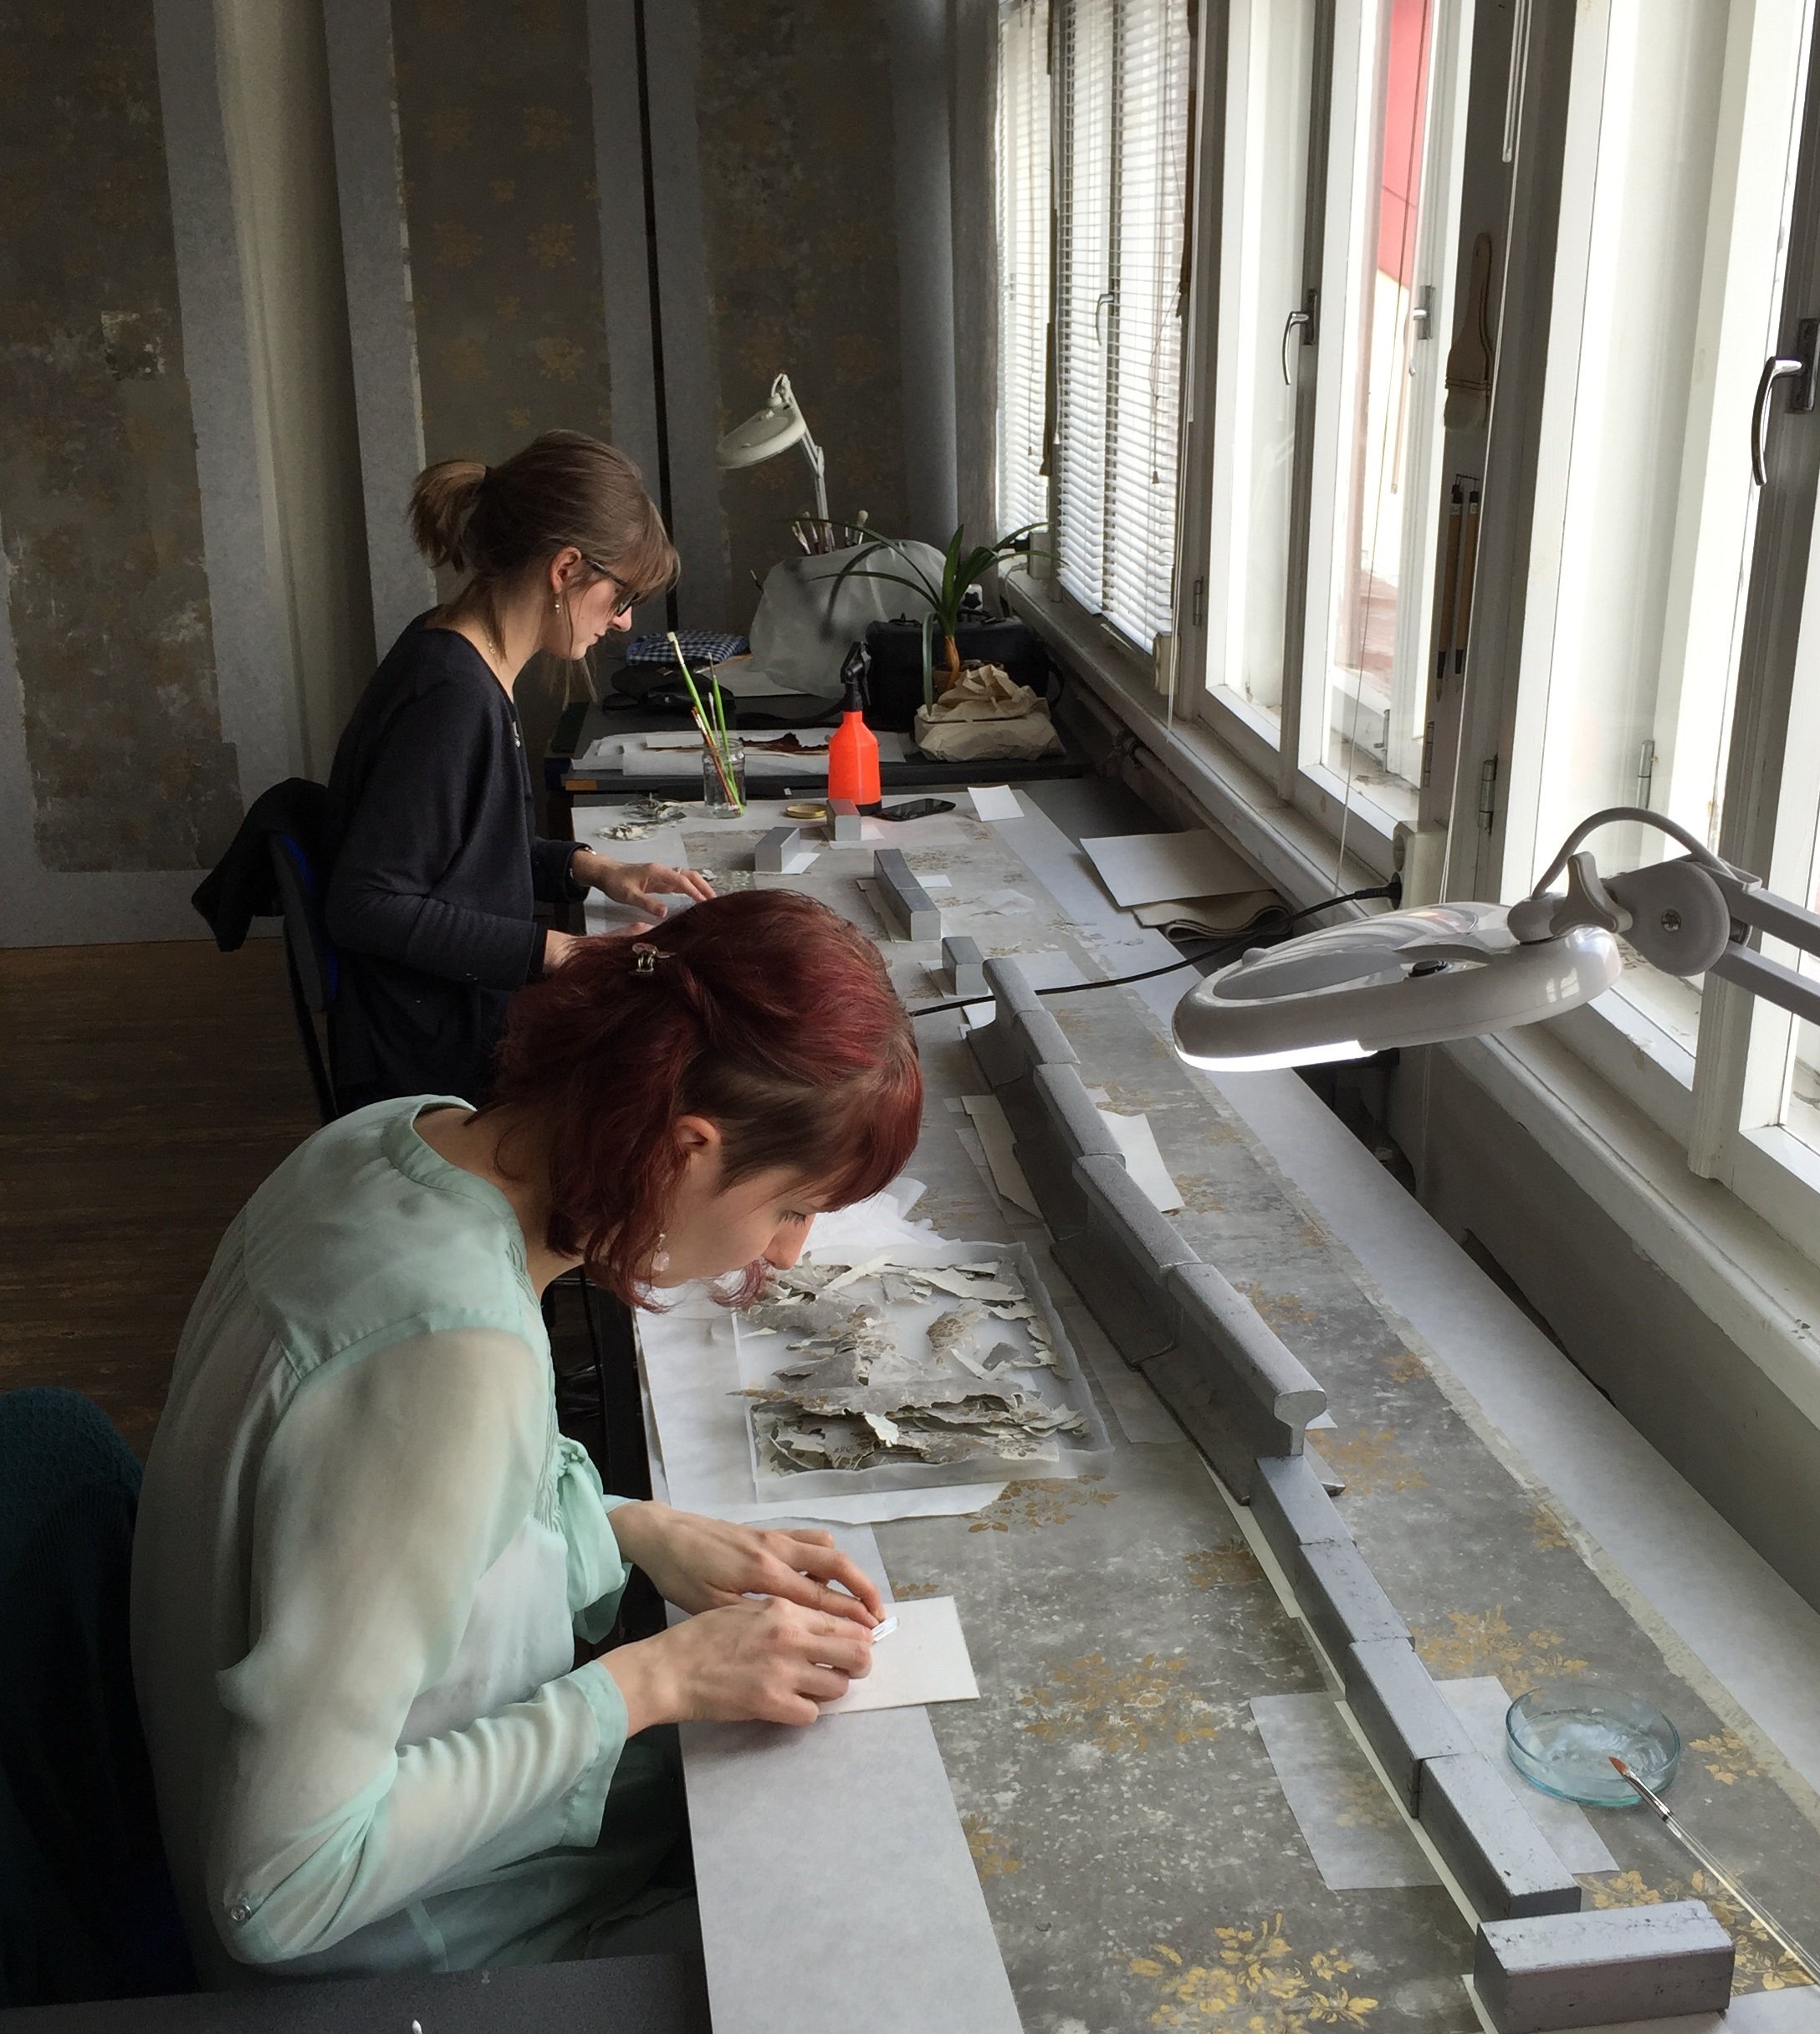
The wallpaper scheme, typical of the era, has been hidden for a long time, since it was covered with a double-wall for insulation purposes. National Heritage experts and the owner of the building came to the decision that the wallpaper should be preserved as much as possible and exhibited on its initial location. The conservation work was trusted to the conservators of EVM Conservation and Digitisation Centre Kanut.
Extensive teamwork that lasted for half a year engaged specialists of all the departments of the Kanut. The project provided a lot of new experience and due to it special methodologies were developed specifically for the conservation and preservation of this large scale paper object as a part of an interior design.
Description of the find
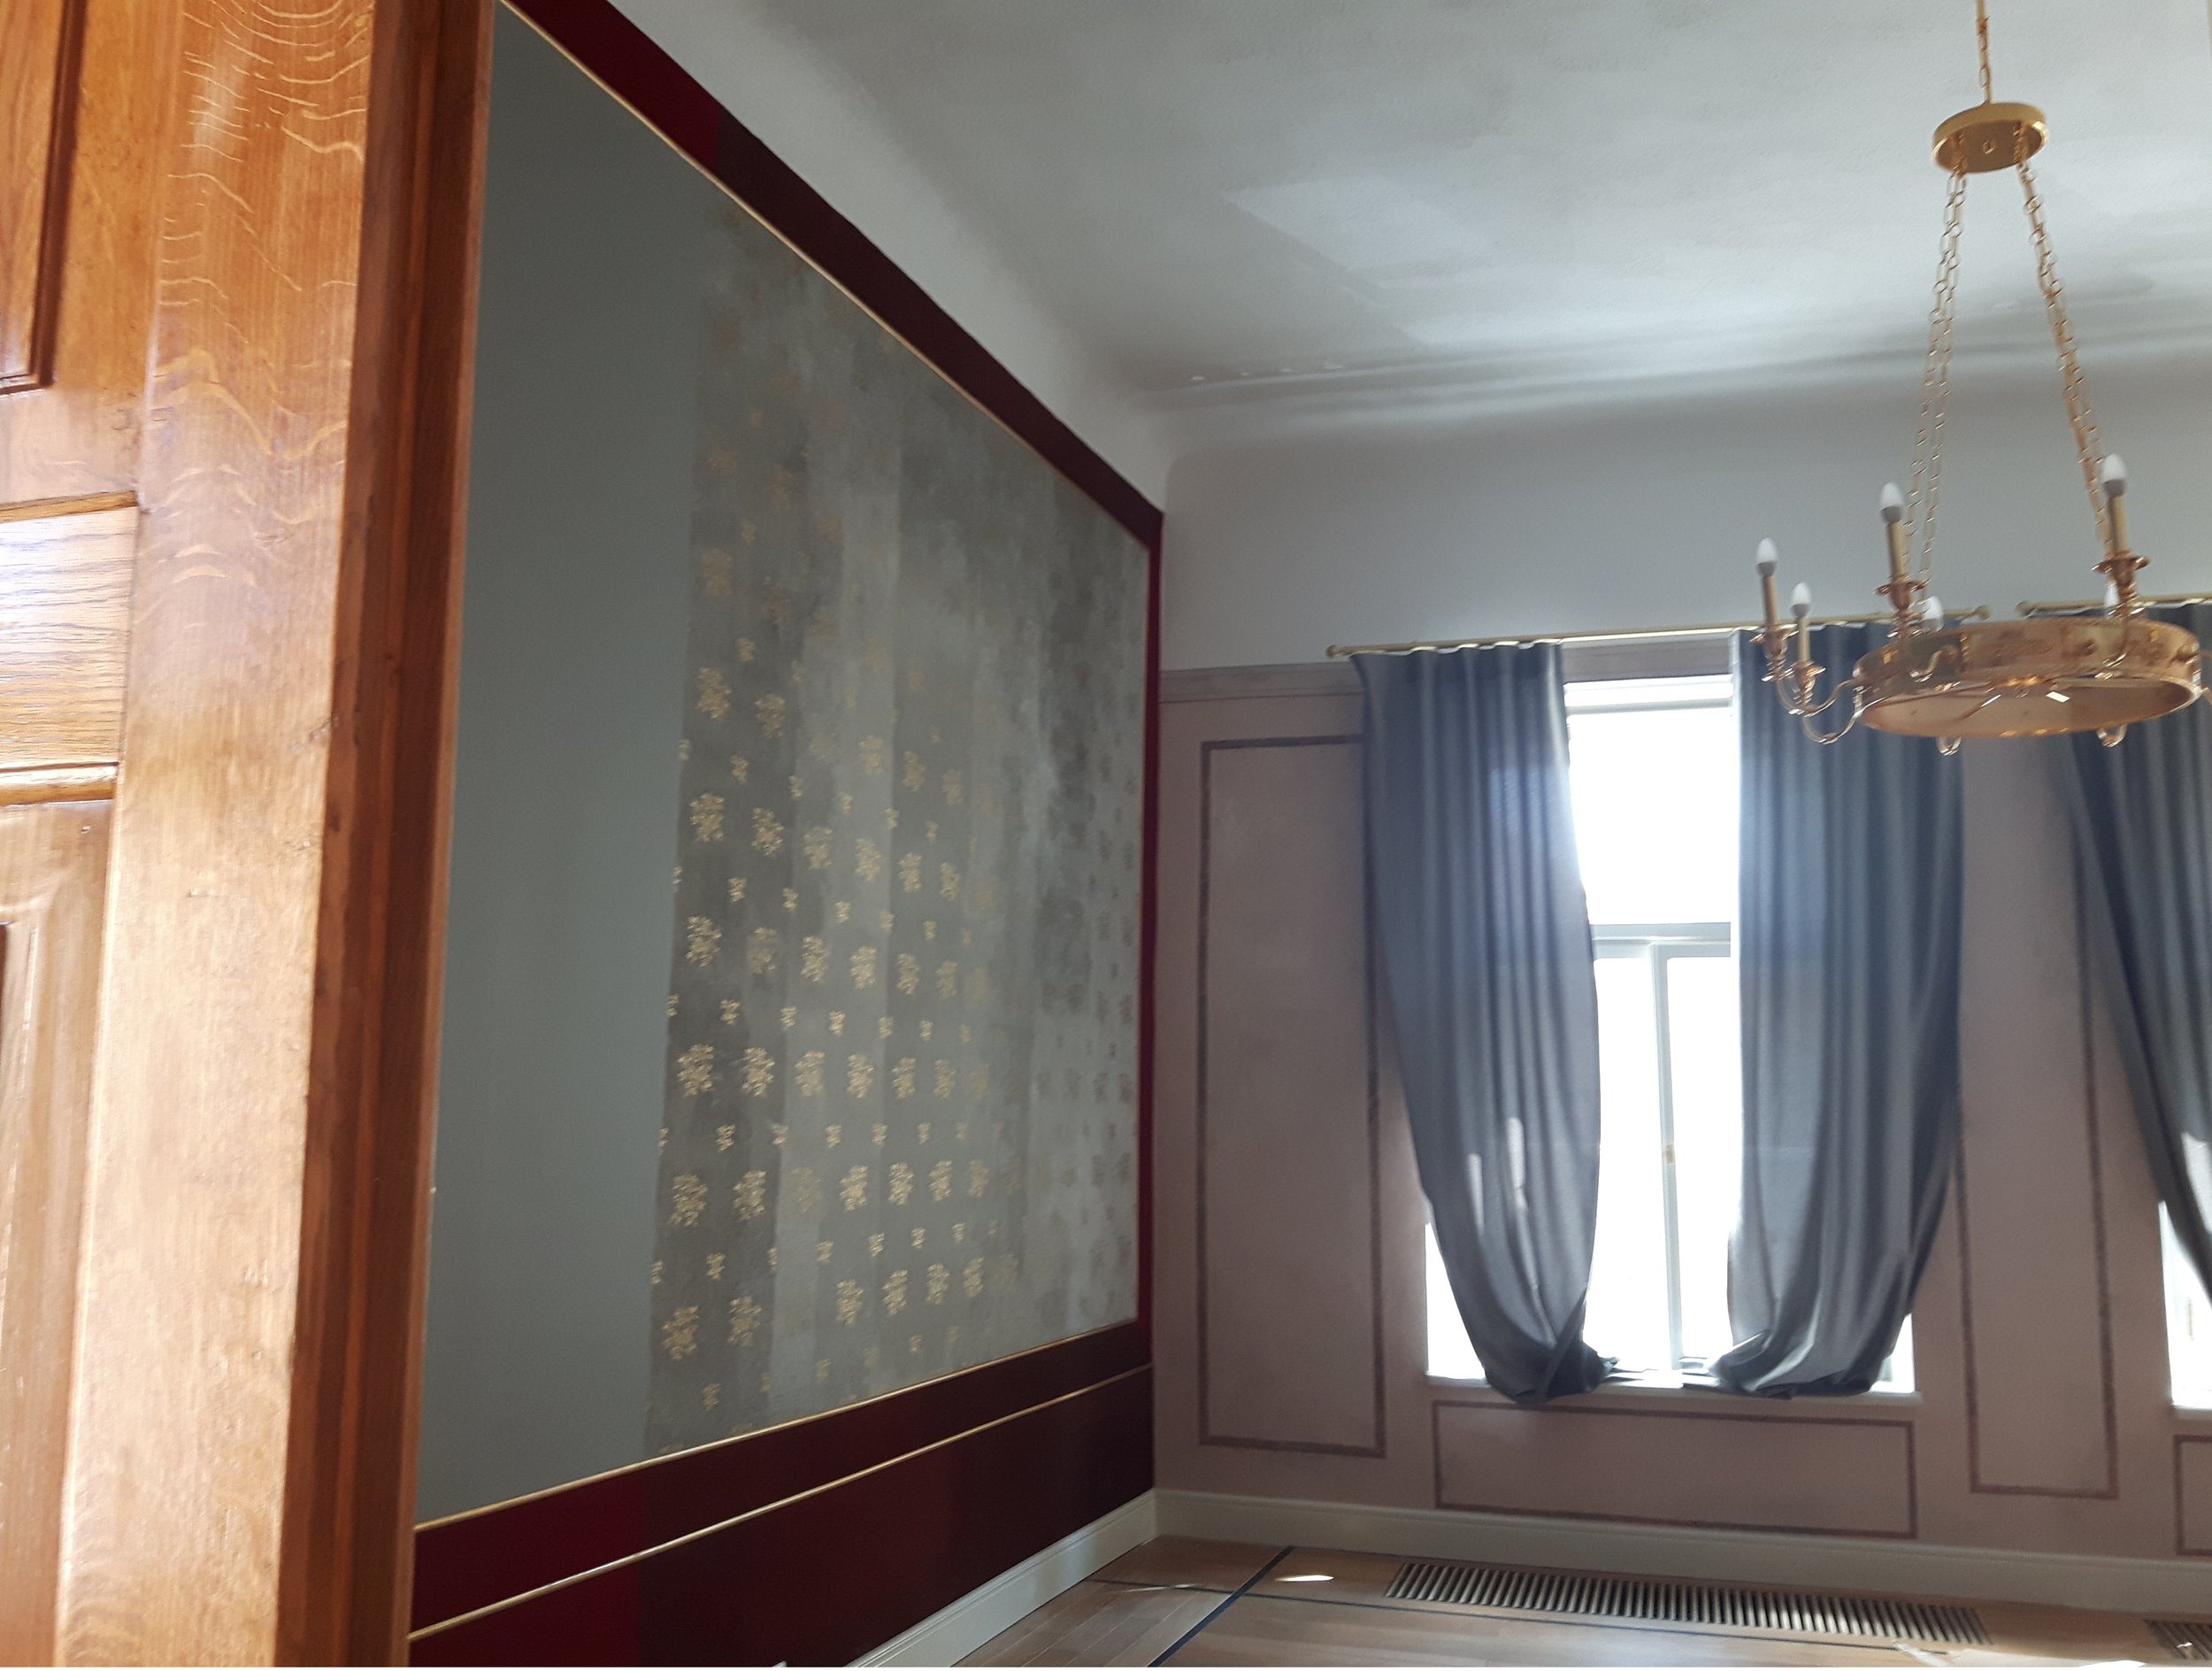
Wallpaper is located in the parlour against the left side of the hall, on the north wall of the room.
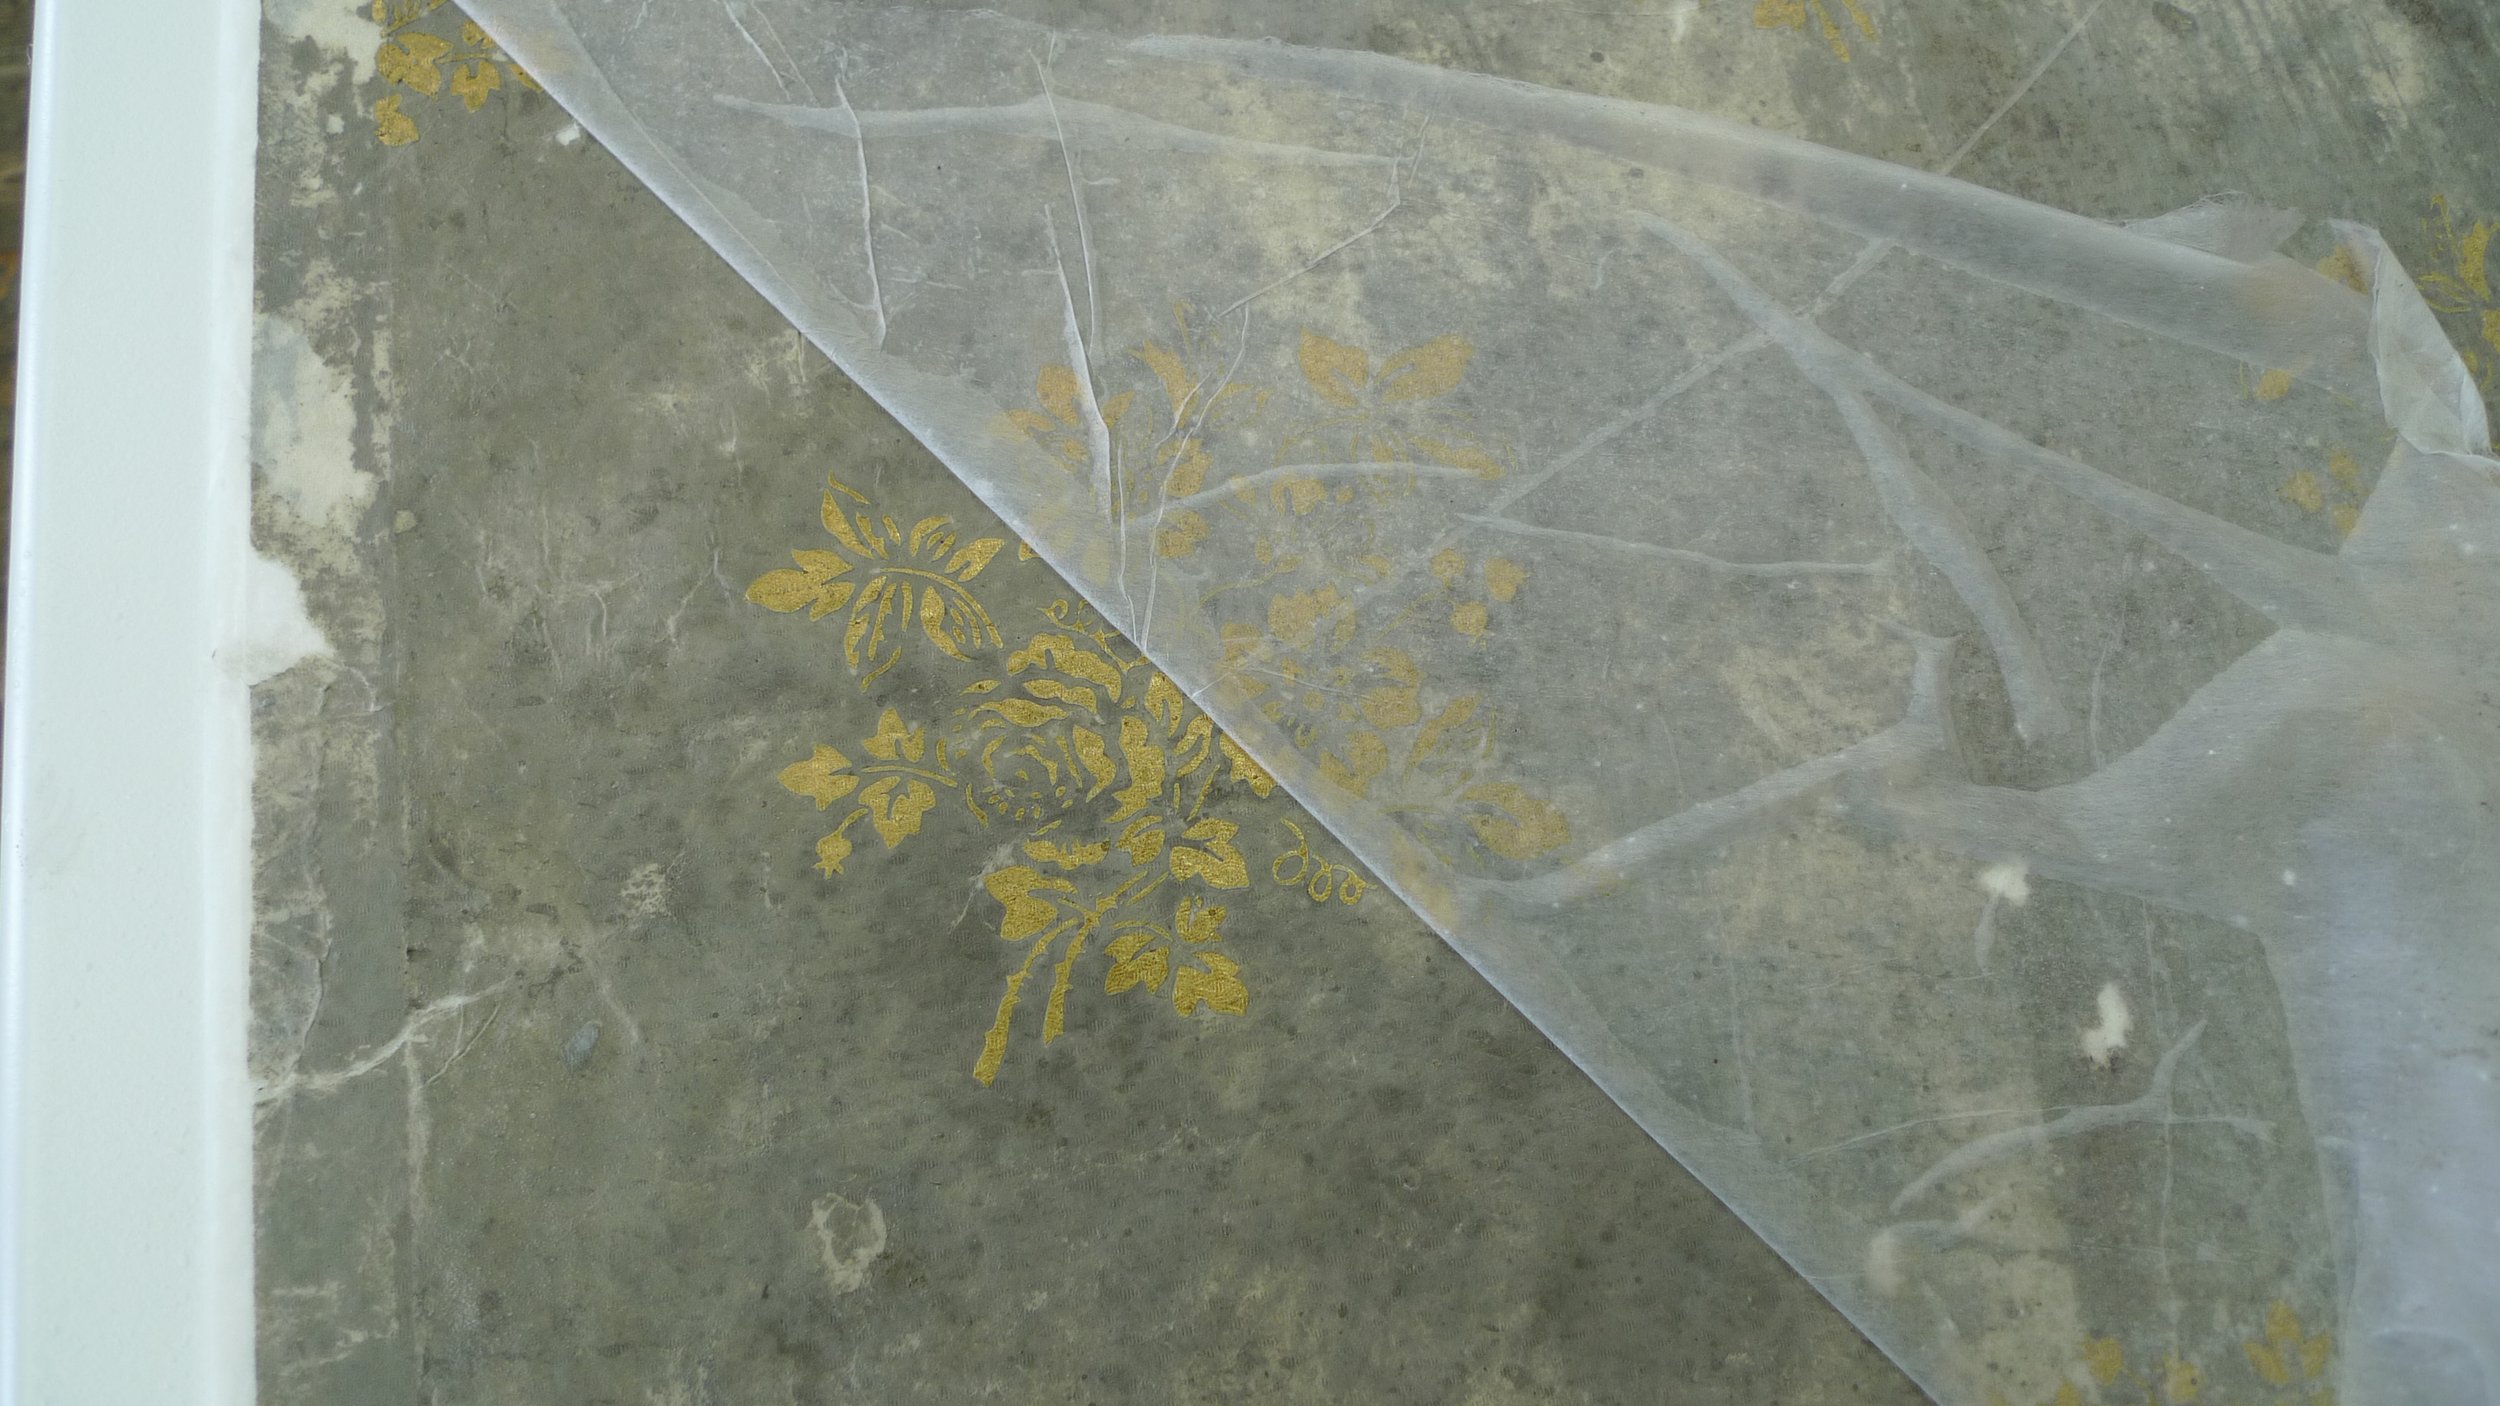
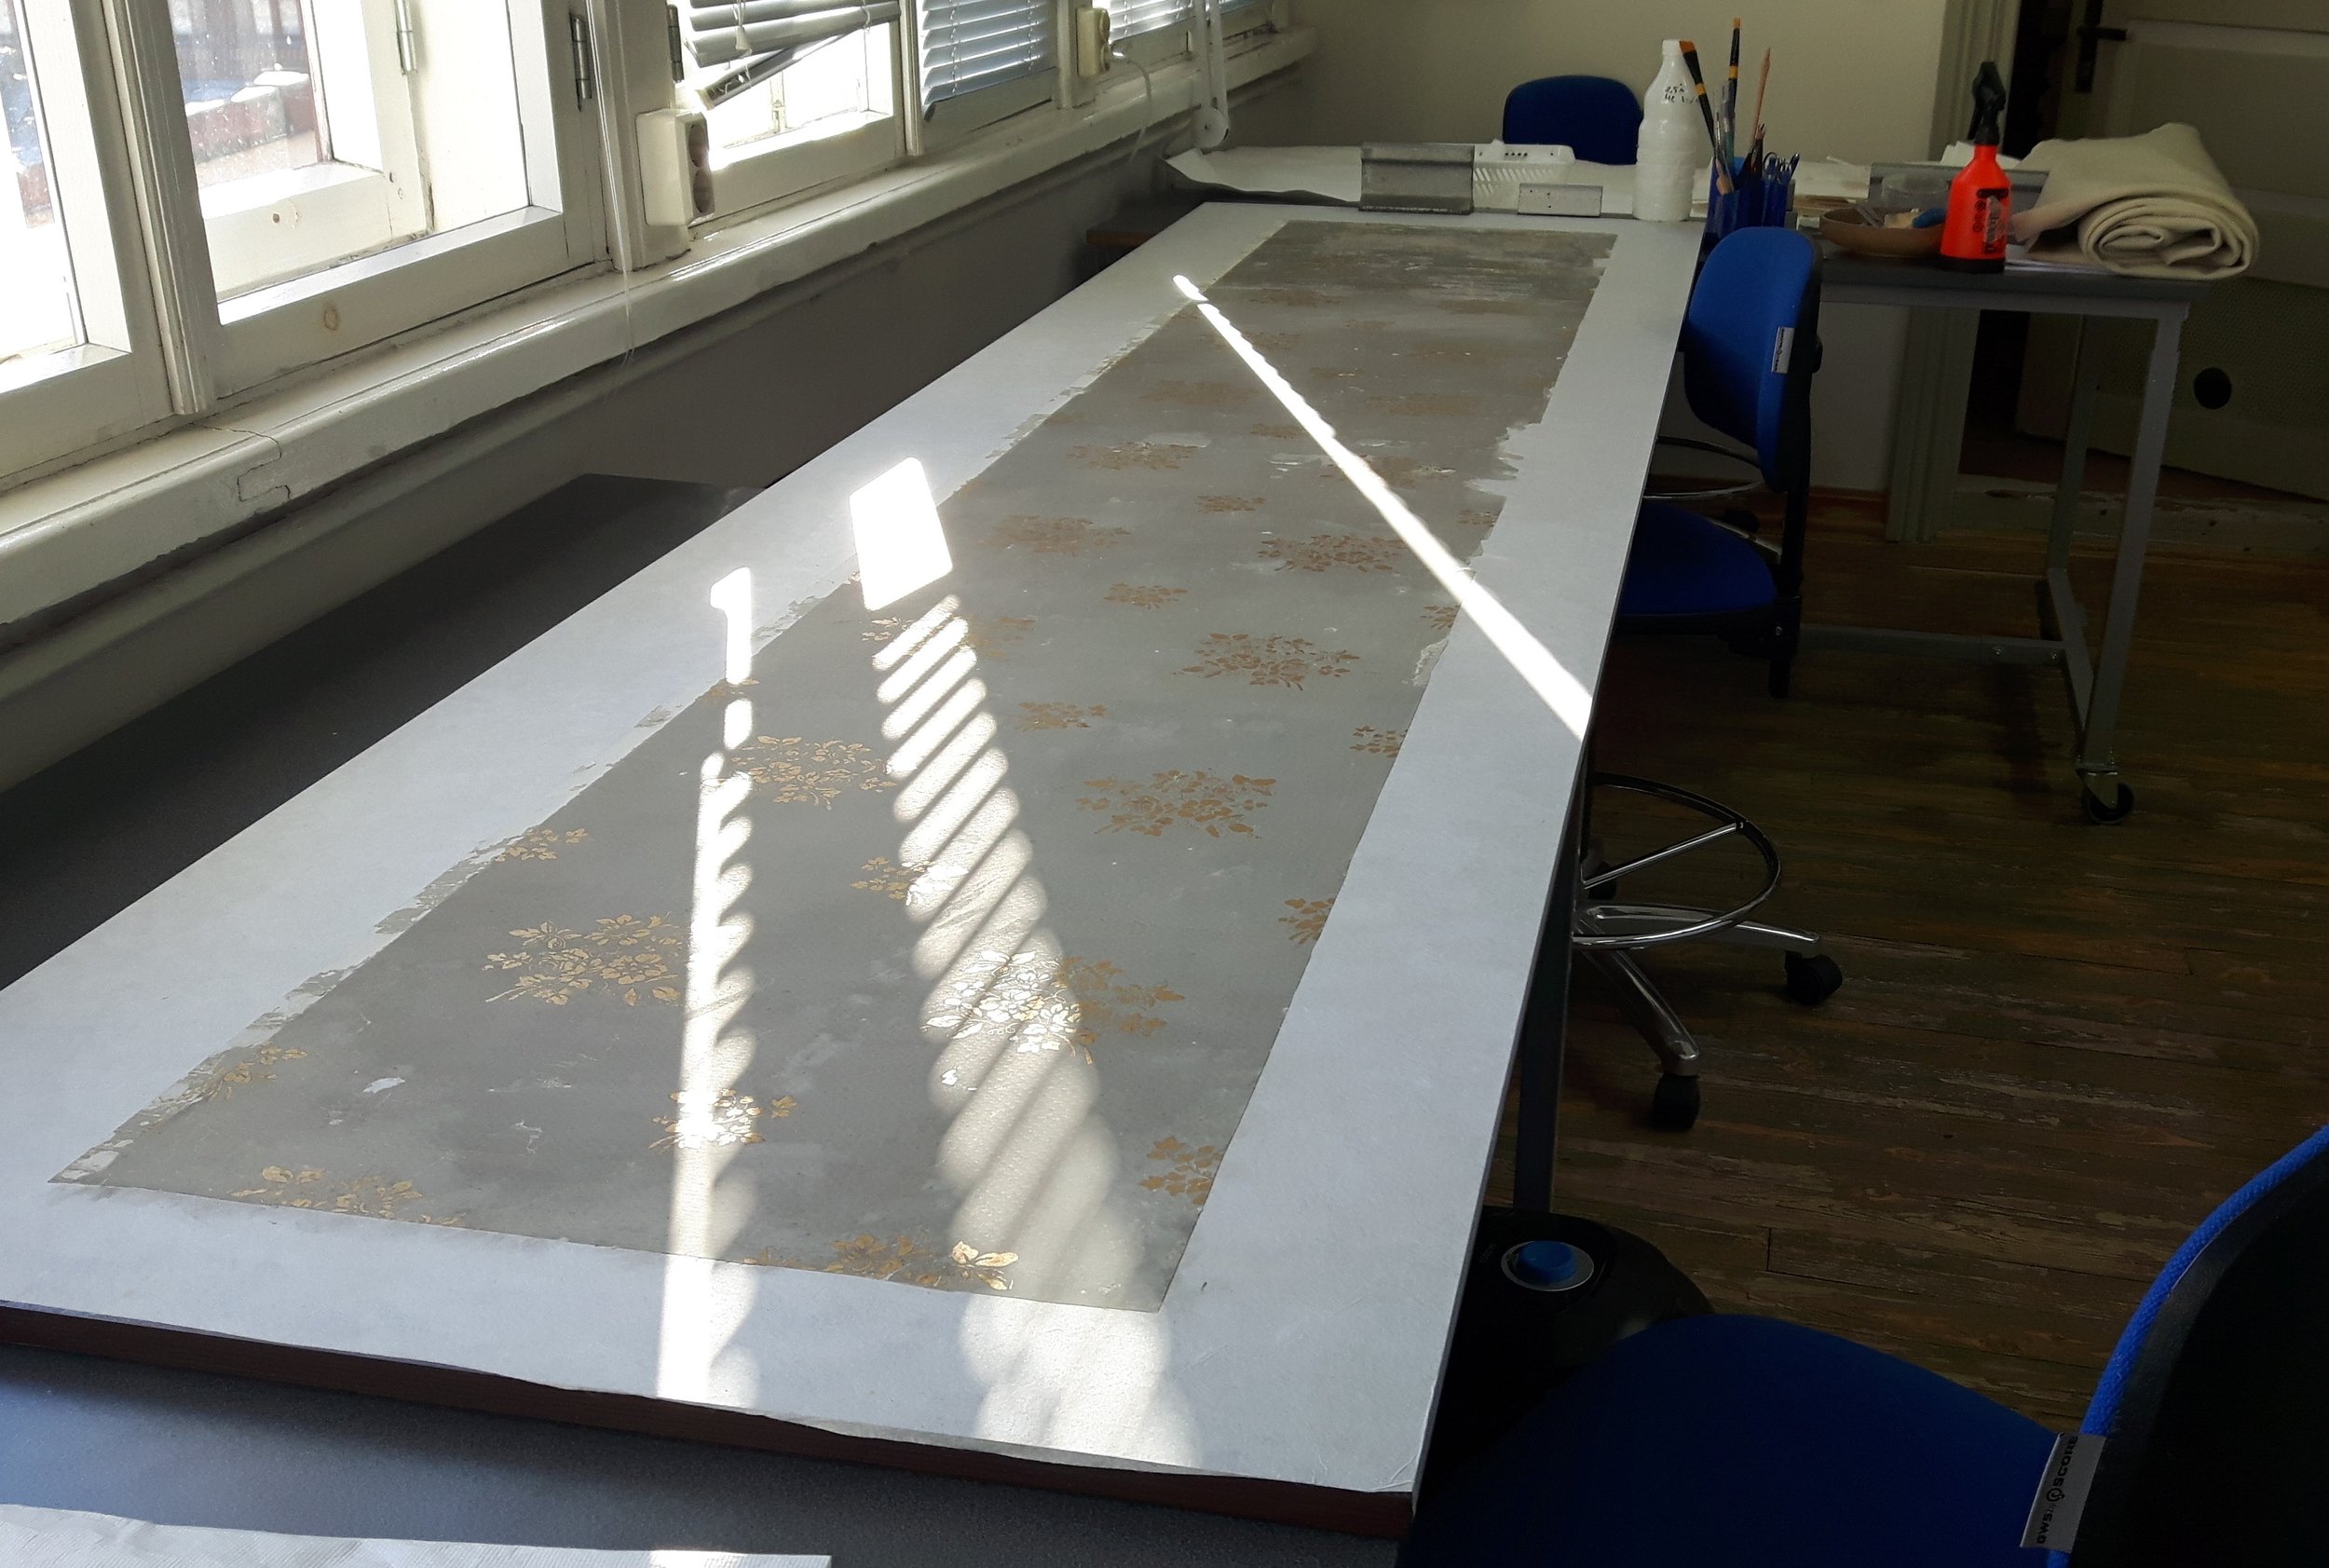
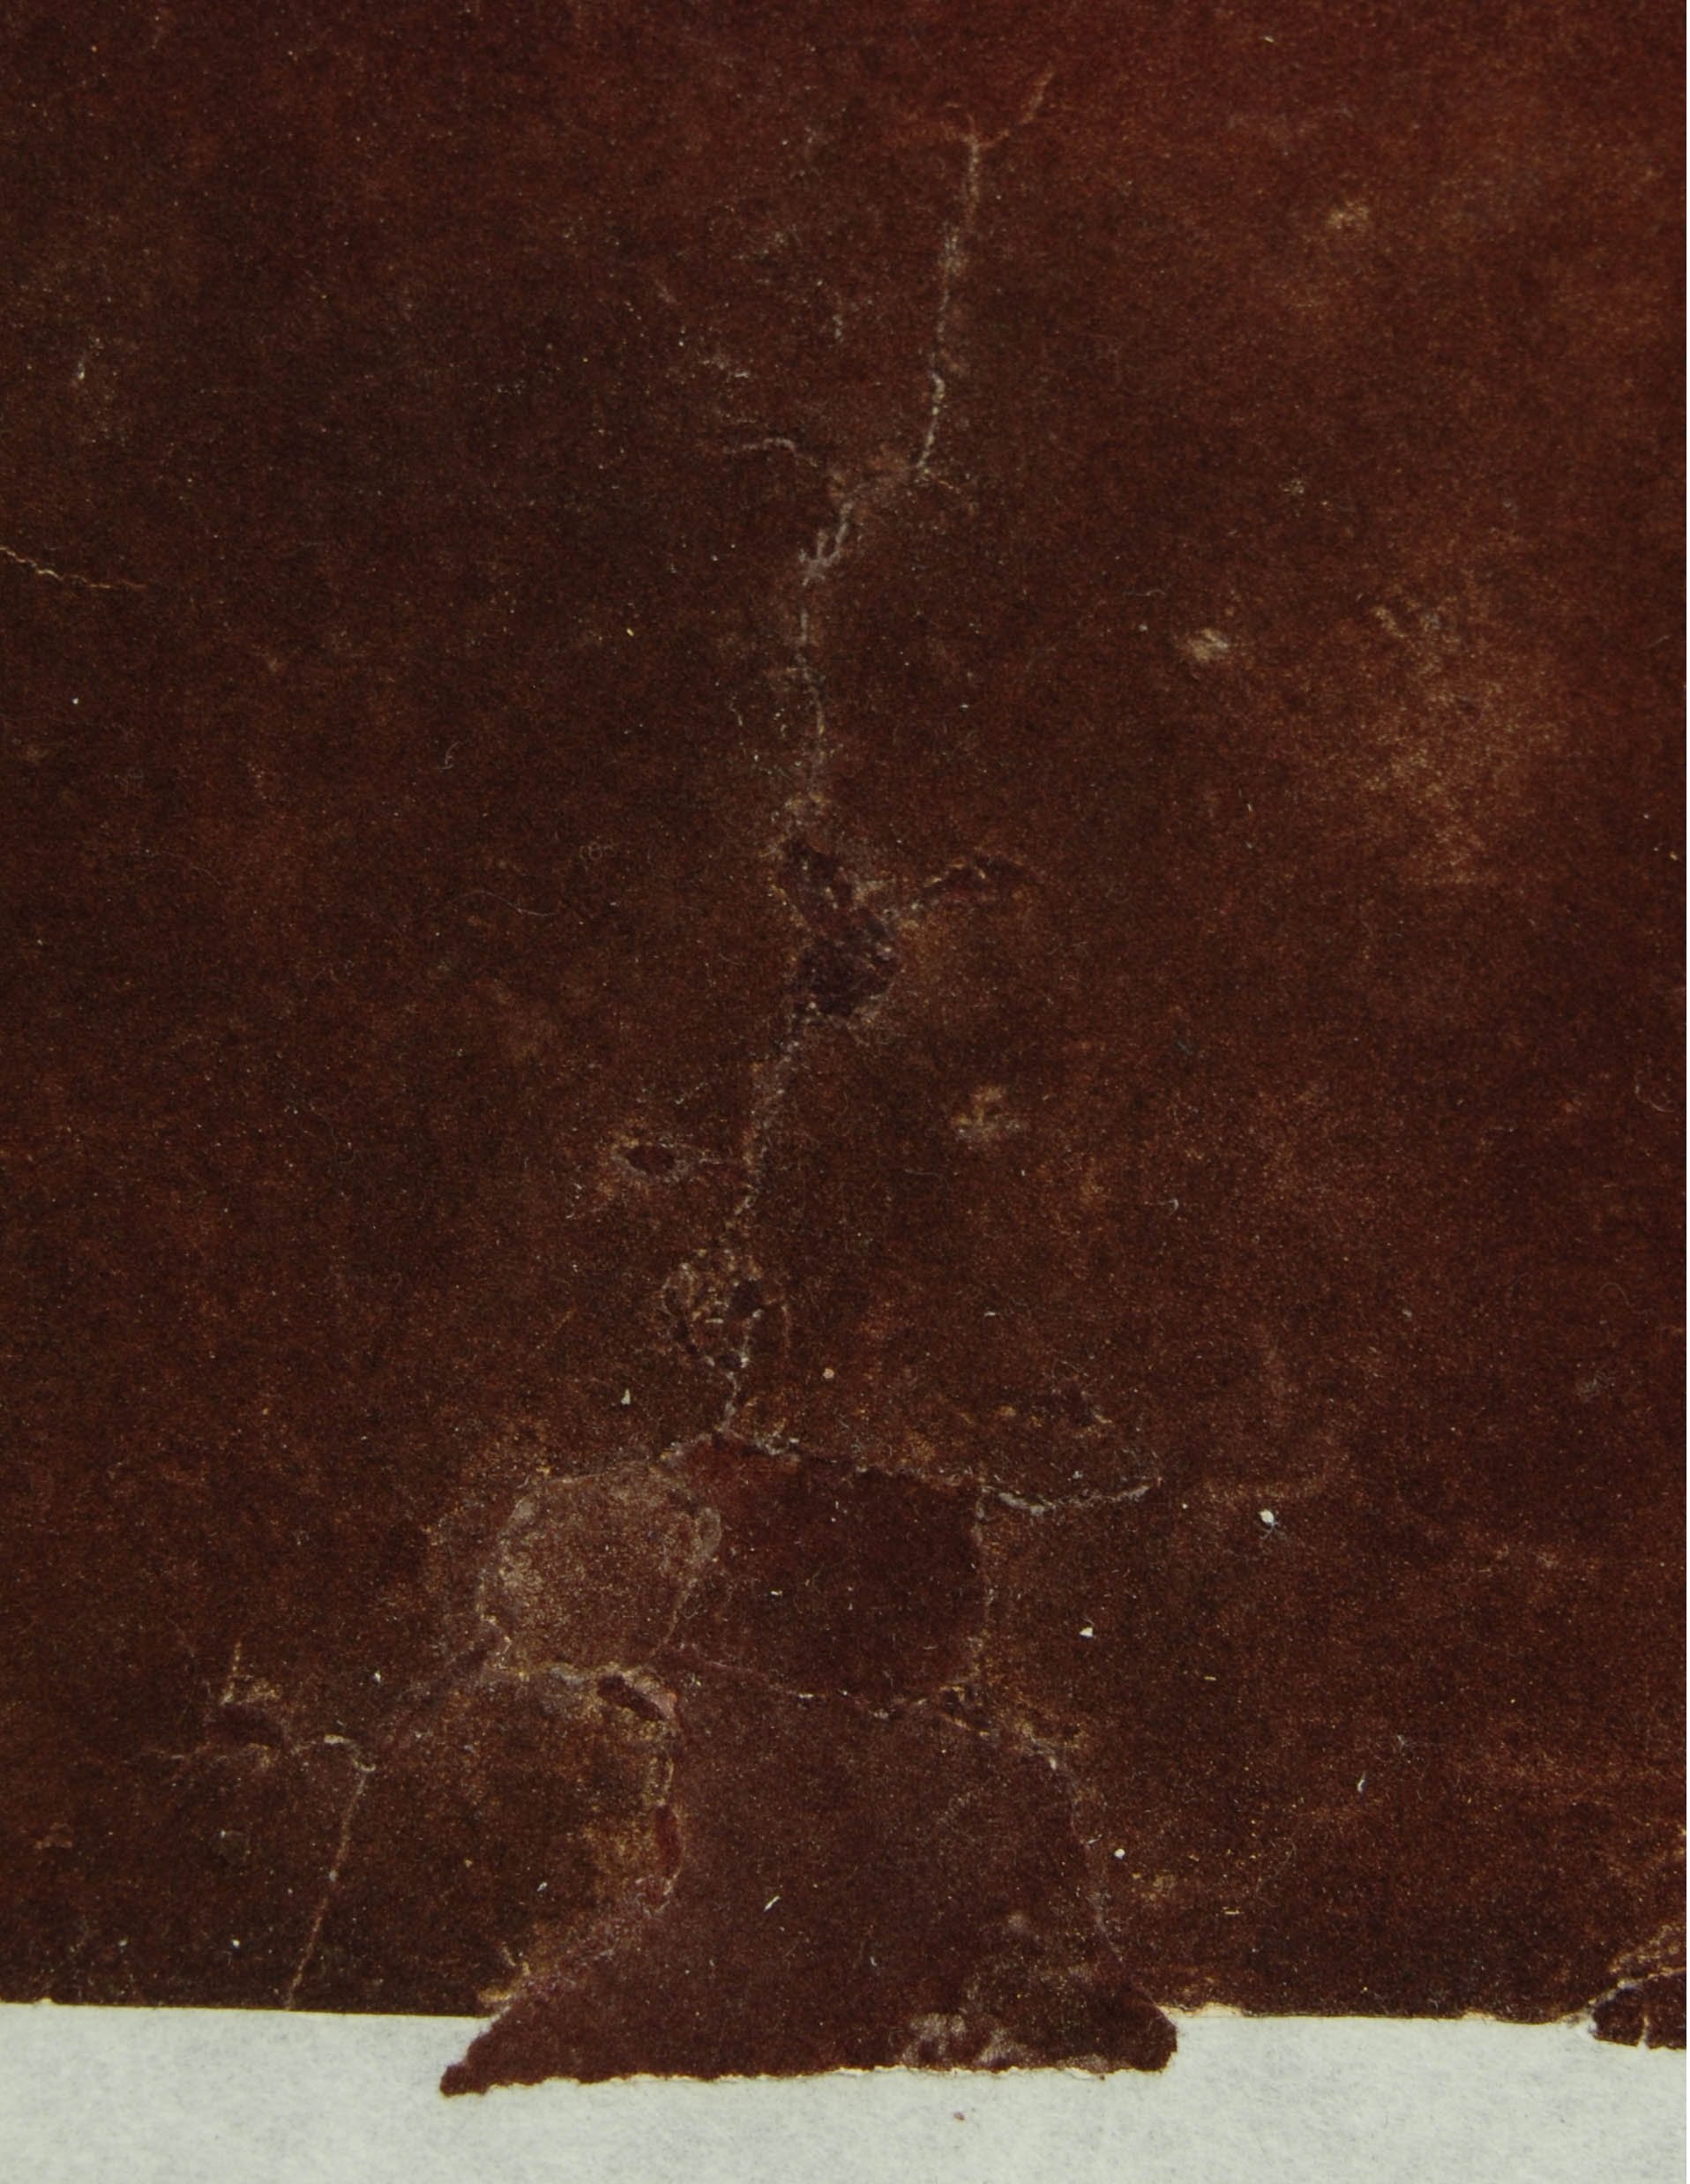
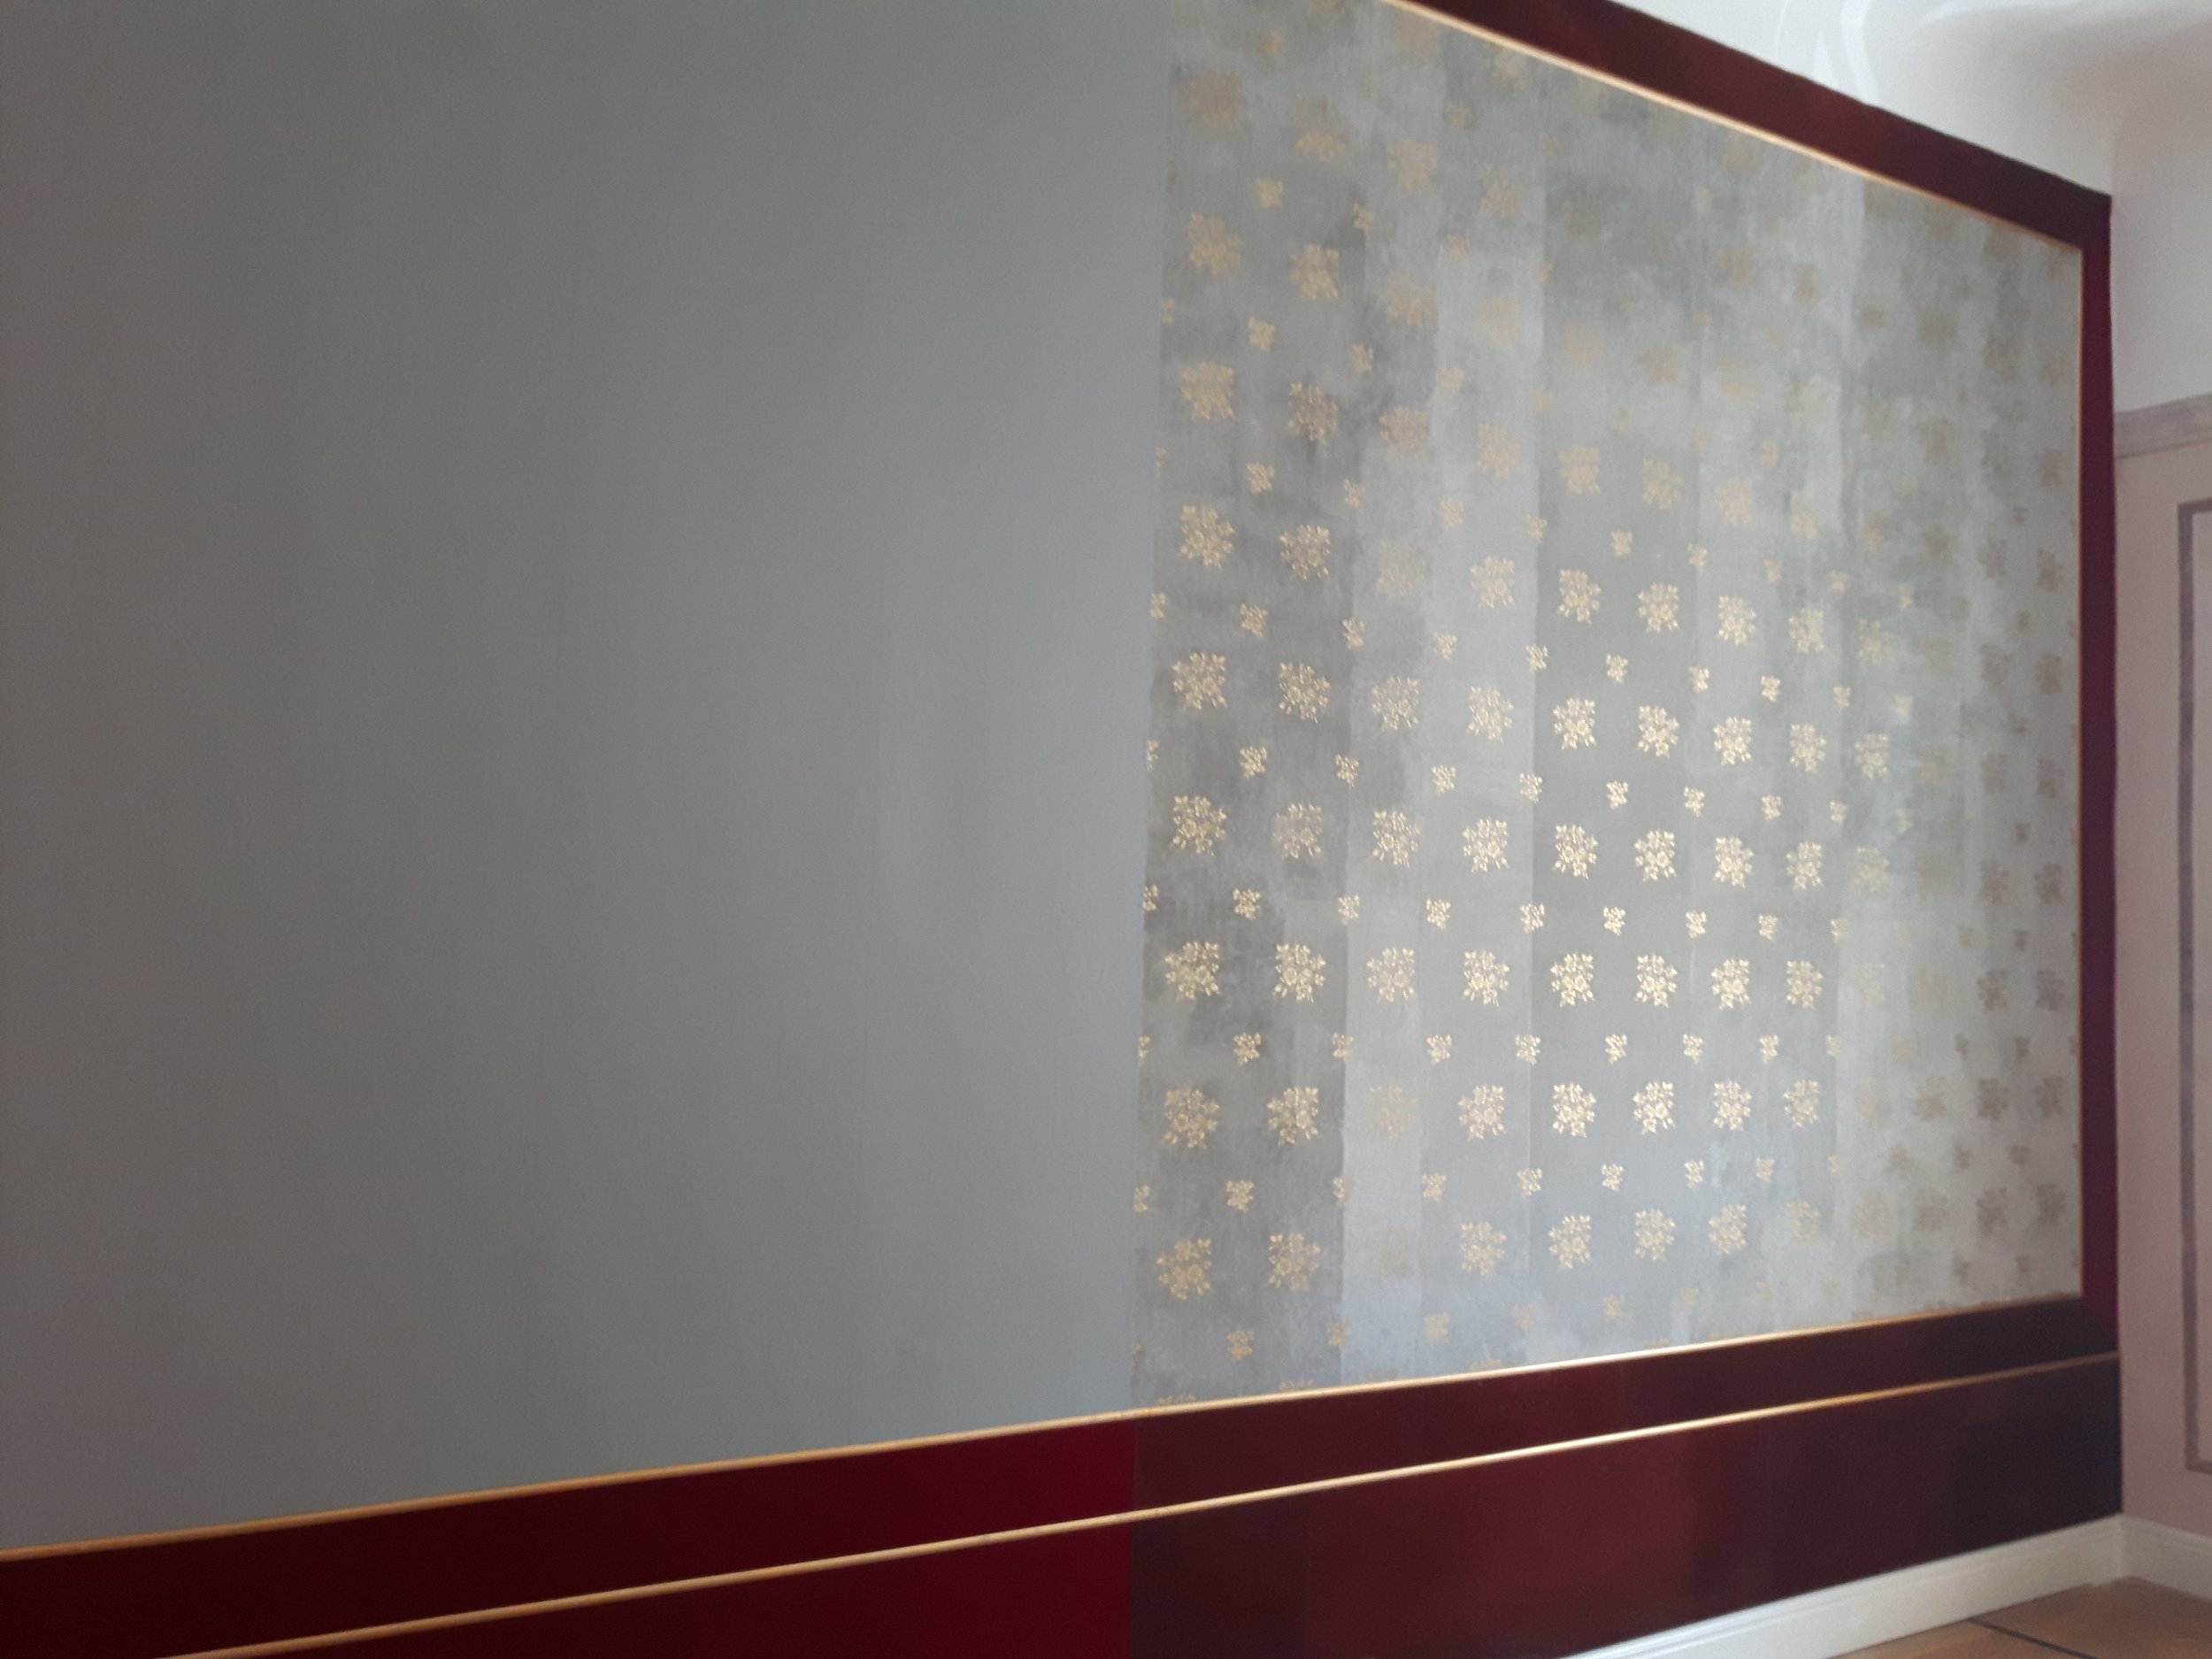
The paper-based wall-scheme combined of two different wallpapers is a really unique find in Estonia. Through the entire wall the diagram is horizontally split. The lower part of the scheme represents a deep red flocked lambree and in the center there is a grey distempered wallpaper with printed golden floral pattern, bordered on each four sides by red flocked braiding. [fig.5] The lambree and the braiding are made of the same good quality flocked paper. The gray roll-print wallpaper dates from the end of the 19th century. Techniques and materials used refer to a professional wall-papering work that was probably ordered as a complete solution. [fig.6]
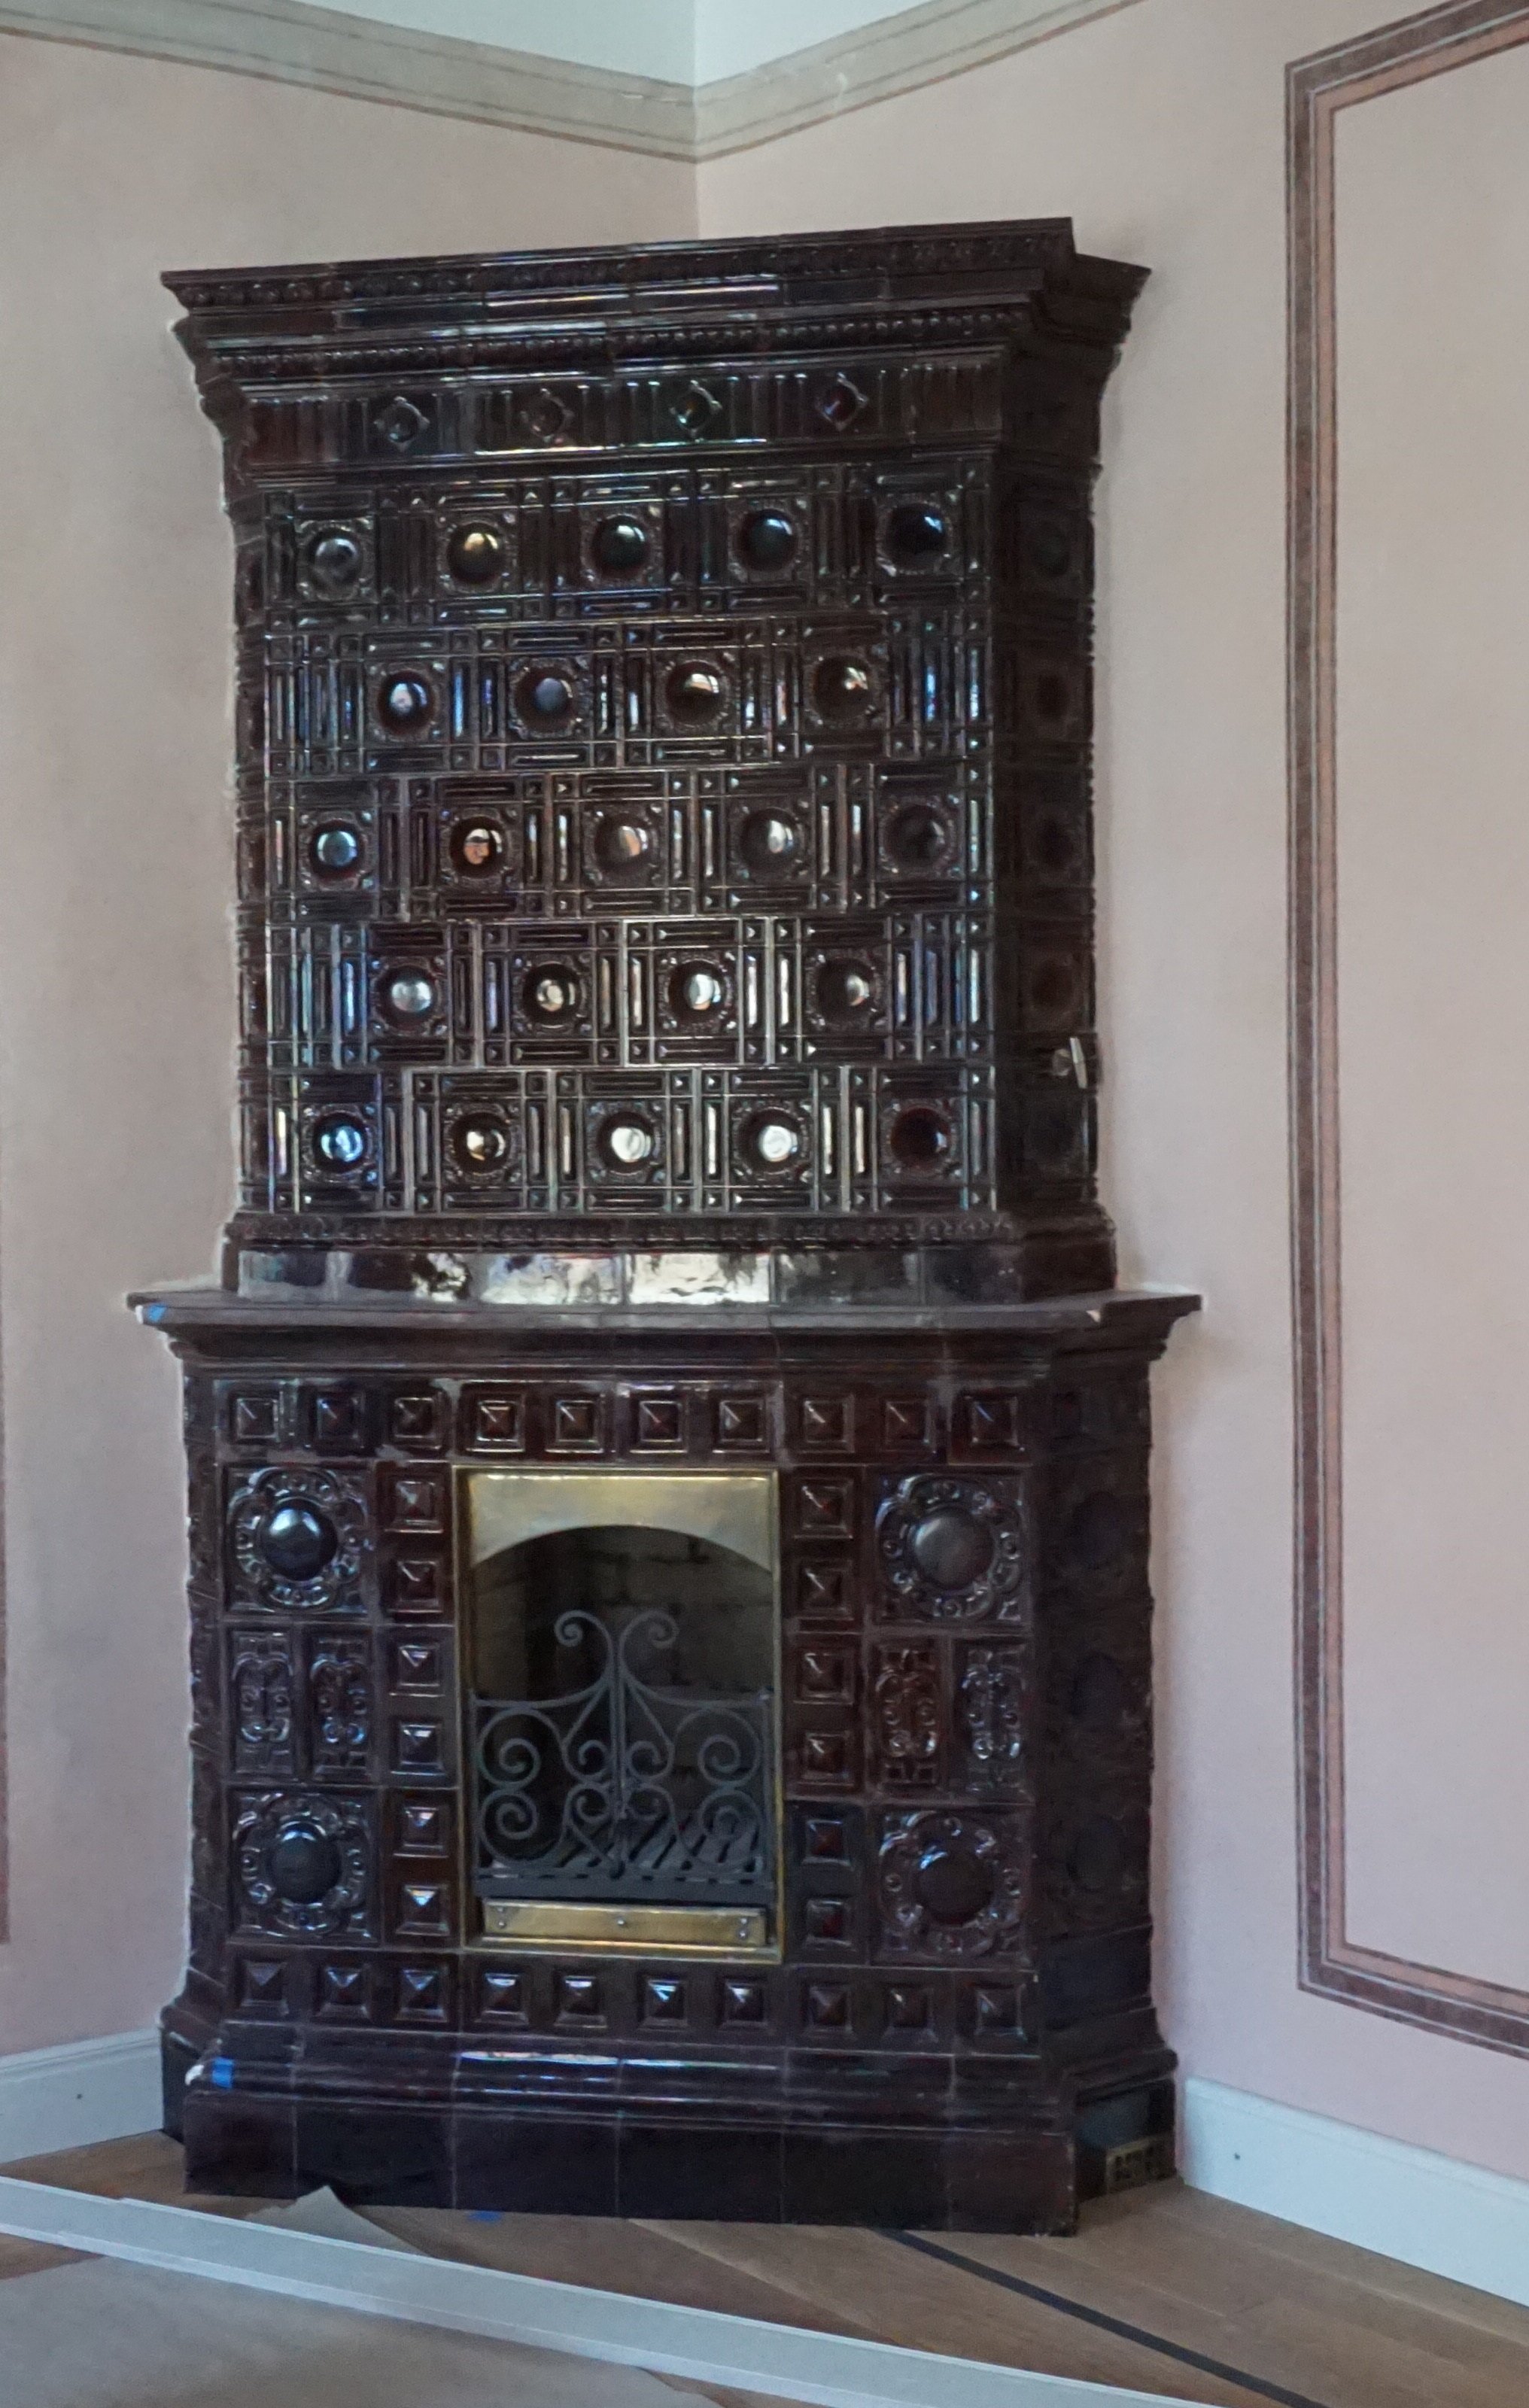
A line of series of nail holes found between wallpaper and the flocking suggests that the joints were covered with thin strips of wood-profile which, considering the wallpaper pattern were probably painted in gold. A historicist reddish-brown tiled stove preserved in the corner of the room emphasises this festive wall scheme. [fig.7]
Gray wallpaper
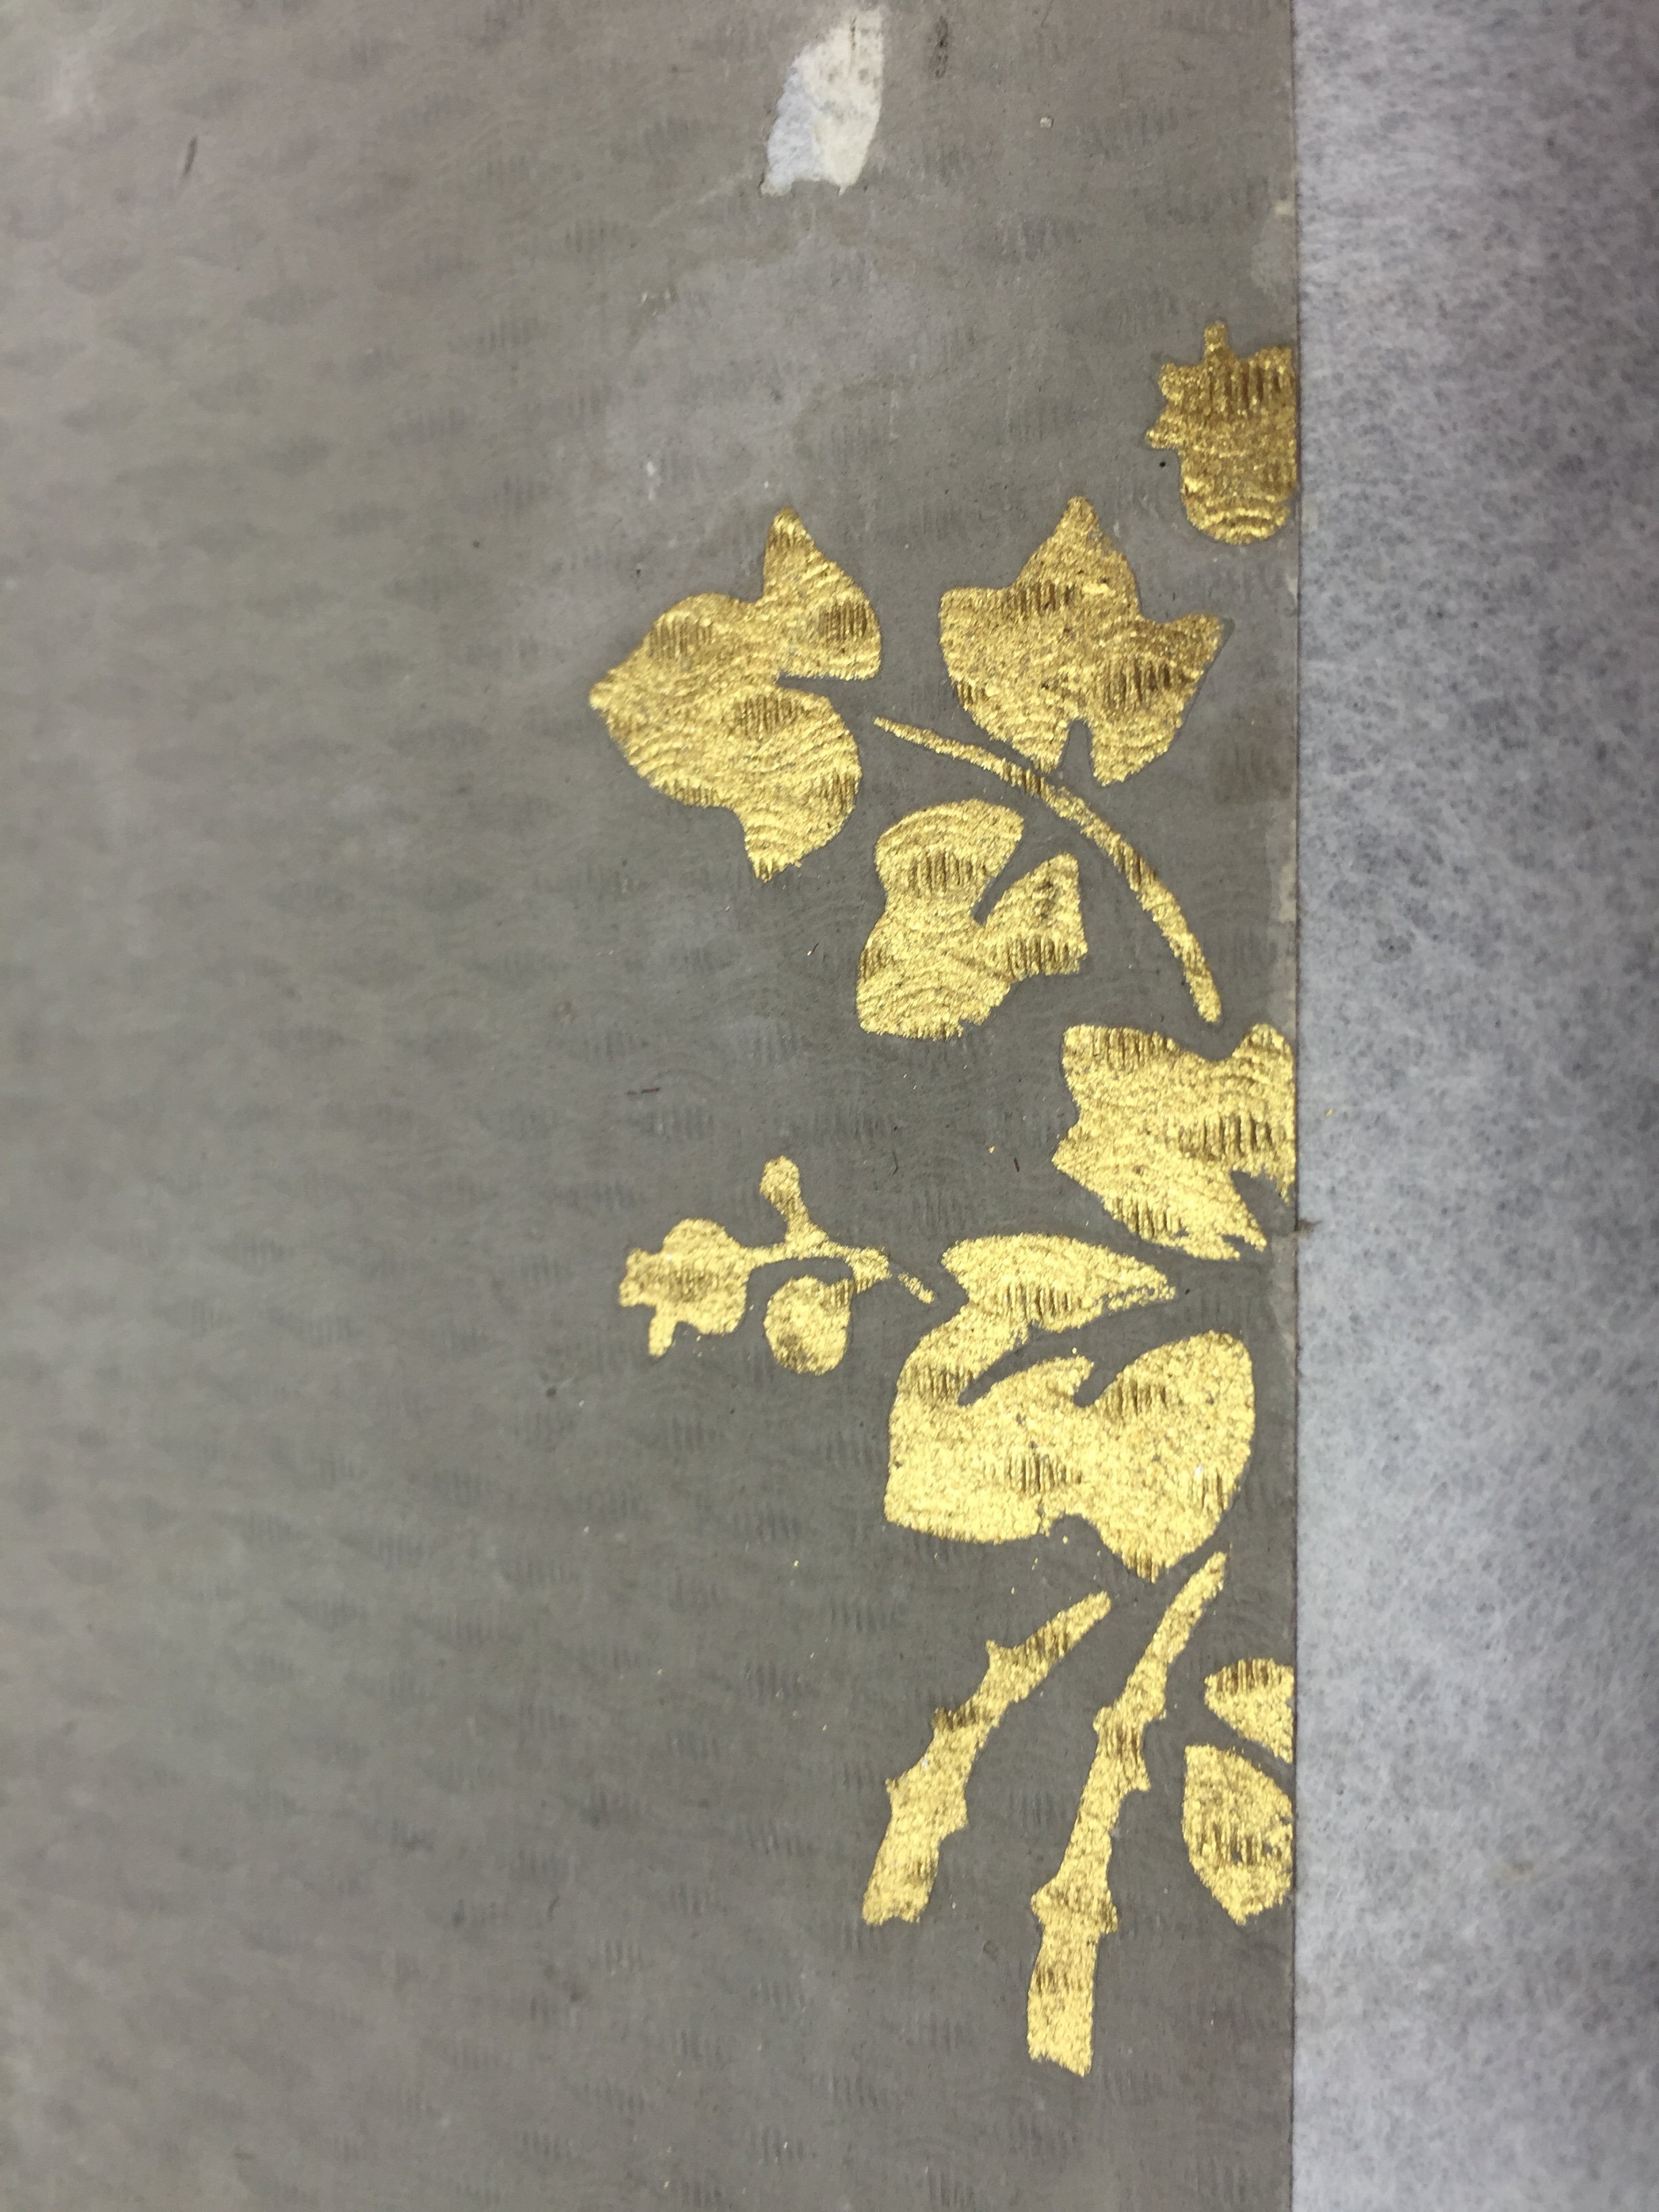
The descending pattern of repeated bouquets in two sizes on the surface of the grey wallpaper is printed in gold leaf. In addition a blank printed circuit of fine embossed rhombus pattern is printed on the grey surface.
In some places there are two layers of the grey wallpaper. Non-standard size pieces have been used, that were probably leftovers. It seems that during some later refreshment of the interior more worn-out spots of wallpaper have been covered with the leftovers of the initial wallpaper. Wastepaper used underneath is a good quality greenish-grey rag paper.
Flocking
Braiding is cut from a wider roll, as the cutting edges are uneven. Lambree is applied as one horizontal tile. Flocking consists of four layers: thicker base paper, a thinner paper coated with red color, a thick layer of glue and a layer of red wool crumbs attached to the latter.
Condition before conservation
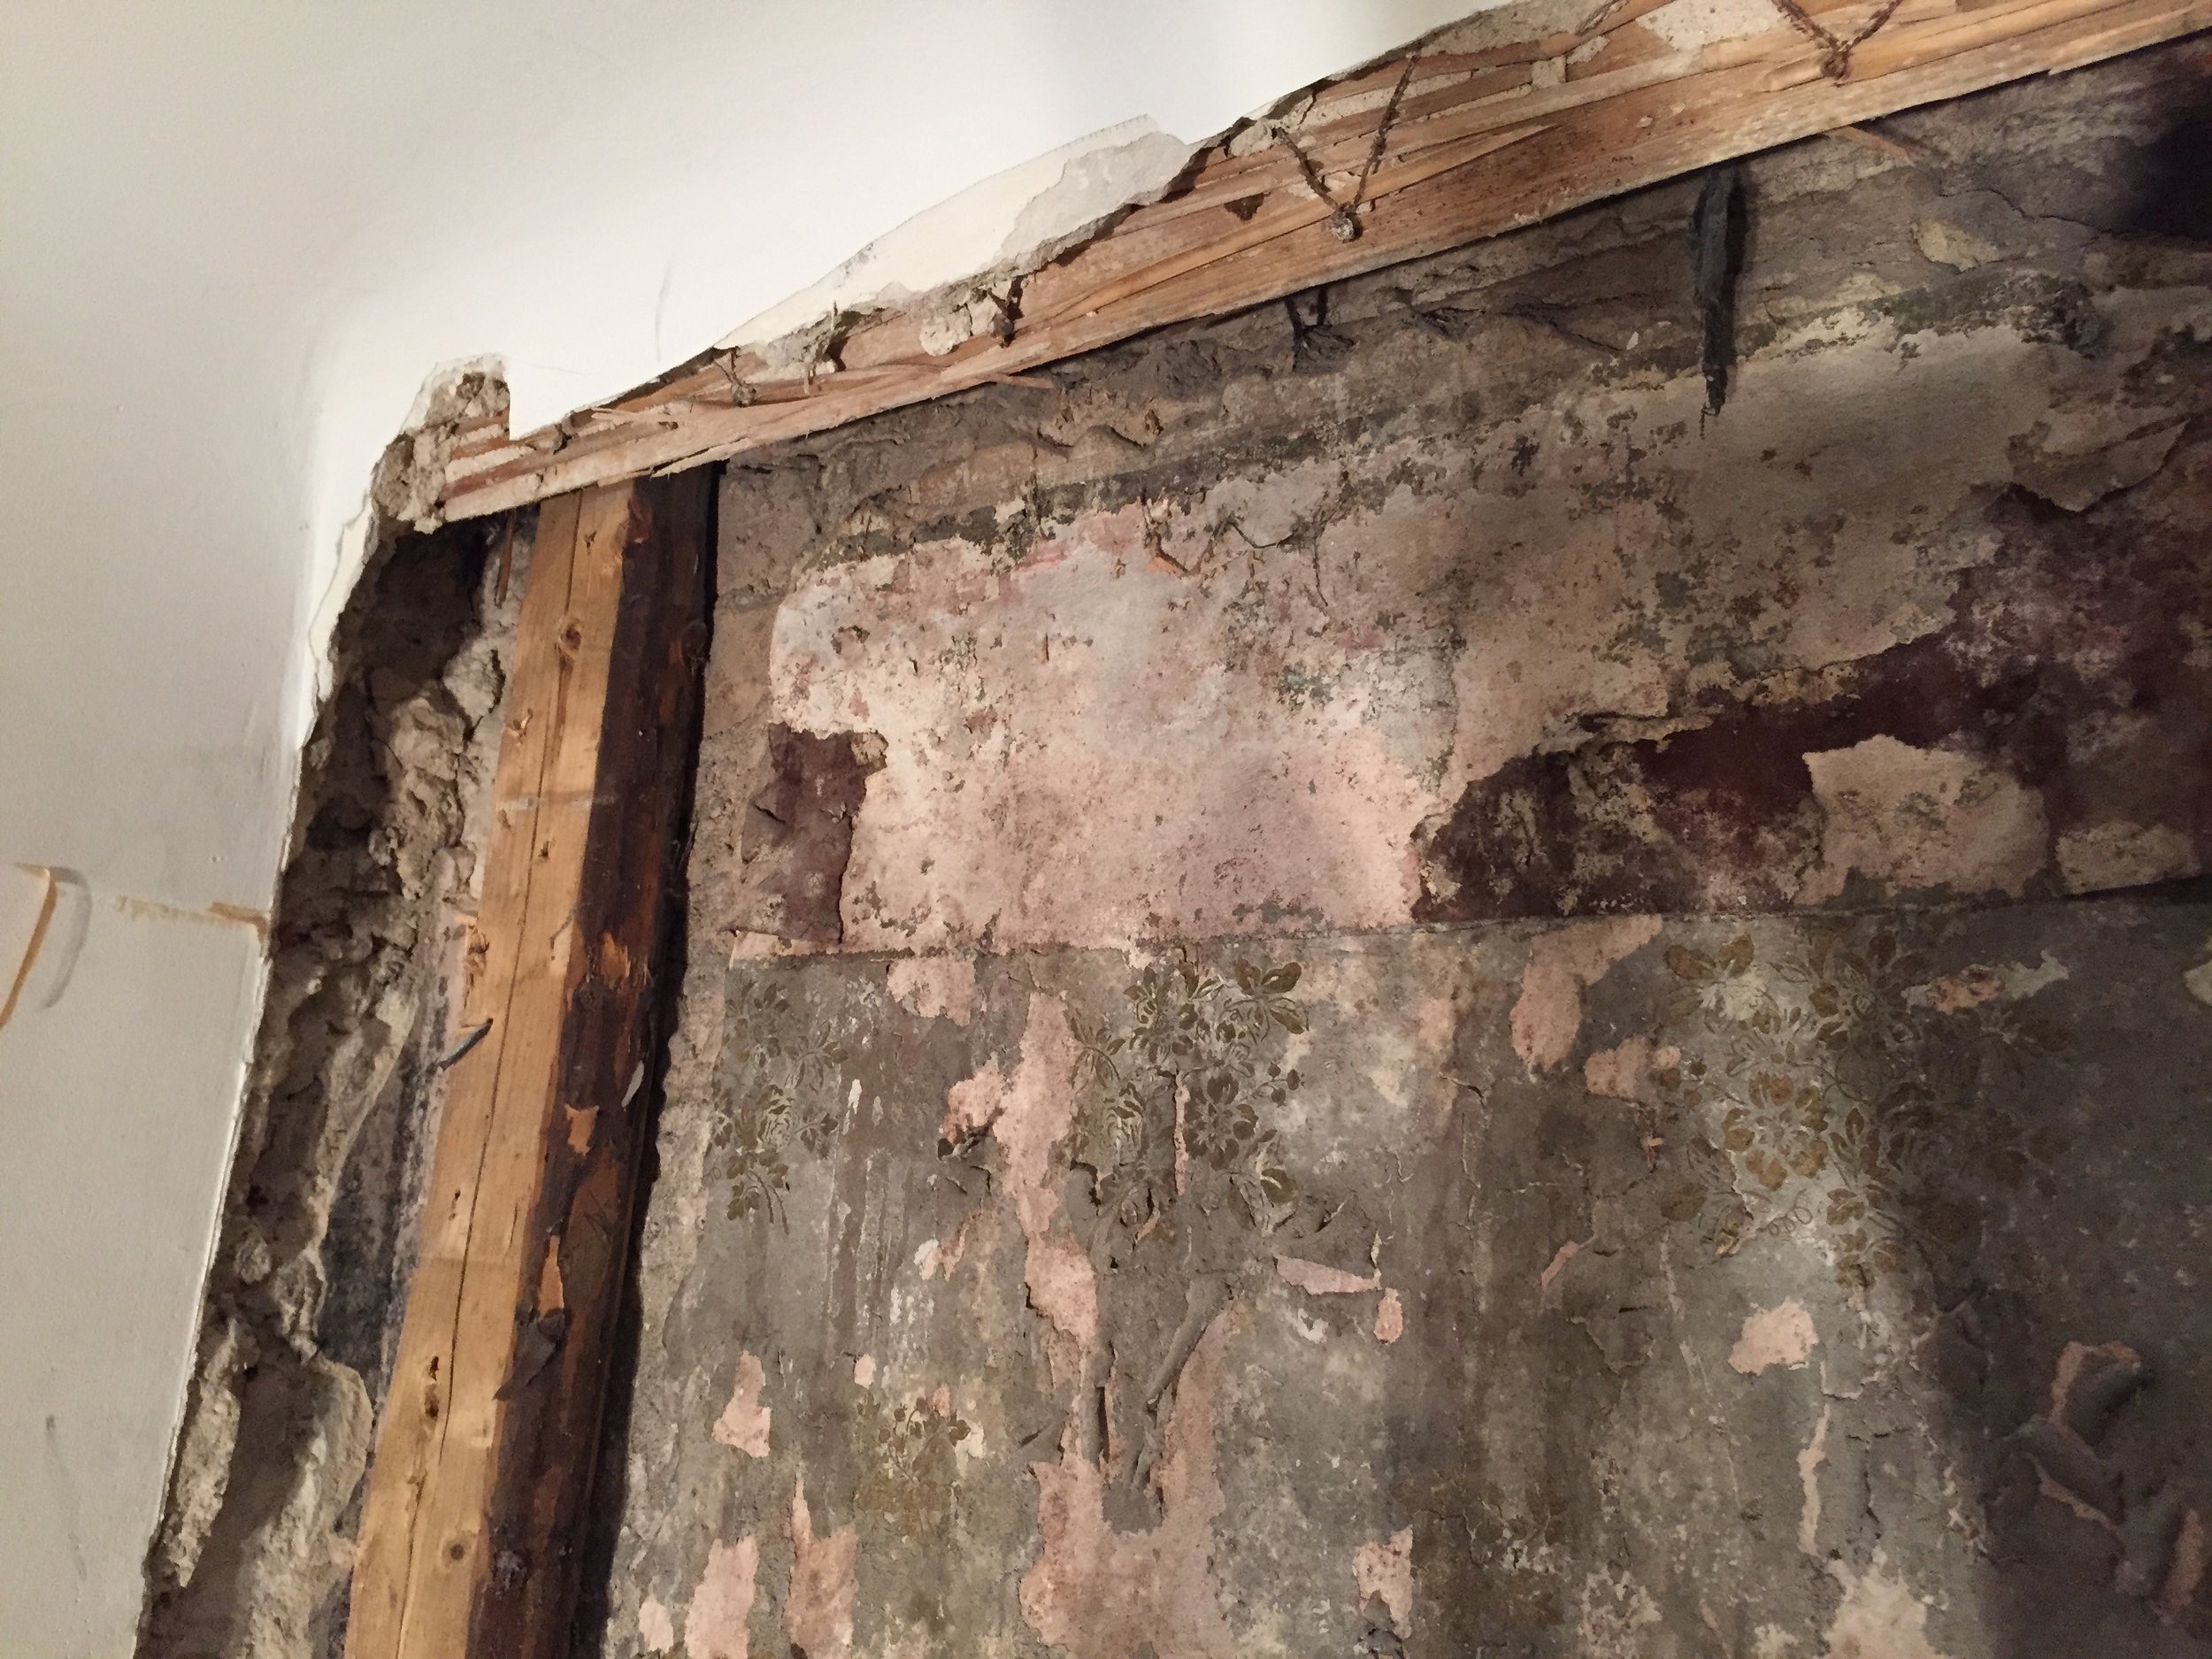
The wallpaper covered wall was found during the restoration work of the building. An additional inner wooden wall, obviously in order to improve the insulation of the baroness’s parlour, had been added on one of the stone walls during some later repairs. As a result, the wallpaper that had been pasted on the outer plaster-limestone wall got sealed in a closed space.
Due to this the wallpaper that was originally pasted on the plastered limestone outer wall of the room remained between a narrow air-gap of about 10 cm. [fig.8] The humidity coming from the stone wall condensed in the confined space between the two walls. The closed humid environment had caused extensive mould damage and decay on the paper. Due to these severe damages and the generally poor condition the wallpaper could not be restored in situ.
The wallpaper was in a rather poor condition but, fortunately, preserved in exceptionally large patches.
The surface of the wallpaper was heavily soiled, covered with dirt, spider webs, plaster residue and dust, whereas the structure of the paper was rotten. Many black and orange spore clusters were present on the pigment layer of the grey wallpaper and the paint was discolored or worn-out in several places.
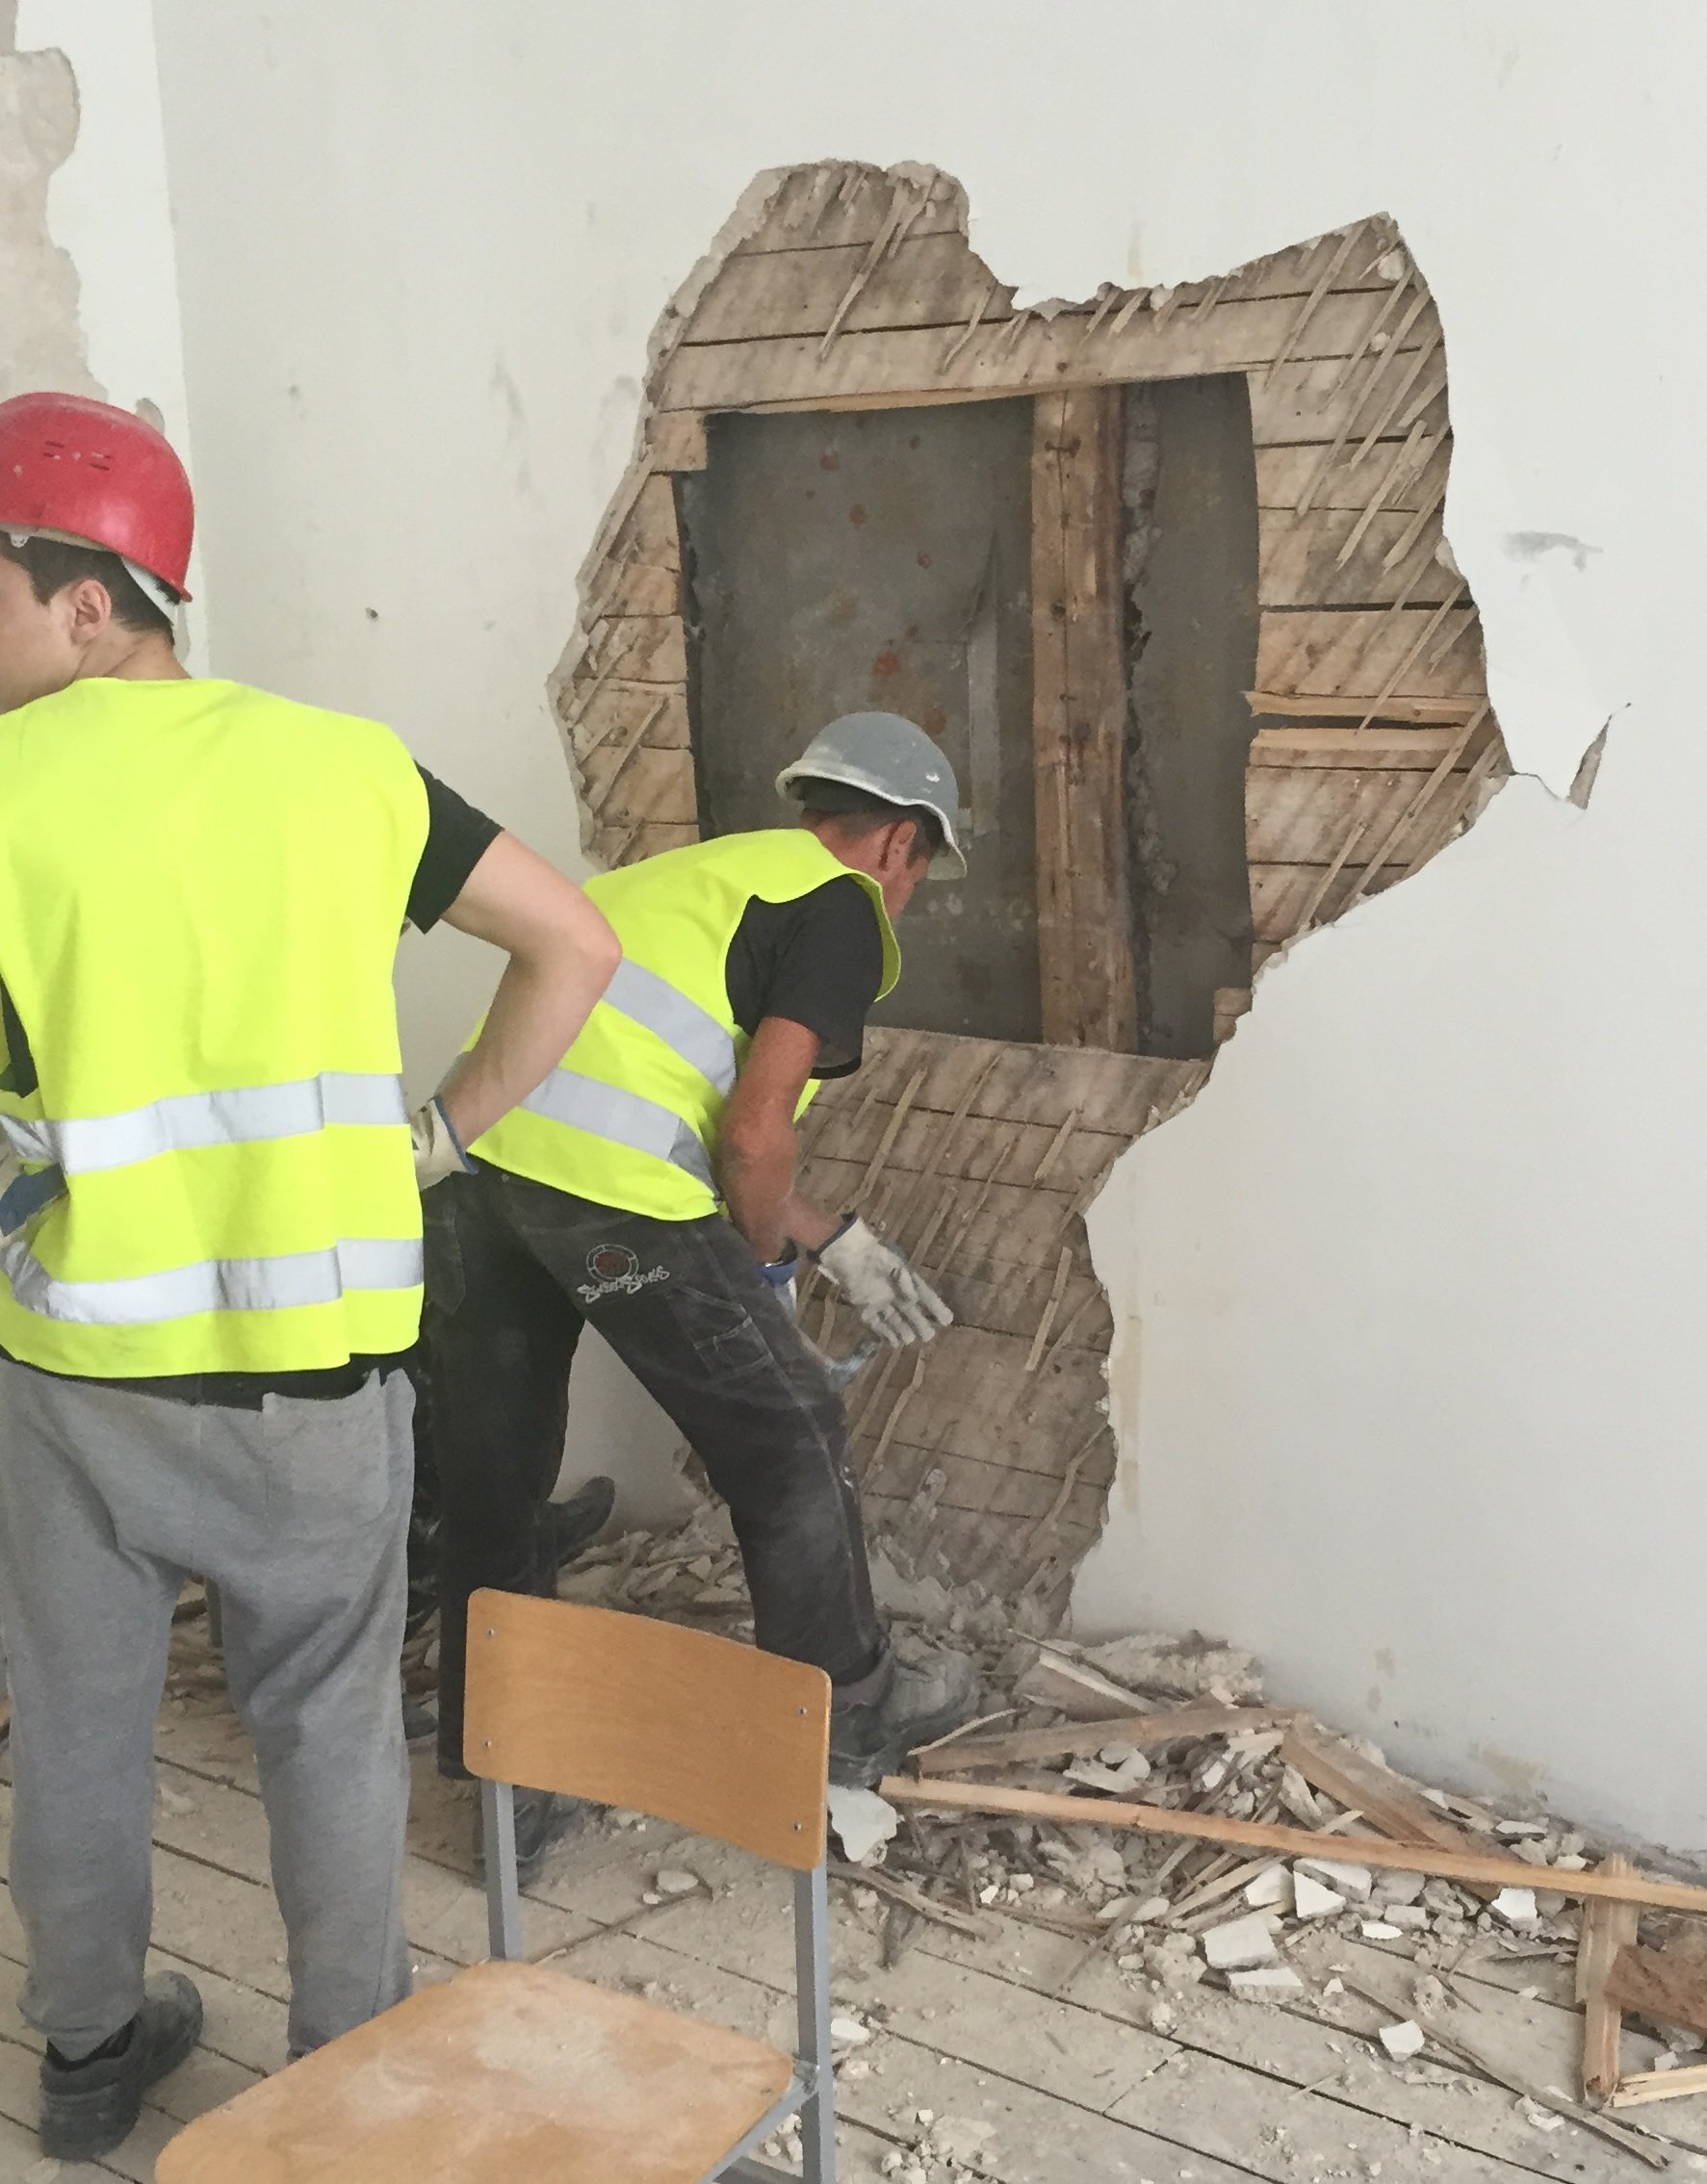
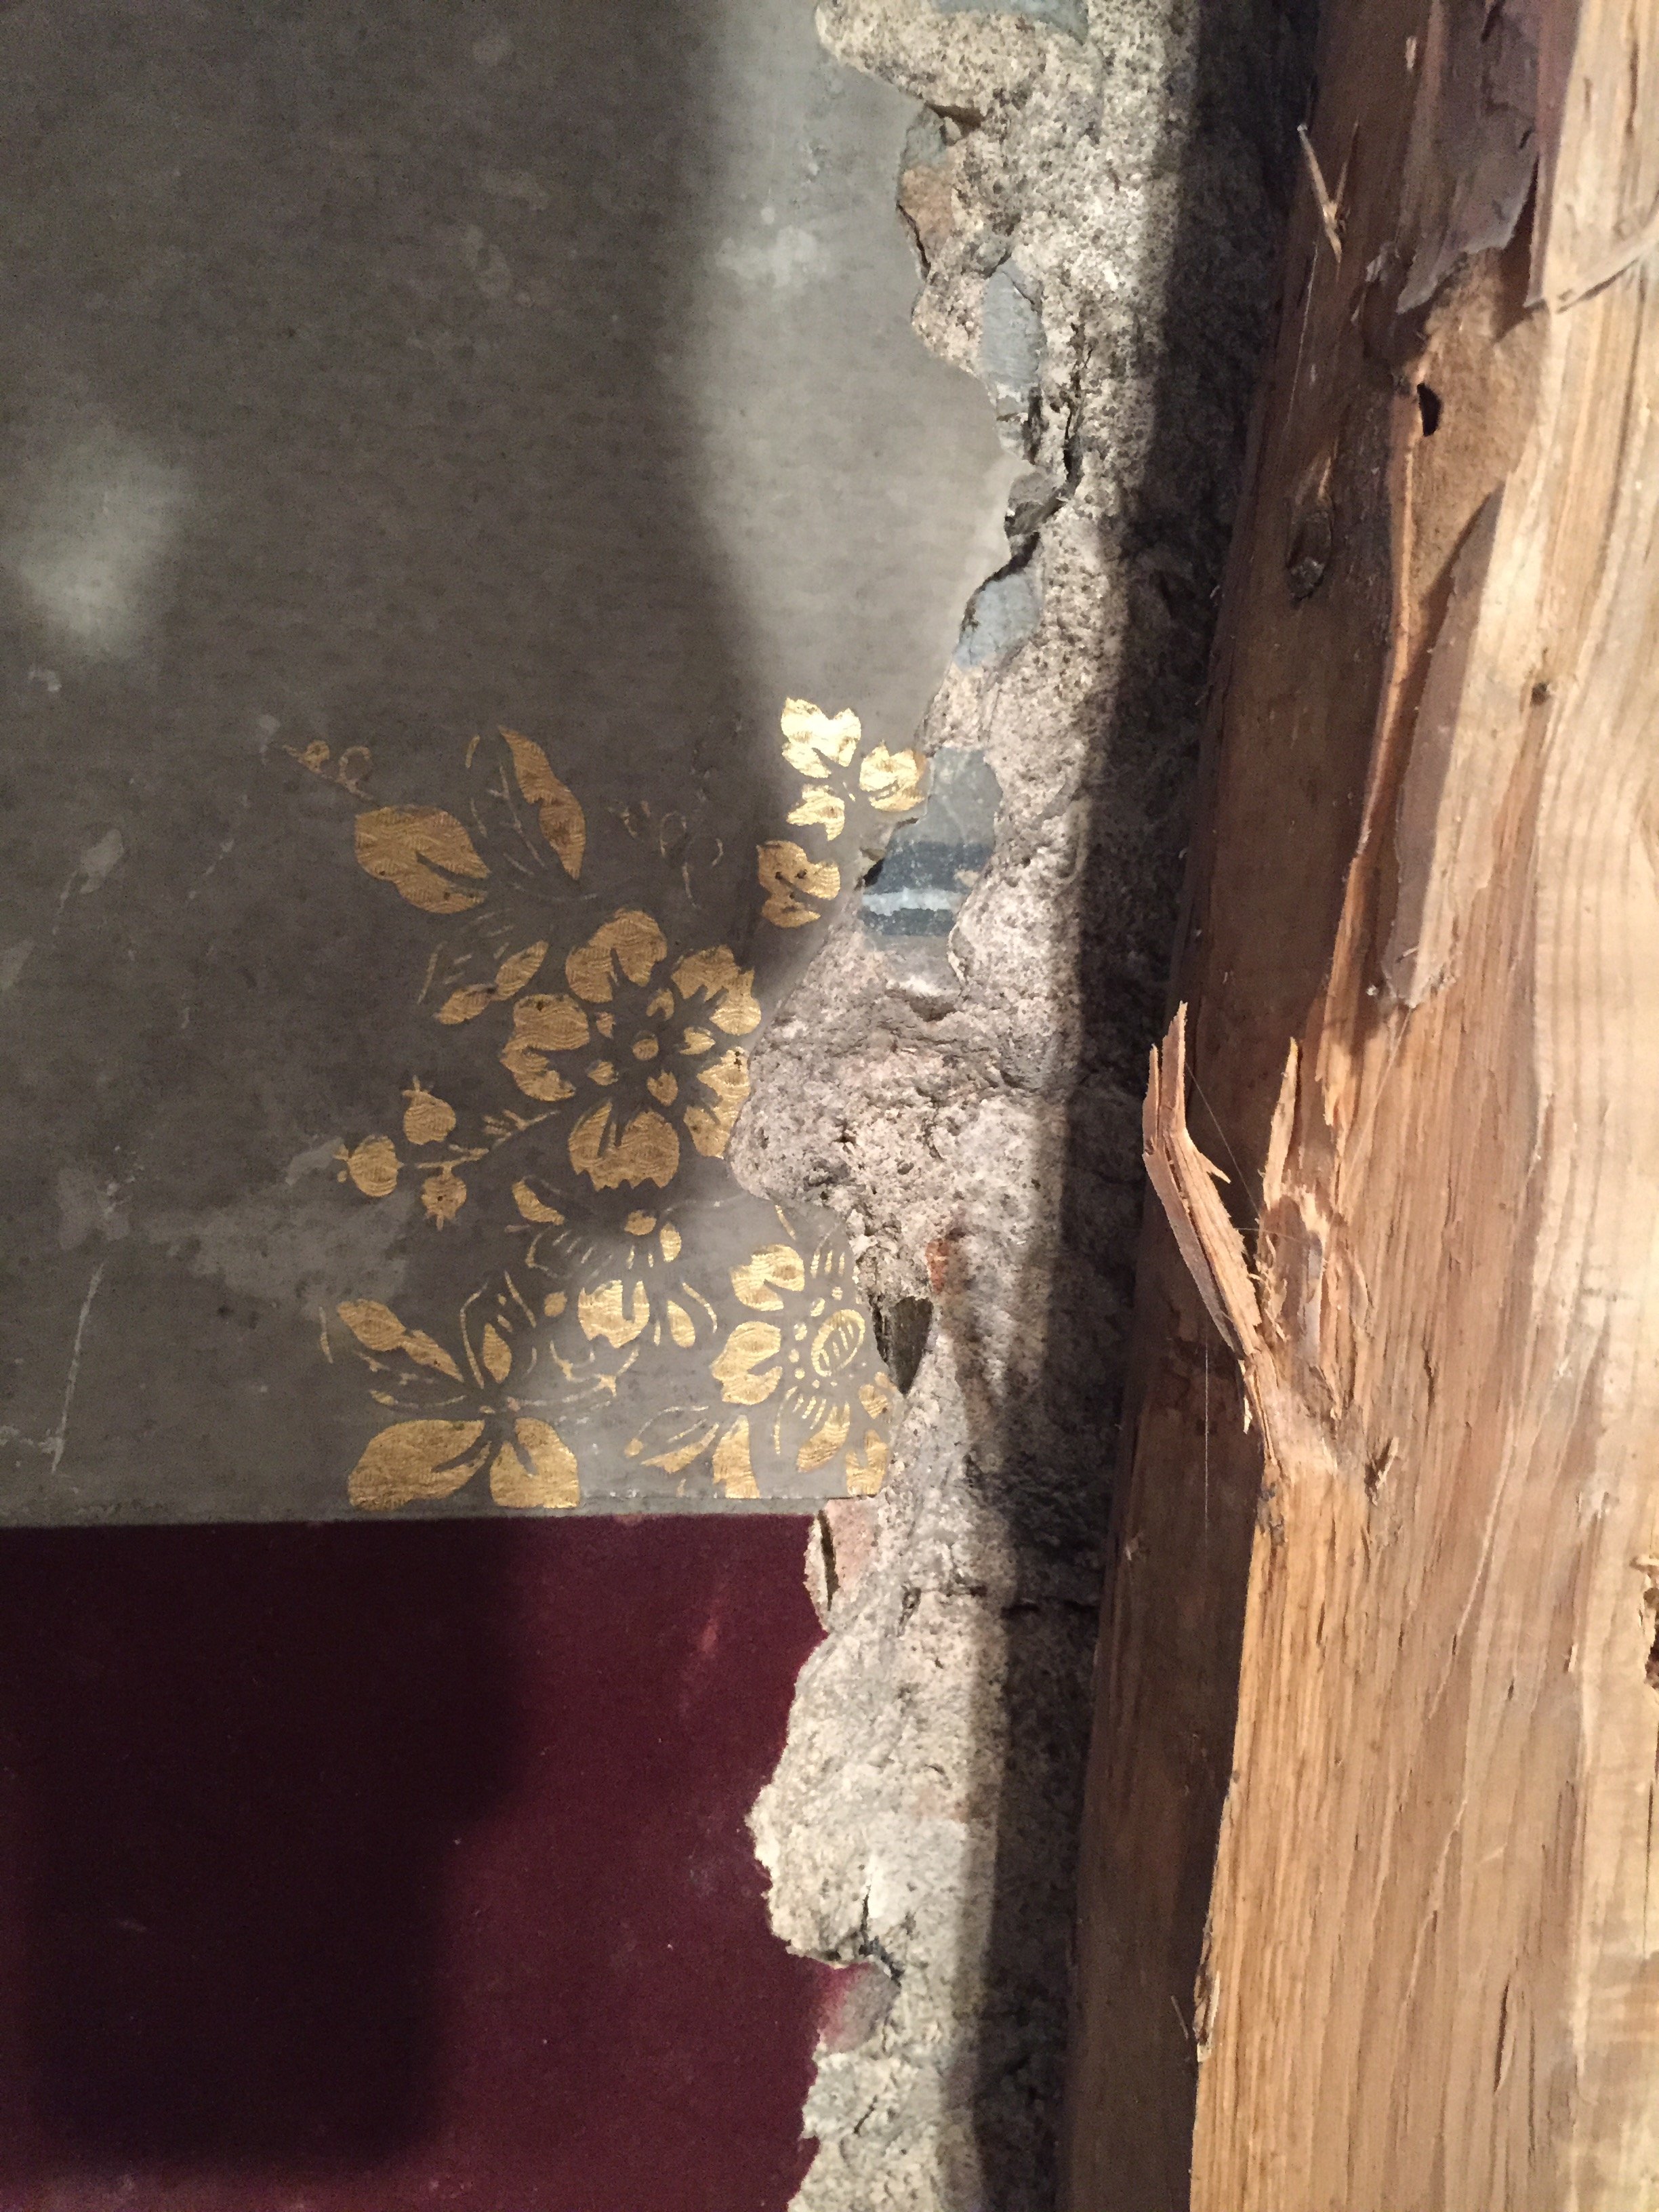
During the insulation work (while building a skeleton for the inner wall) the wallpapered stone wall had been vandalised by breaking several floor-to-ceiling cavities ca 15 cm wide into it for inserting wooden beams. These cavities caused the wallpaper to be totally destroyed and thus lost. [fig.9], [fig.10]
Condition of the wall-scheme
The humidity damage was most extreme in the left and lower part of the wall. Three wallpaper tiles on the left had especially strong damages of soiling and were destroyed. On the areas of the construction-beams the losses of wallpaper were 15 to 25 cm wide, with uneven and torn edges. All in all, there were only two grey wallpaper-tiles that had retained their original width.
Condition of the wallpapers
The condition of the grey wallpaper differs in the areas of the wall. Severe damages of moisture and mold, as well as the degradation of paper and missing parts occur mainly on the tiles that were located at the edges of the wall. In the center, where the tiles had preserved better, they were also much stronger attached to the wall.
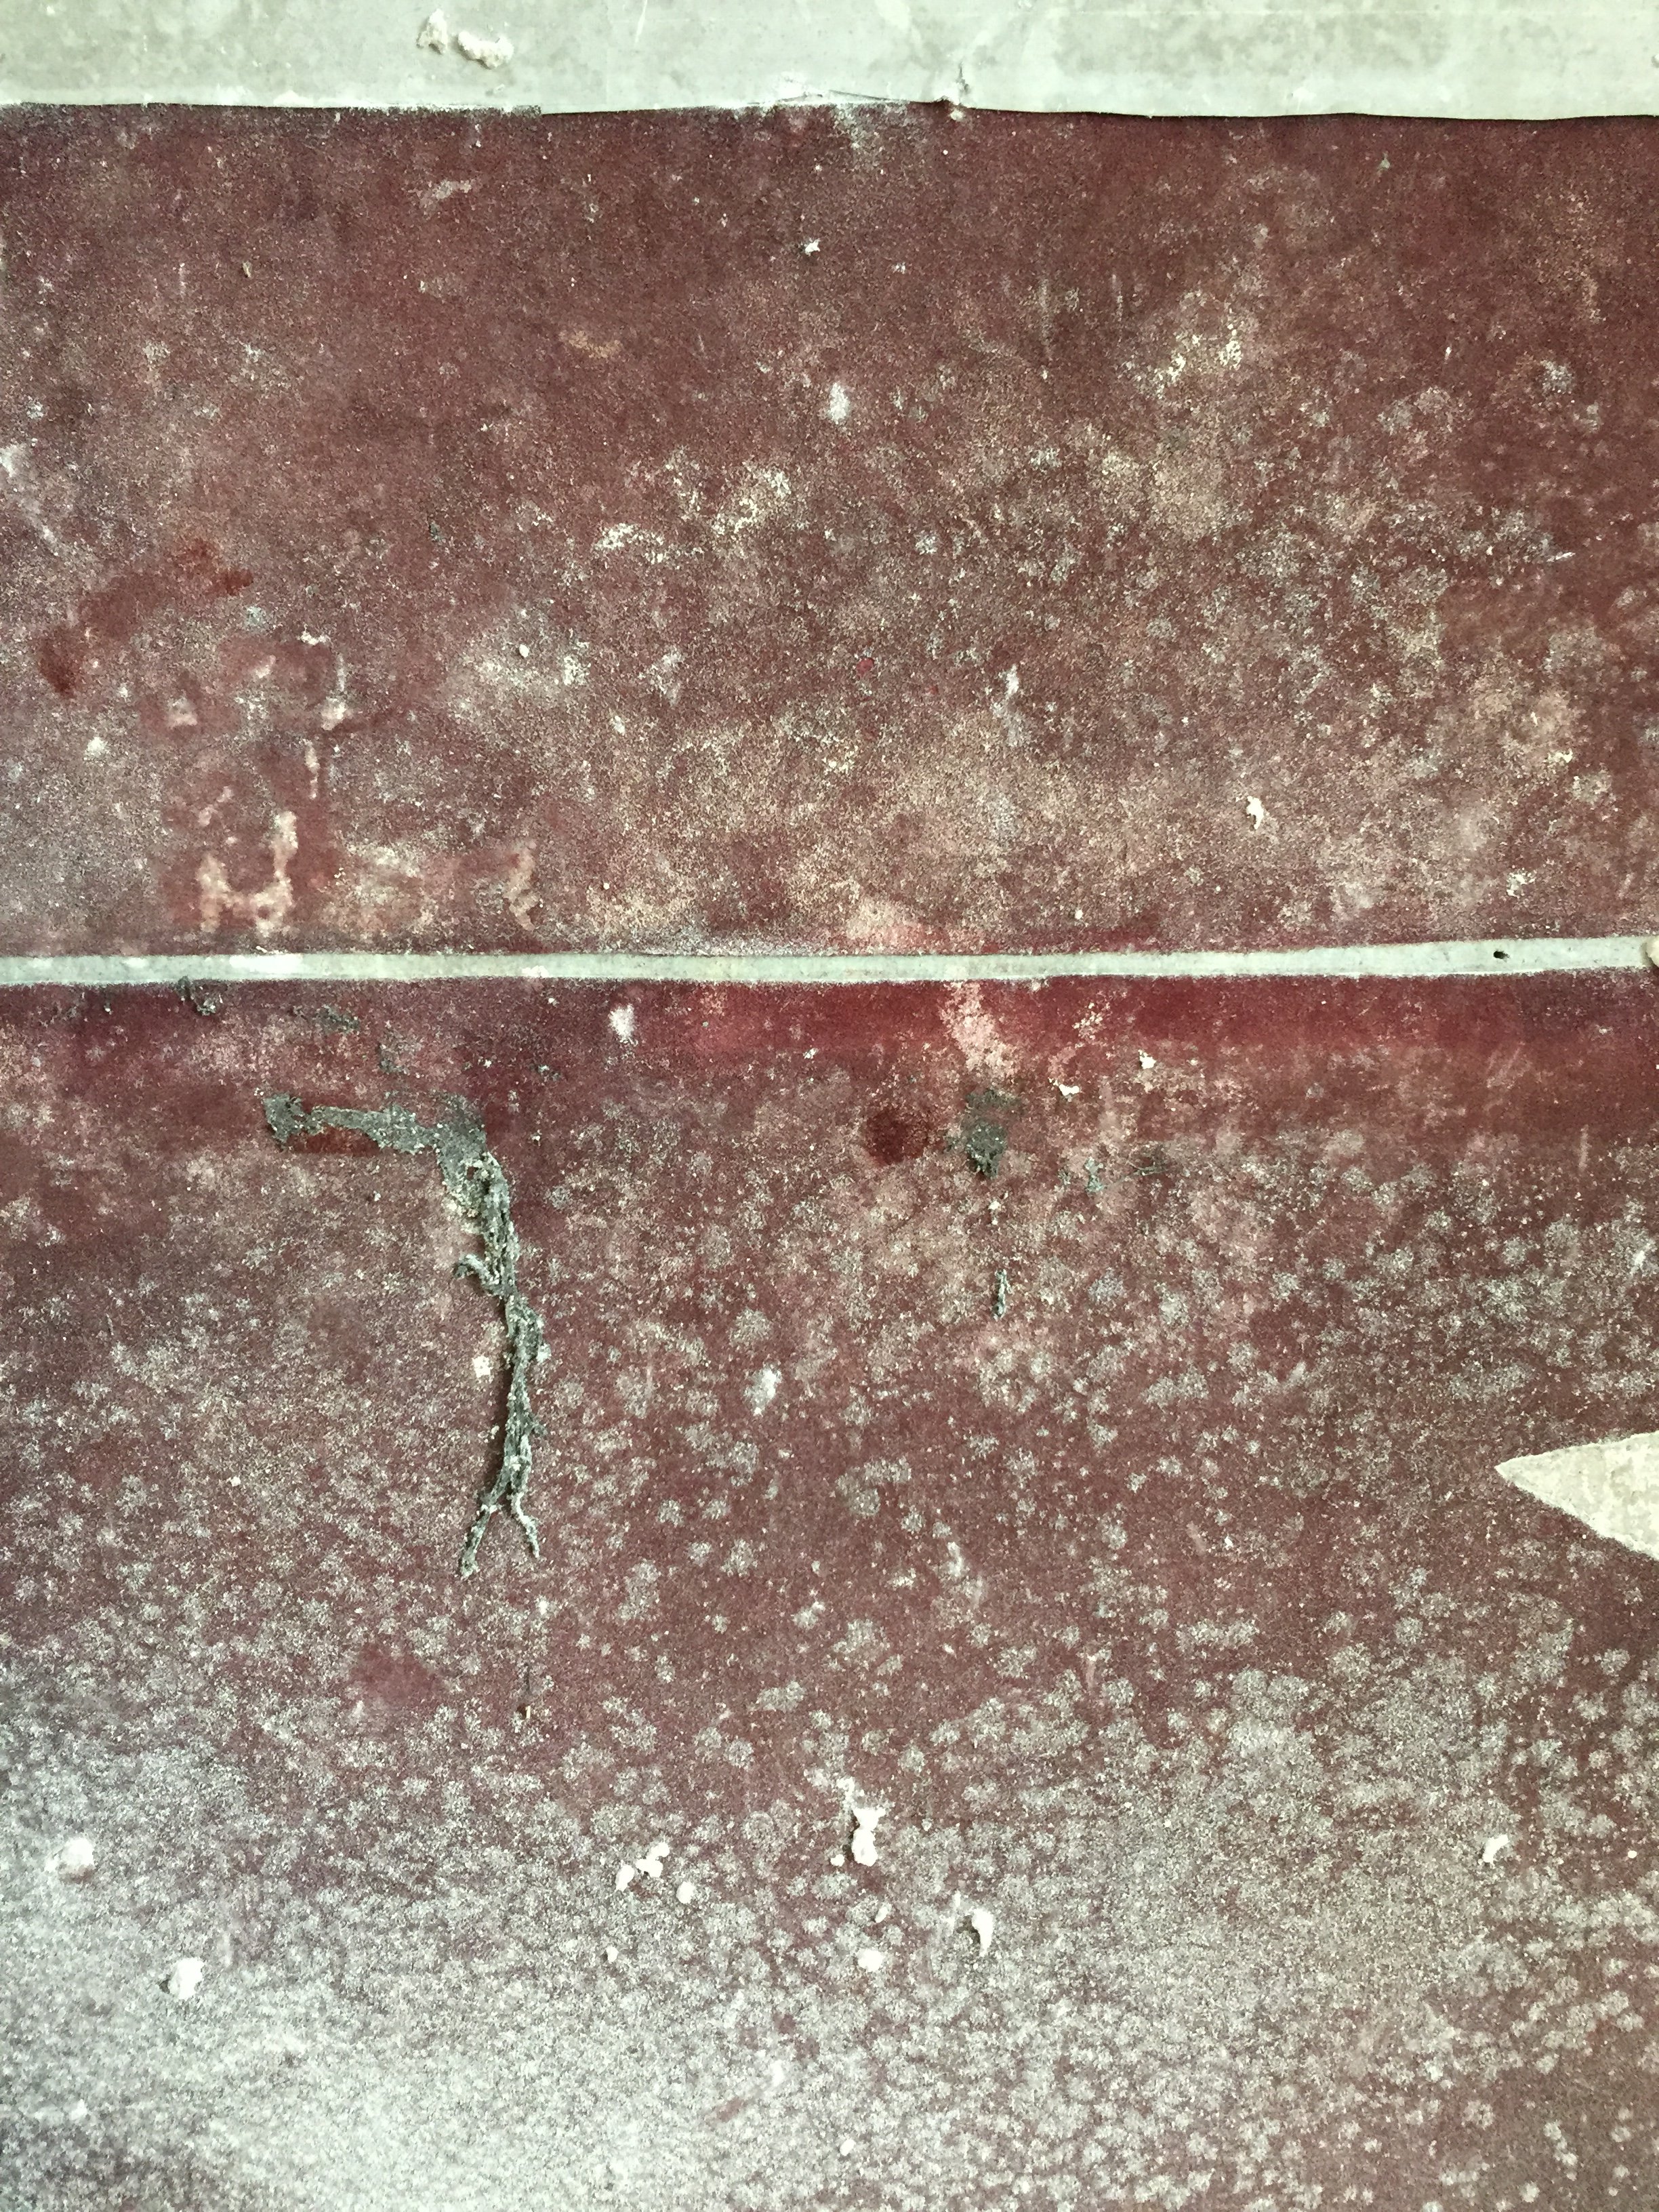
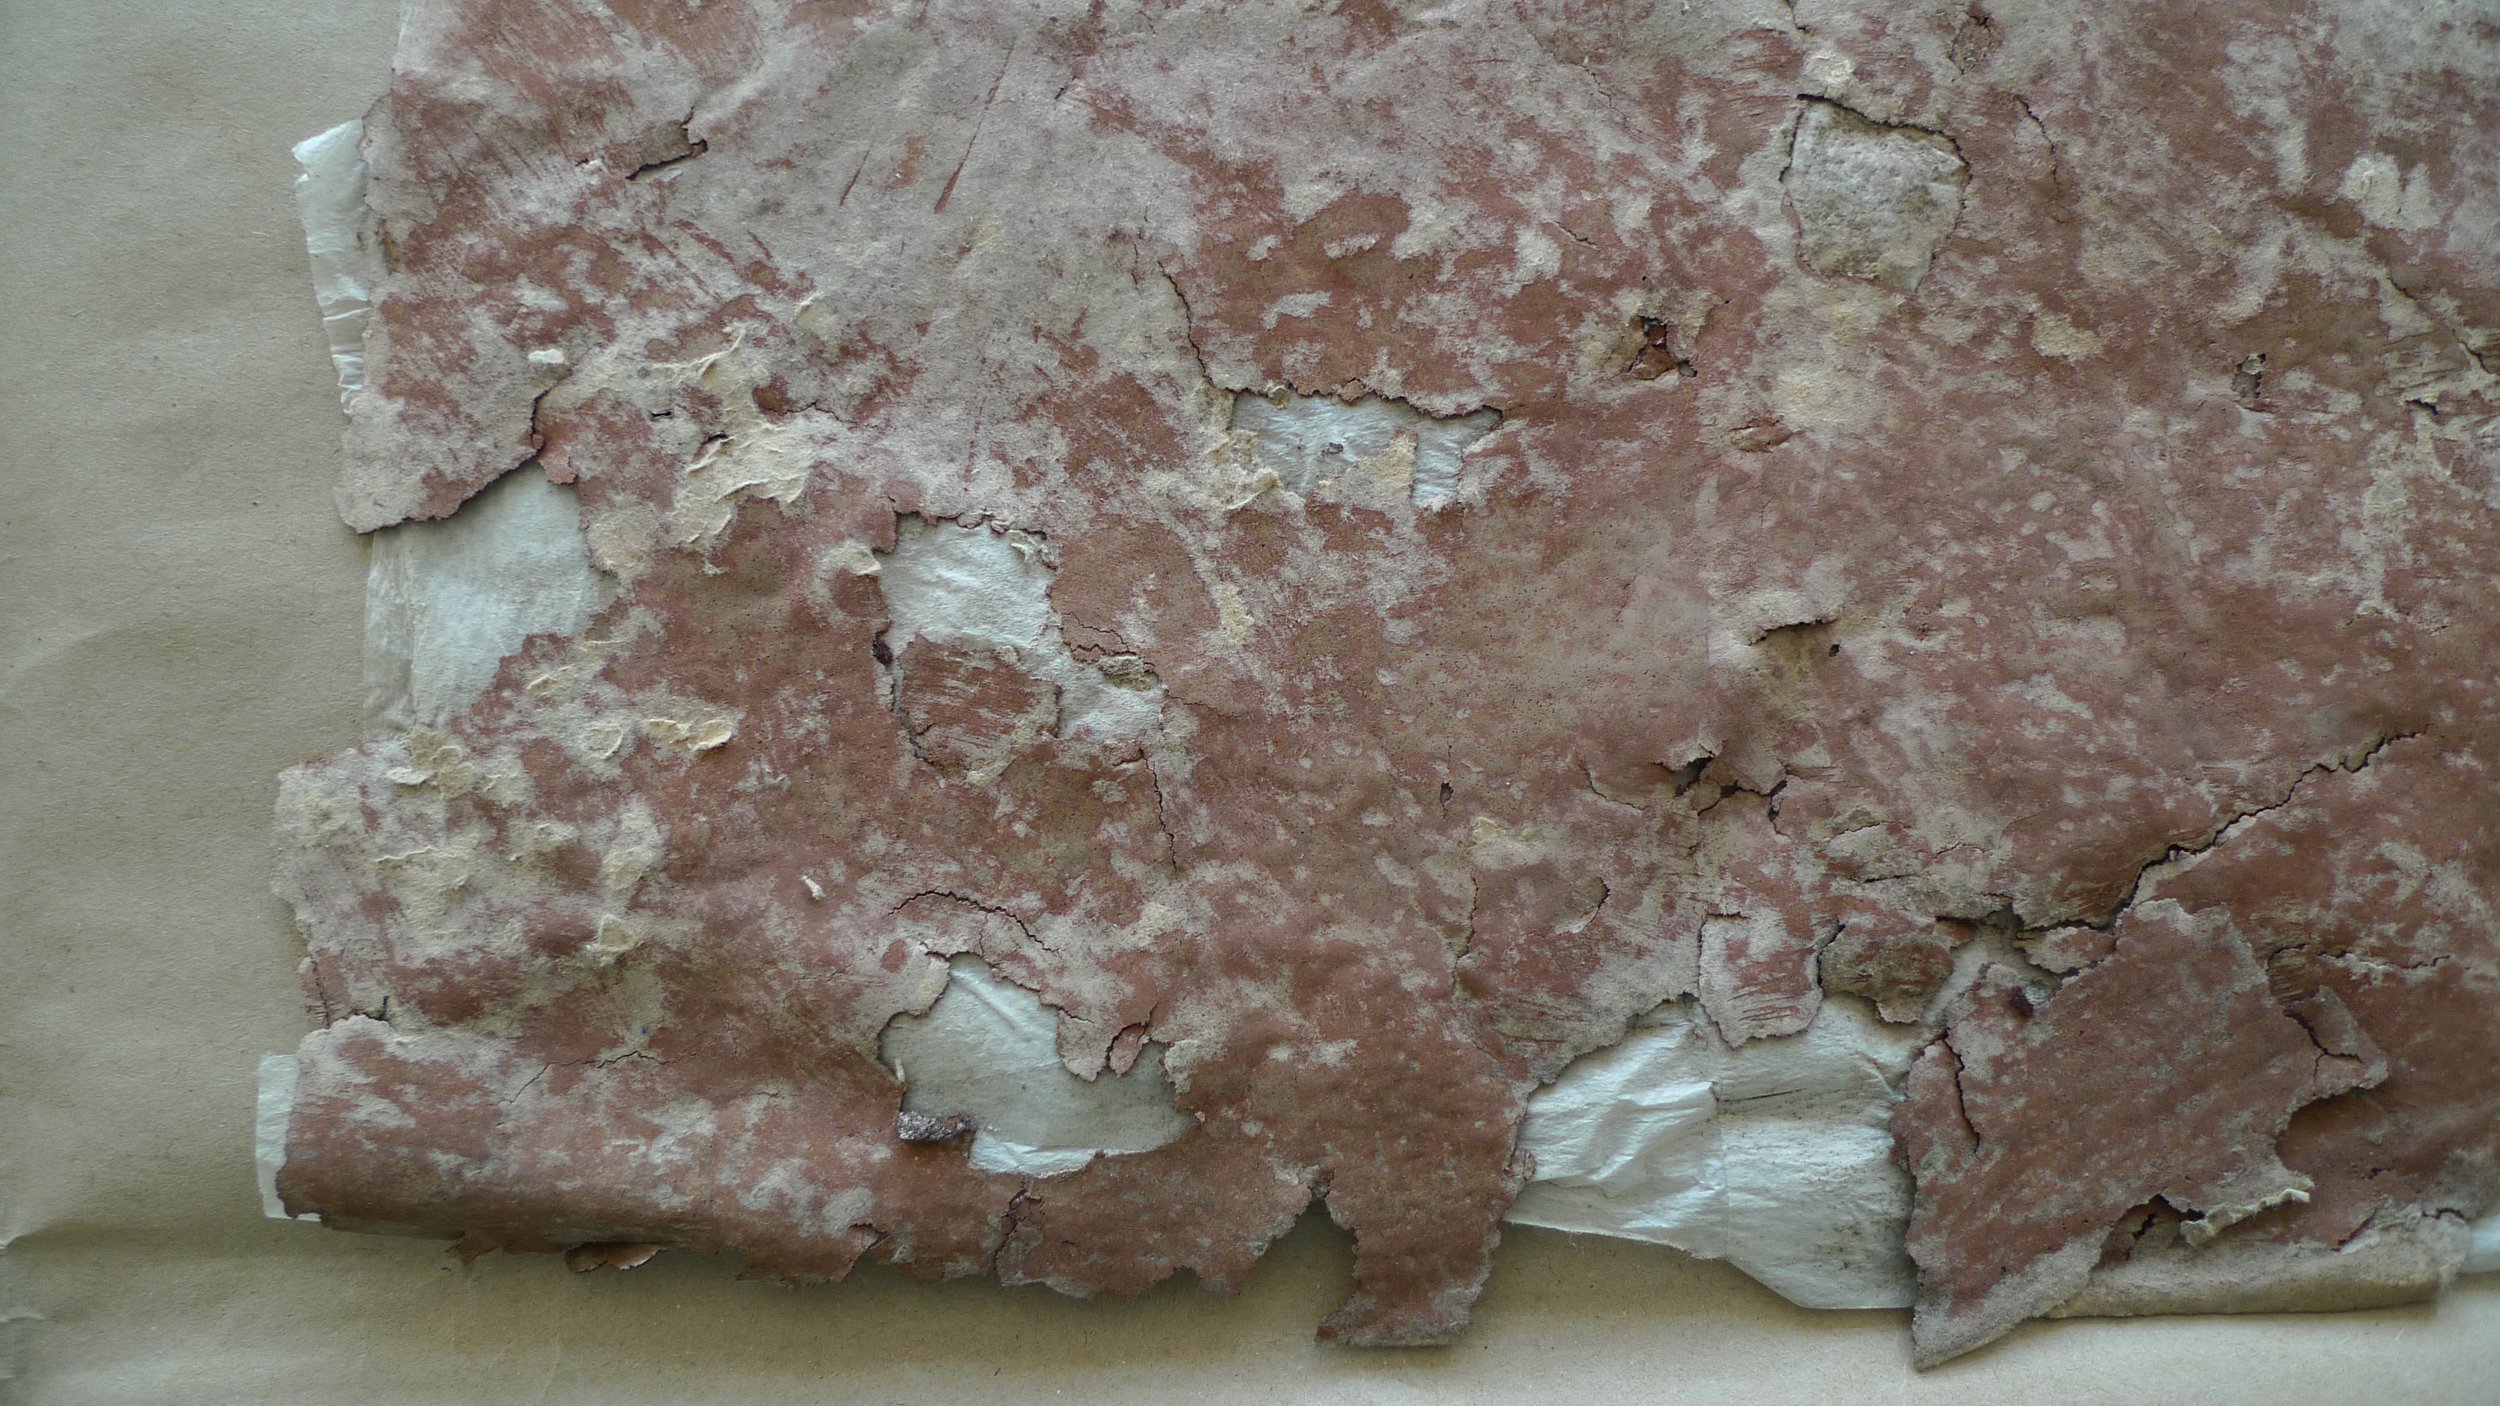
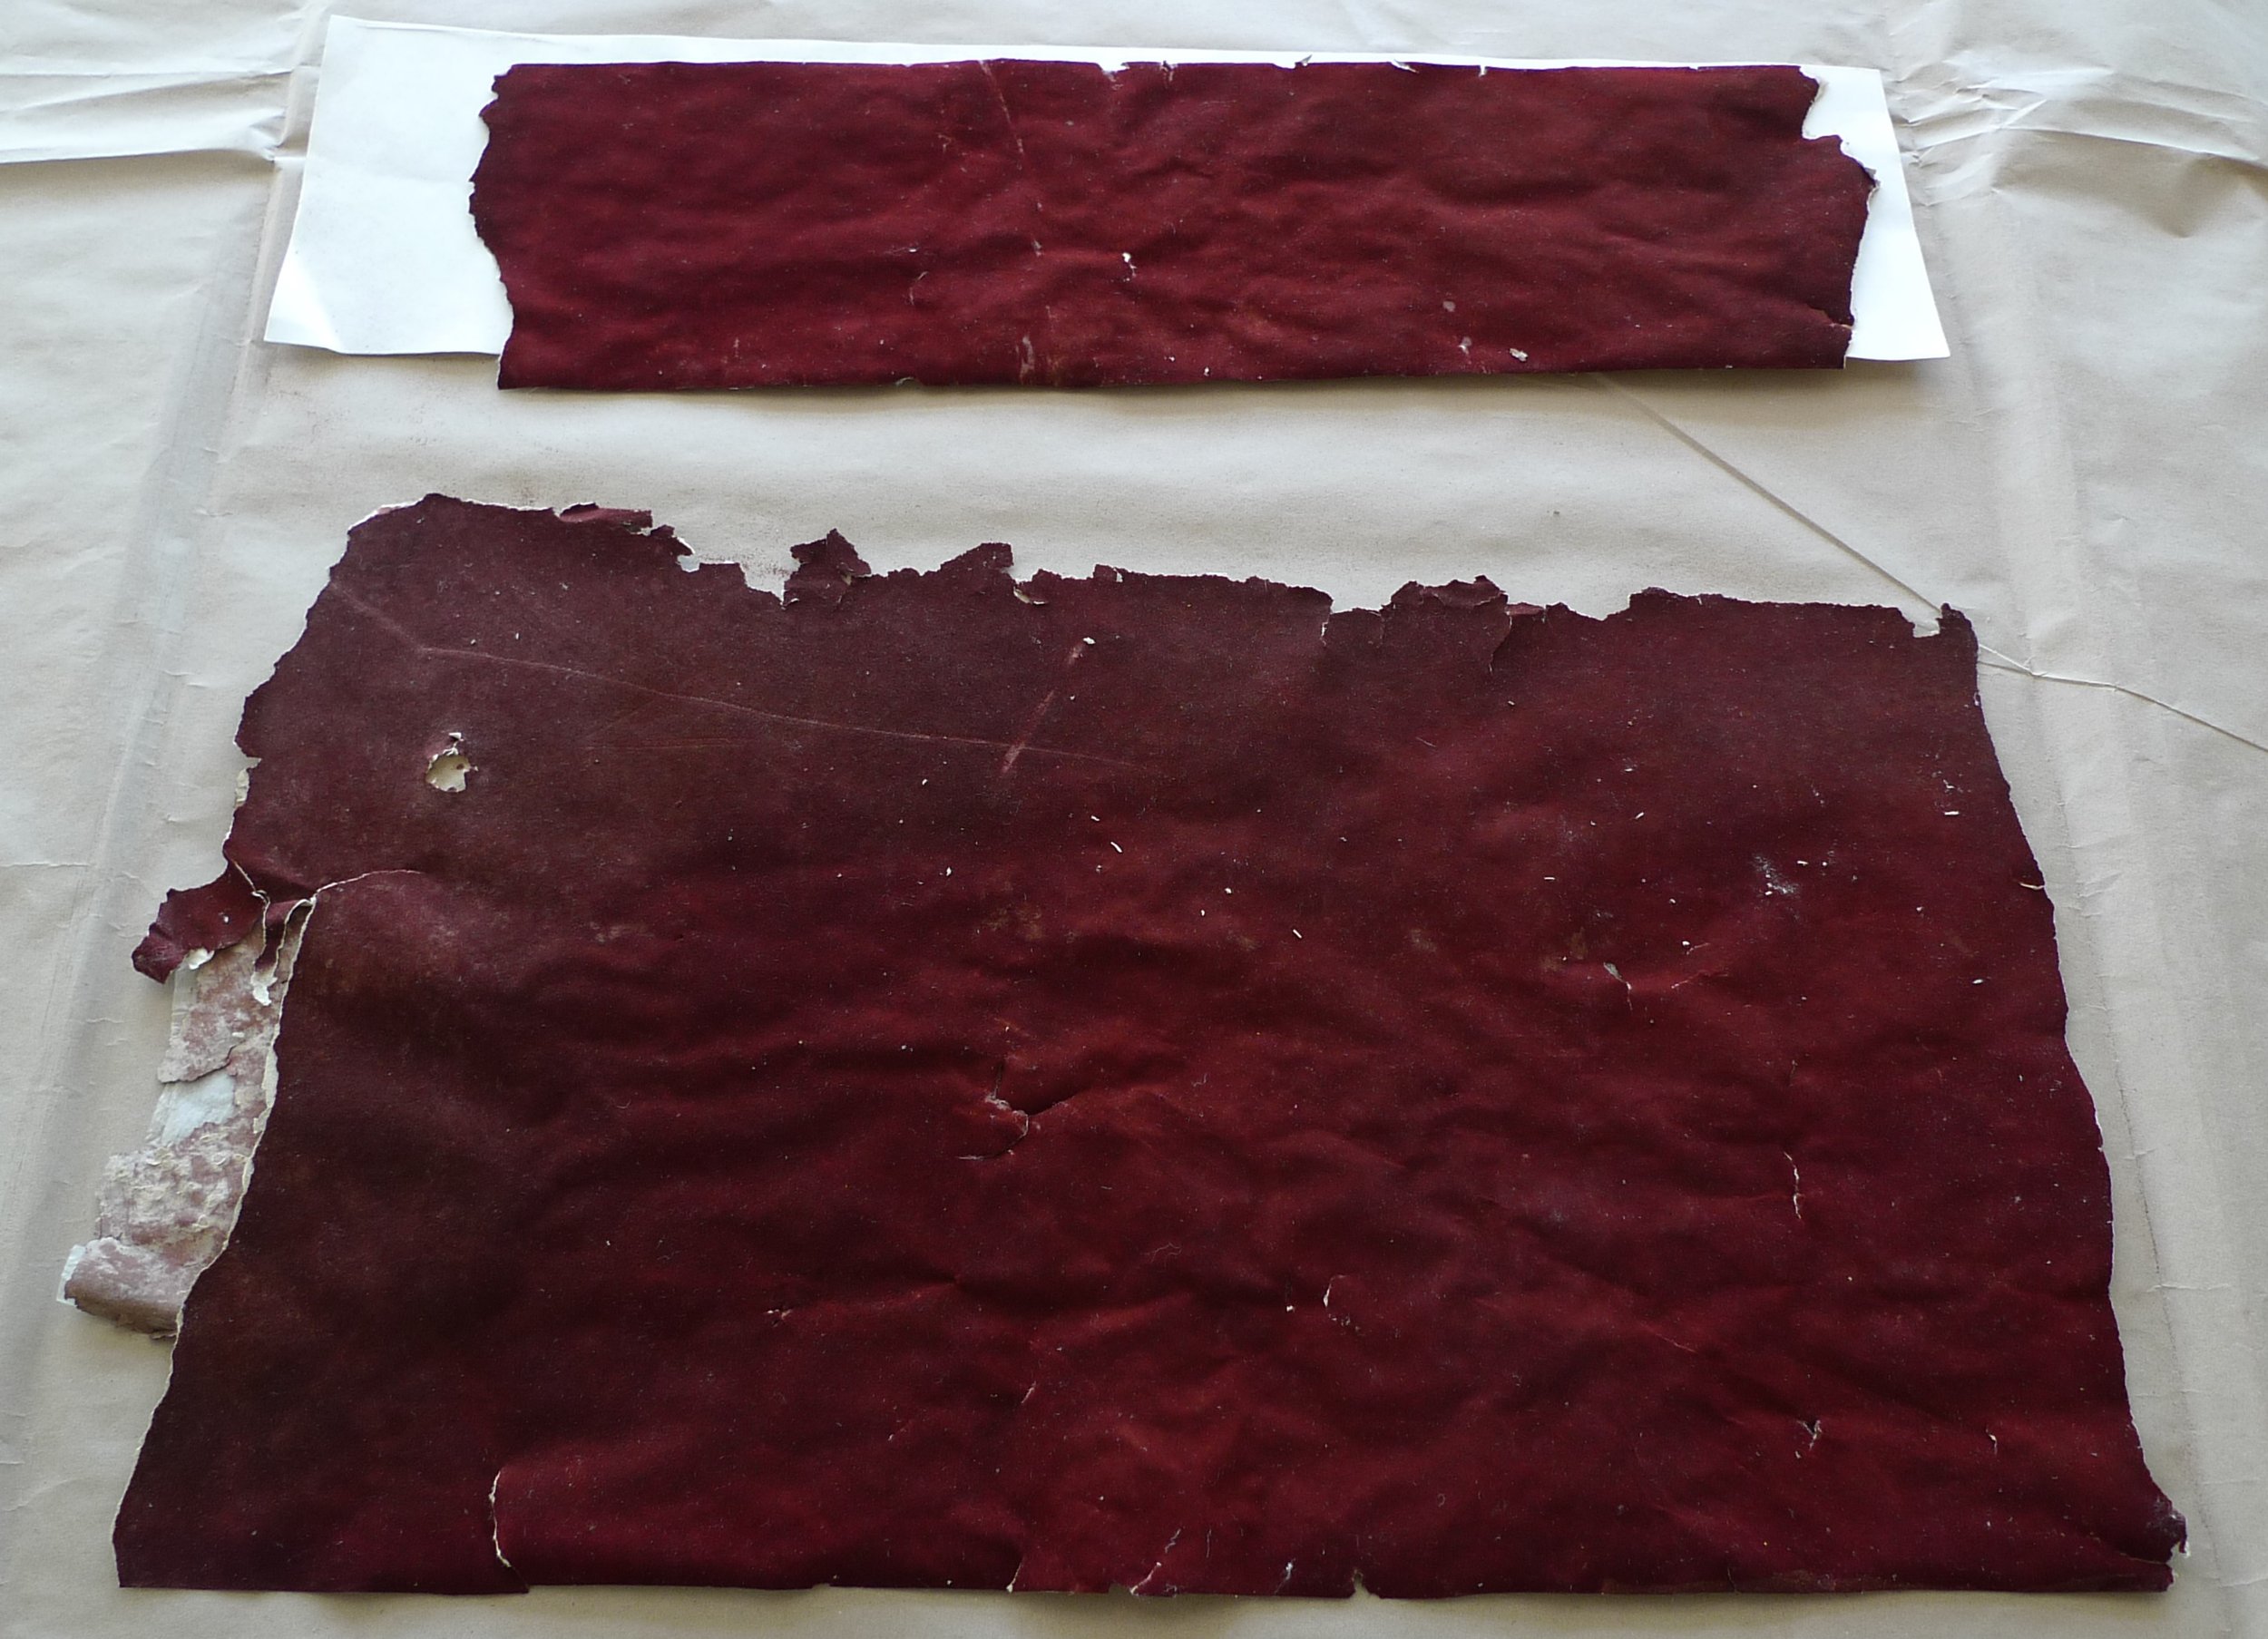
The flocked paper of the braiding had preserved quite well, mainly in the corners of the room there were missing parts due to the wall construction and in the areas of moisture damage the layers of flocking were detached. The lambree had more moisture damages on its lower area ca 20 cm from the floor and due to moisture and mold the paper had ceased to exist and become a soil-like moist dark substance. [fig.11], [fig.12], [fig.13]
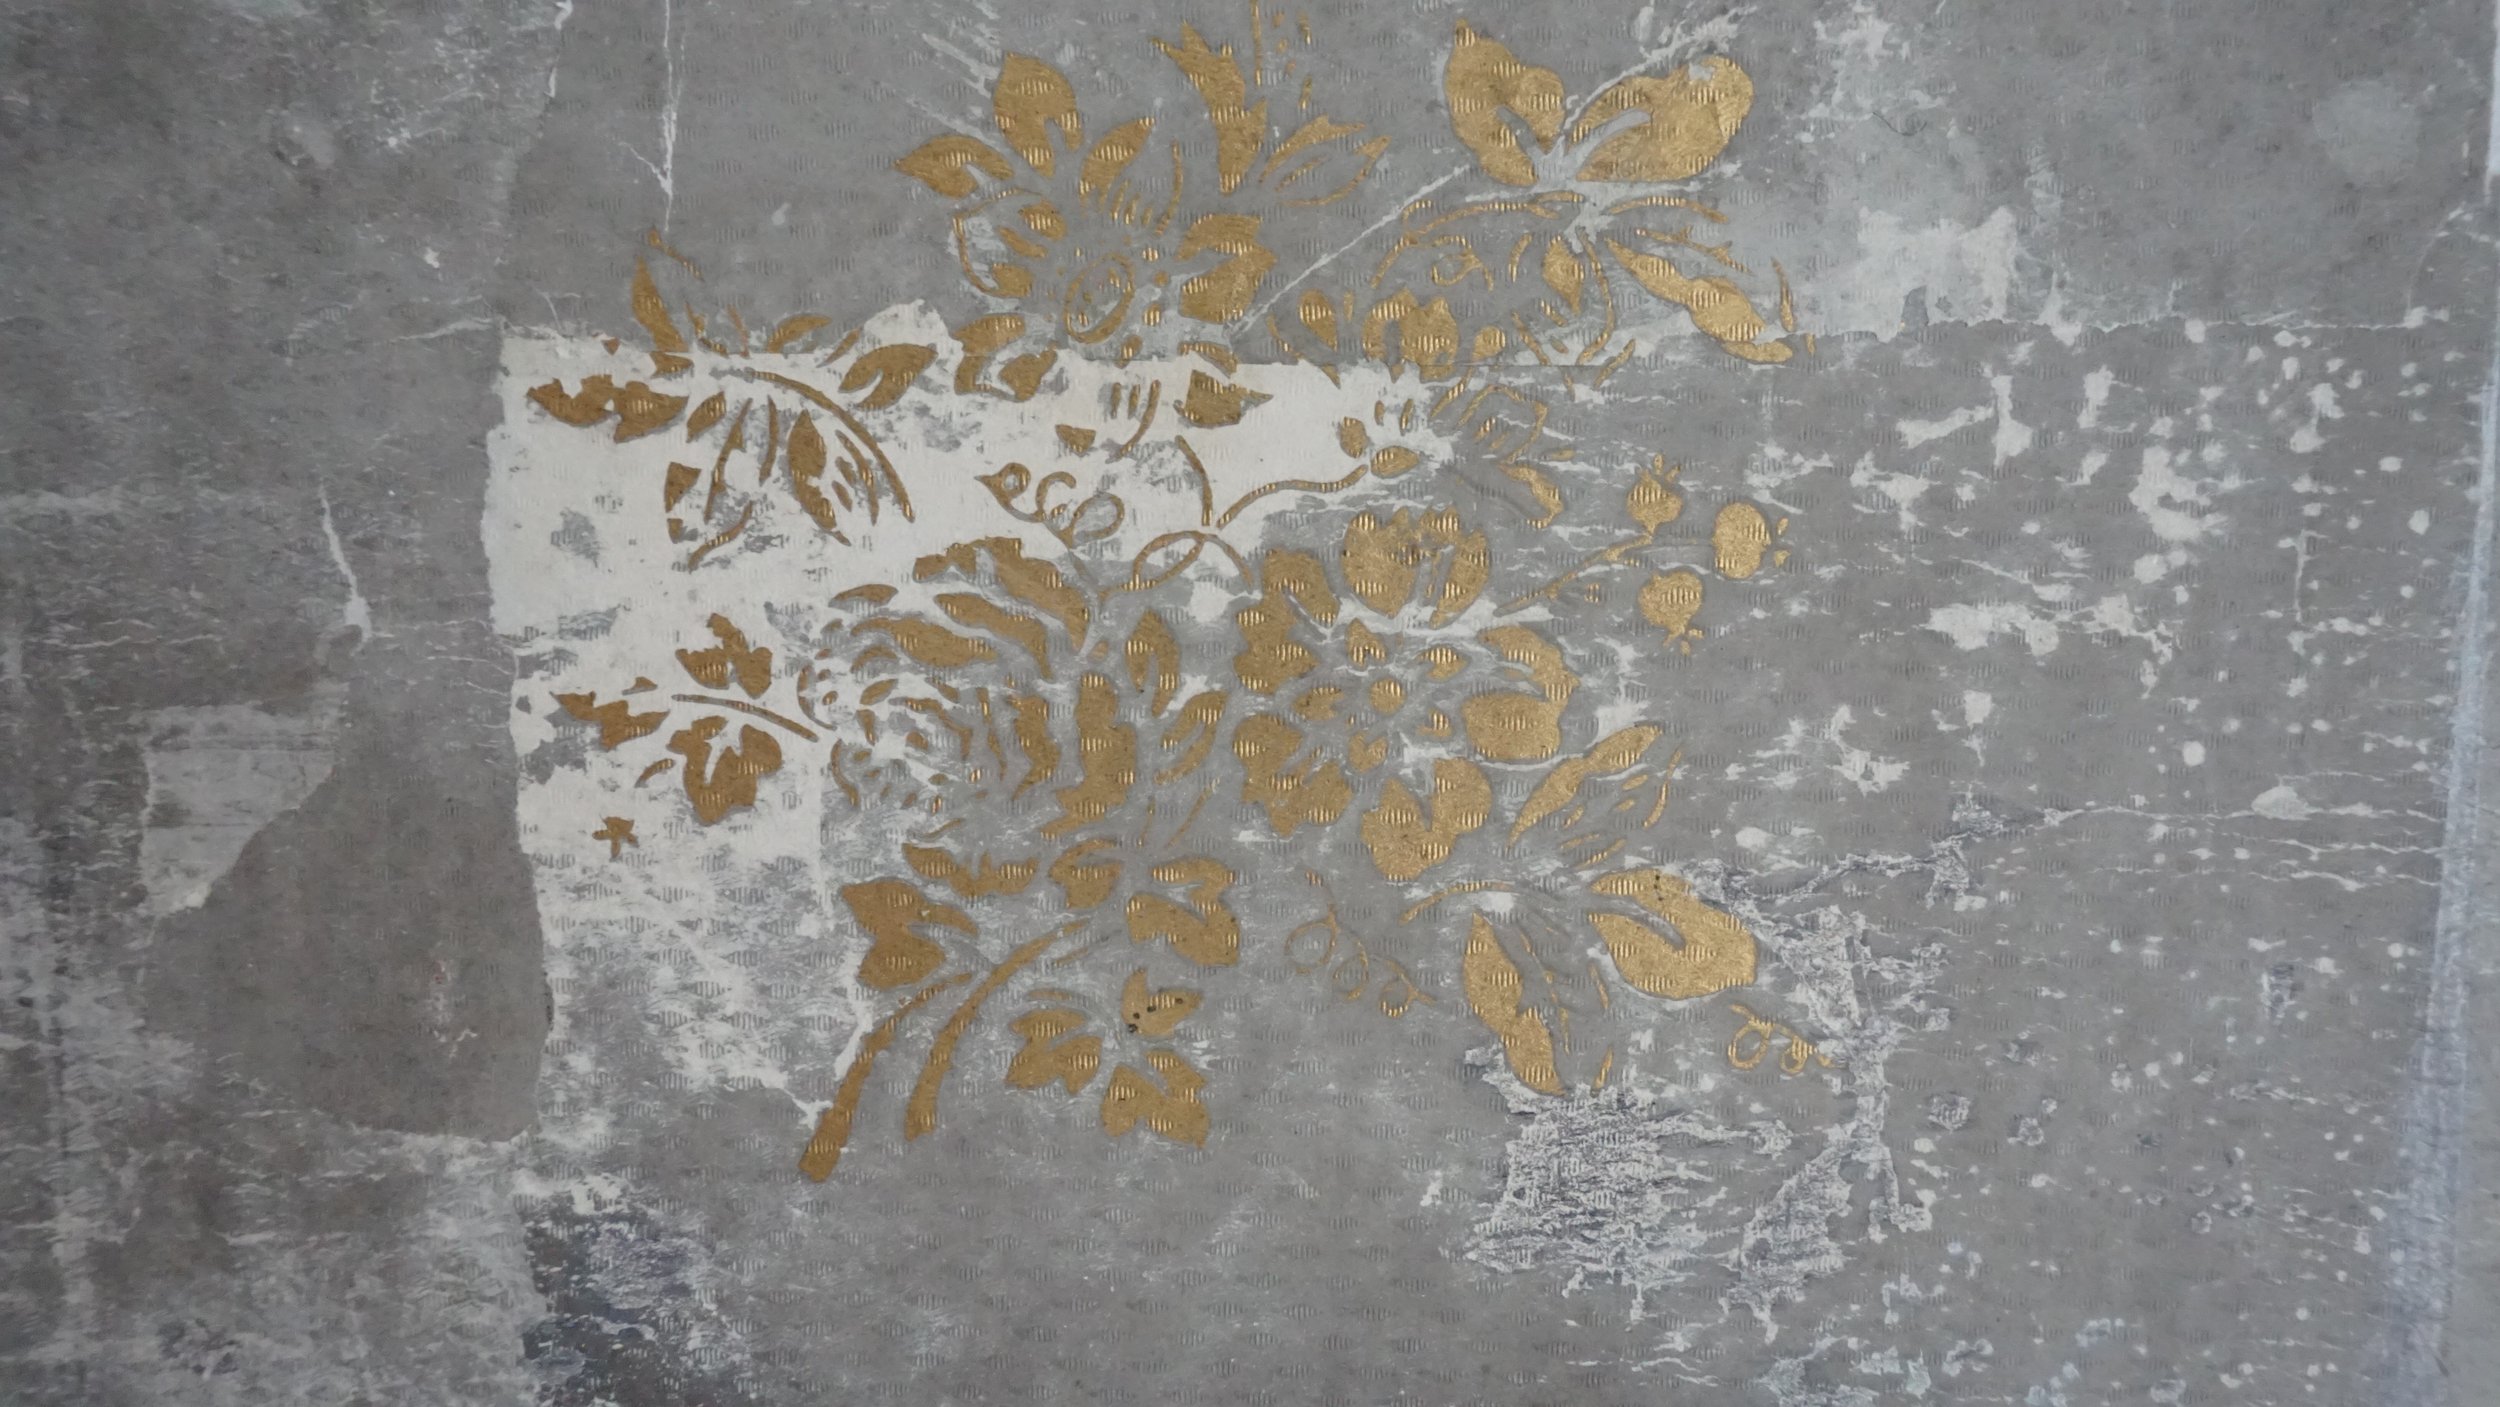
On the paint layer of the grey wallpaper there were several different discolorations: the surface dirt caused by the living activities of human inhabitants, stove soot stains, light-faded areas, several discolorations of mold damage, water stains and fragments of the same wallpaper that had been added during later renovations and were in much better condition because of that. The paint layer is poorly attached to paper in the areas of moist damage and there are losses of paint.
The gold print was shiny and in quite good condition, but there were losses of the pattern and the gold layer had a tendency of detaching from the grey paint layer and flaking off.
Due to severe damages and poor condition the wallpaper could not be restored in situ.
The conservation task
As the decision was made to exhibit the wall-scheme on its initial location, the damaged wallpaper fragments had to be removed from the wall and conserved in the lab of Kanut. After that the tiles and scheme of the wall could be restored. As there were a lot of missing parts, they had to be filled in. The best solution would have been to prepare reconstructions of the historical wallpapers using traditional materials and methods. Sadly the amount of this task did not meet the resources of the owner and as a compromise the decision was made to cover the missing areas with contemporary marking material. [fig.14] As contemporary material is not suitable for filling in the losses inside historical material it was decided that the preserved fragments will be combined and mounted together to form complete wallpaper-tiles of their original size and pattern. The restored wallpaper will be mounted on the wall and the remaining area (ca 2/5 of the wall) for which there was no preserved original wallpaper, would be covered with marking material of contemporary origin.
Conservation
The work was carried out in several stages:
1. Kiriku 2: tests, initial cleaning and dismounting
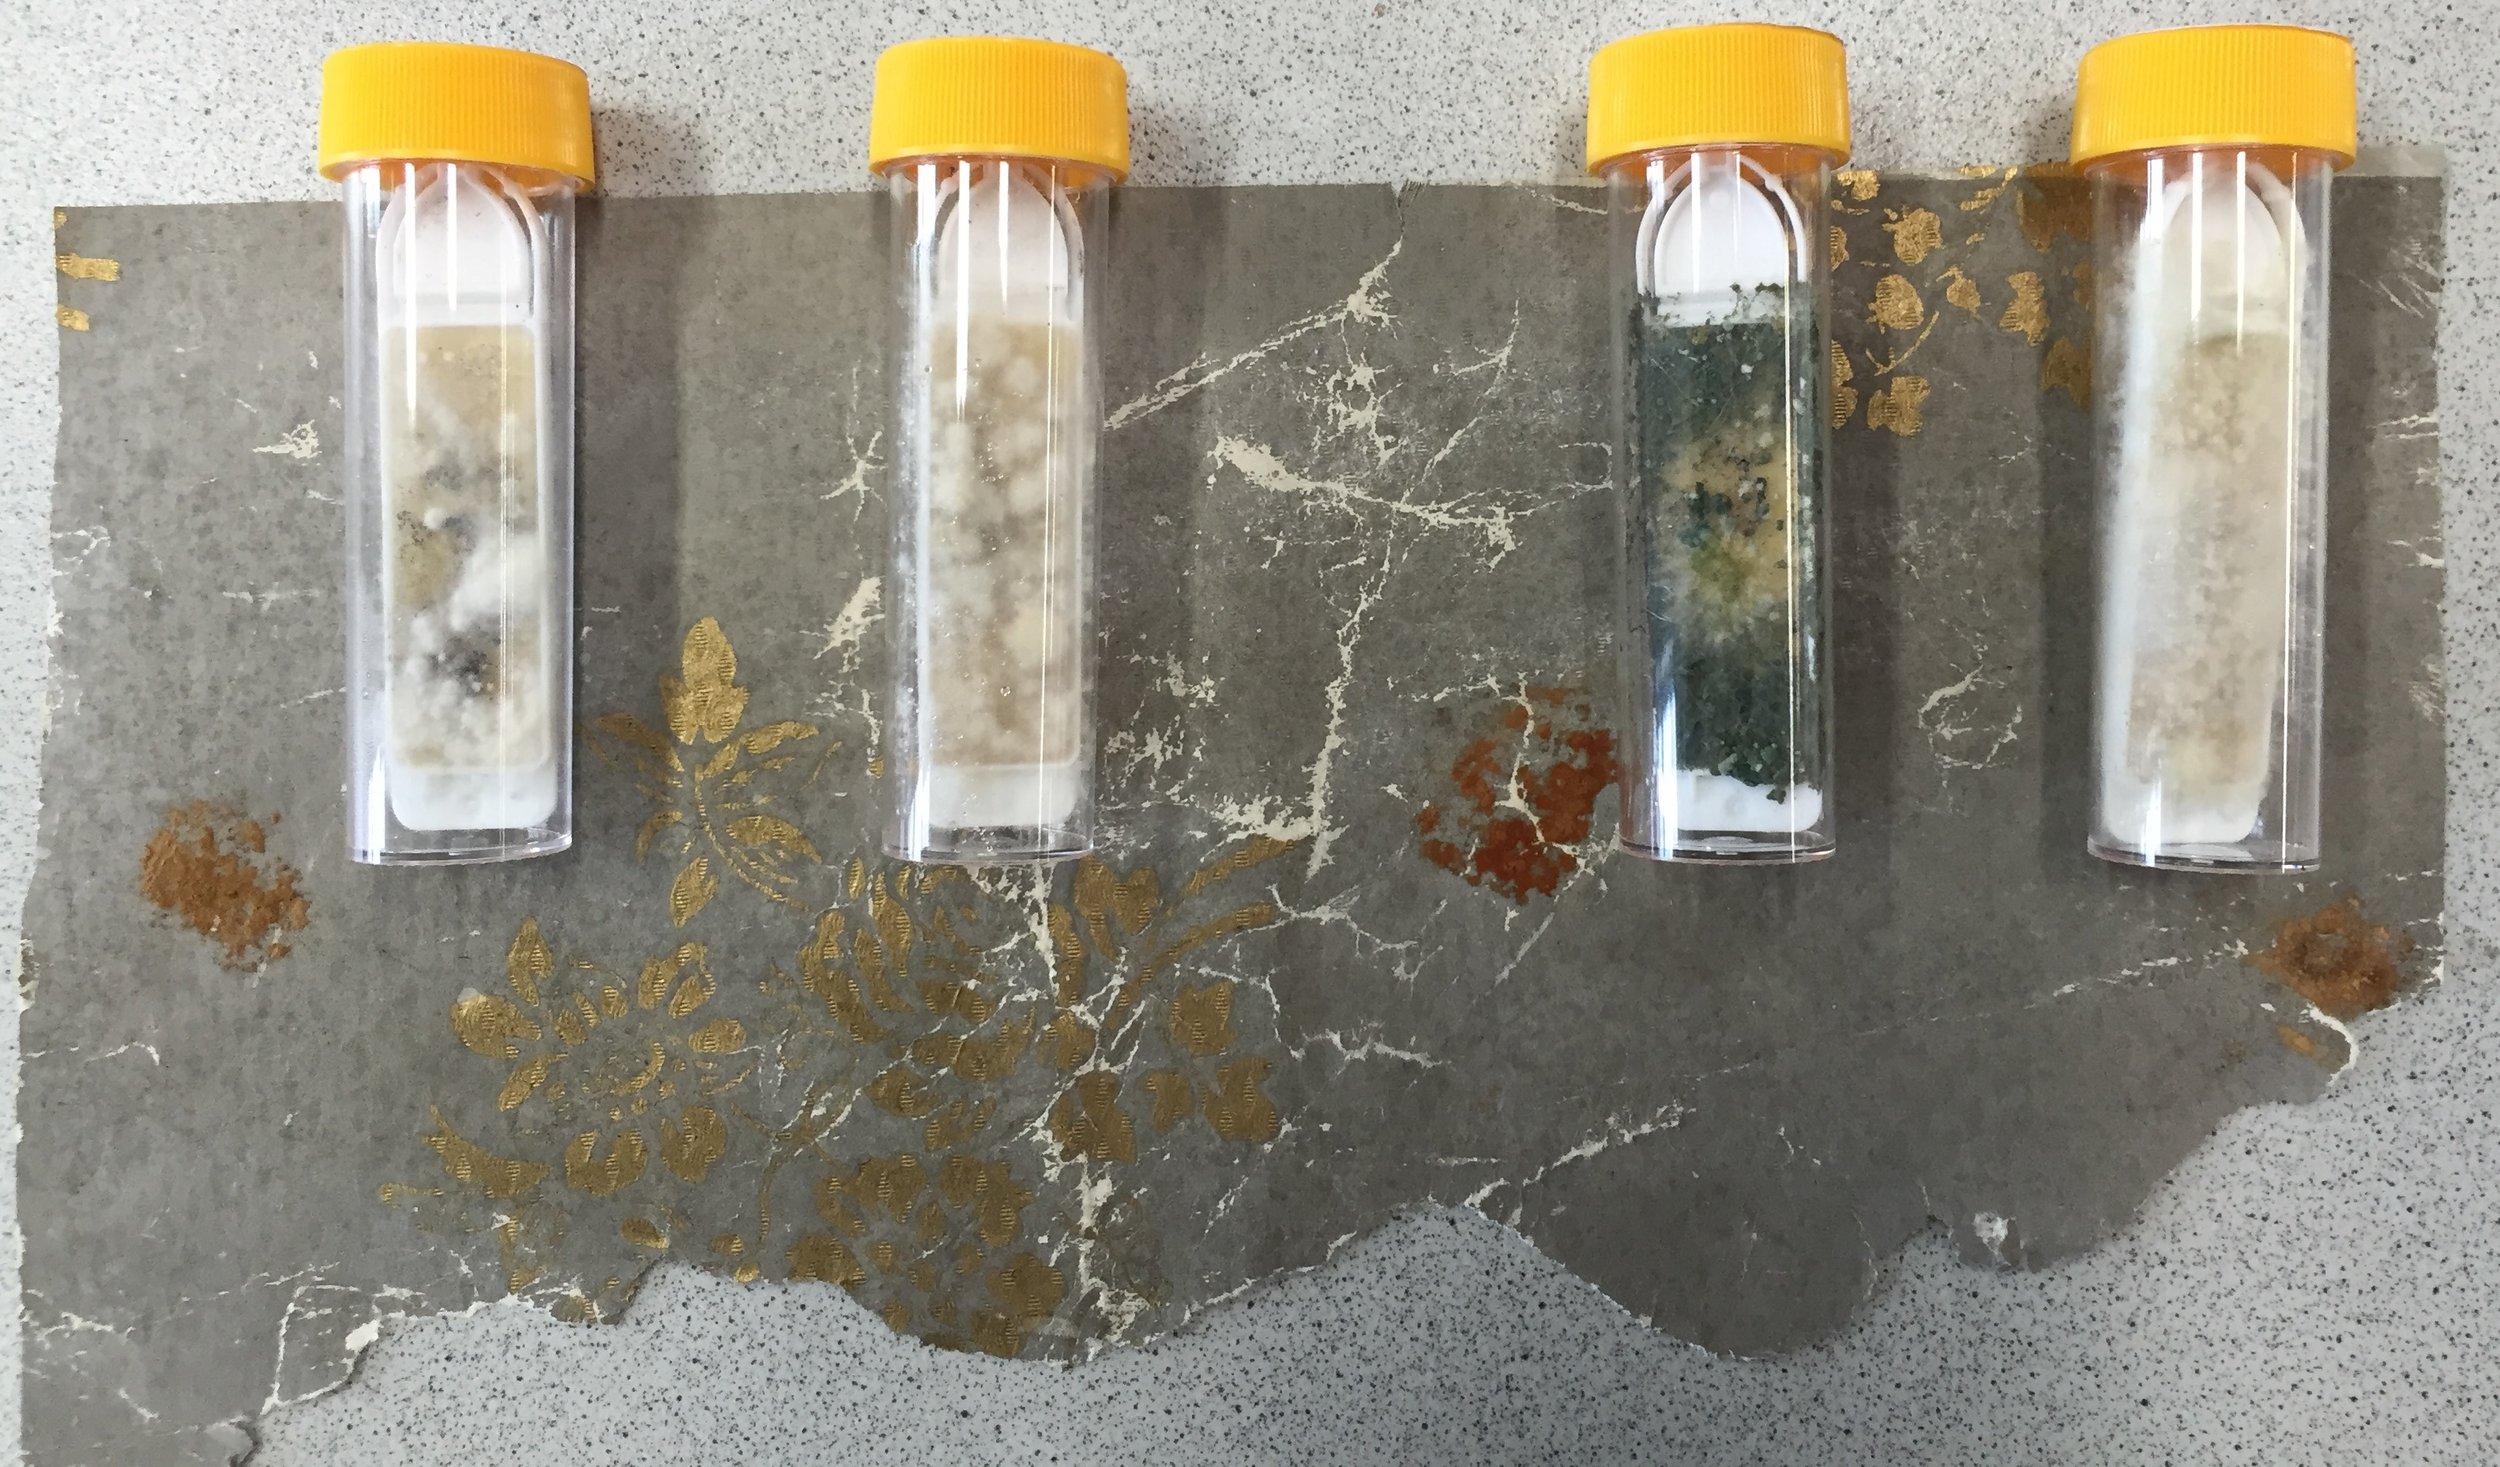
Initial tests for mould (Hygicult Y&F) [fig.15] and for the water/solvent sustainability of the pigments as well as the surface cleaning of the whole scheme were carried out in situ.
The pigments were tested for their sensitivity to any of the liquids planned to use (water, methylcellulose, ethanol and their solutions).
The grey paint was not water soluble, but sensitive to abrasive treatments. Both, the grey and golden paint layers were flaking in several areas and had to be affixed. In case of sensitive pigments affixing is needed prior to any wet treatment. Affixing water soluble pigments can be done with gelatine several times over a period of time (a traditional method), with contemporary cyclododecane but the methylcellulose glue that was next to be used to apply facing did work as an affixer of the pigment layer also.
As the result of the tests it was decided that the wallpapers need and can sustain wet treatment like washing, repairing the tears and losses and finally lining.
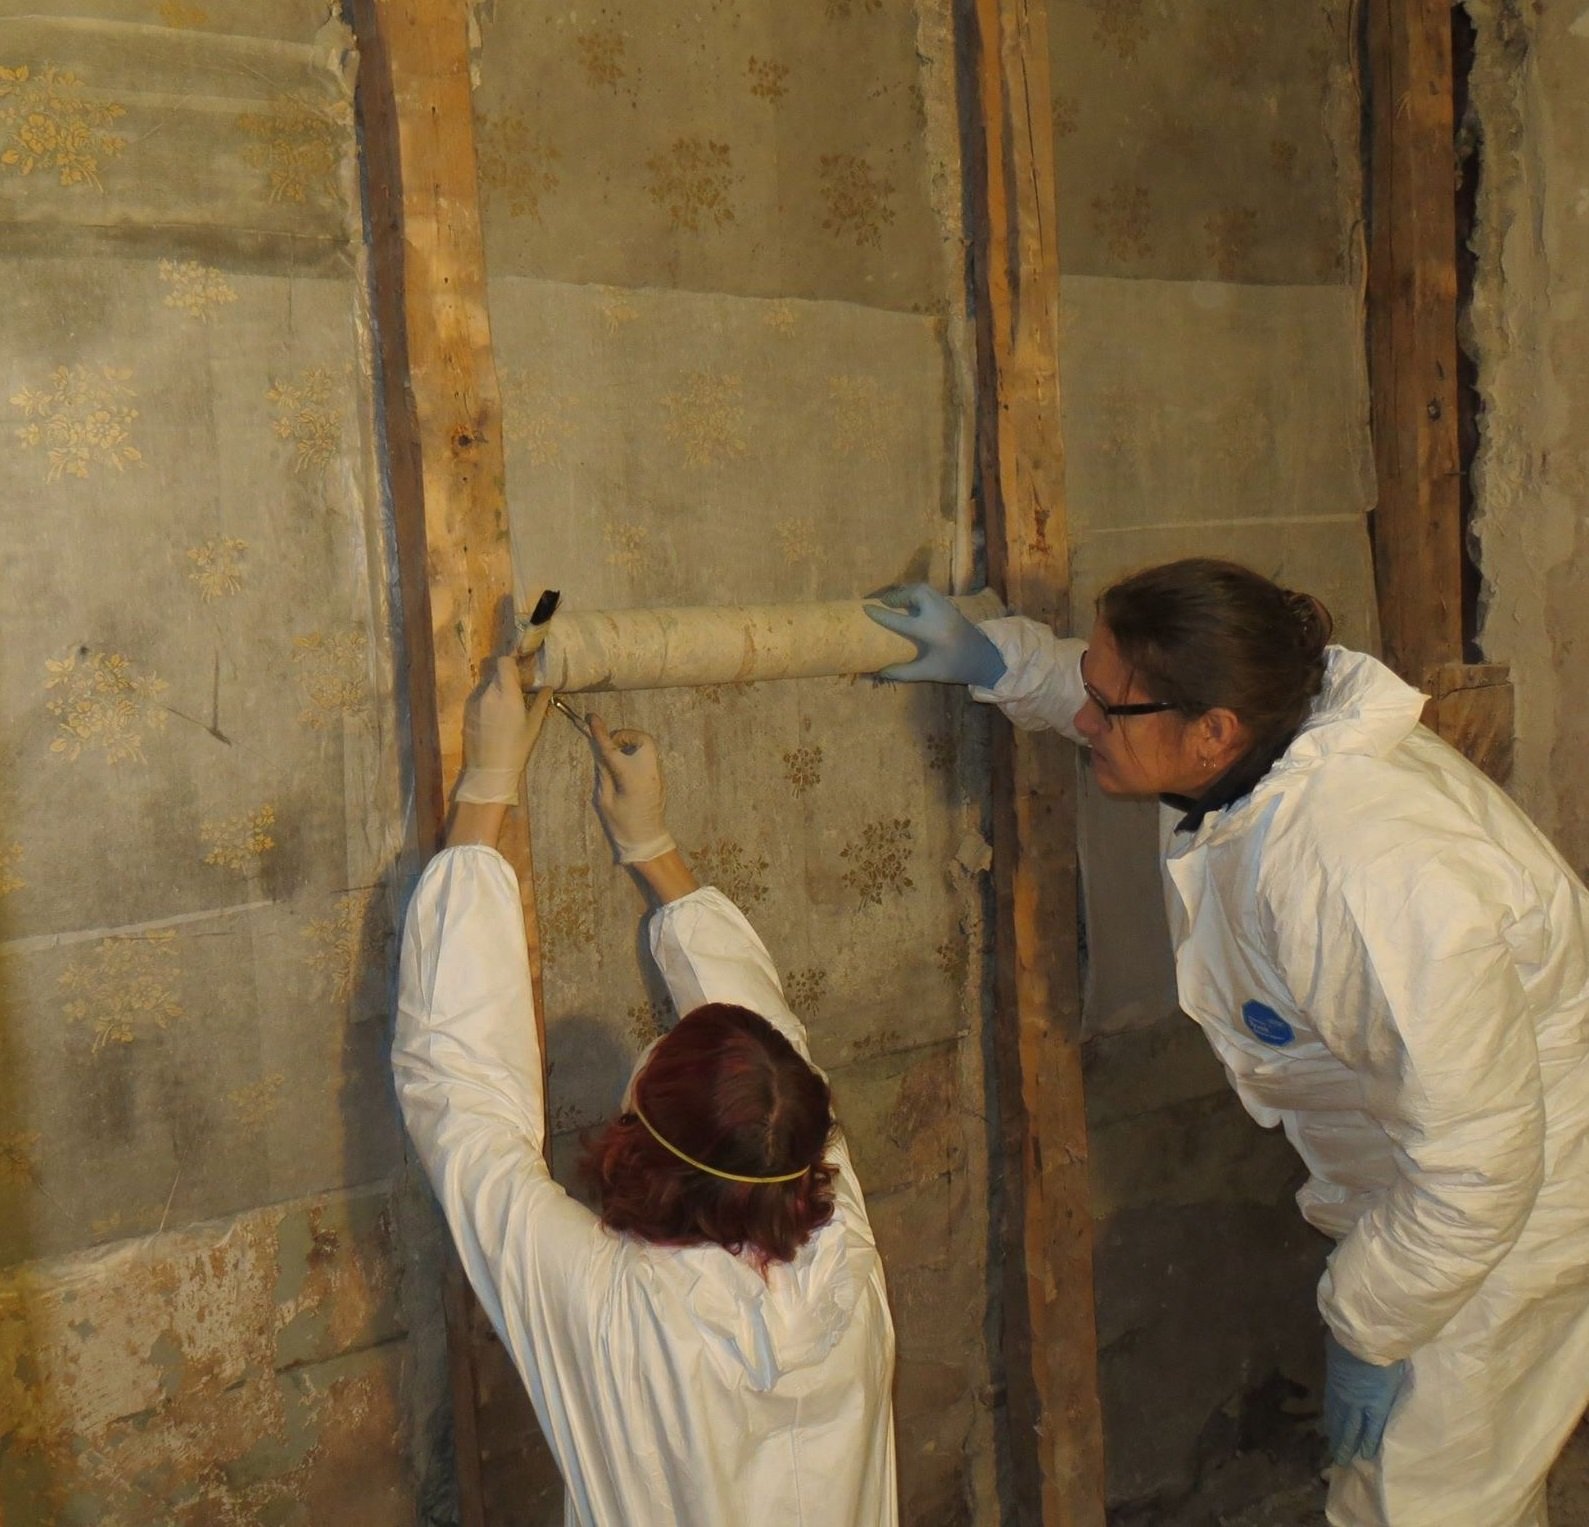
As a rule the first process in paper conservation is surface cleaning, that aims to remove all unwanted dirt that appeares on the surface of paper. Any wet treatment, like applying the facing in the next stage, would cause the surface dirt moving deeper into the structure of the material. We used a vacuum cleaner with hepa filter, brushes, skalpels and erasers in situ. [fig.16]
Three methods were tested for dismounting the wallpapers from the wall: dry method, steam humidifier treatment and moisturizing with methylcellulose.
The loose fragments were best to be removed dry, using mechanical methods only. Dry method was not suitable for larger fragments that were stronger attached to the wall, because the paint layer tended to crack when the wallpaper was bended dry. Moisturising with steam jet would turn the degraded paper too fragile, so the methycellulose method was chosen. For that the wallpapers were covered with a layer of methycellulose glue and on that a protective layer of facing was brushed gently. Facing was also needed to support the degraded material while dismounting and later handling. We used Mikalent paper of Russian origin. Since the material today may be hard to get, a more widely used contemporary facing material should be mentioned, that is Rayon paper. Consisting 40% of Rayon and 60% of Sulphite pulp this material can be used as temporary facing and also as a supportive material in several conservation processes.
The tiles covered with facing where then dried and on the next day they could be just moisturized gently and protected by facing the fragments could be removed from the wall, starting from the lower edge and moving up. The dismounted tiles and fragments were rolled on a cardboard tube. [fig.17]
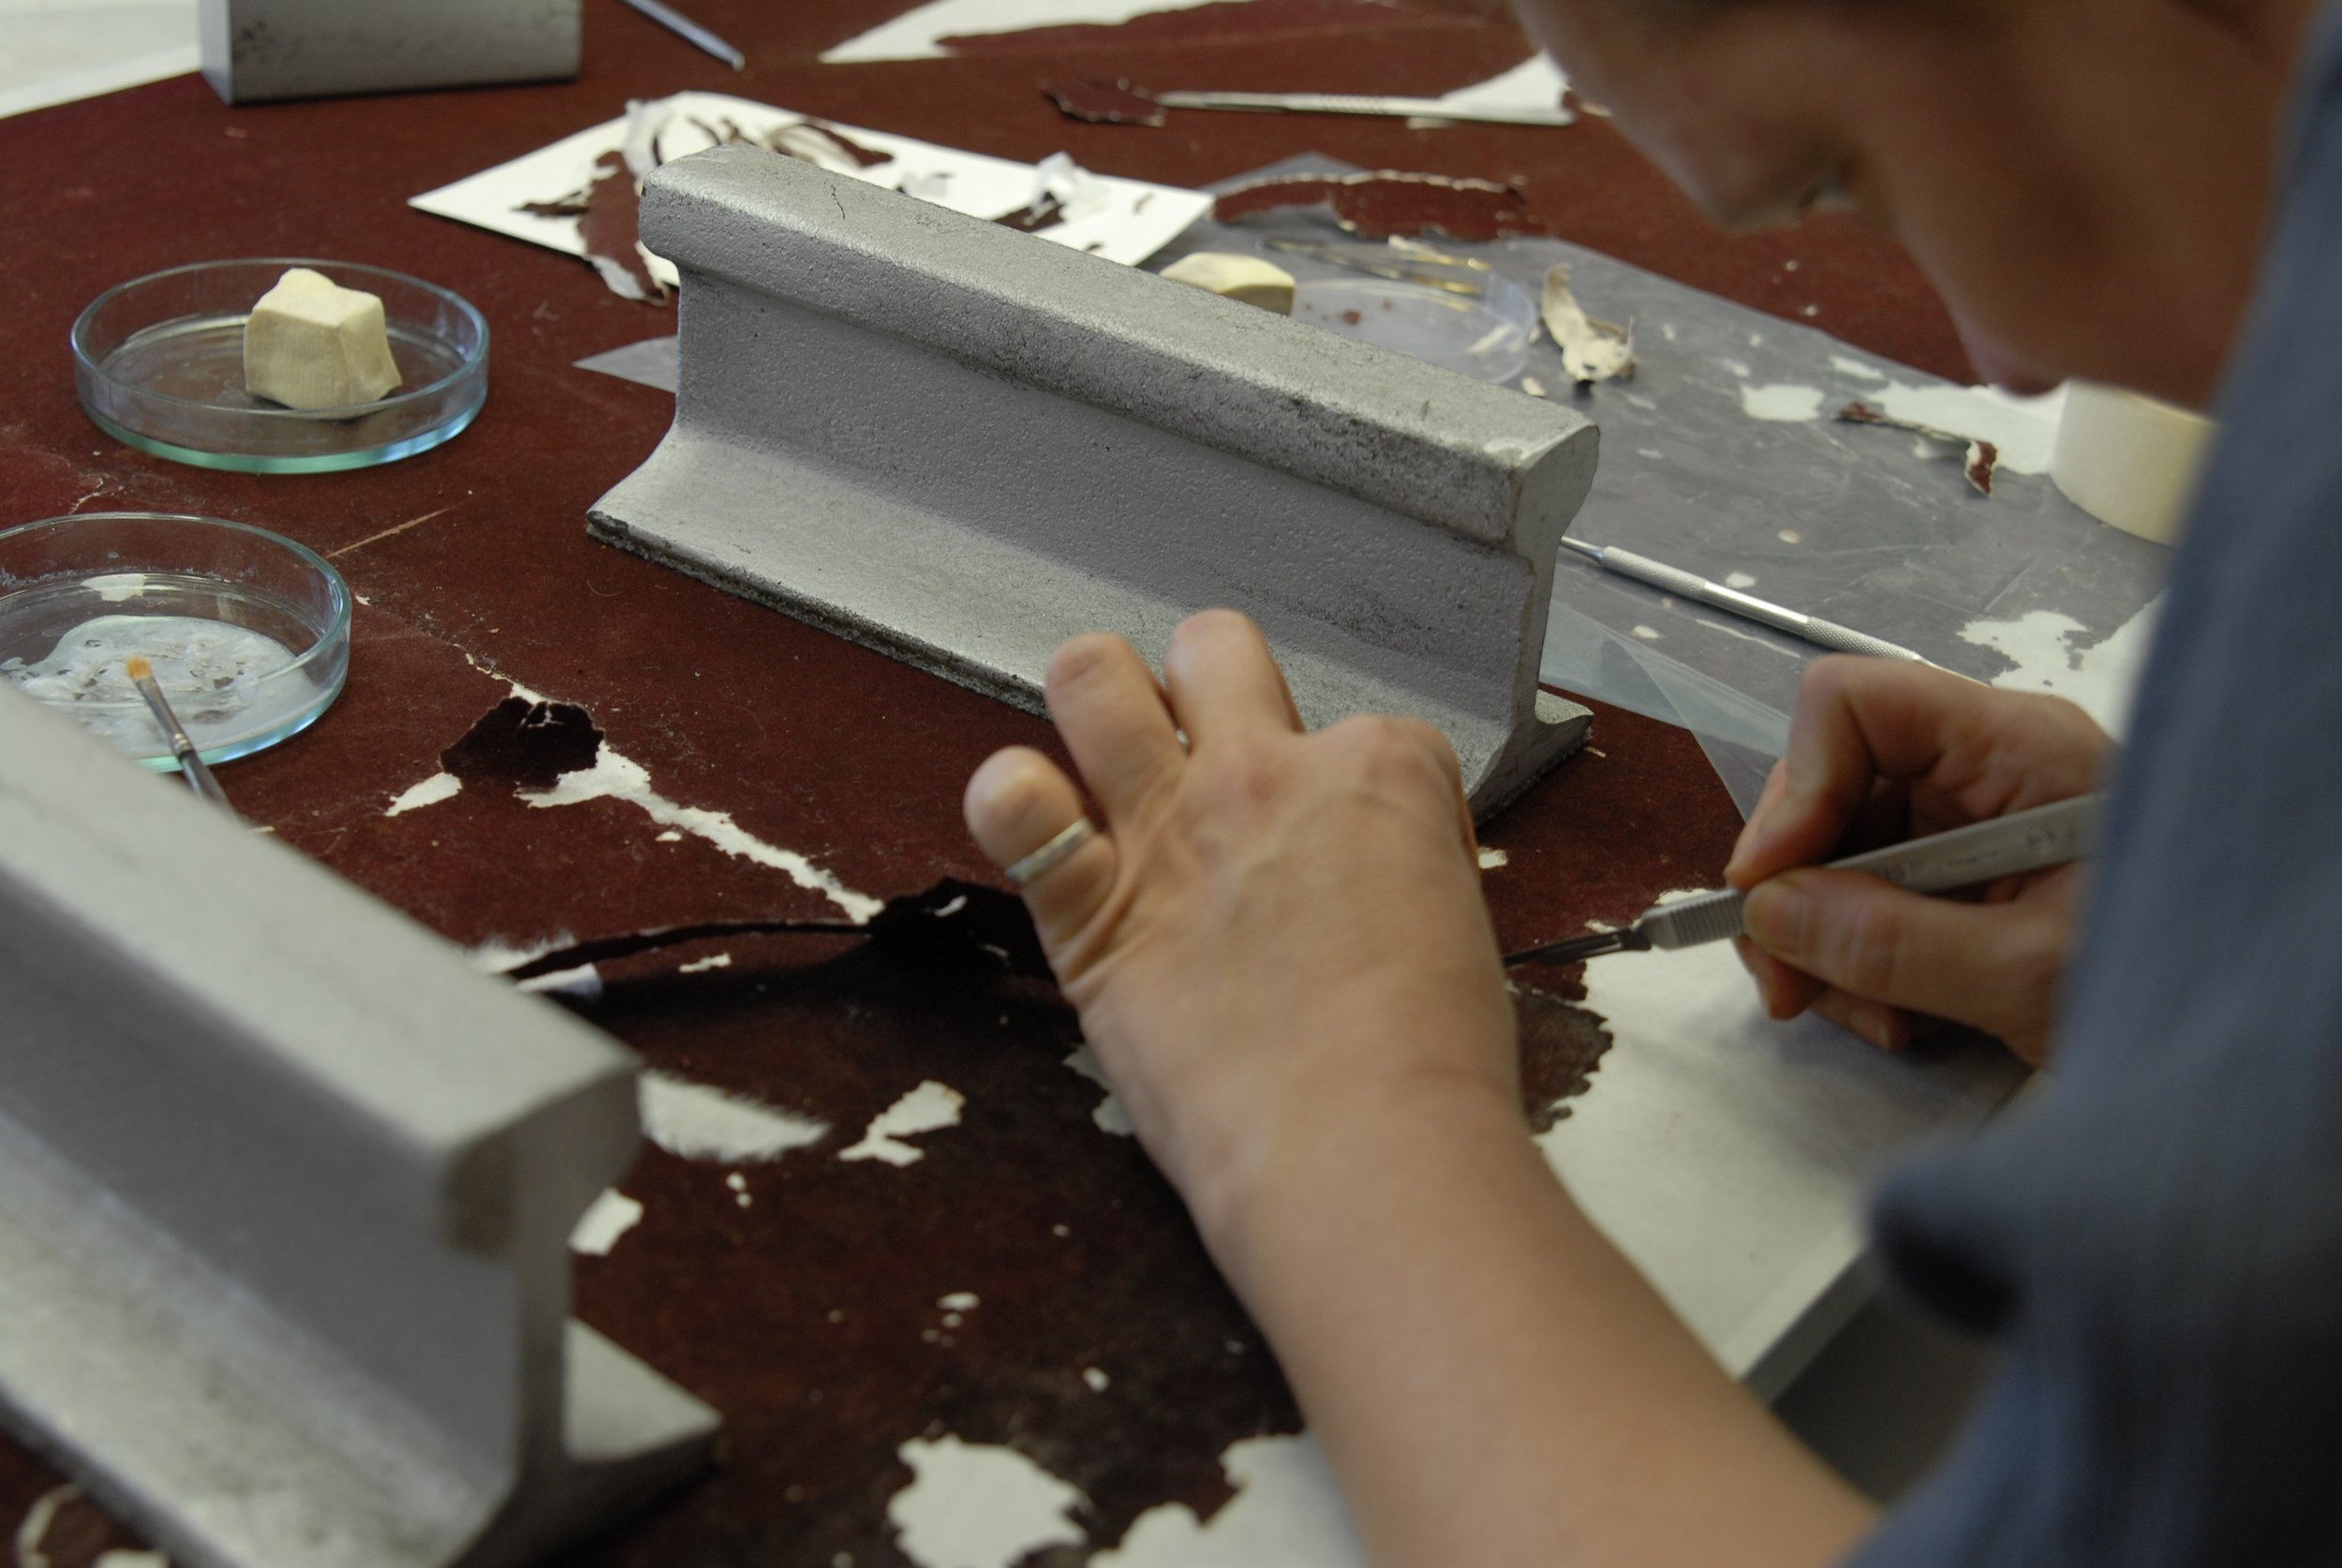
2. Kanut: conservation of wallpaper
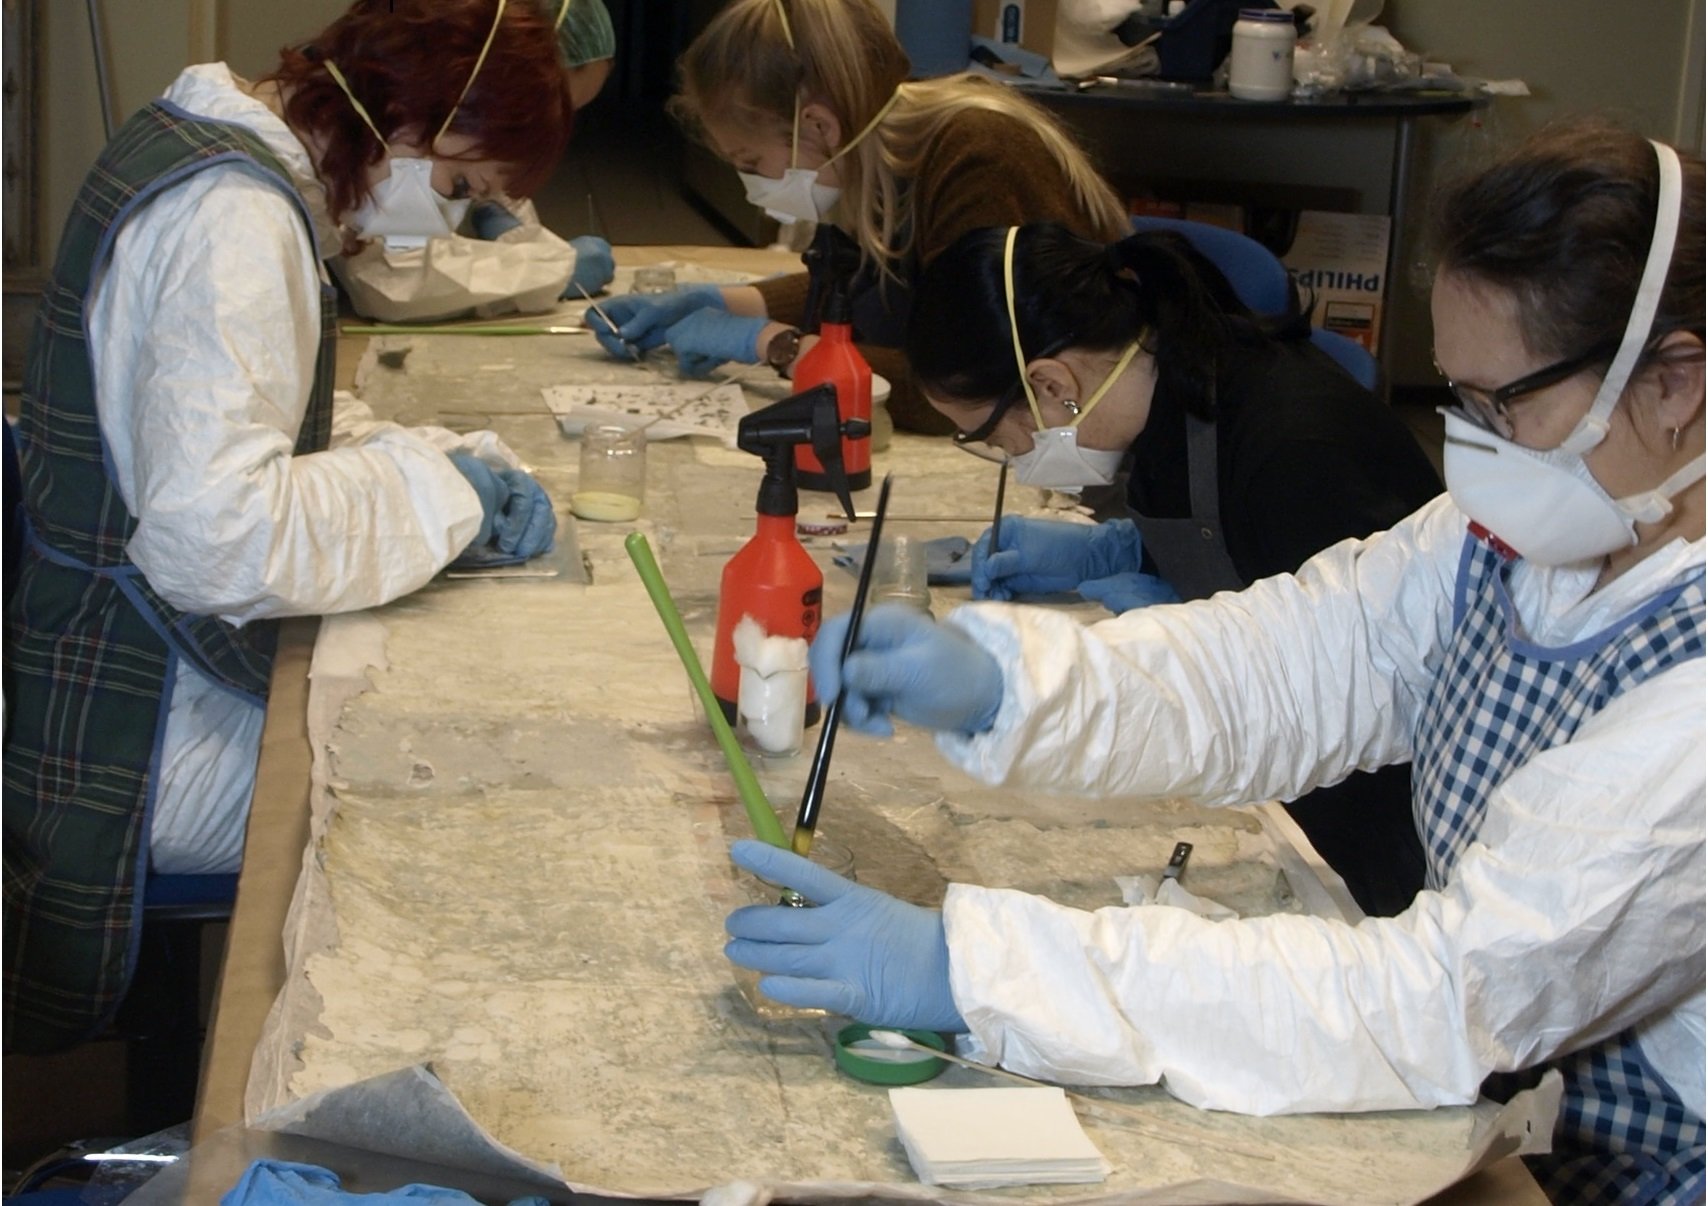
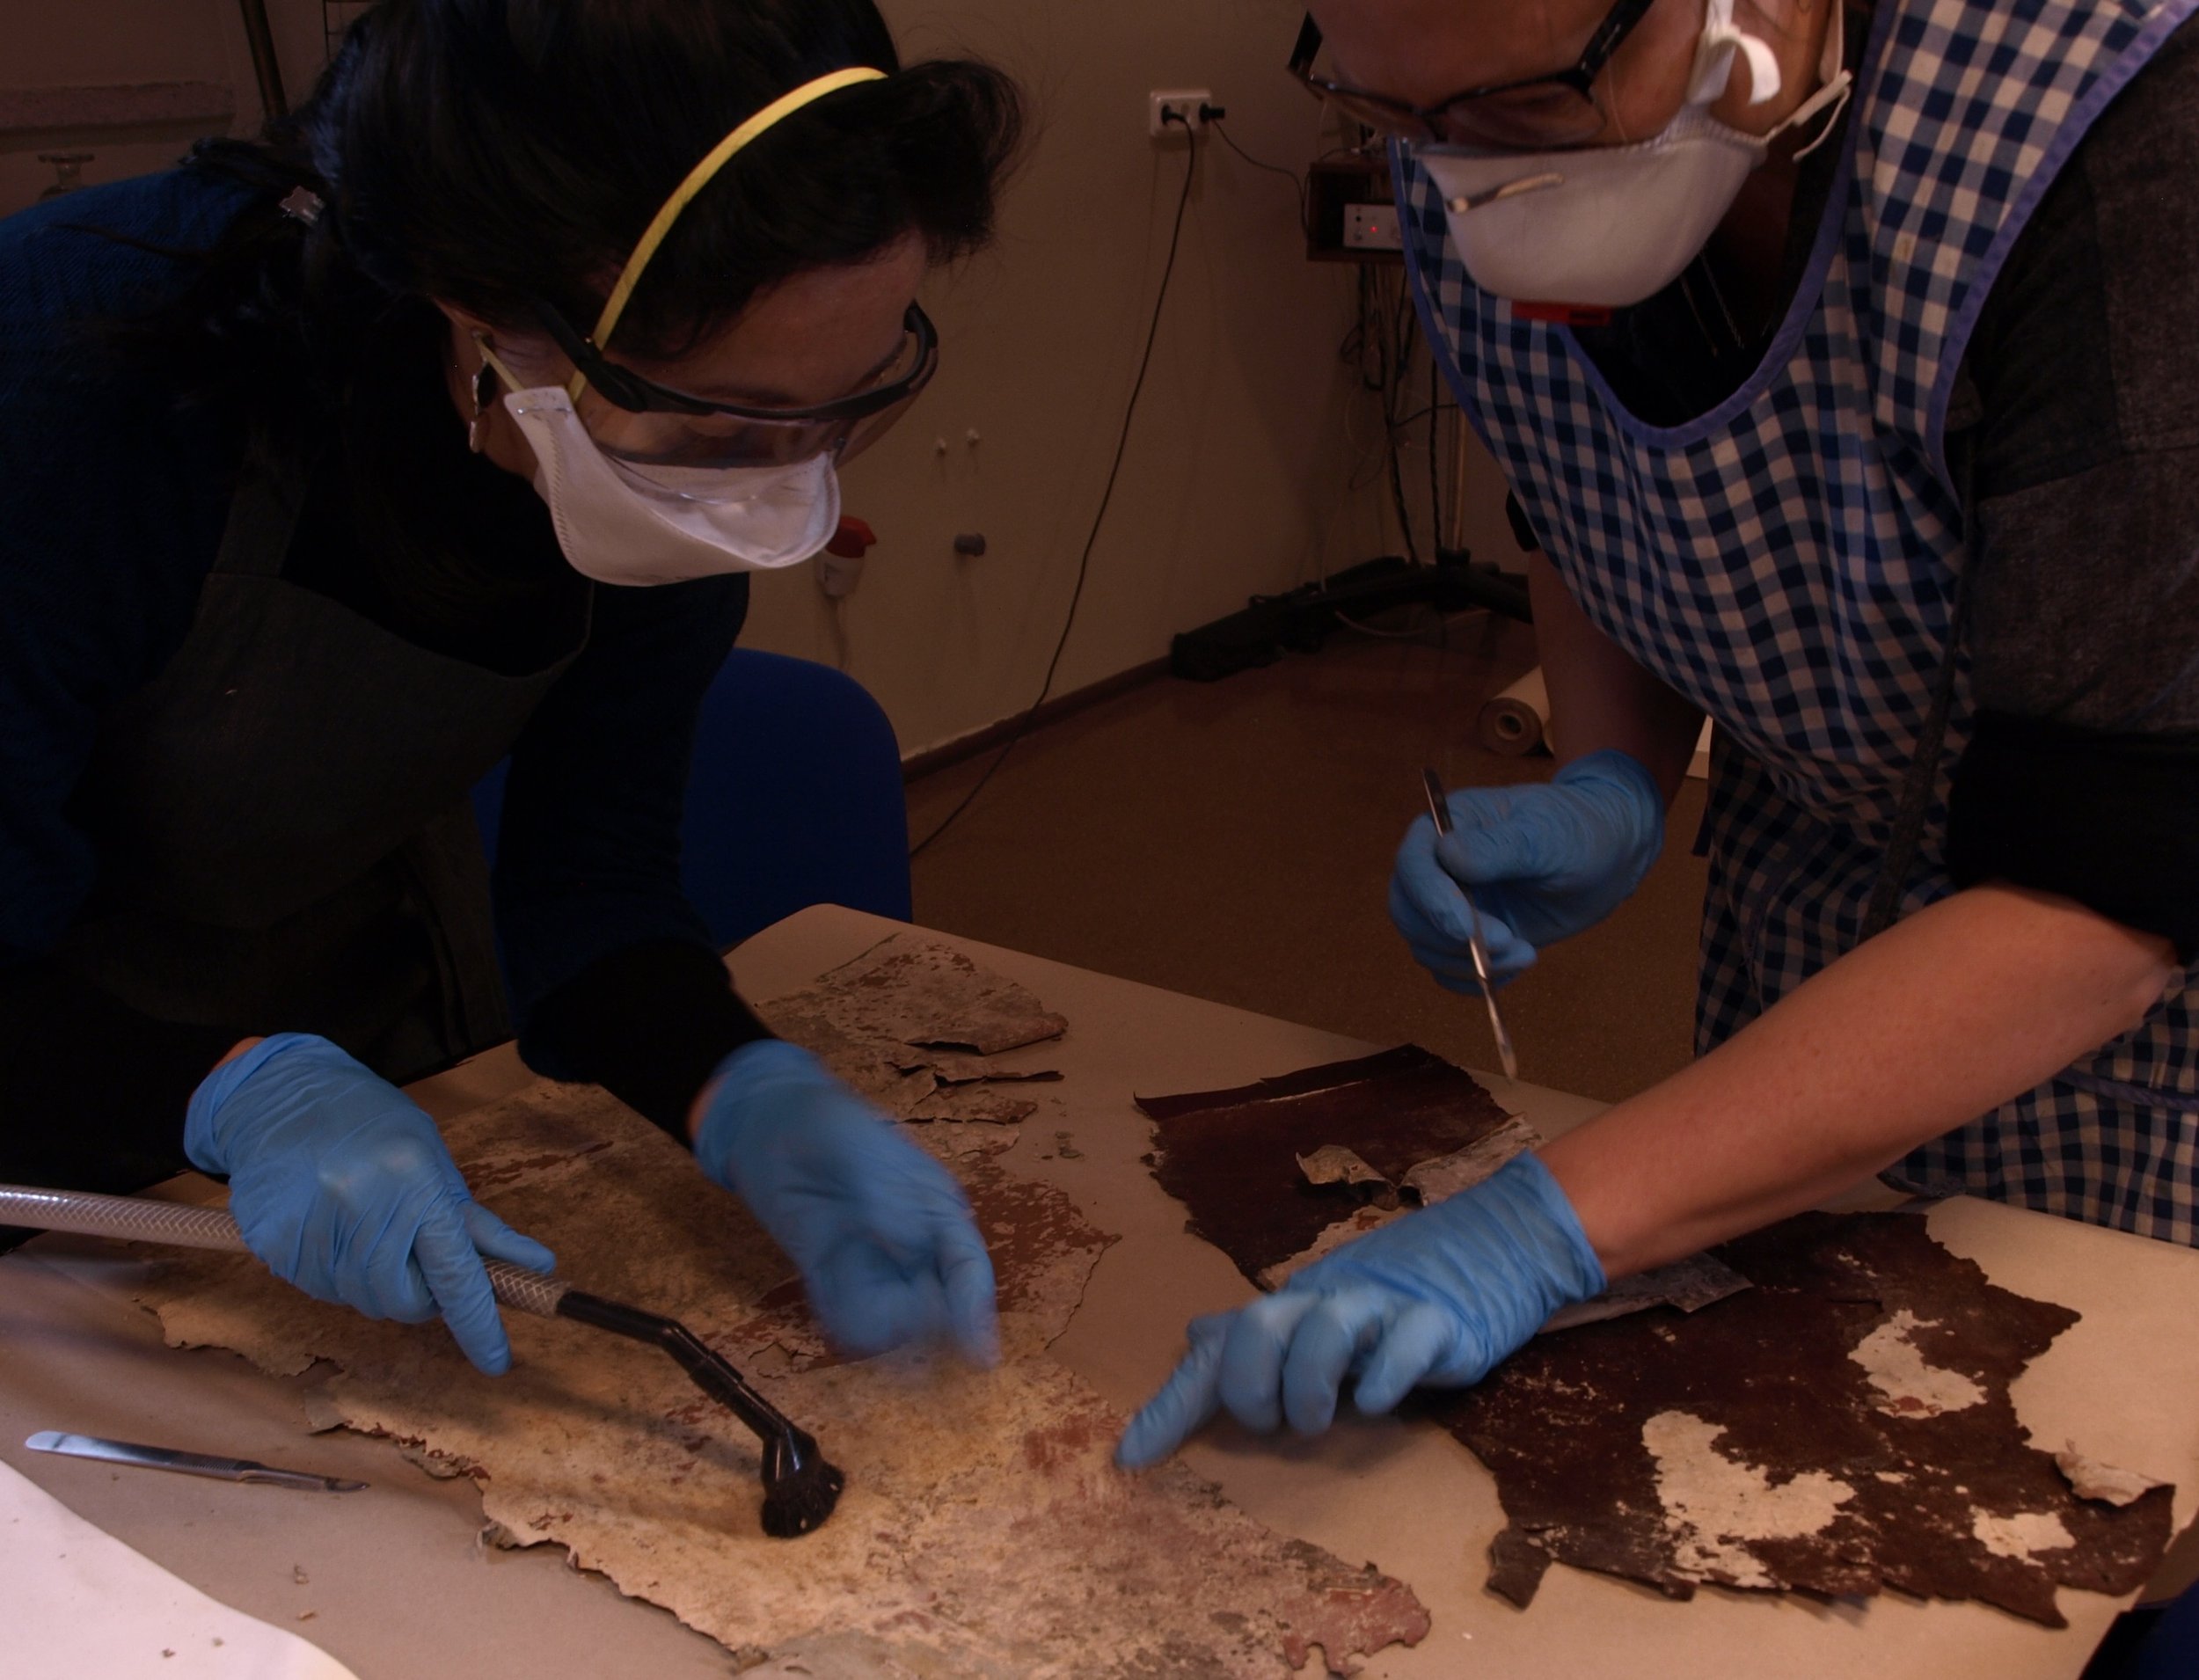
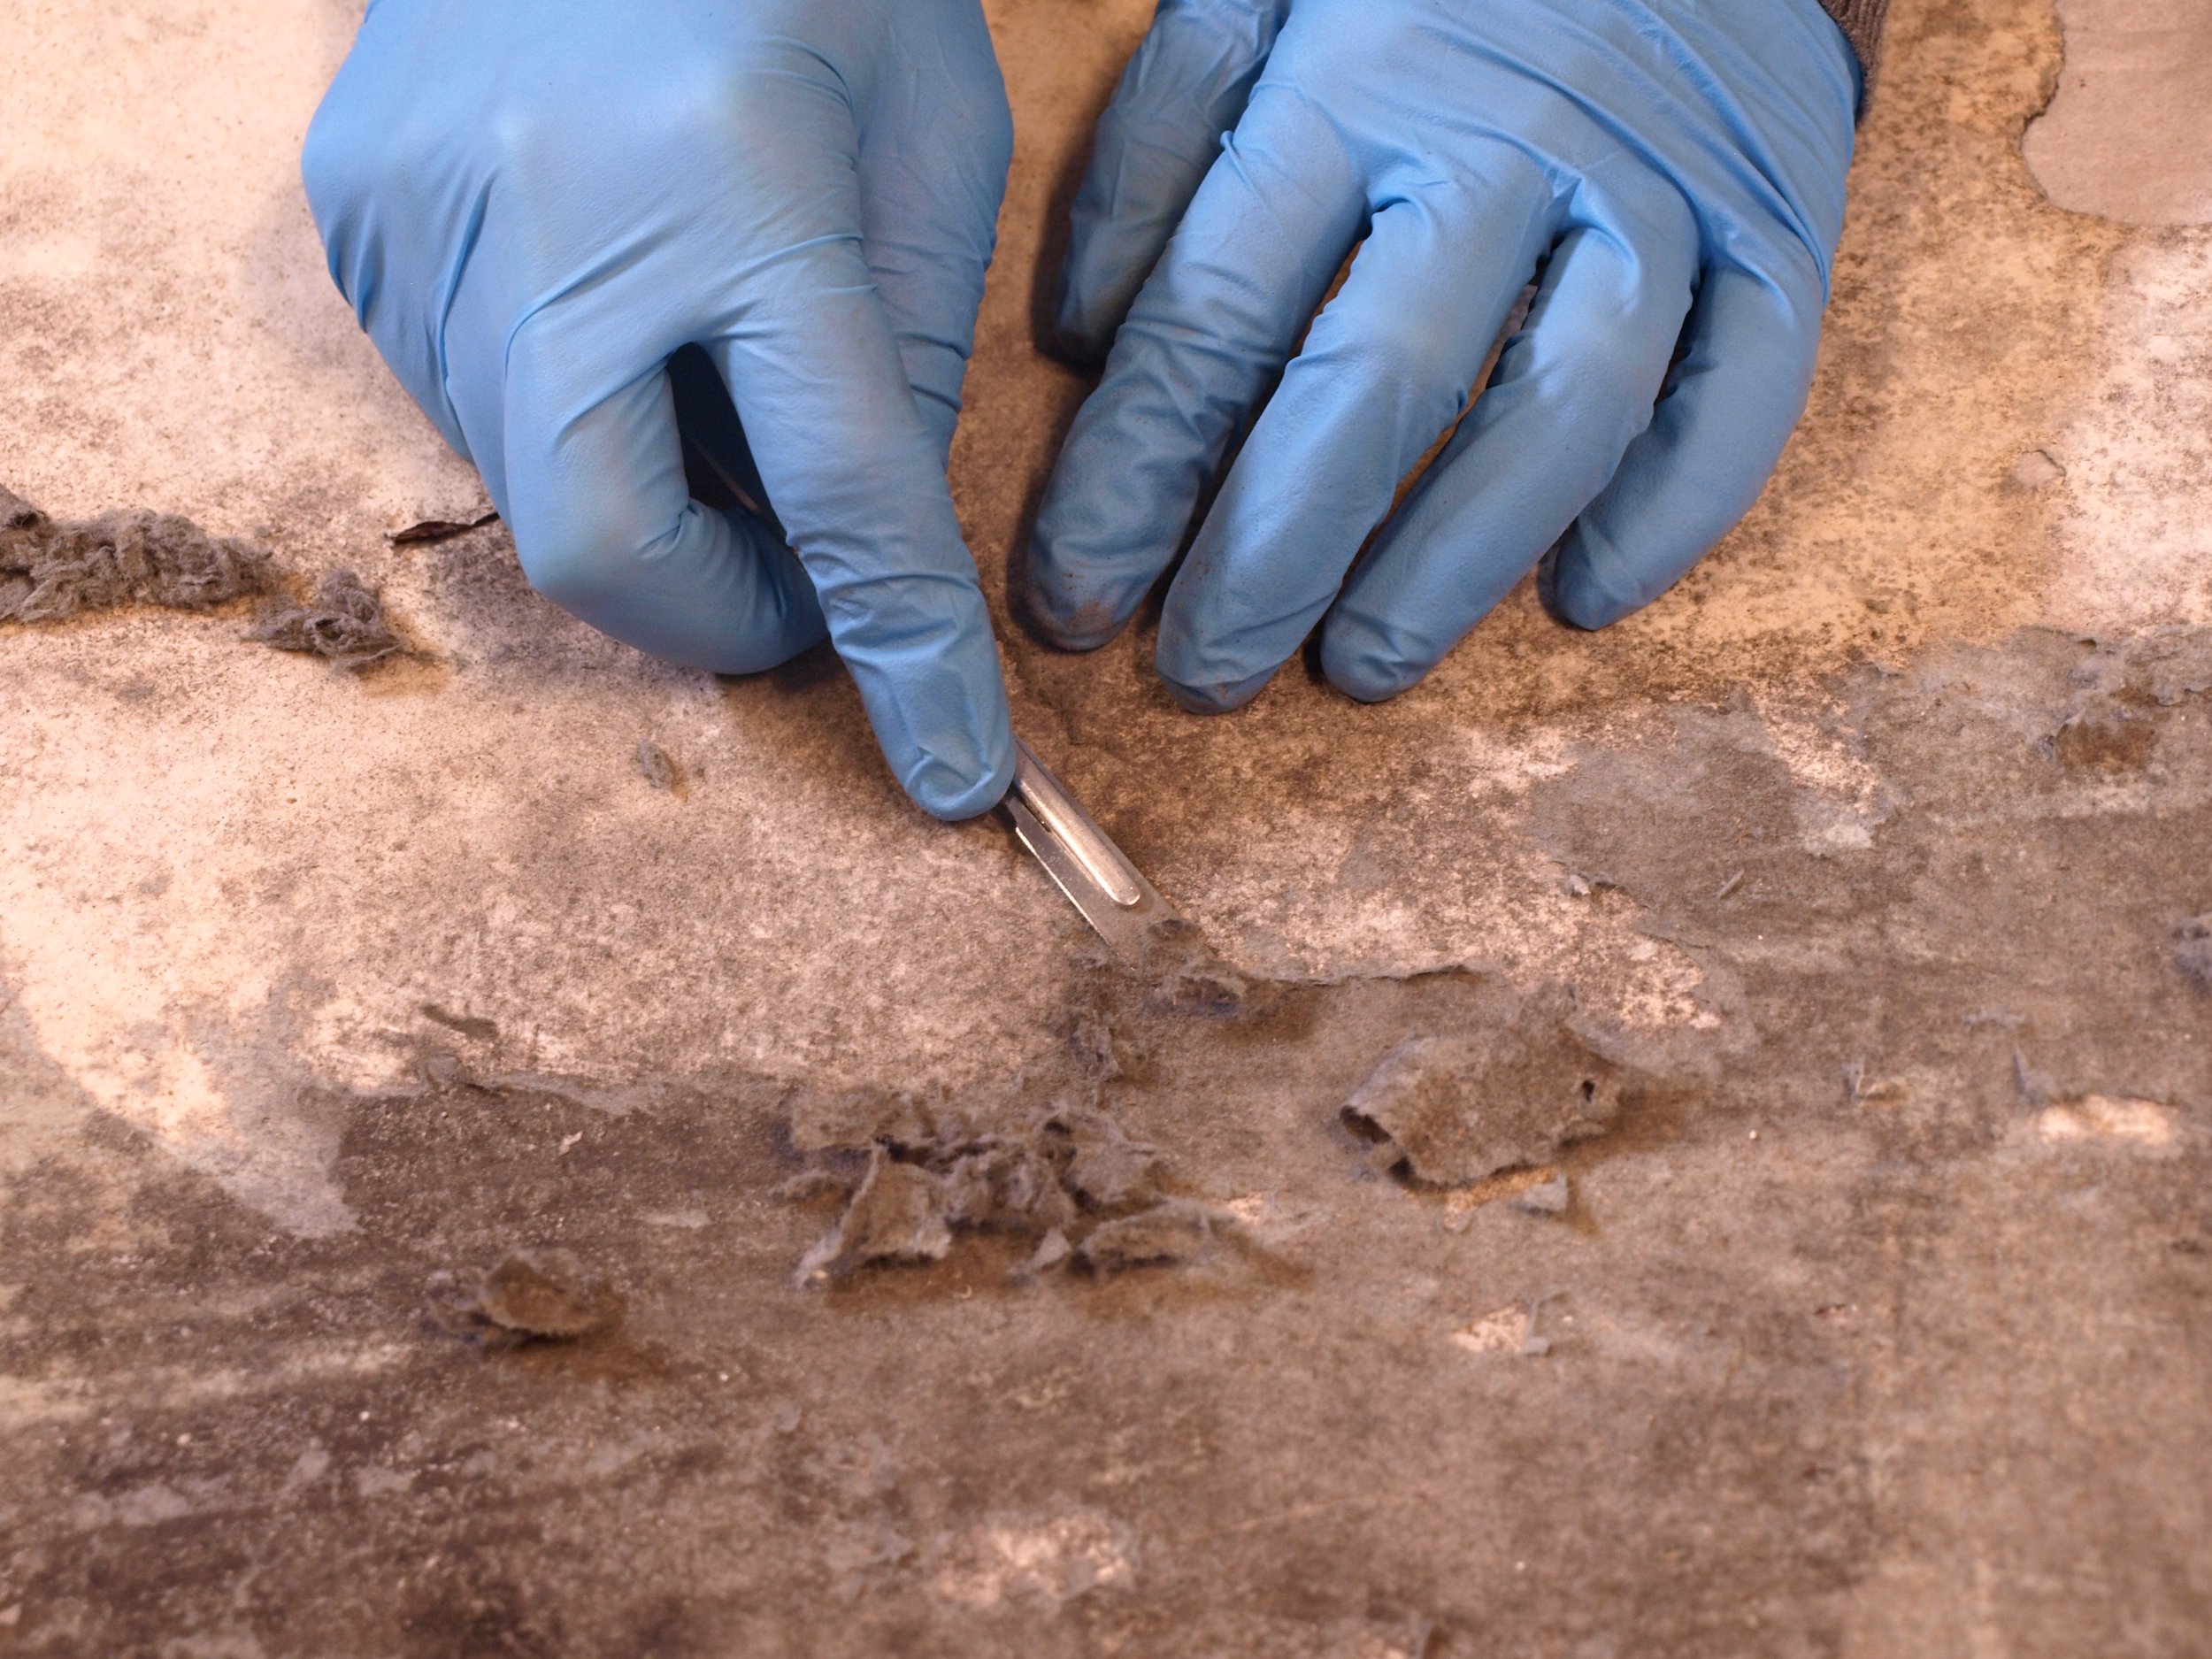
For the conservation treatments the wallpaper fragments were taken to the conservation centre Kanut, where the first process was again dry surface cleaning. [fig.18]
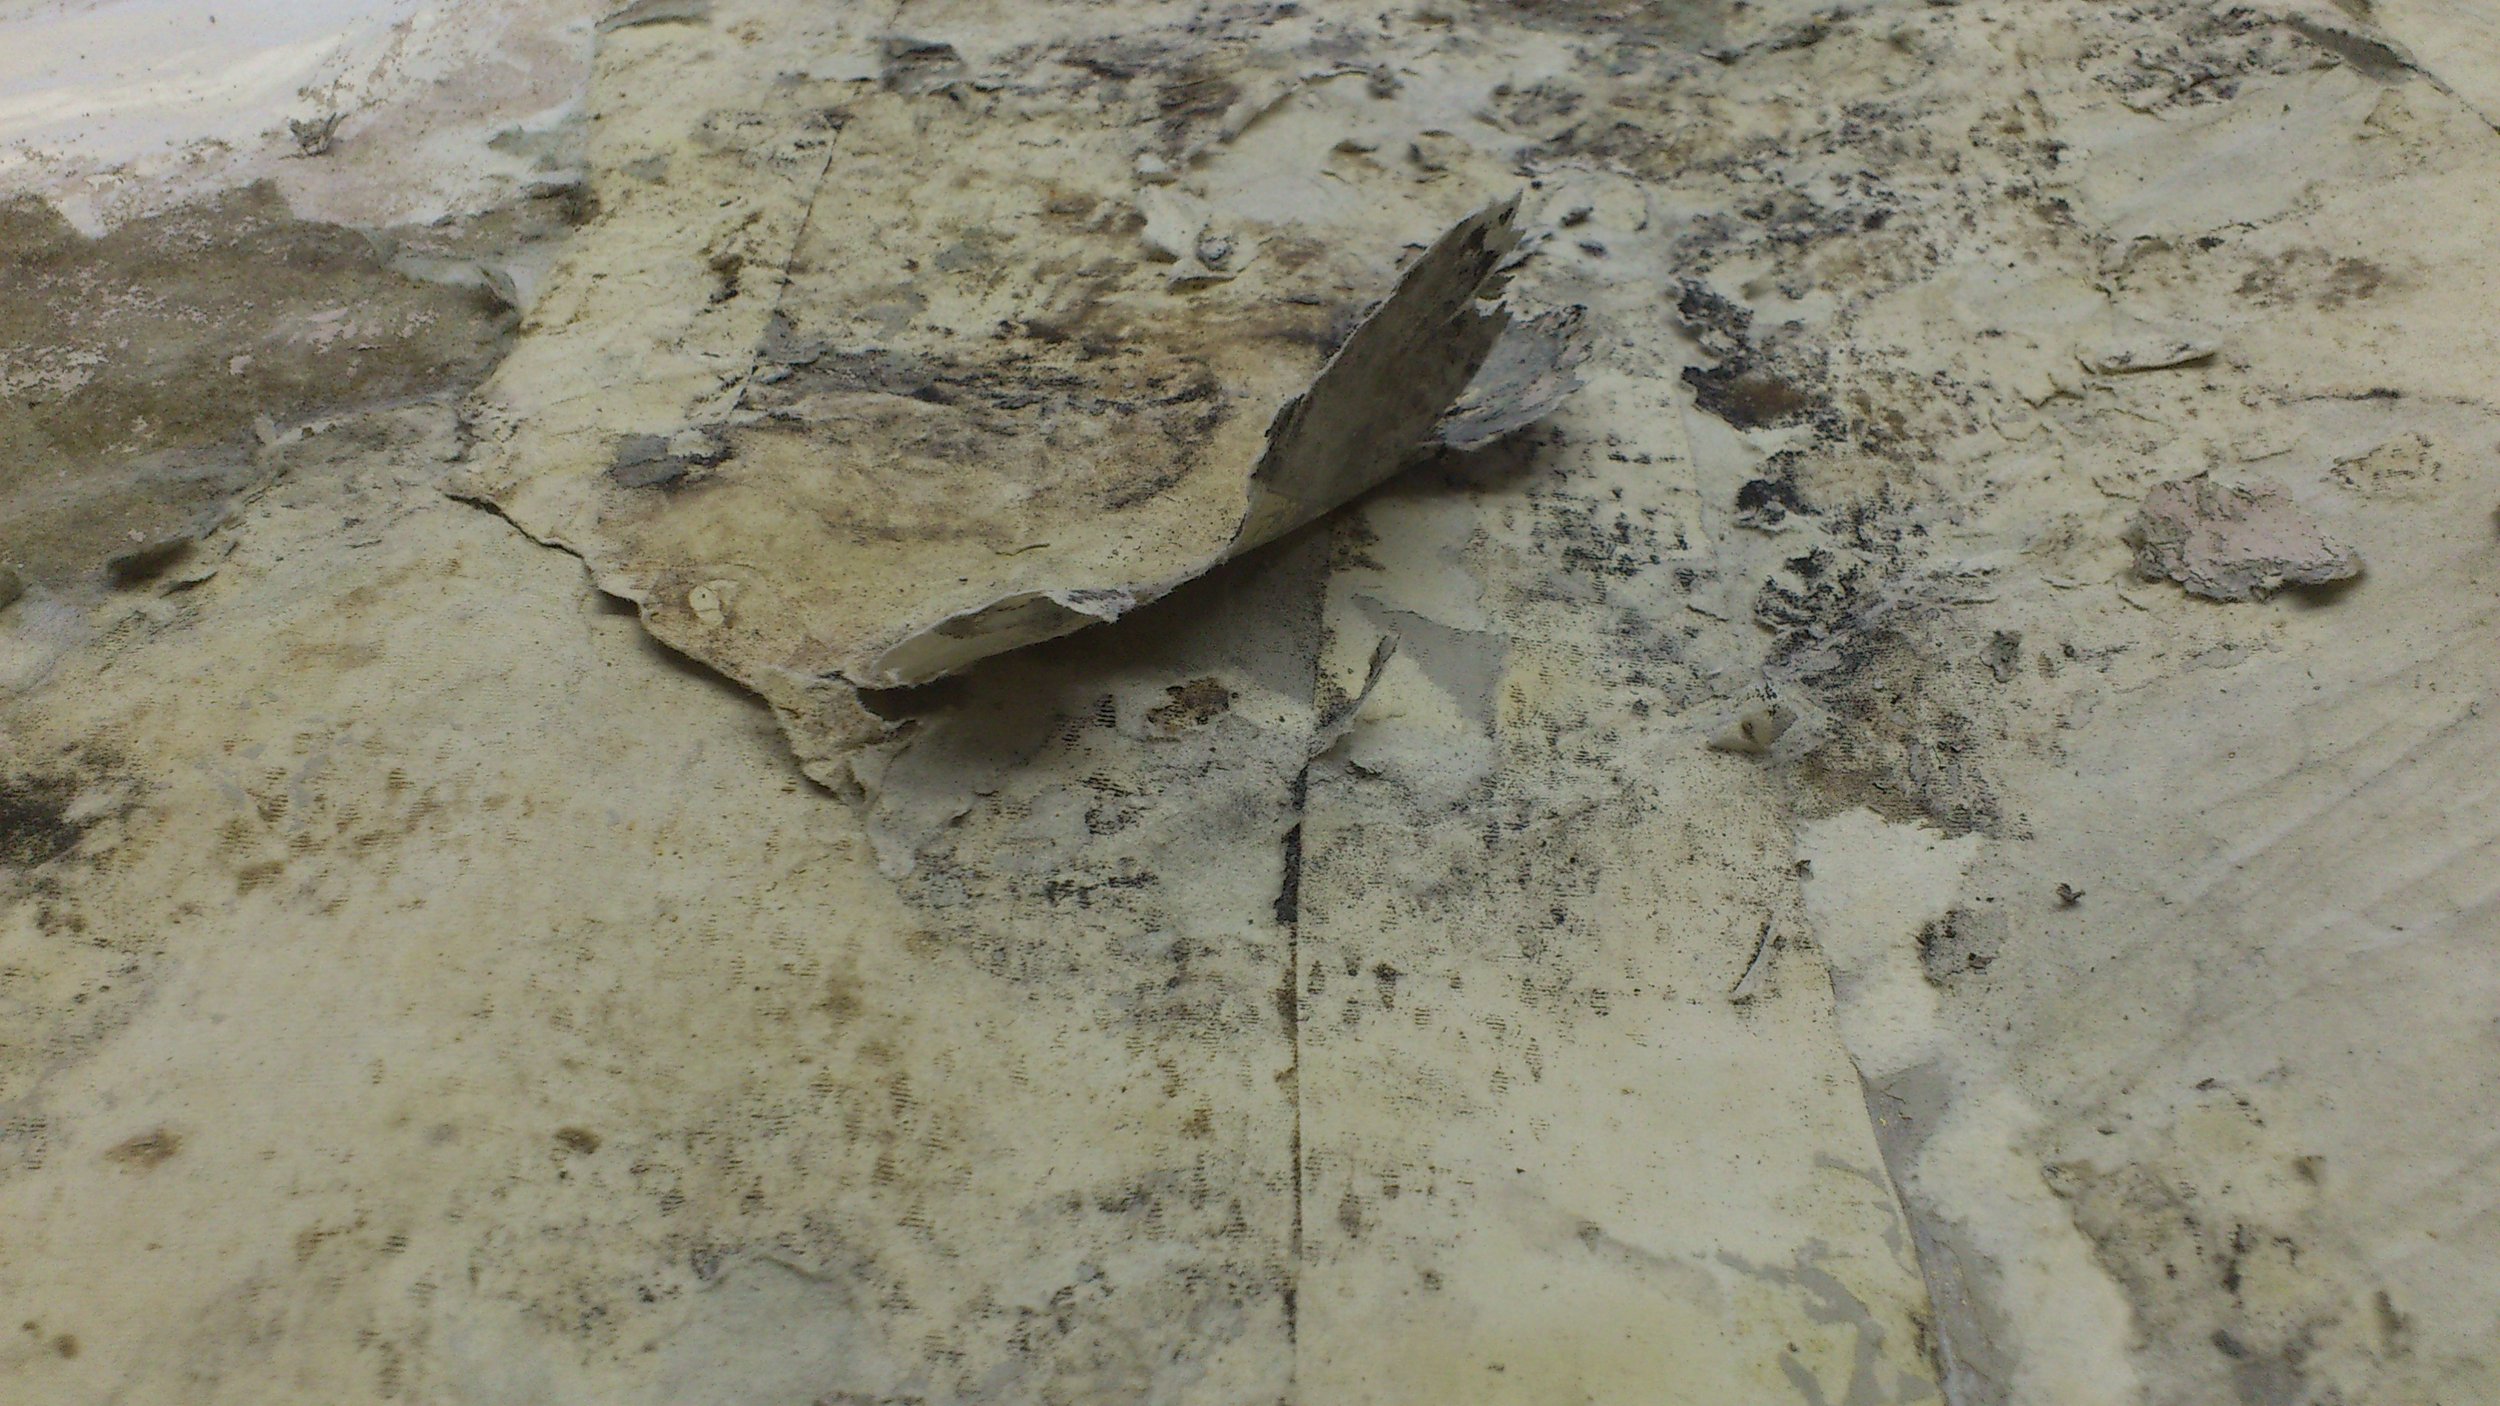
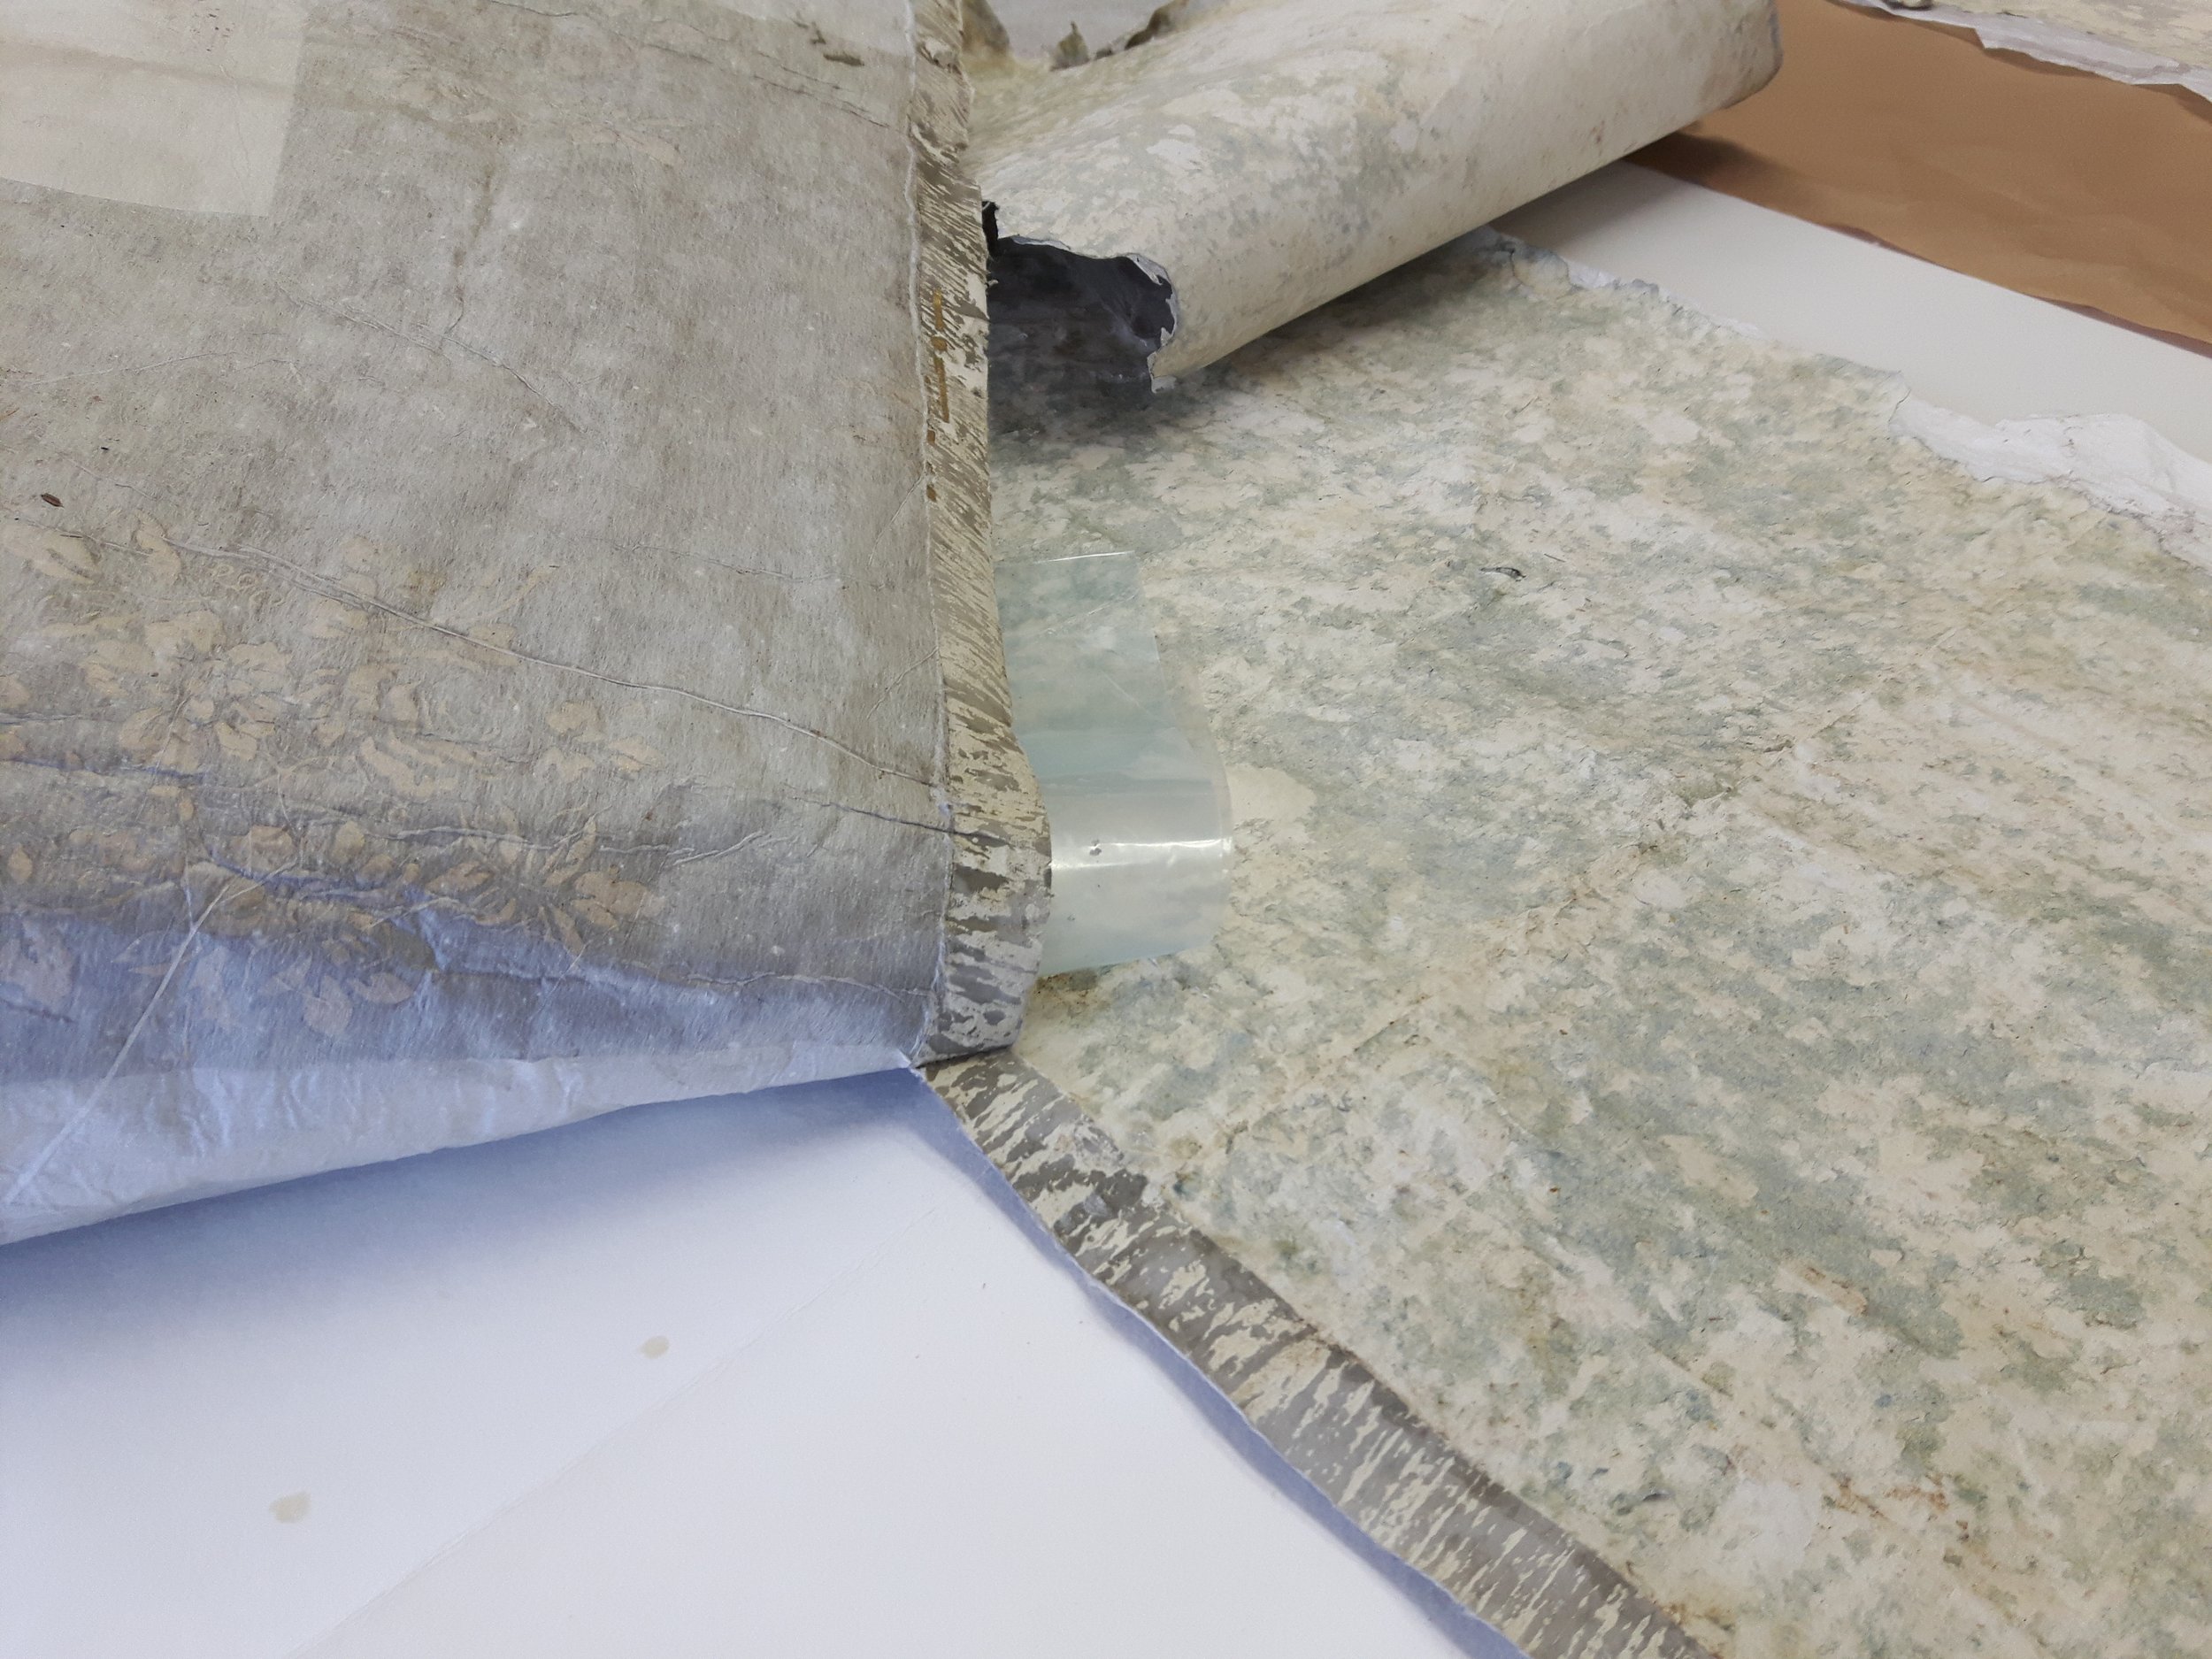
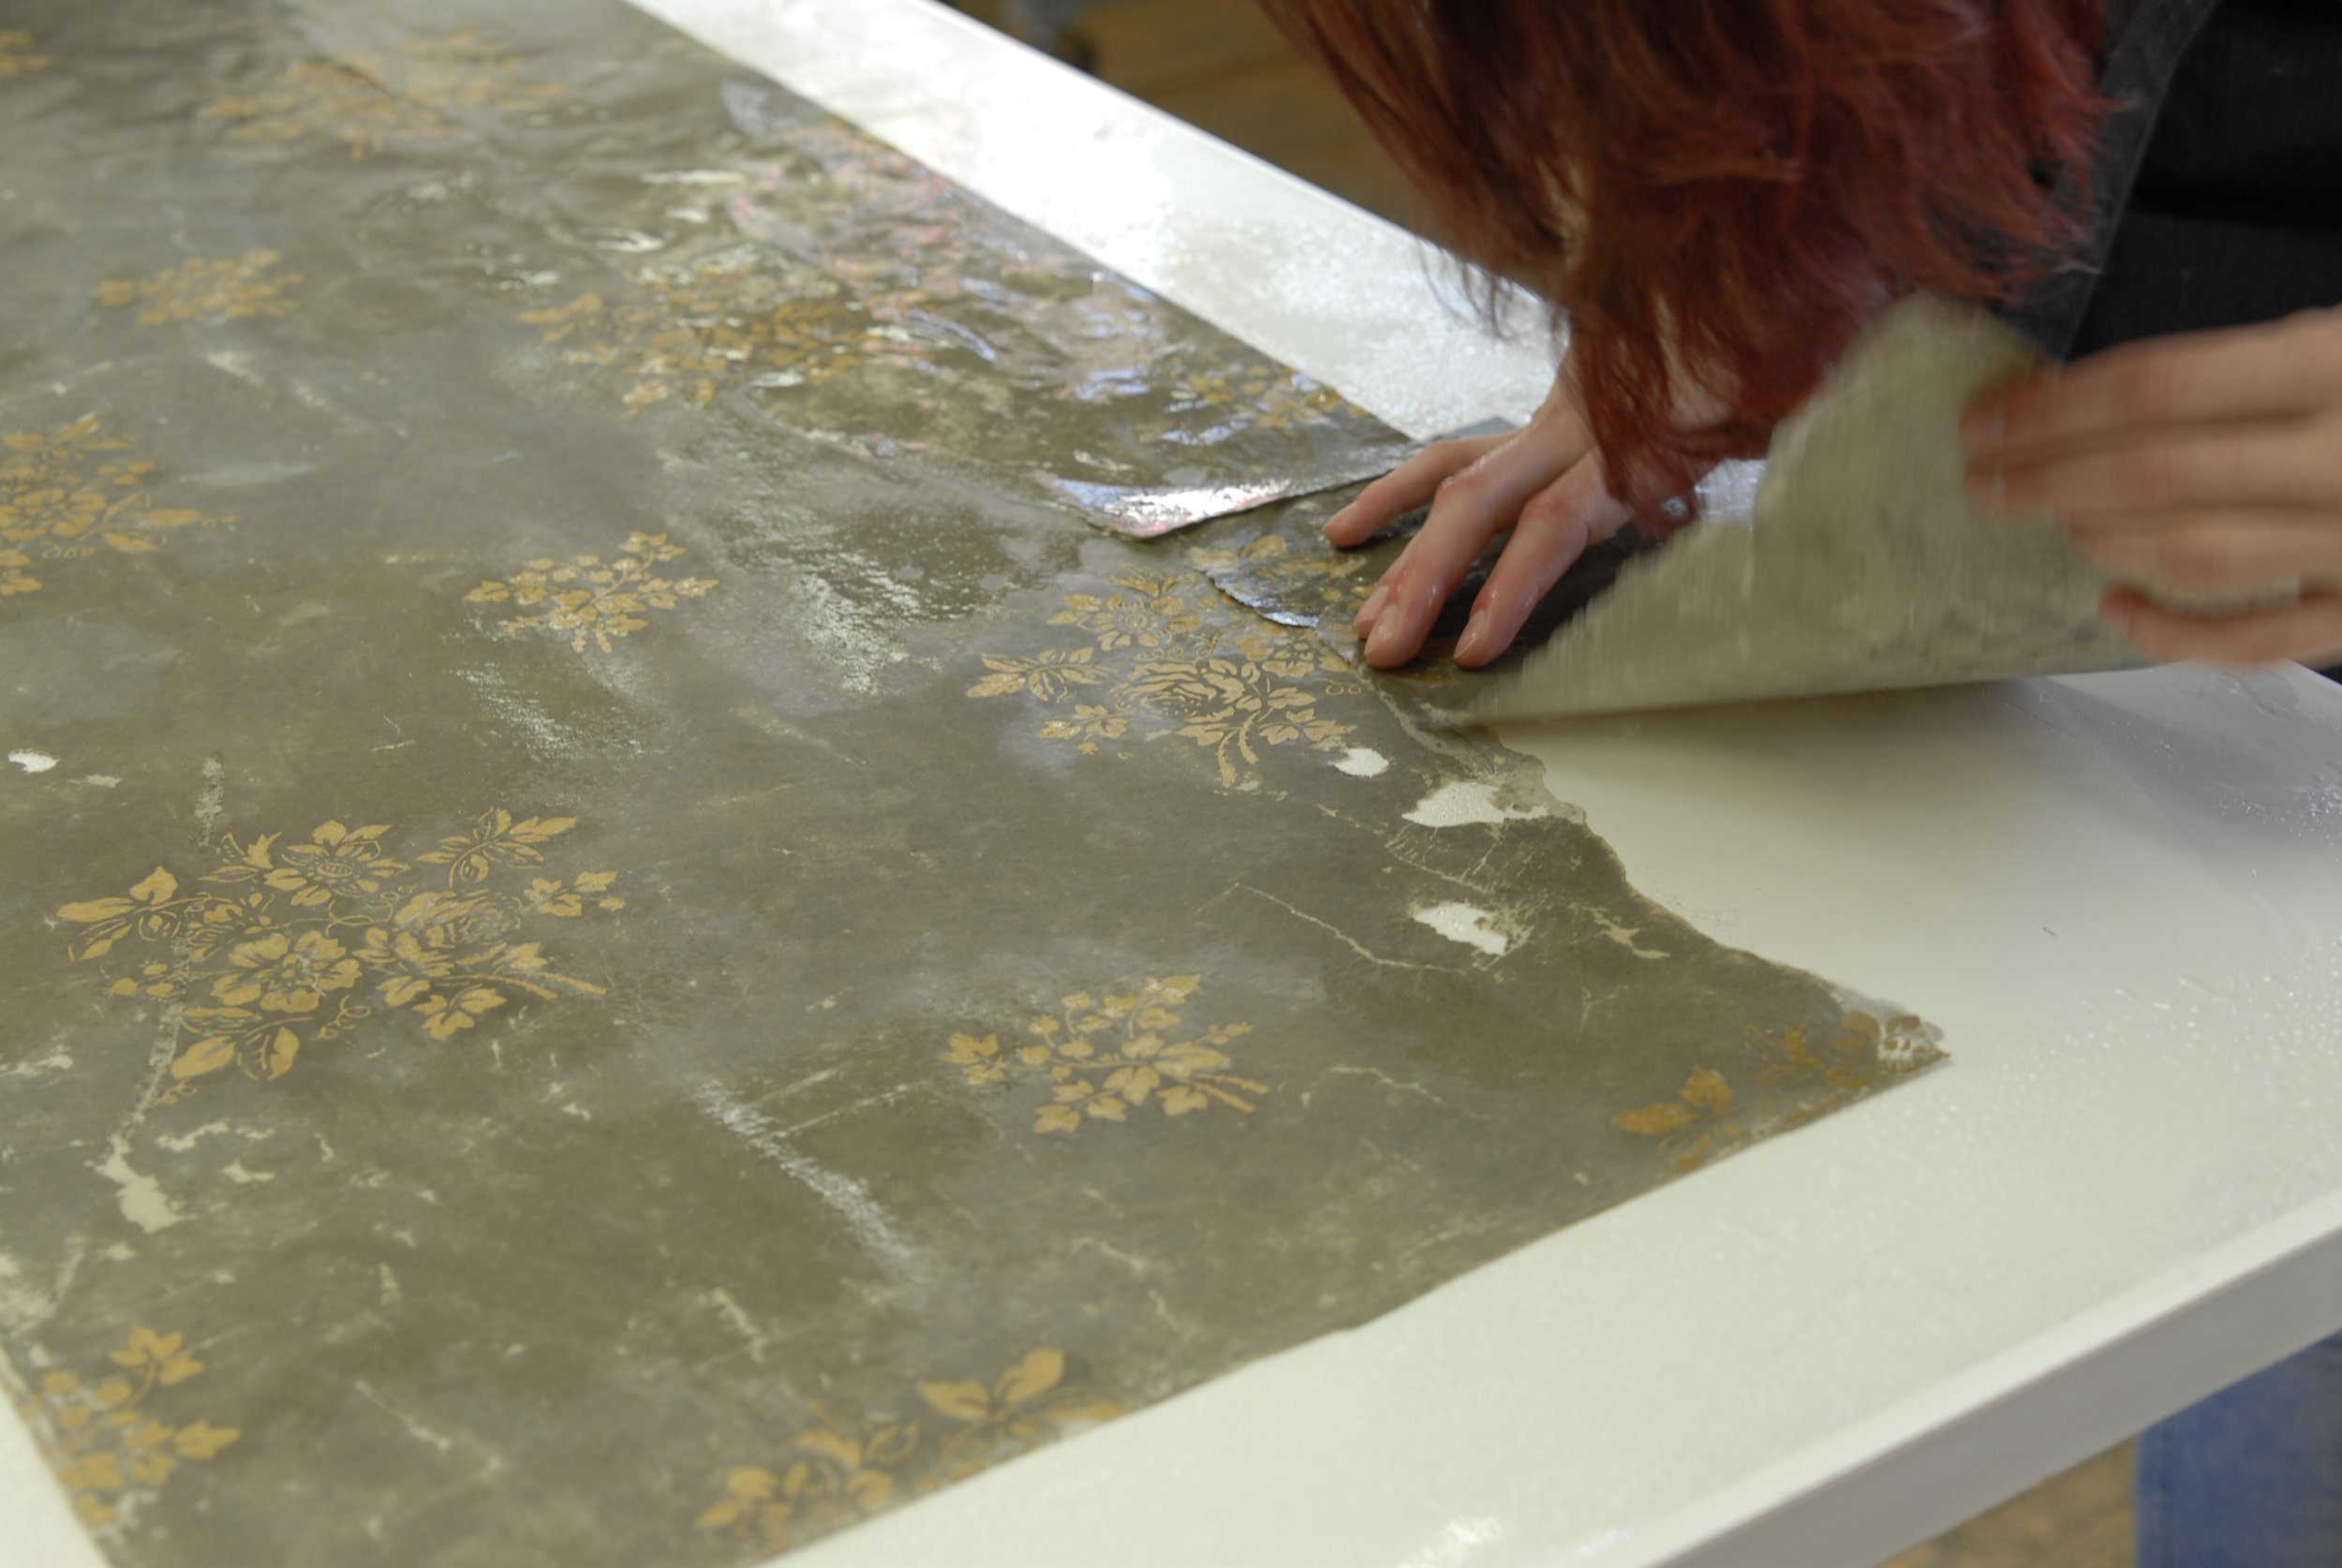
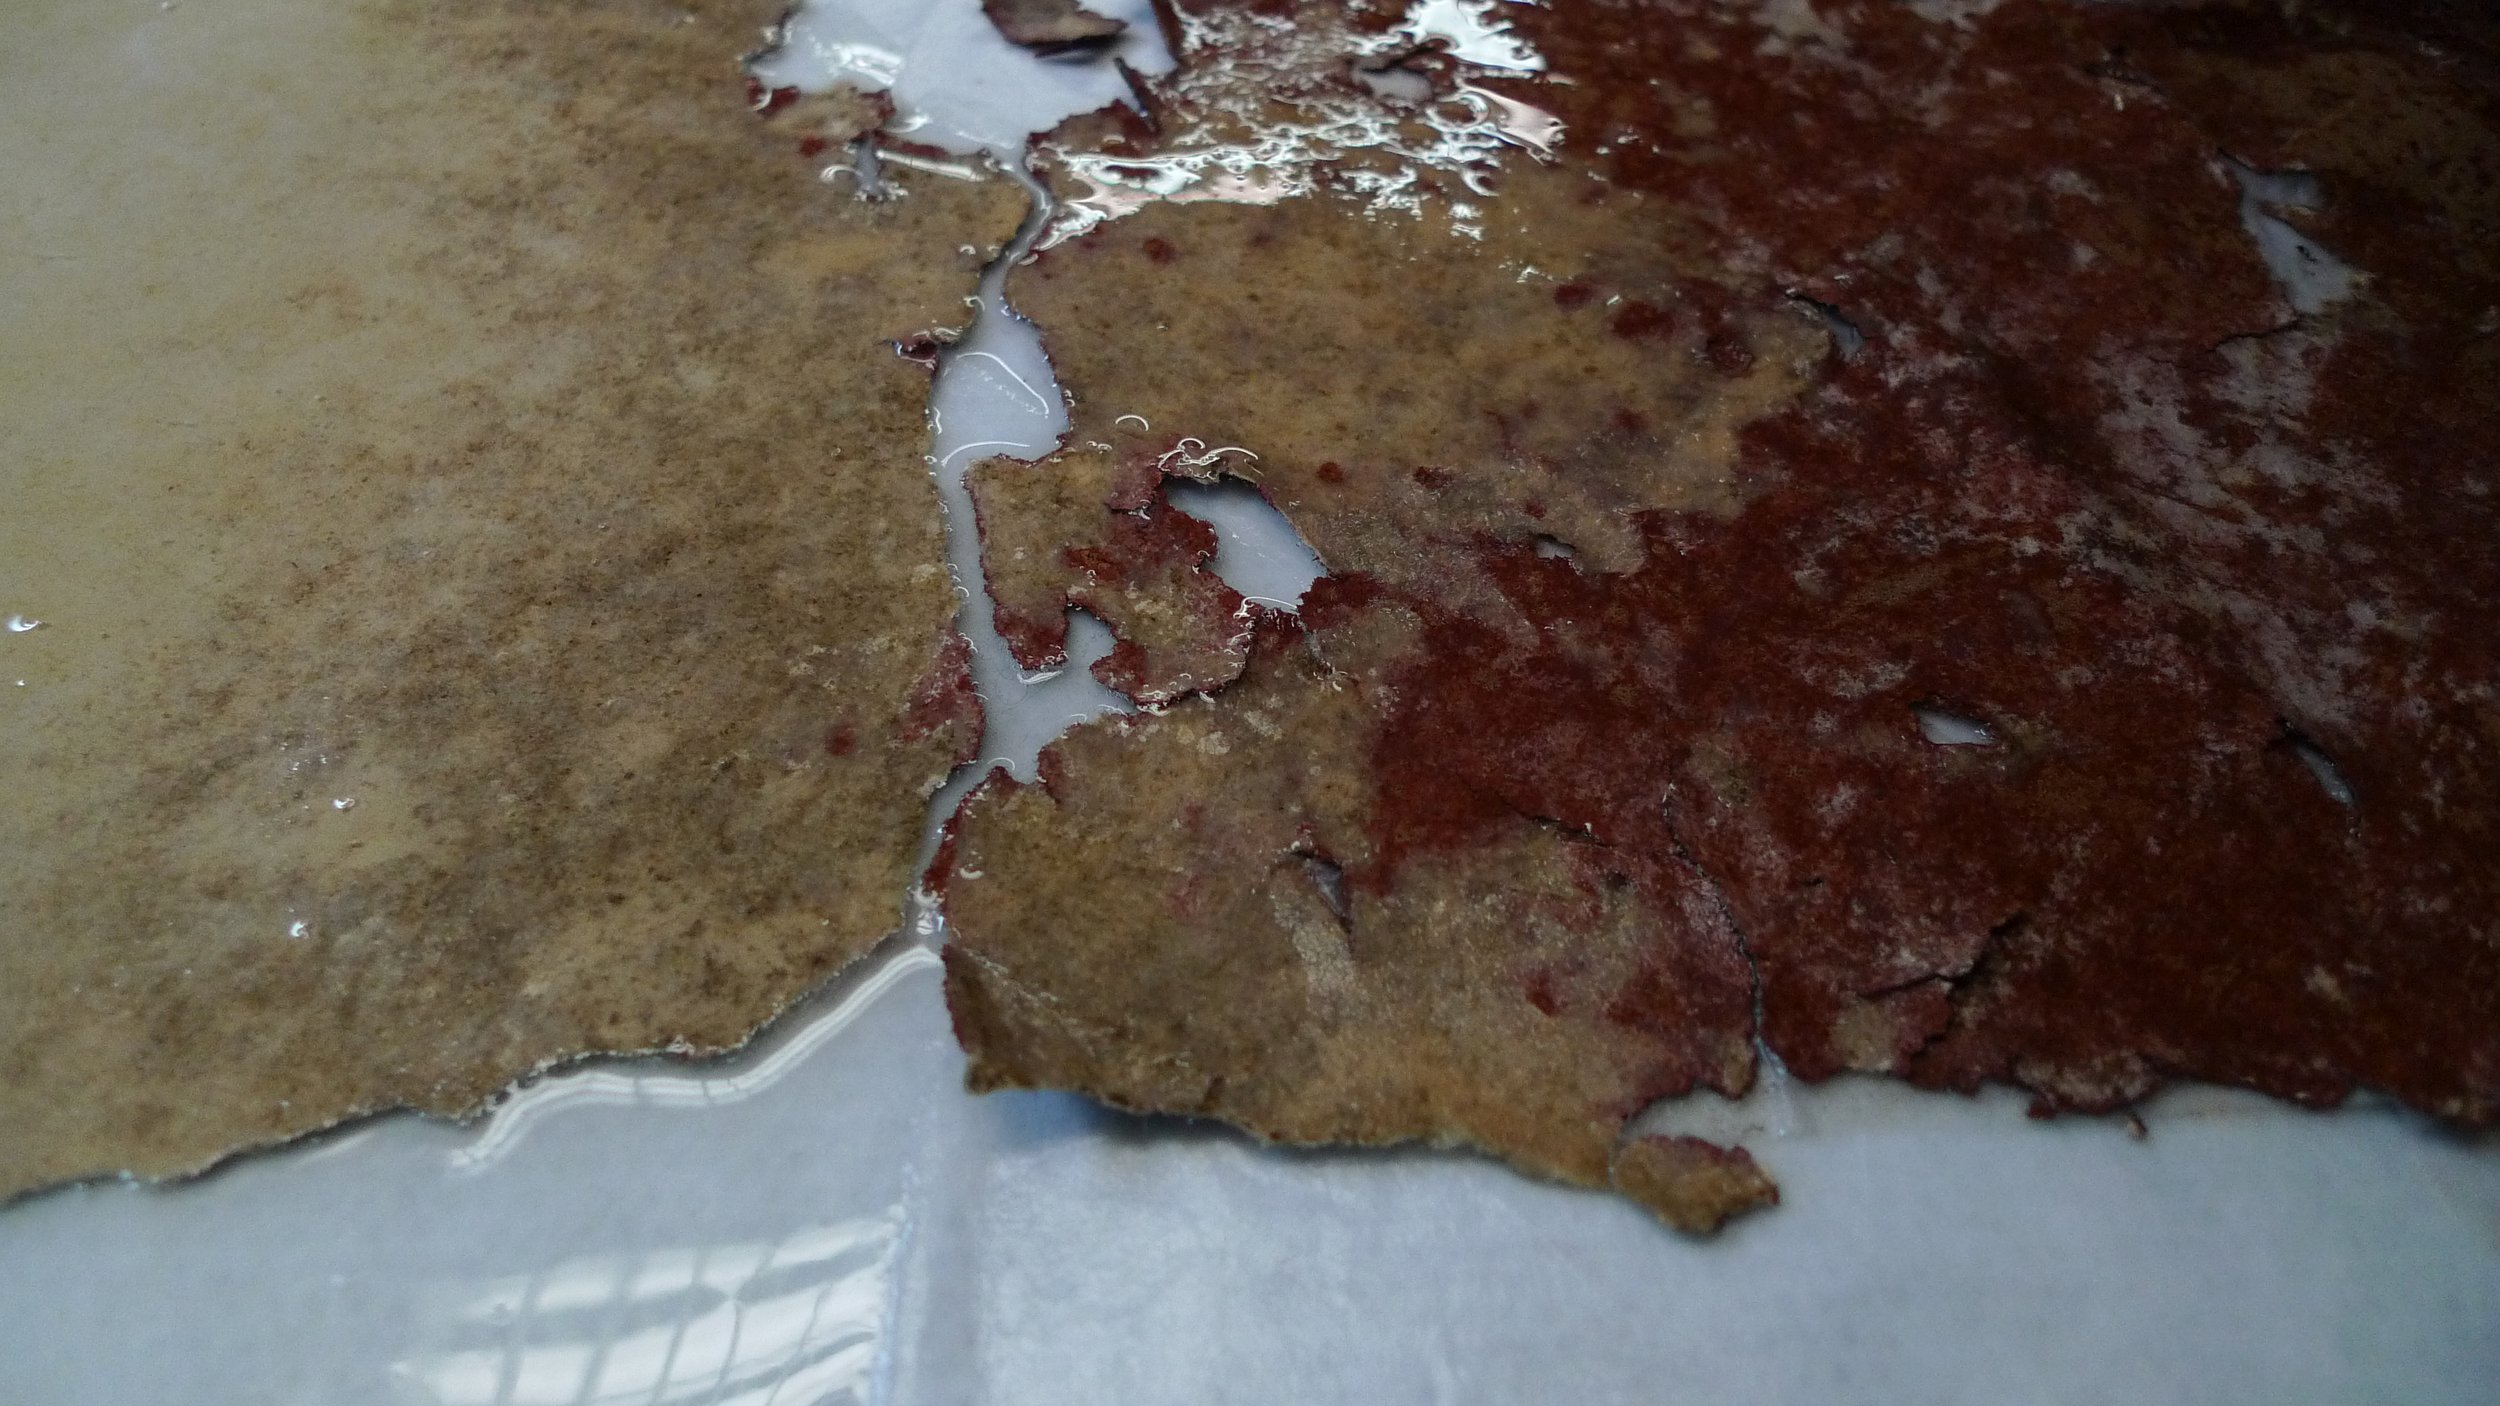
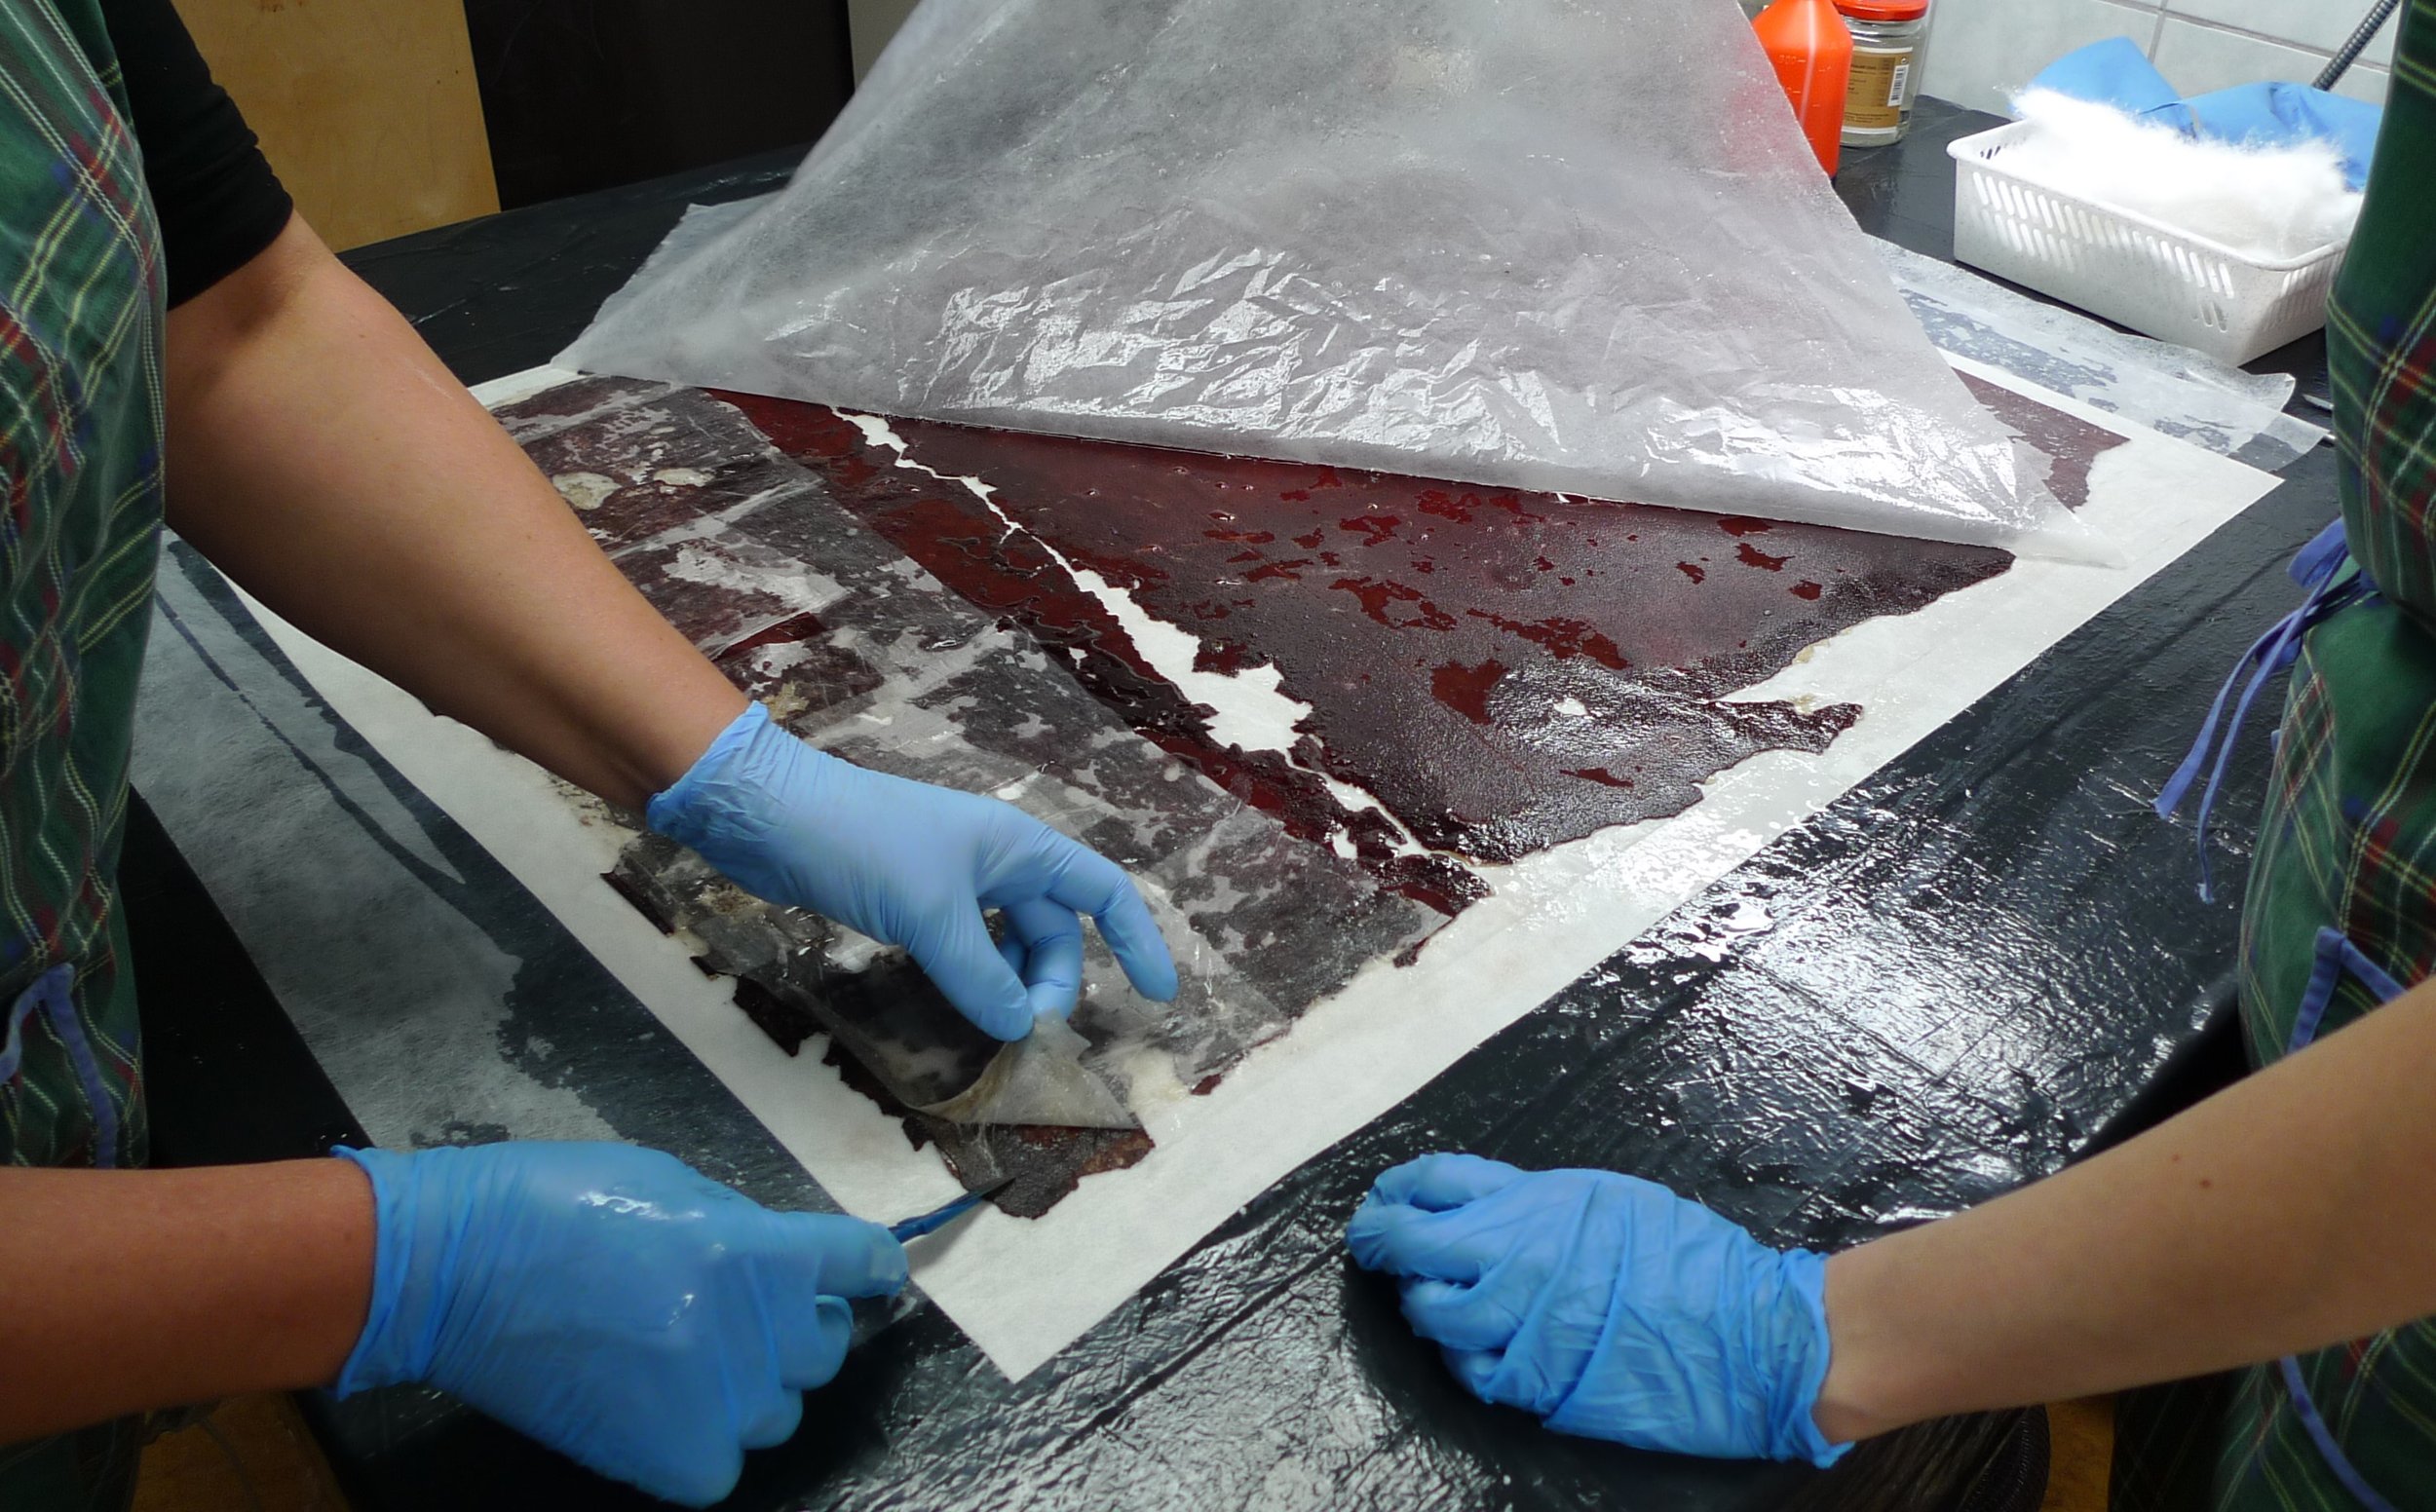
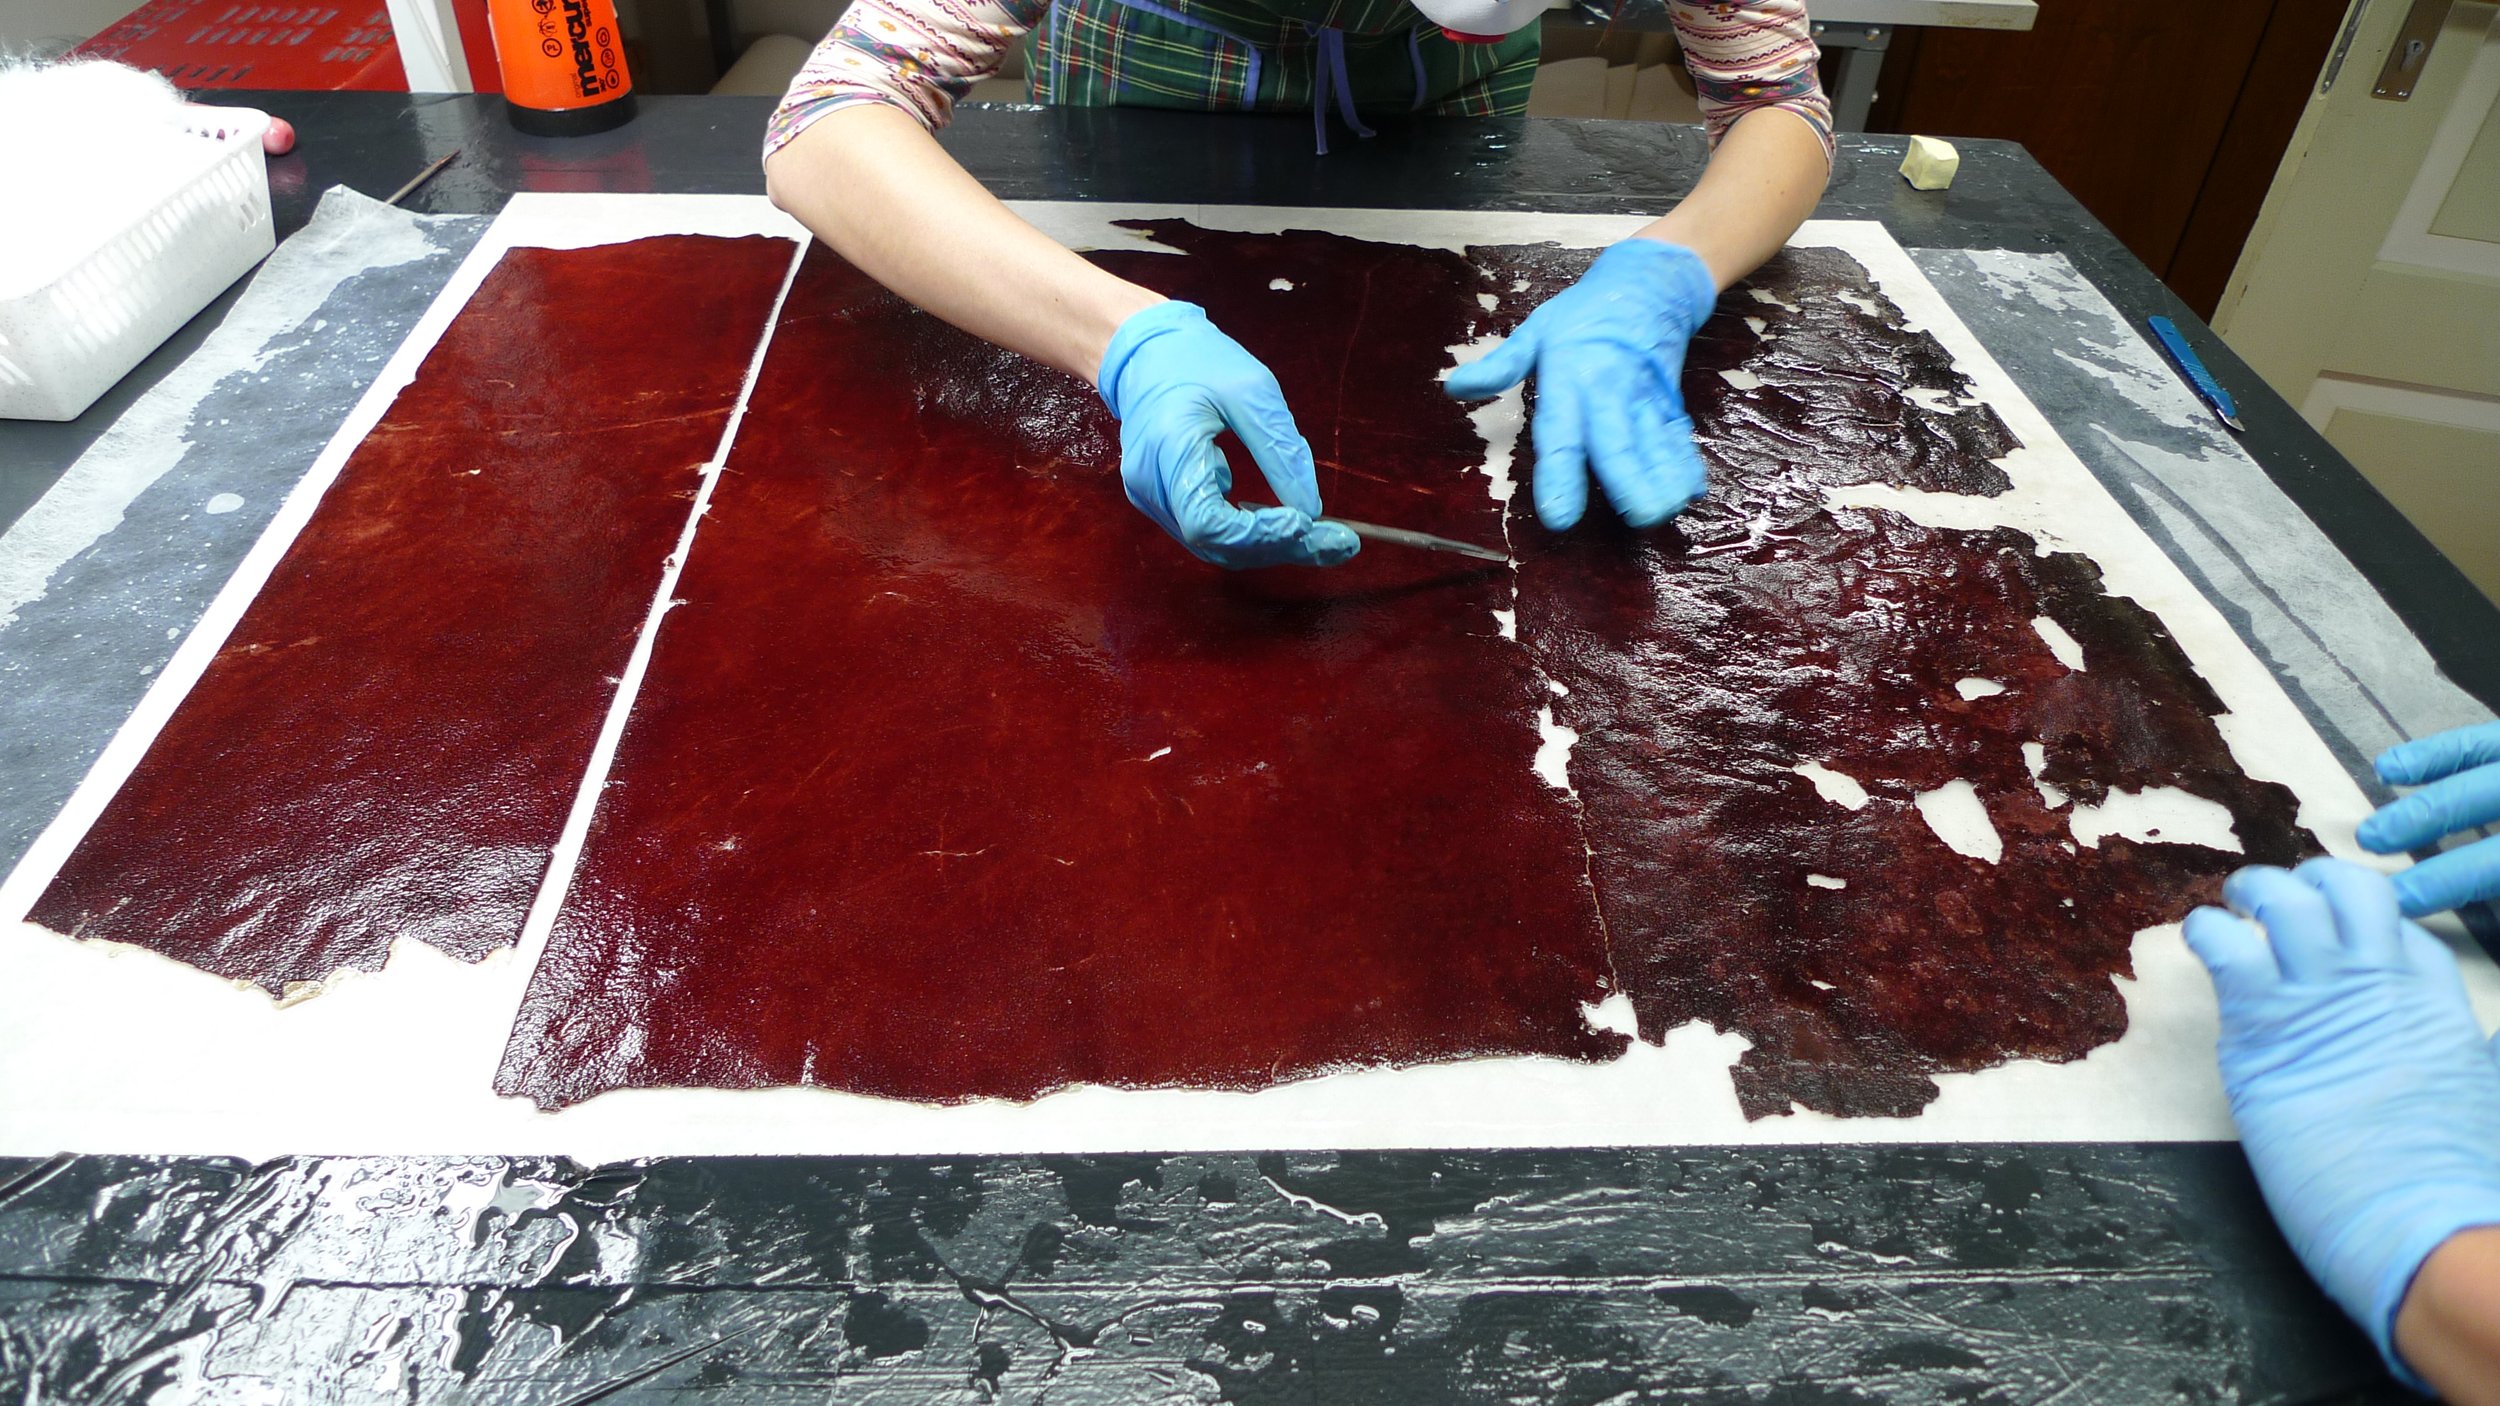
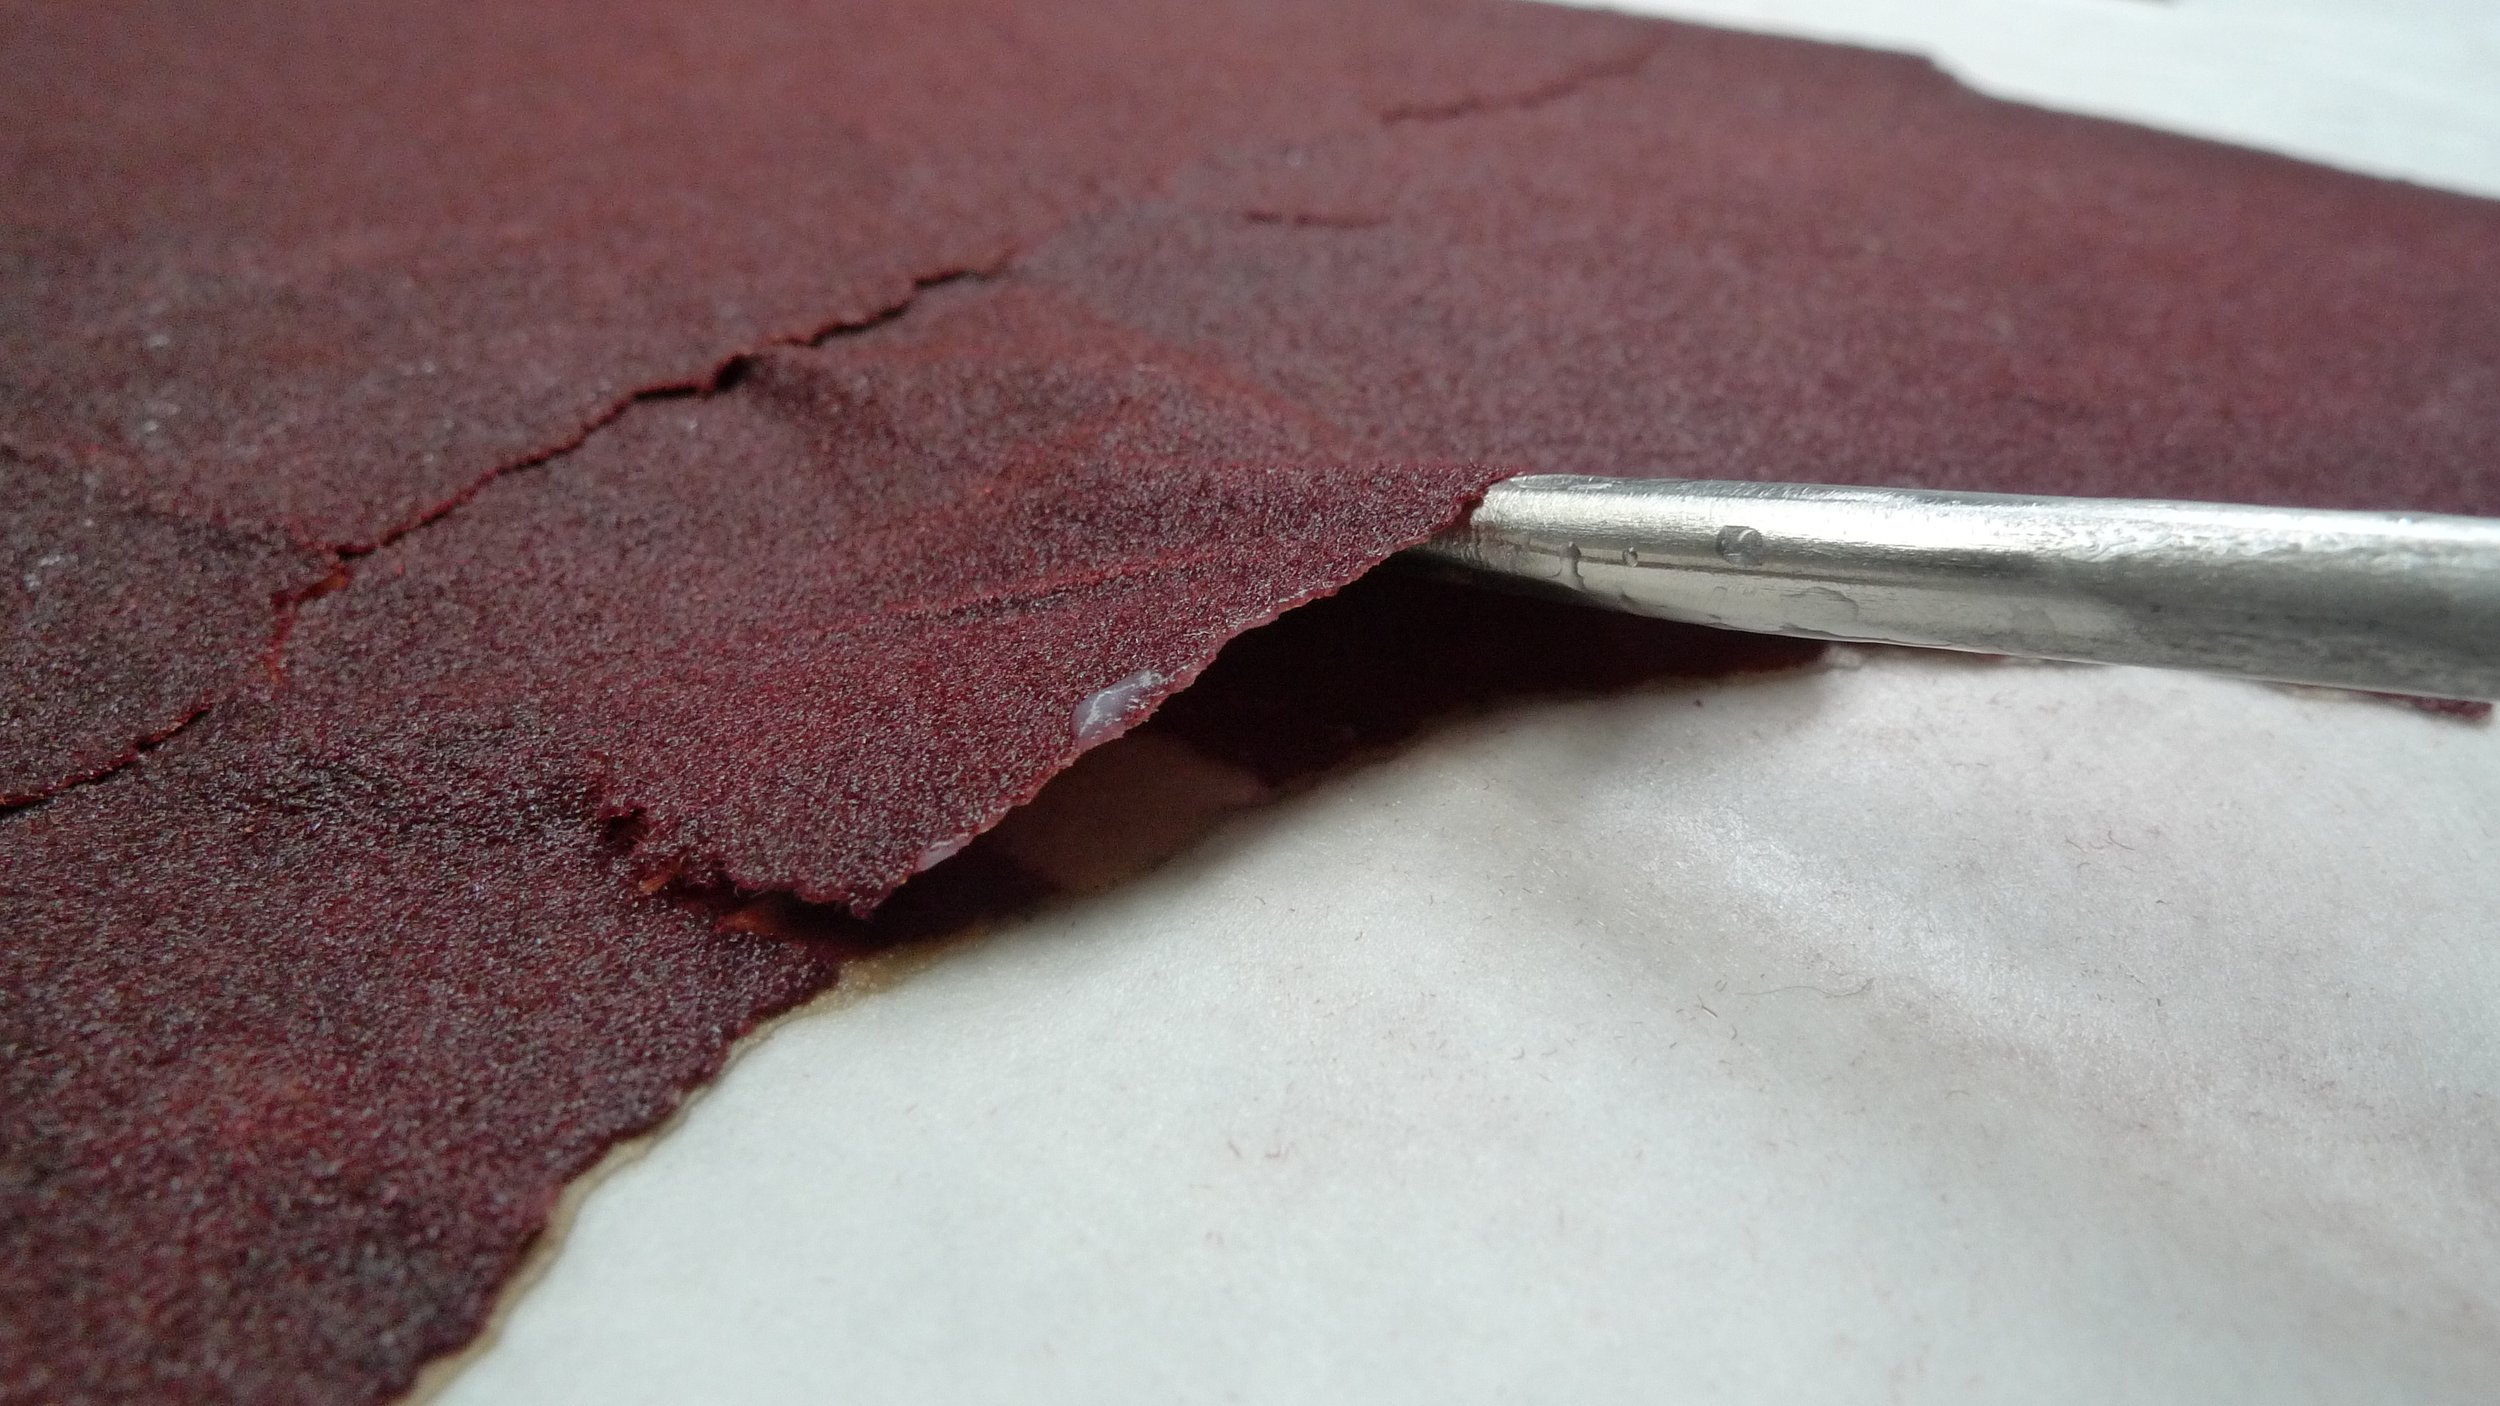
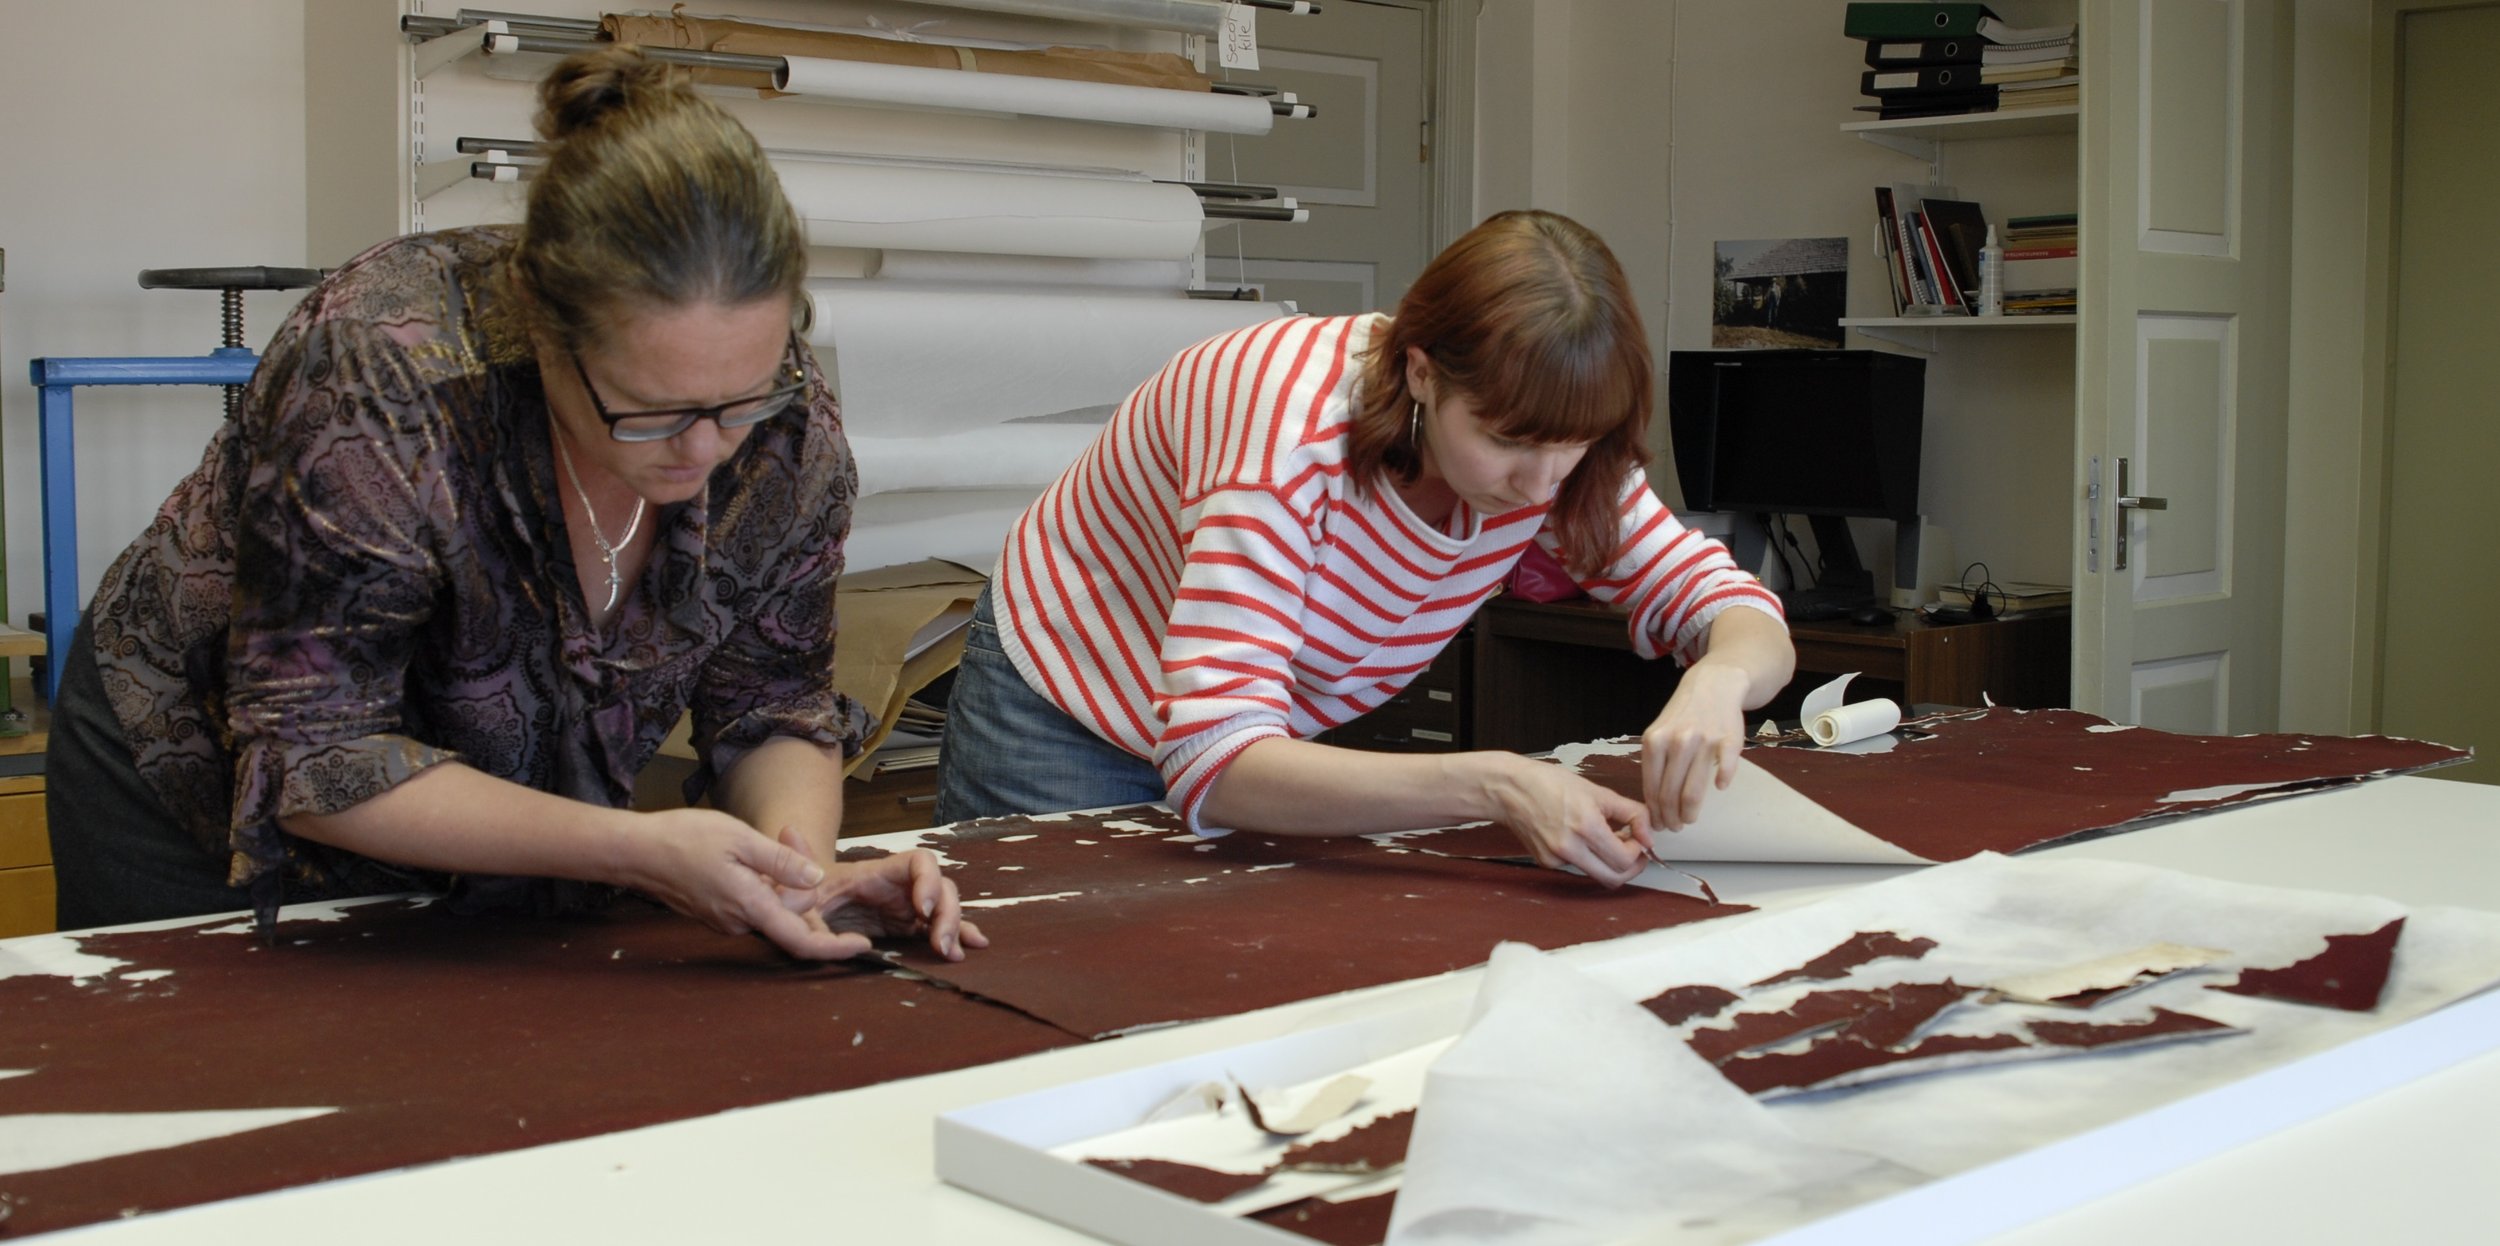
The reverse side was cleansed of plaster, glue and waste-paper residue. Waste-paper that was attatched to the wallpaper had to be removed using wet treatment. Soaking in water in this stage had to be avoided due to the degraded state of the wallpaper, so 5%MC in 50% water and ethanol solution was used to soften up the waste-paper and the initial rye-paste it had been glued with. [fig.19], [fig.20], [fig.21]
Before conservation treatment the wallpaper pH and lignin content were tested. None of the wallpapers contained lignin.
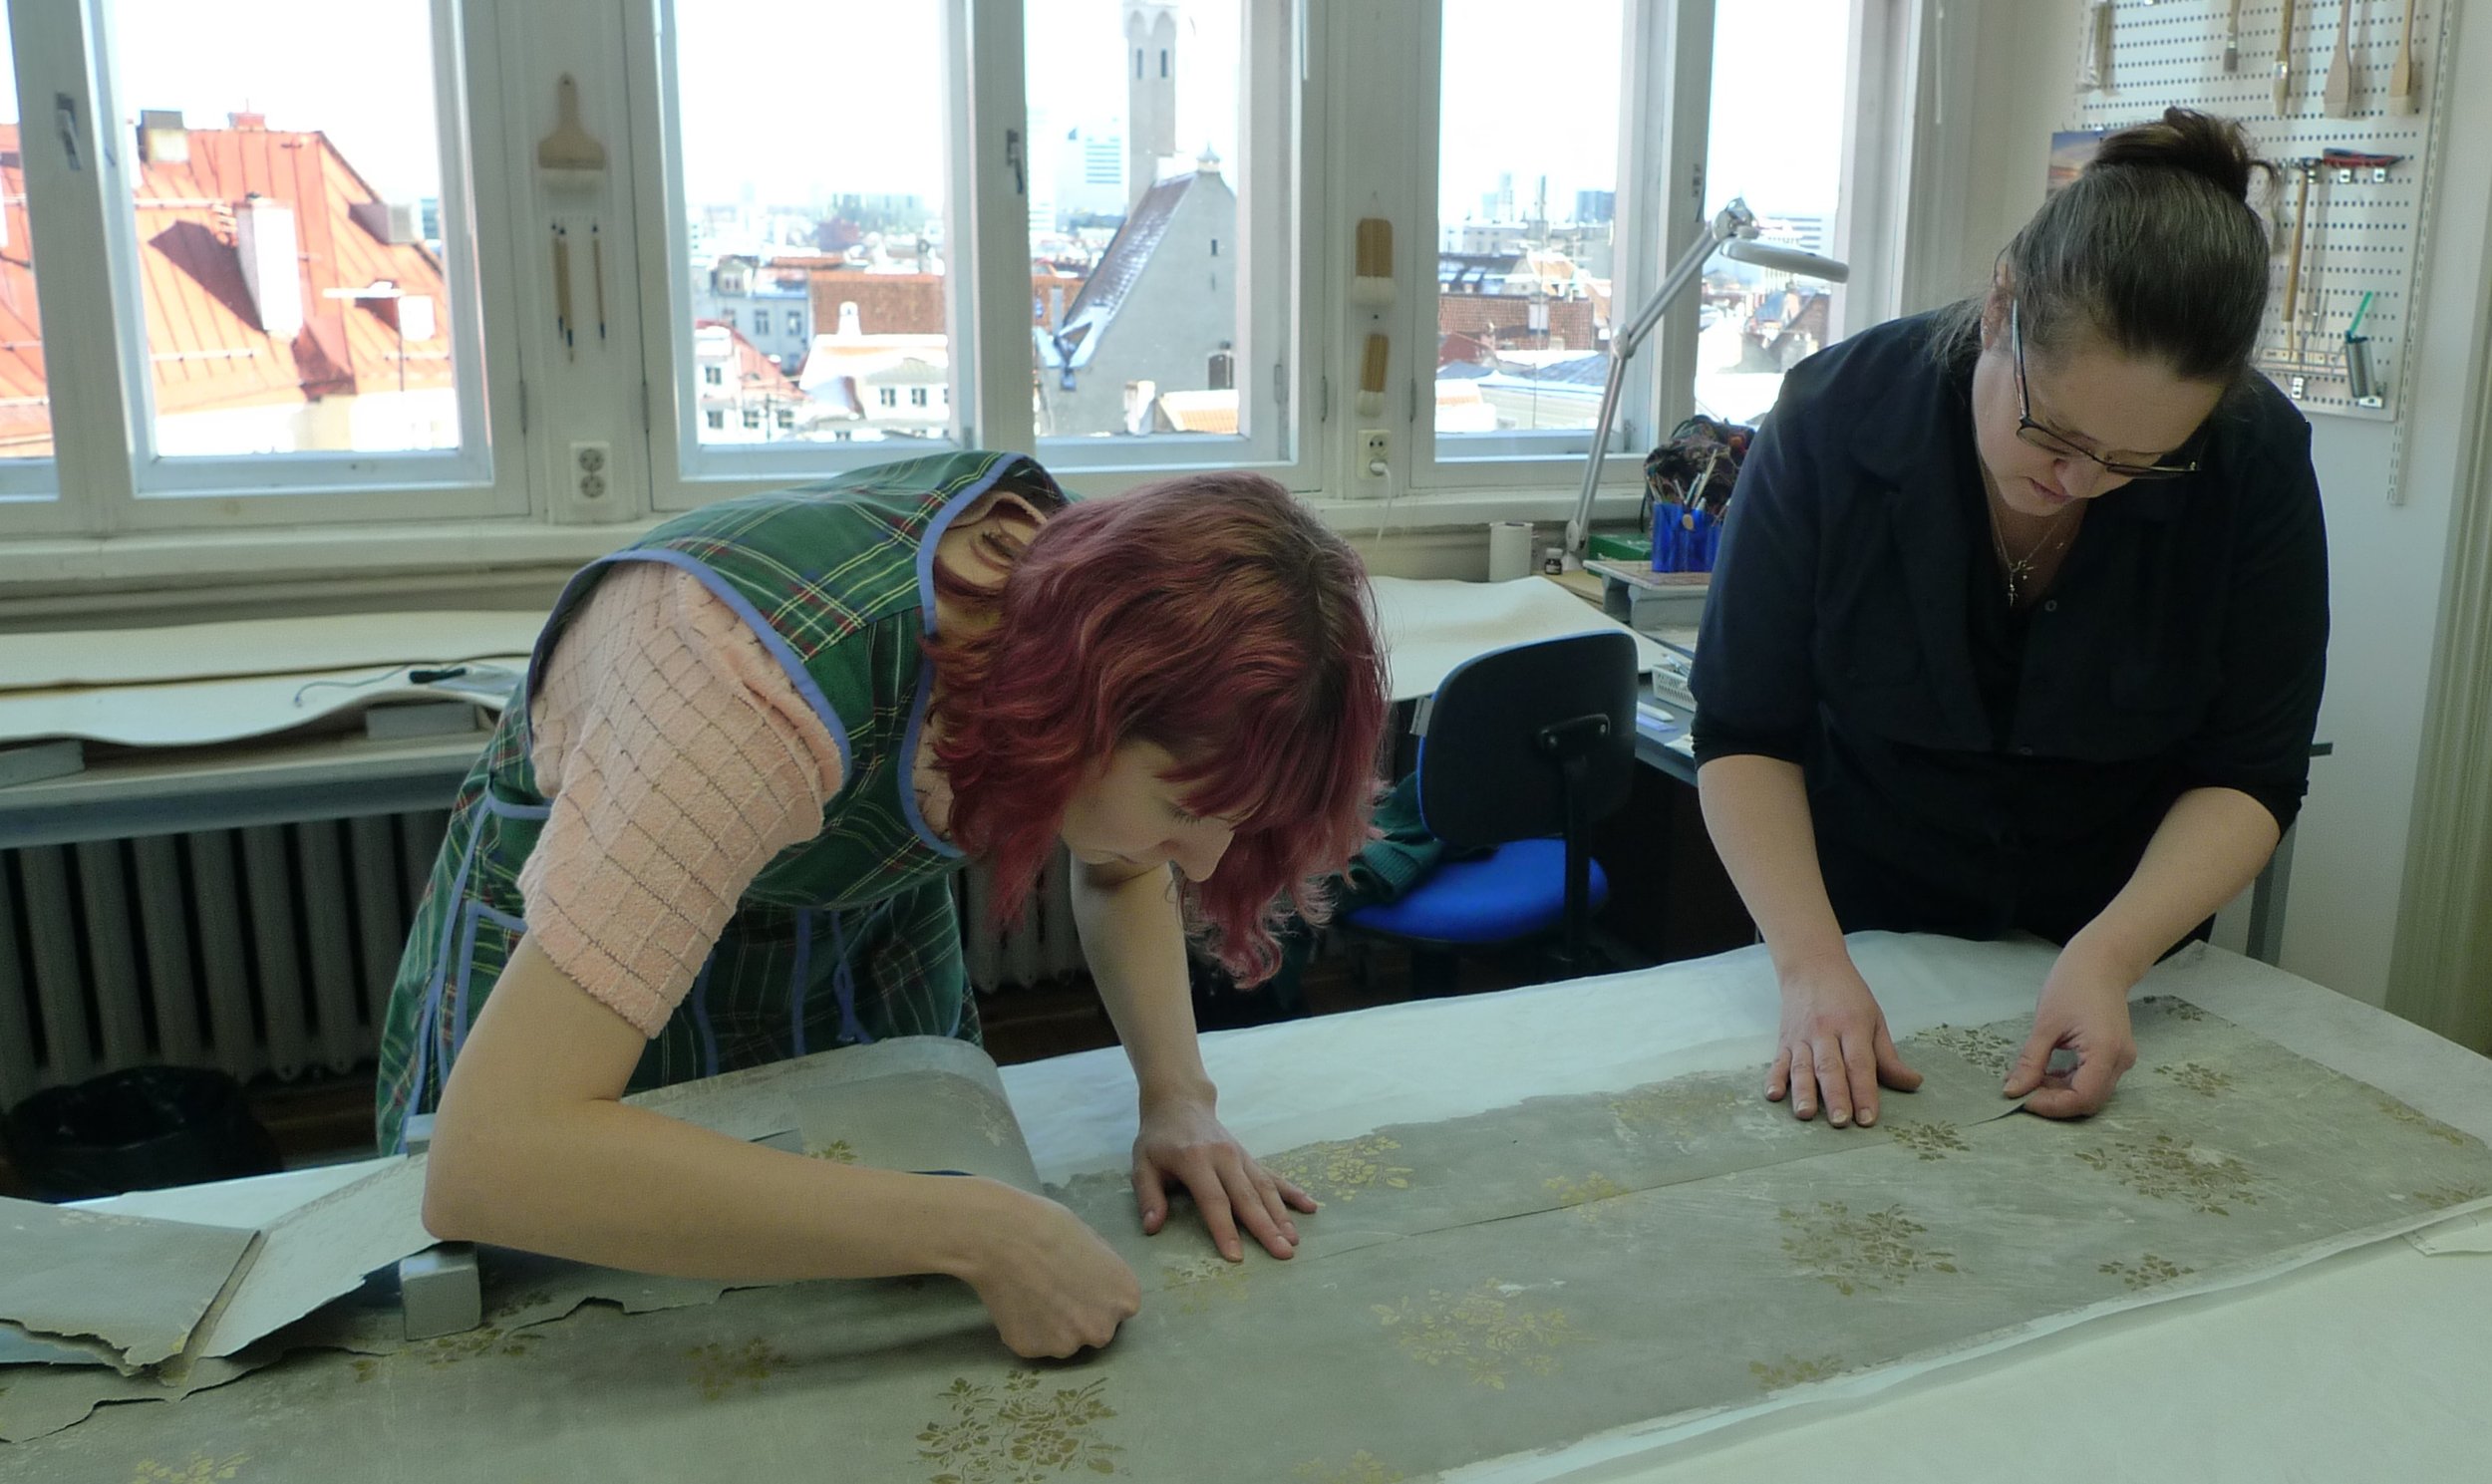
To proceed with washing all the fragments that were still attached to each other by edges or in several layers had to be dismounted individually.
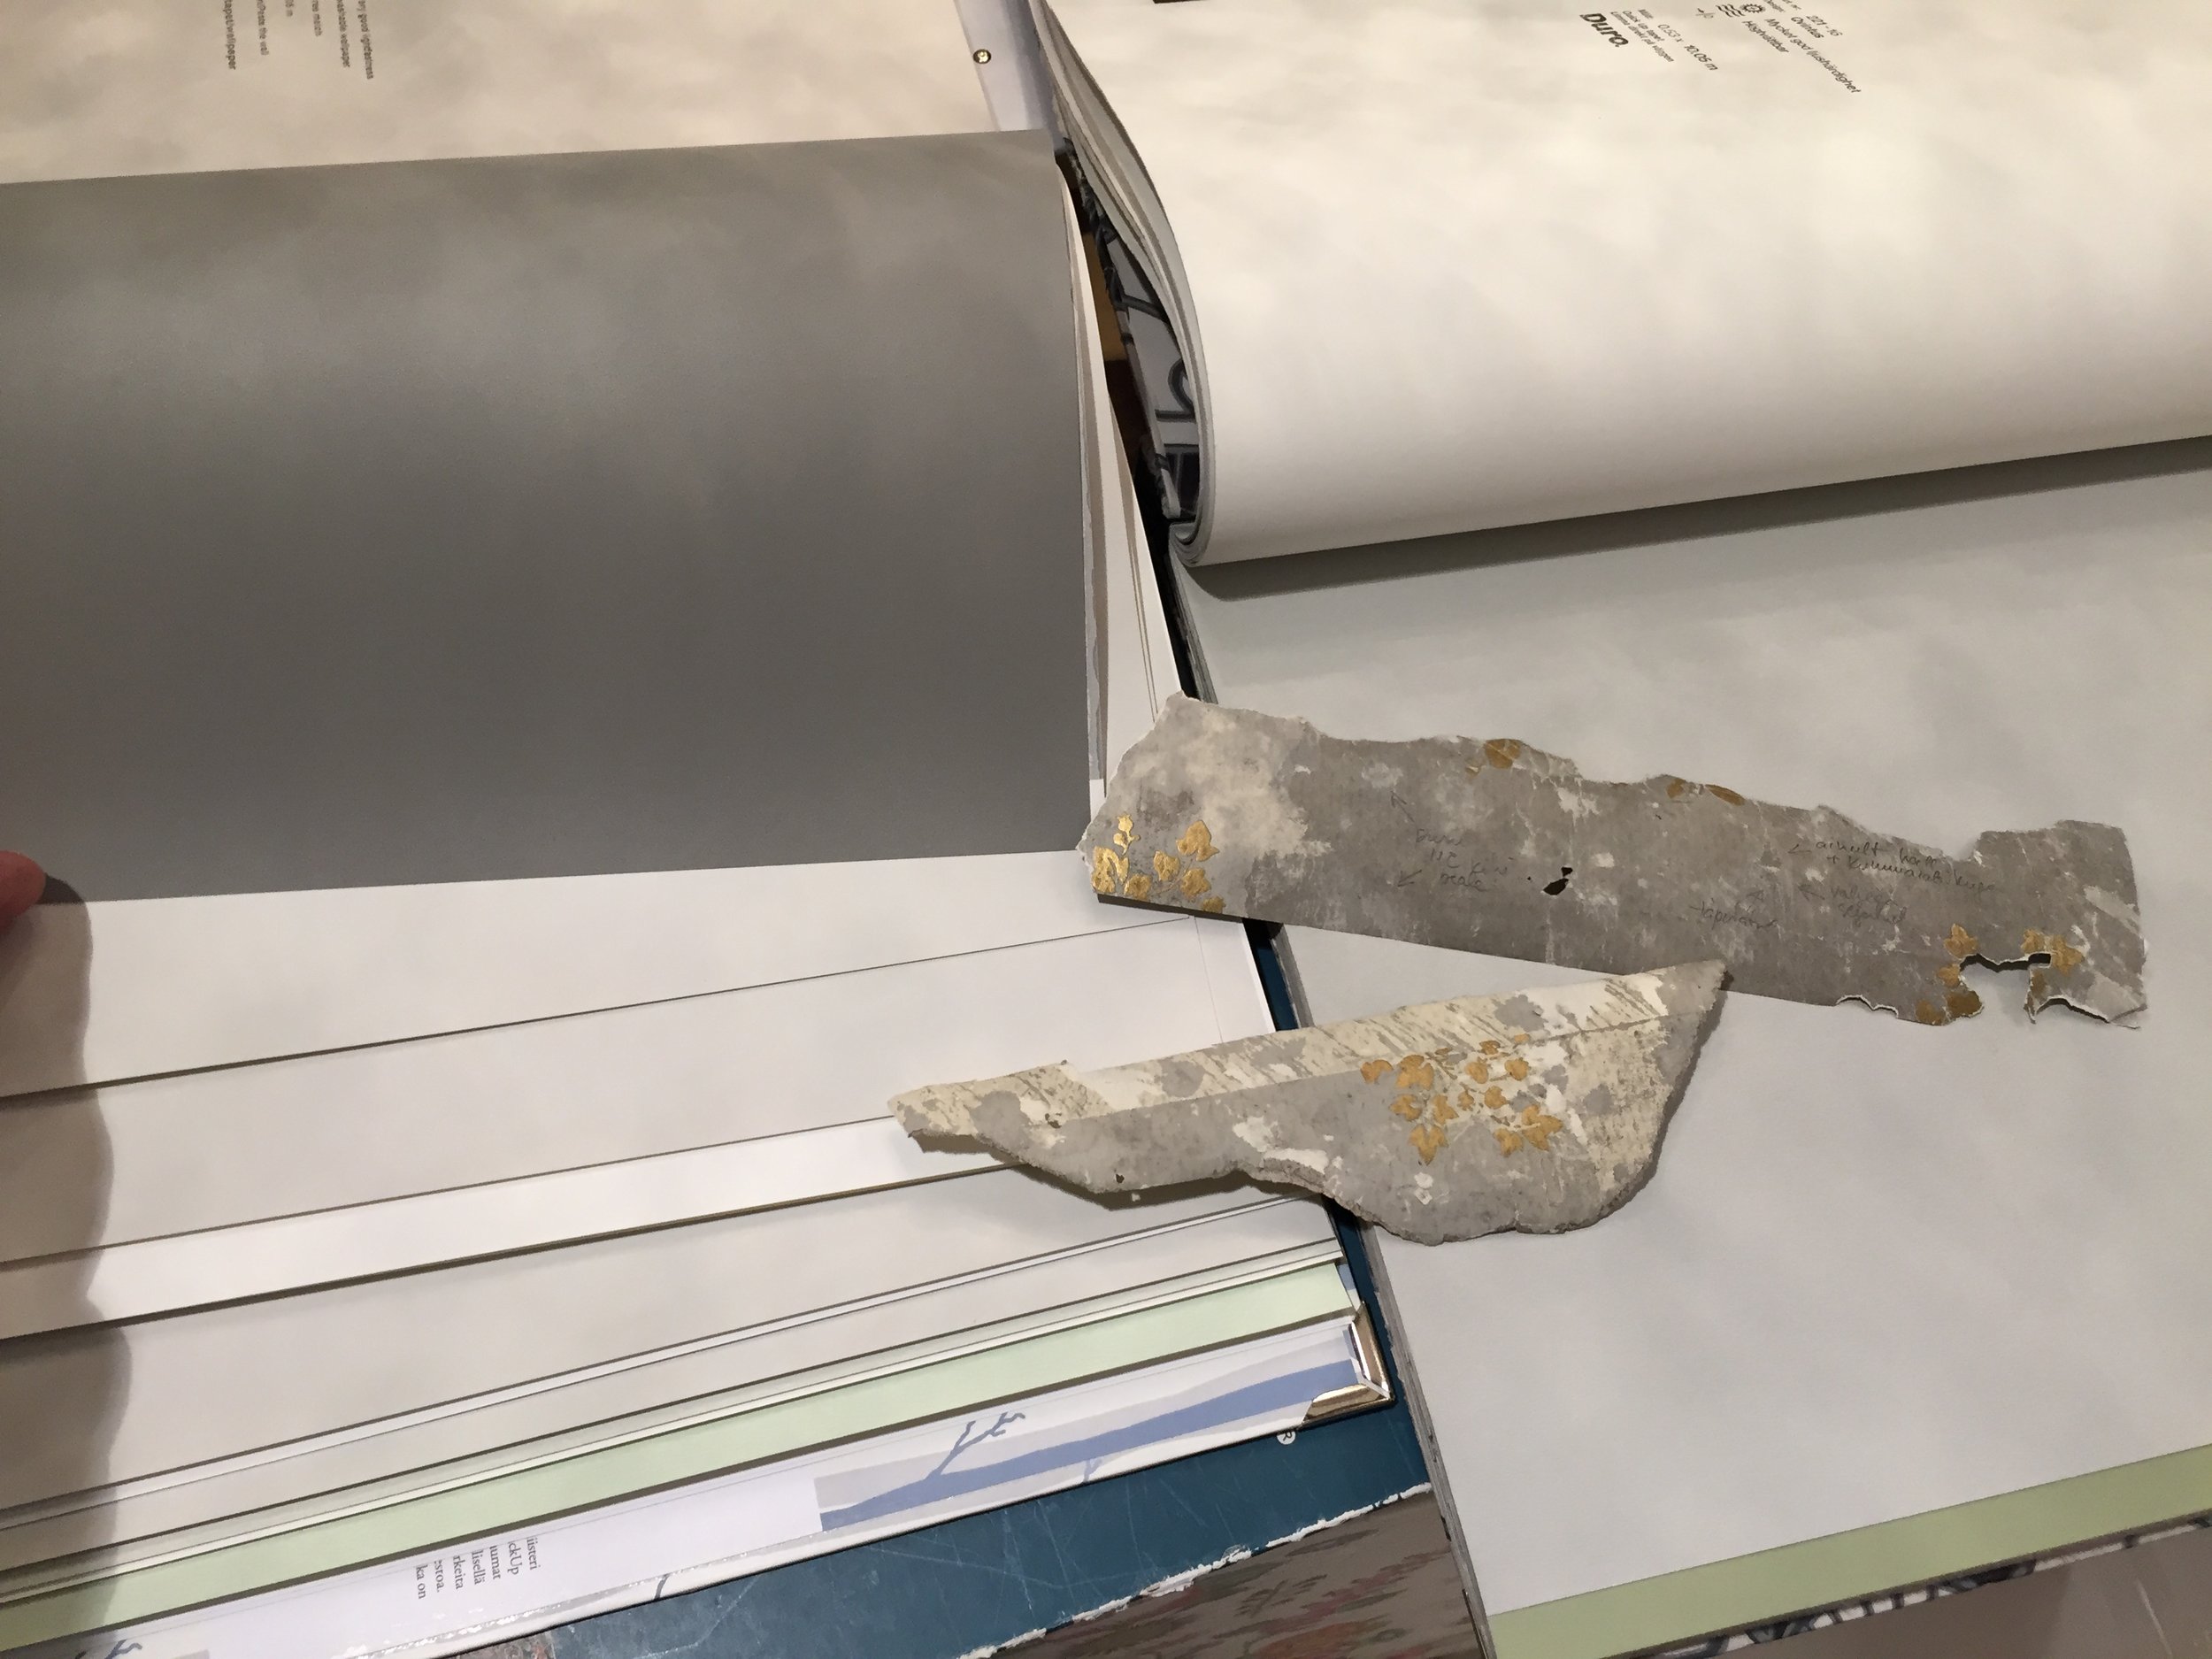
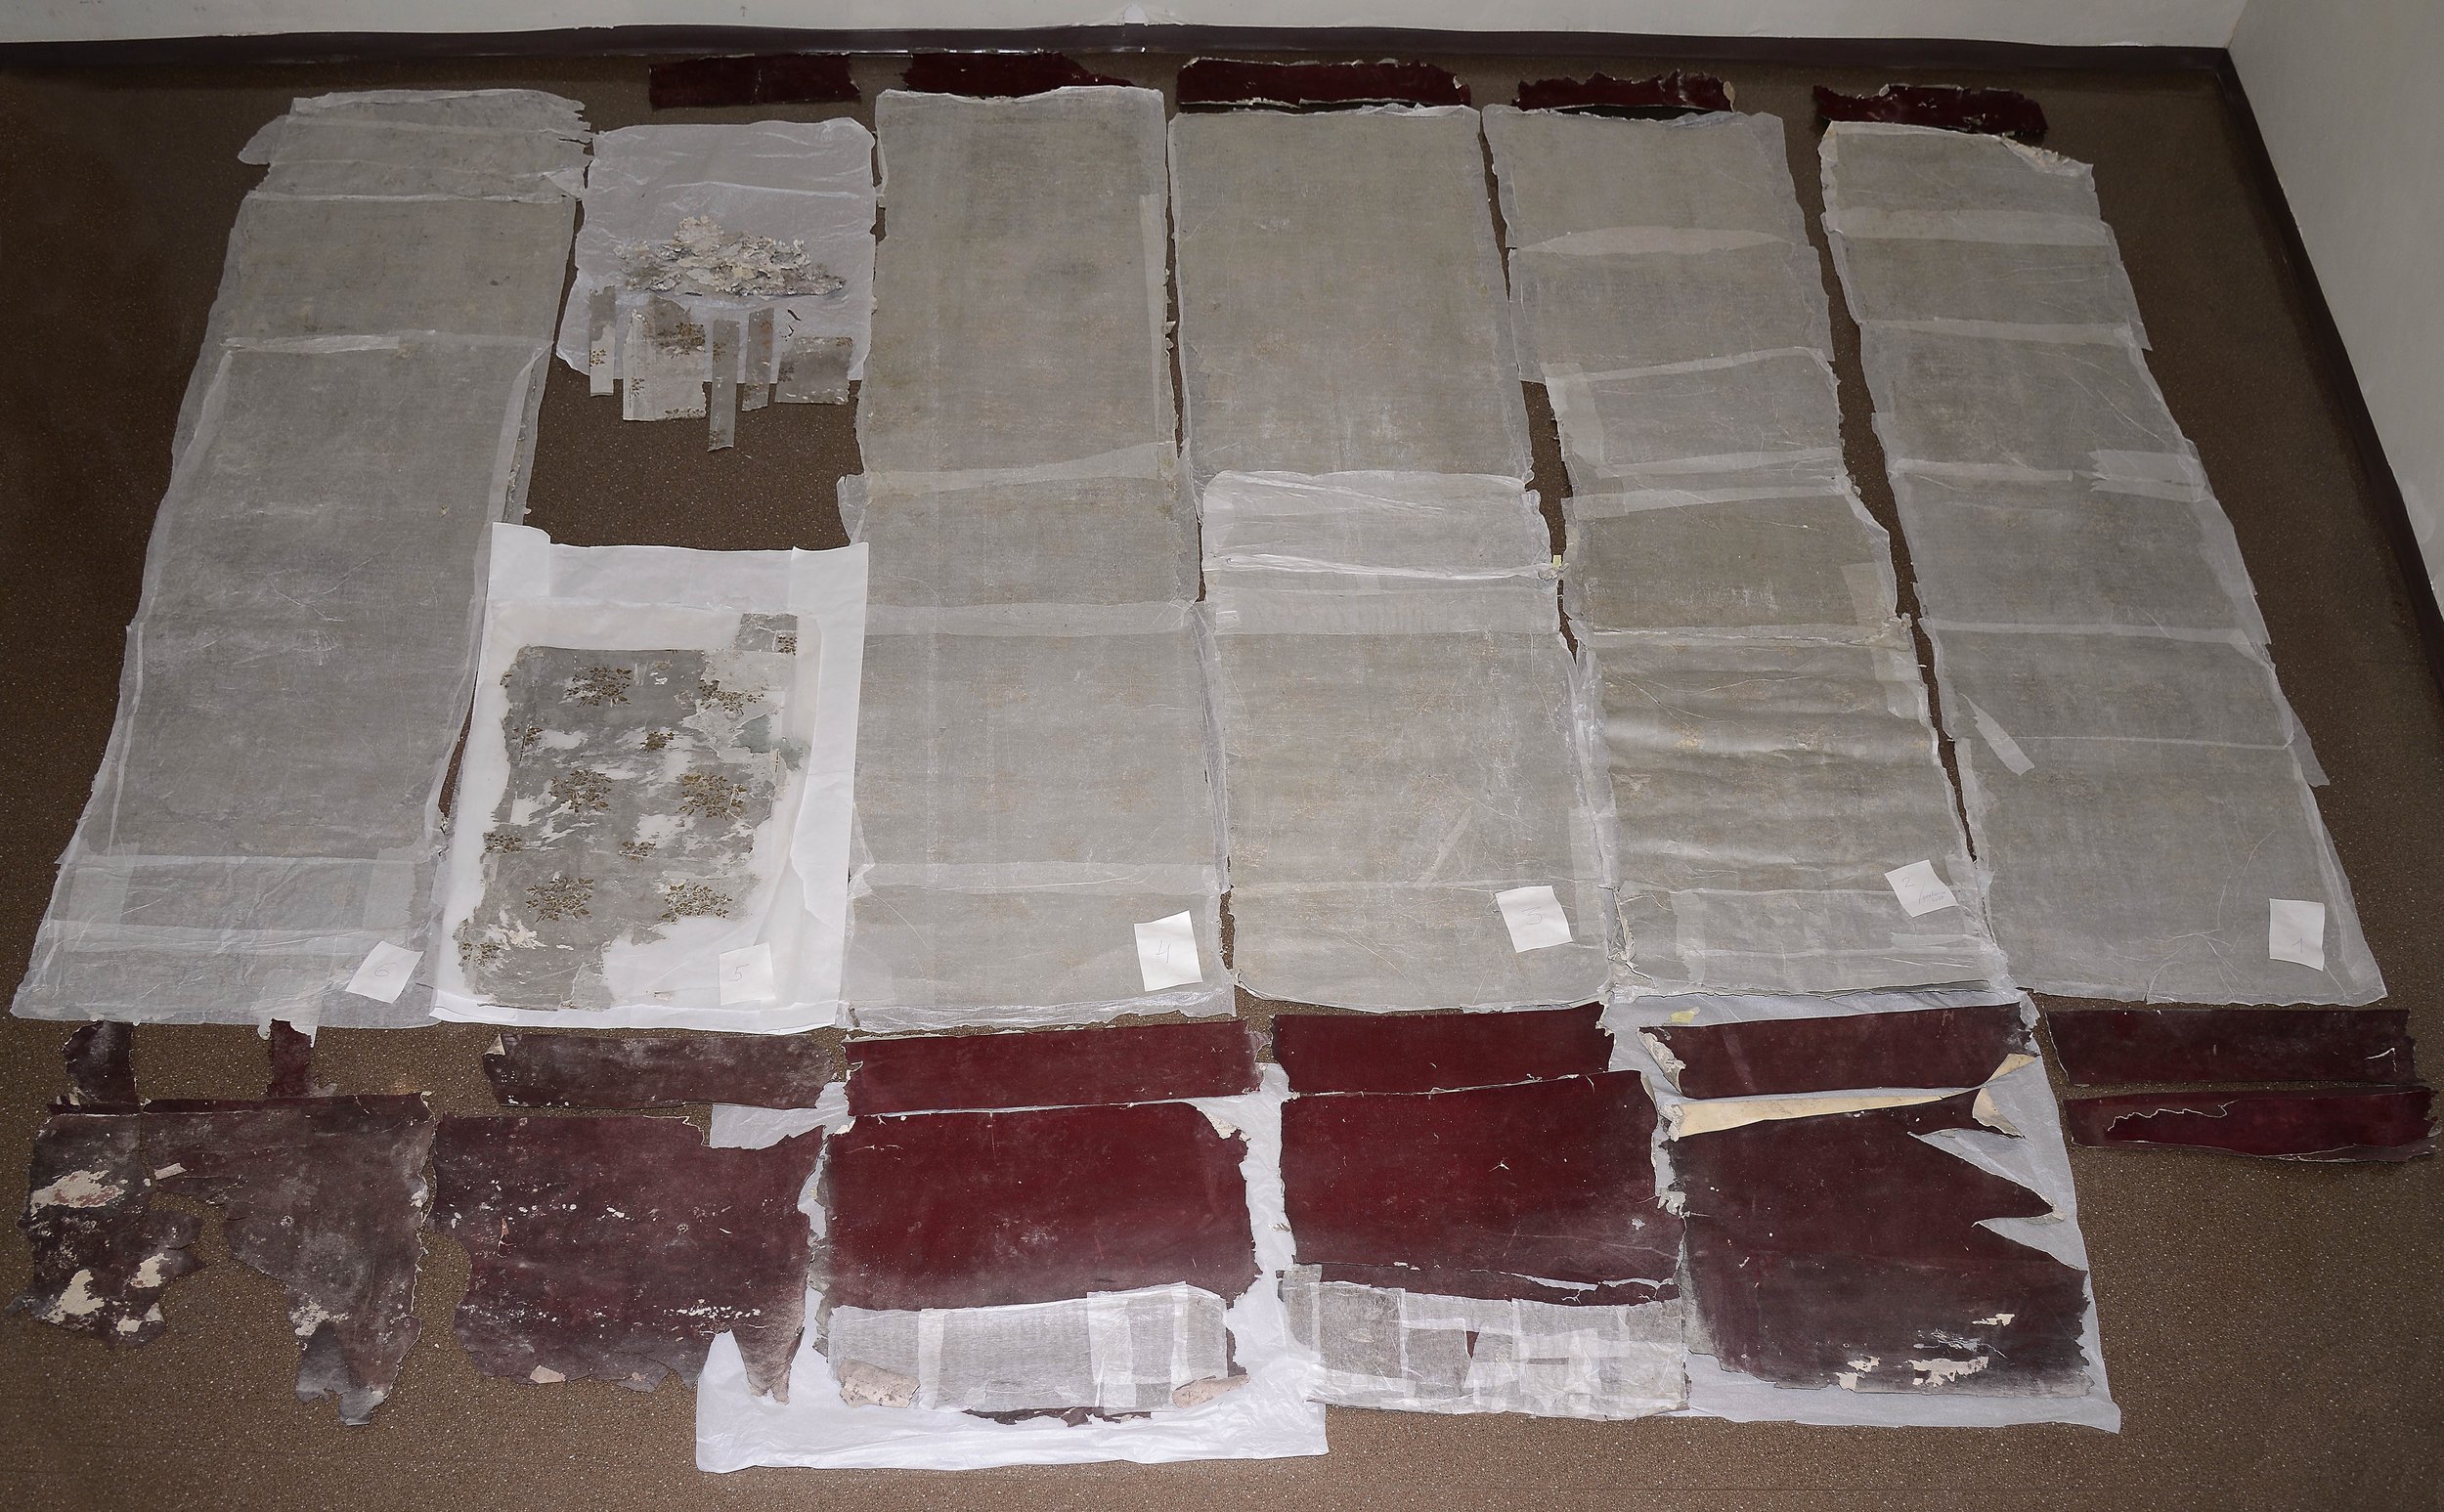
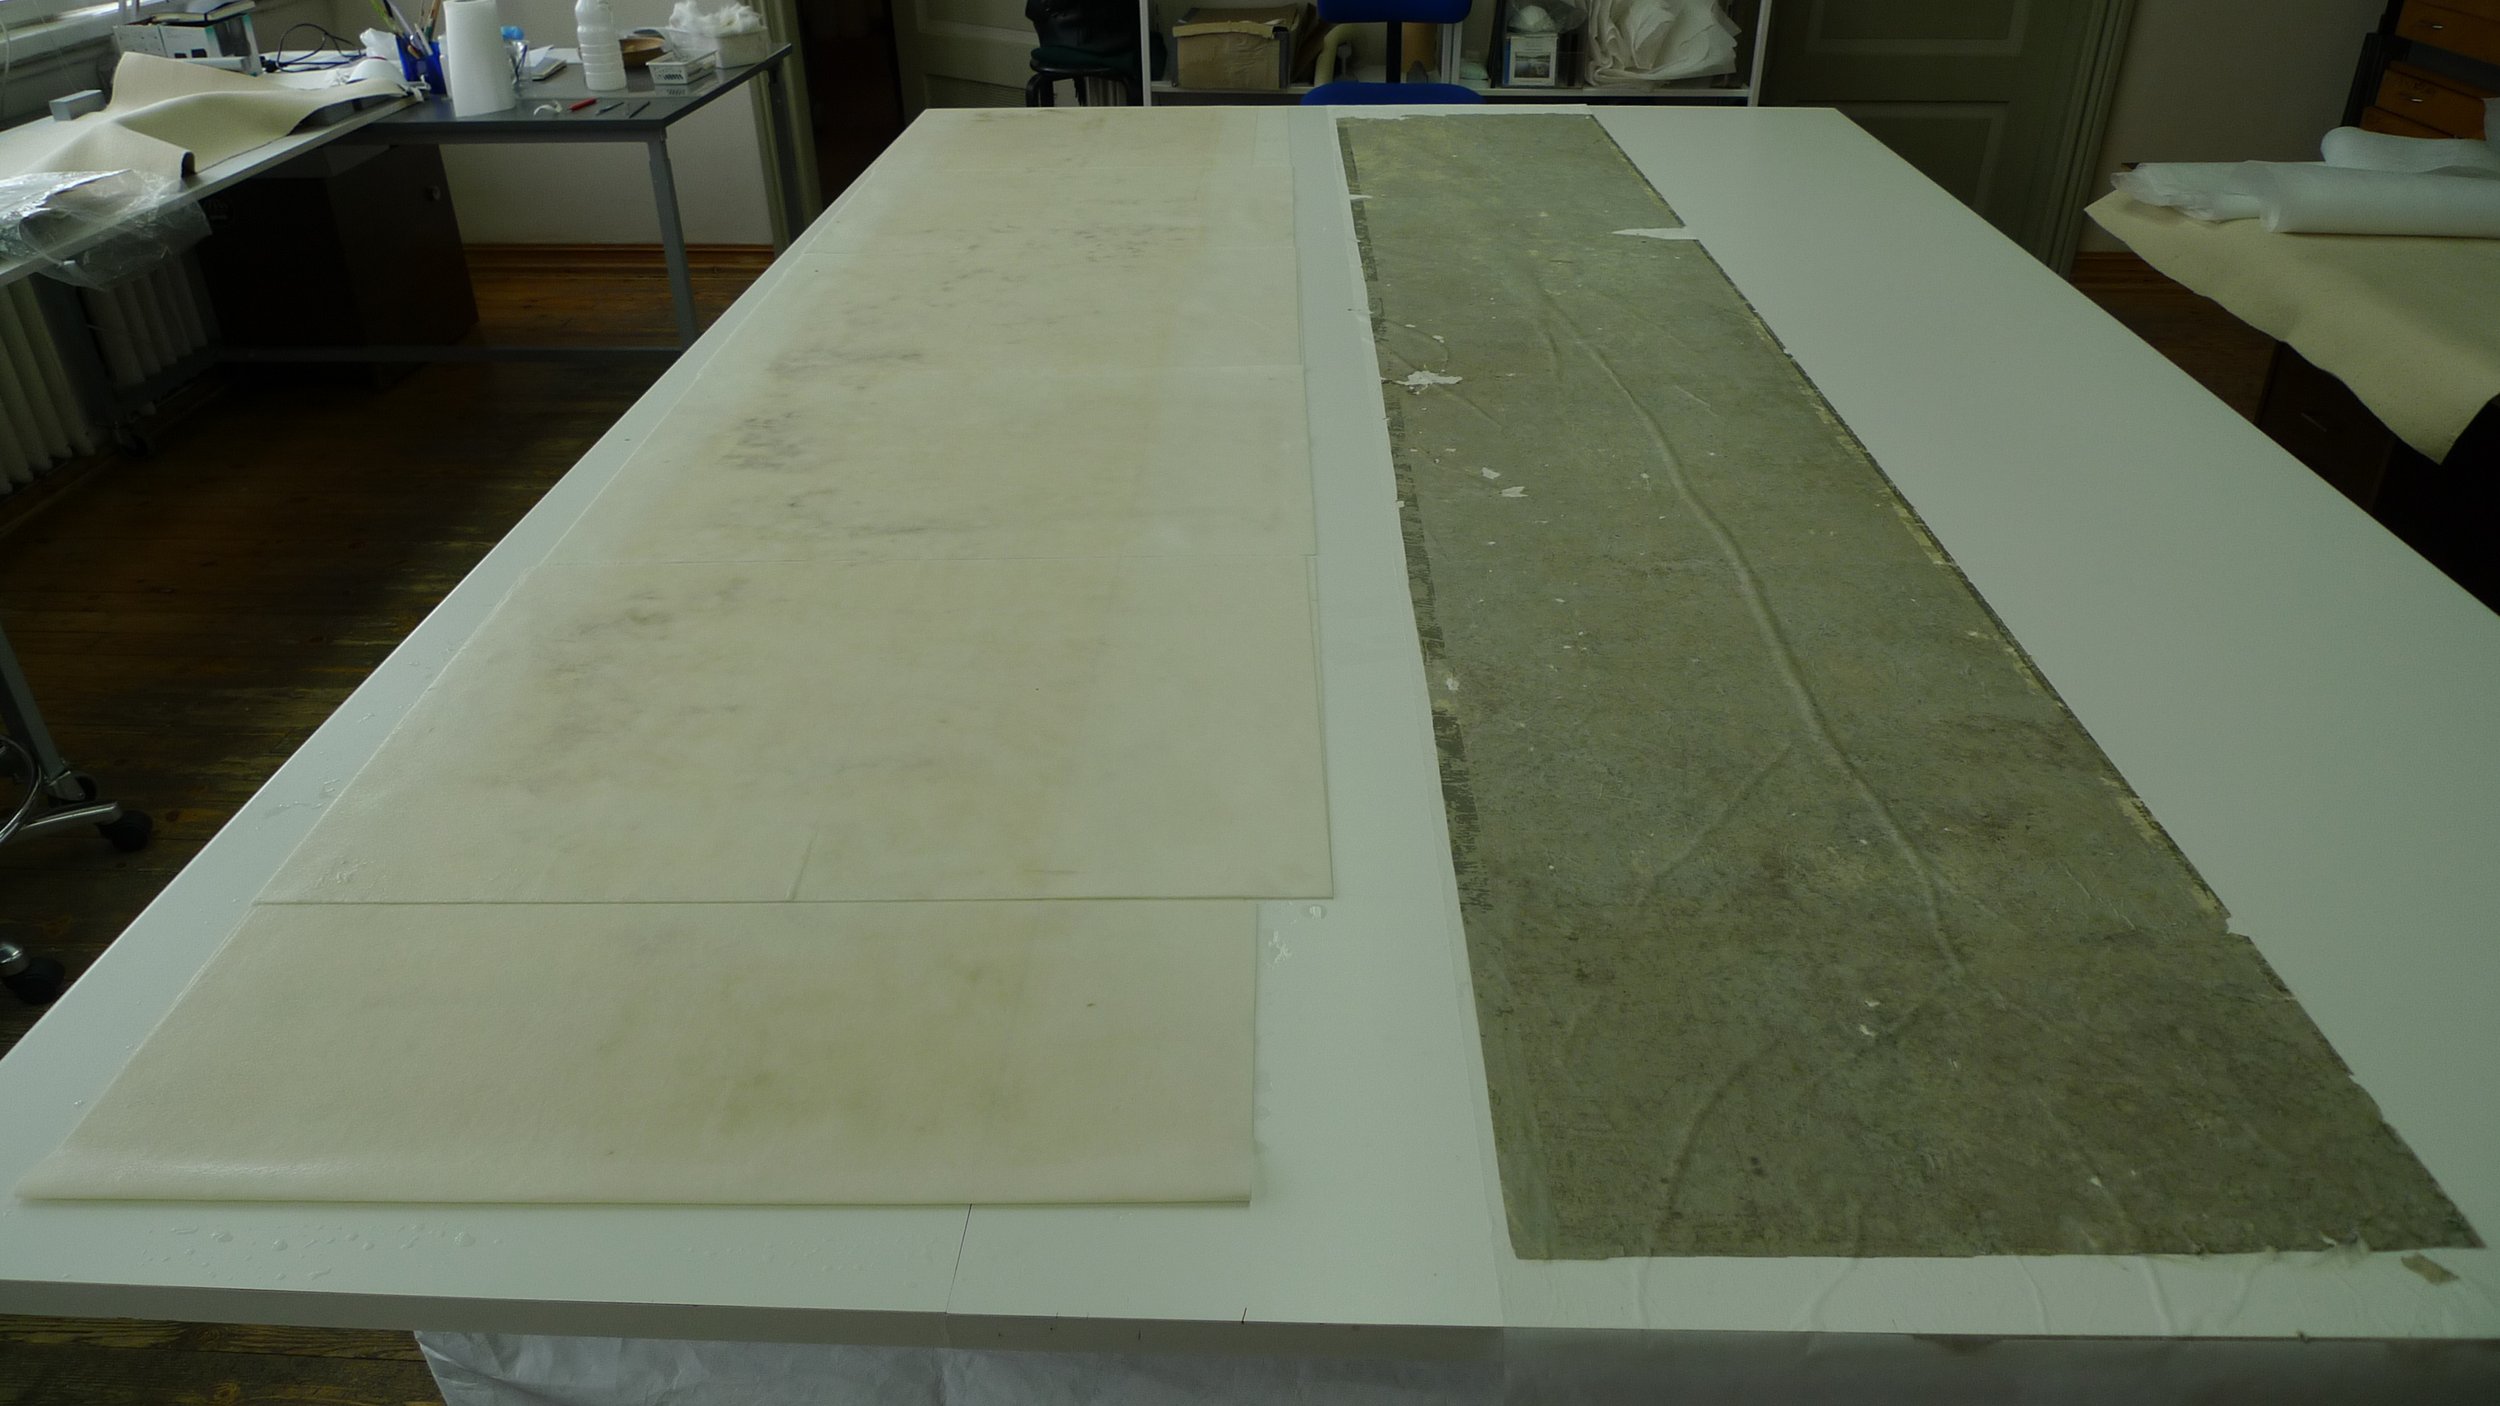
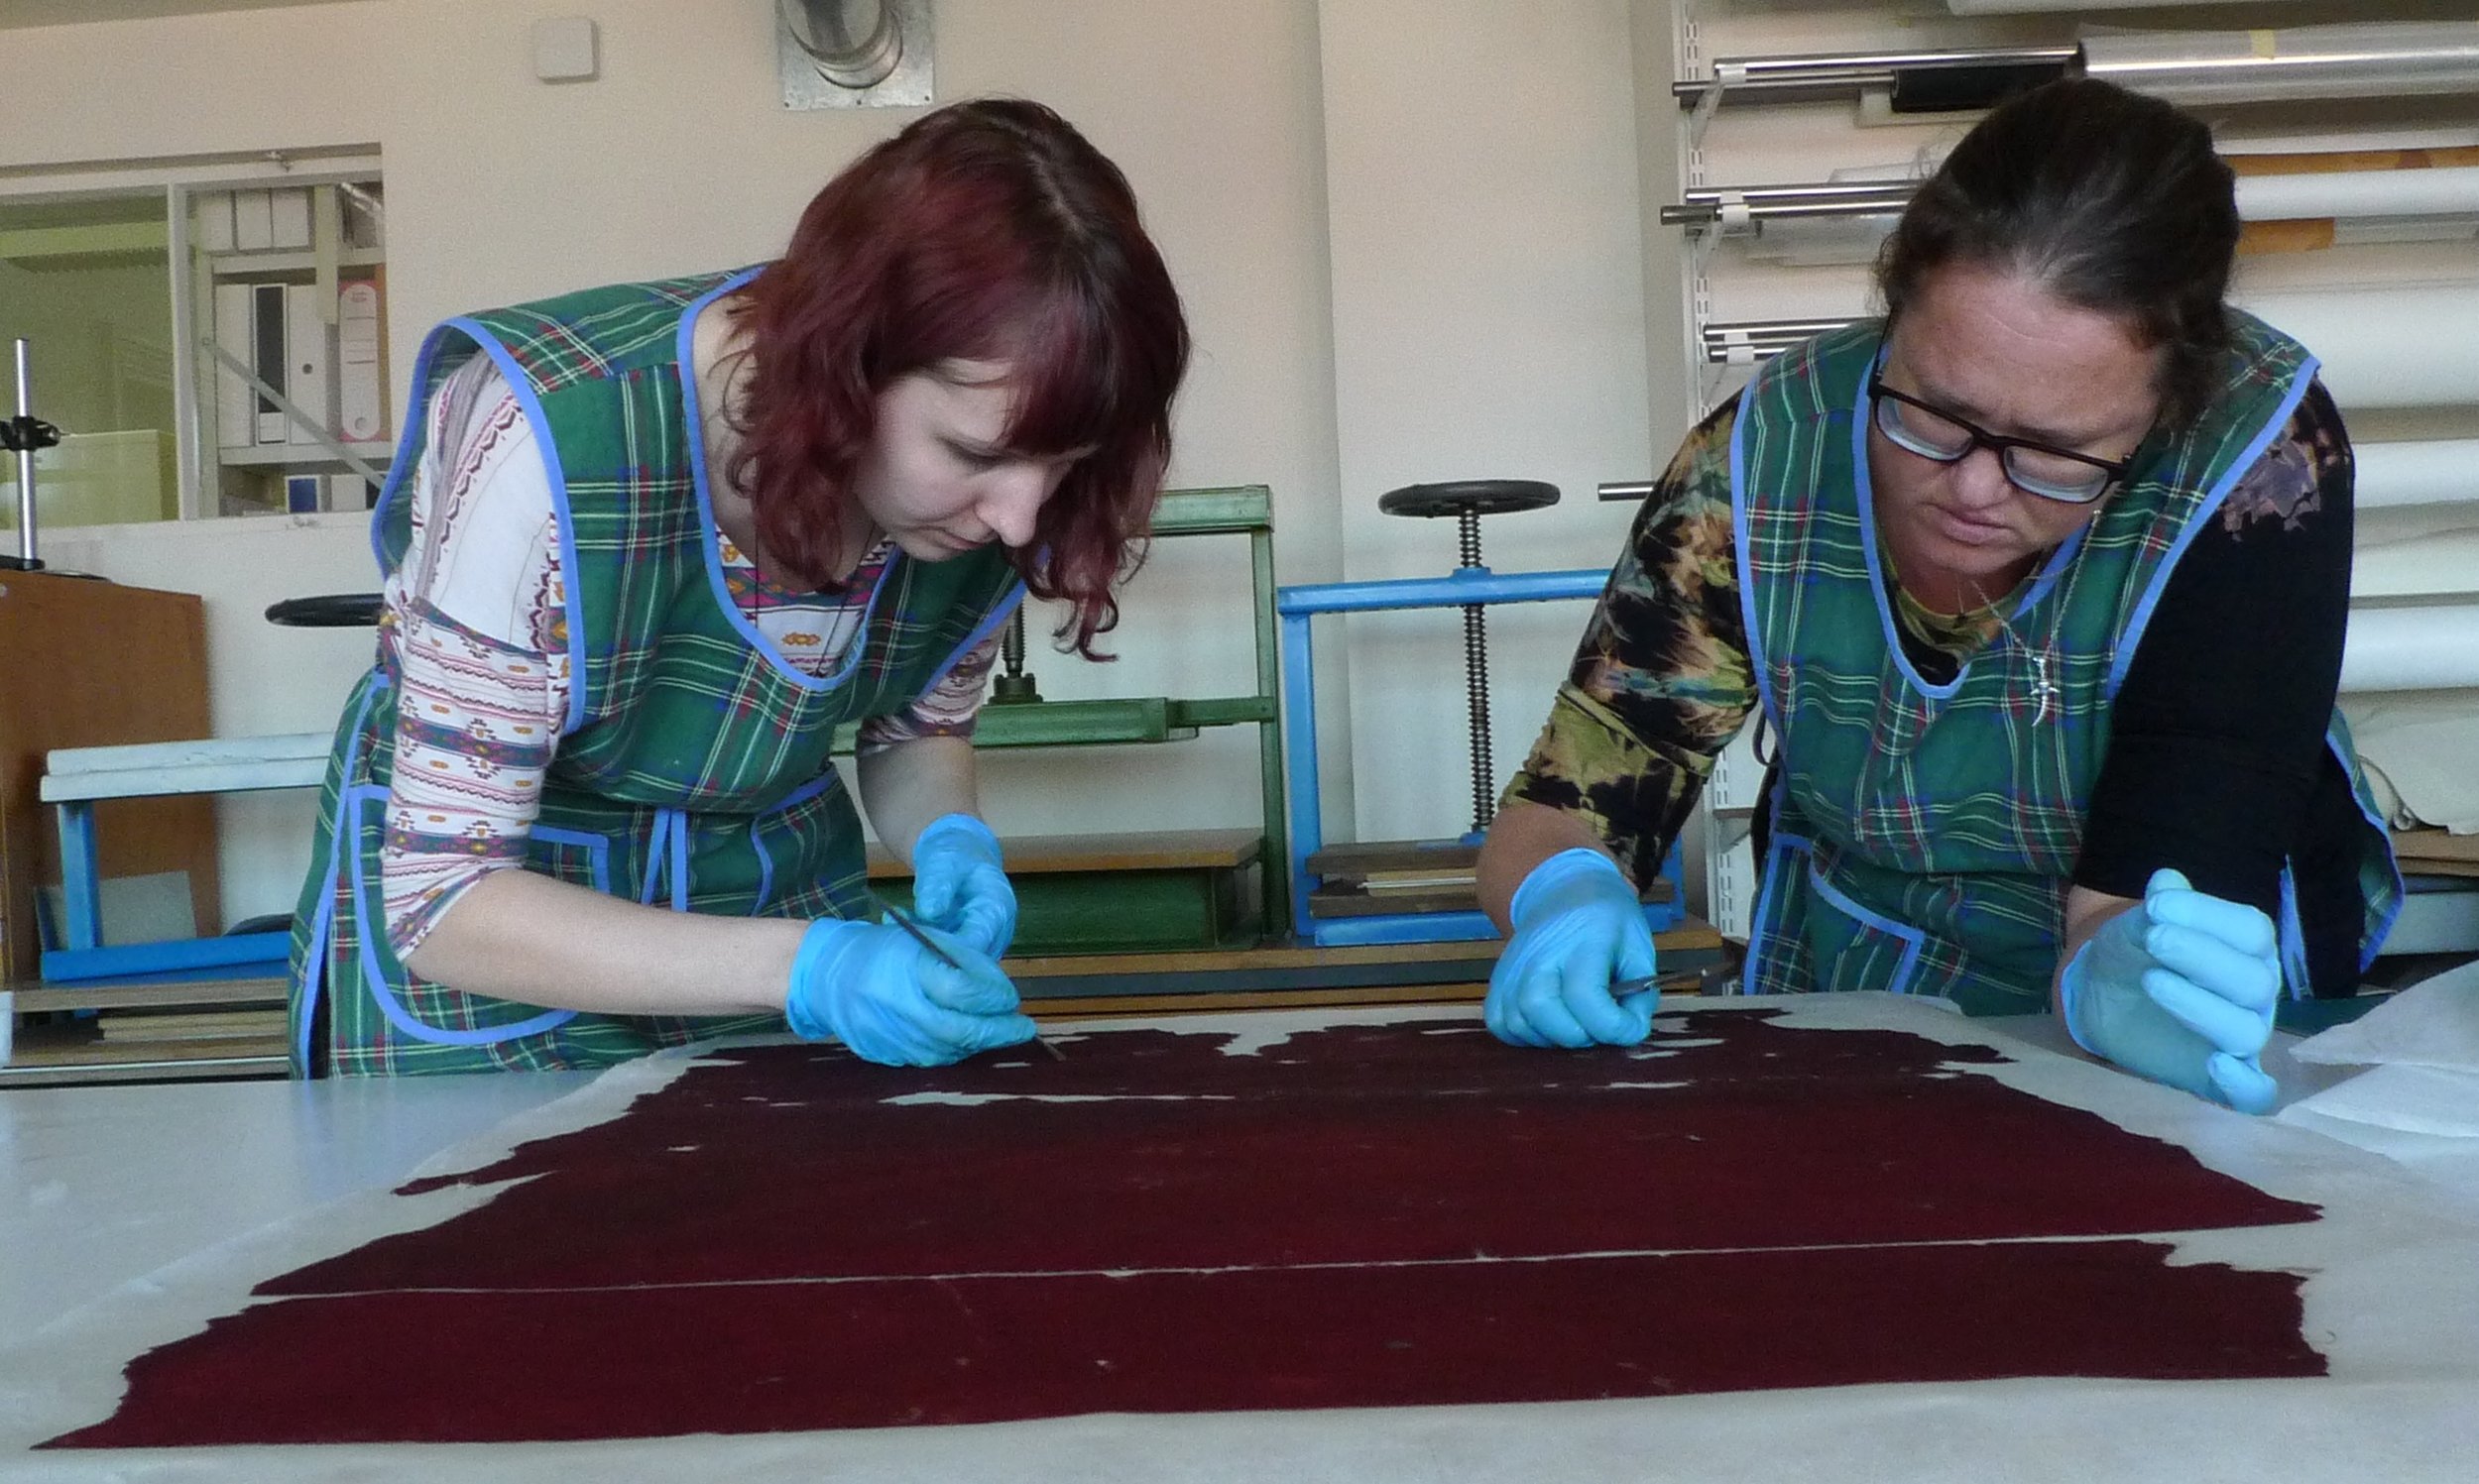
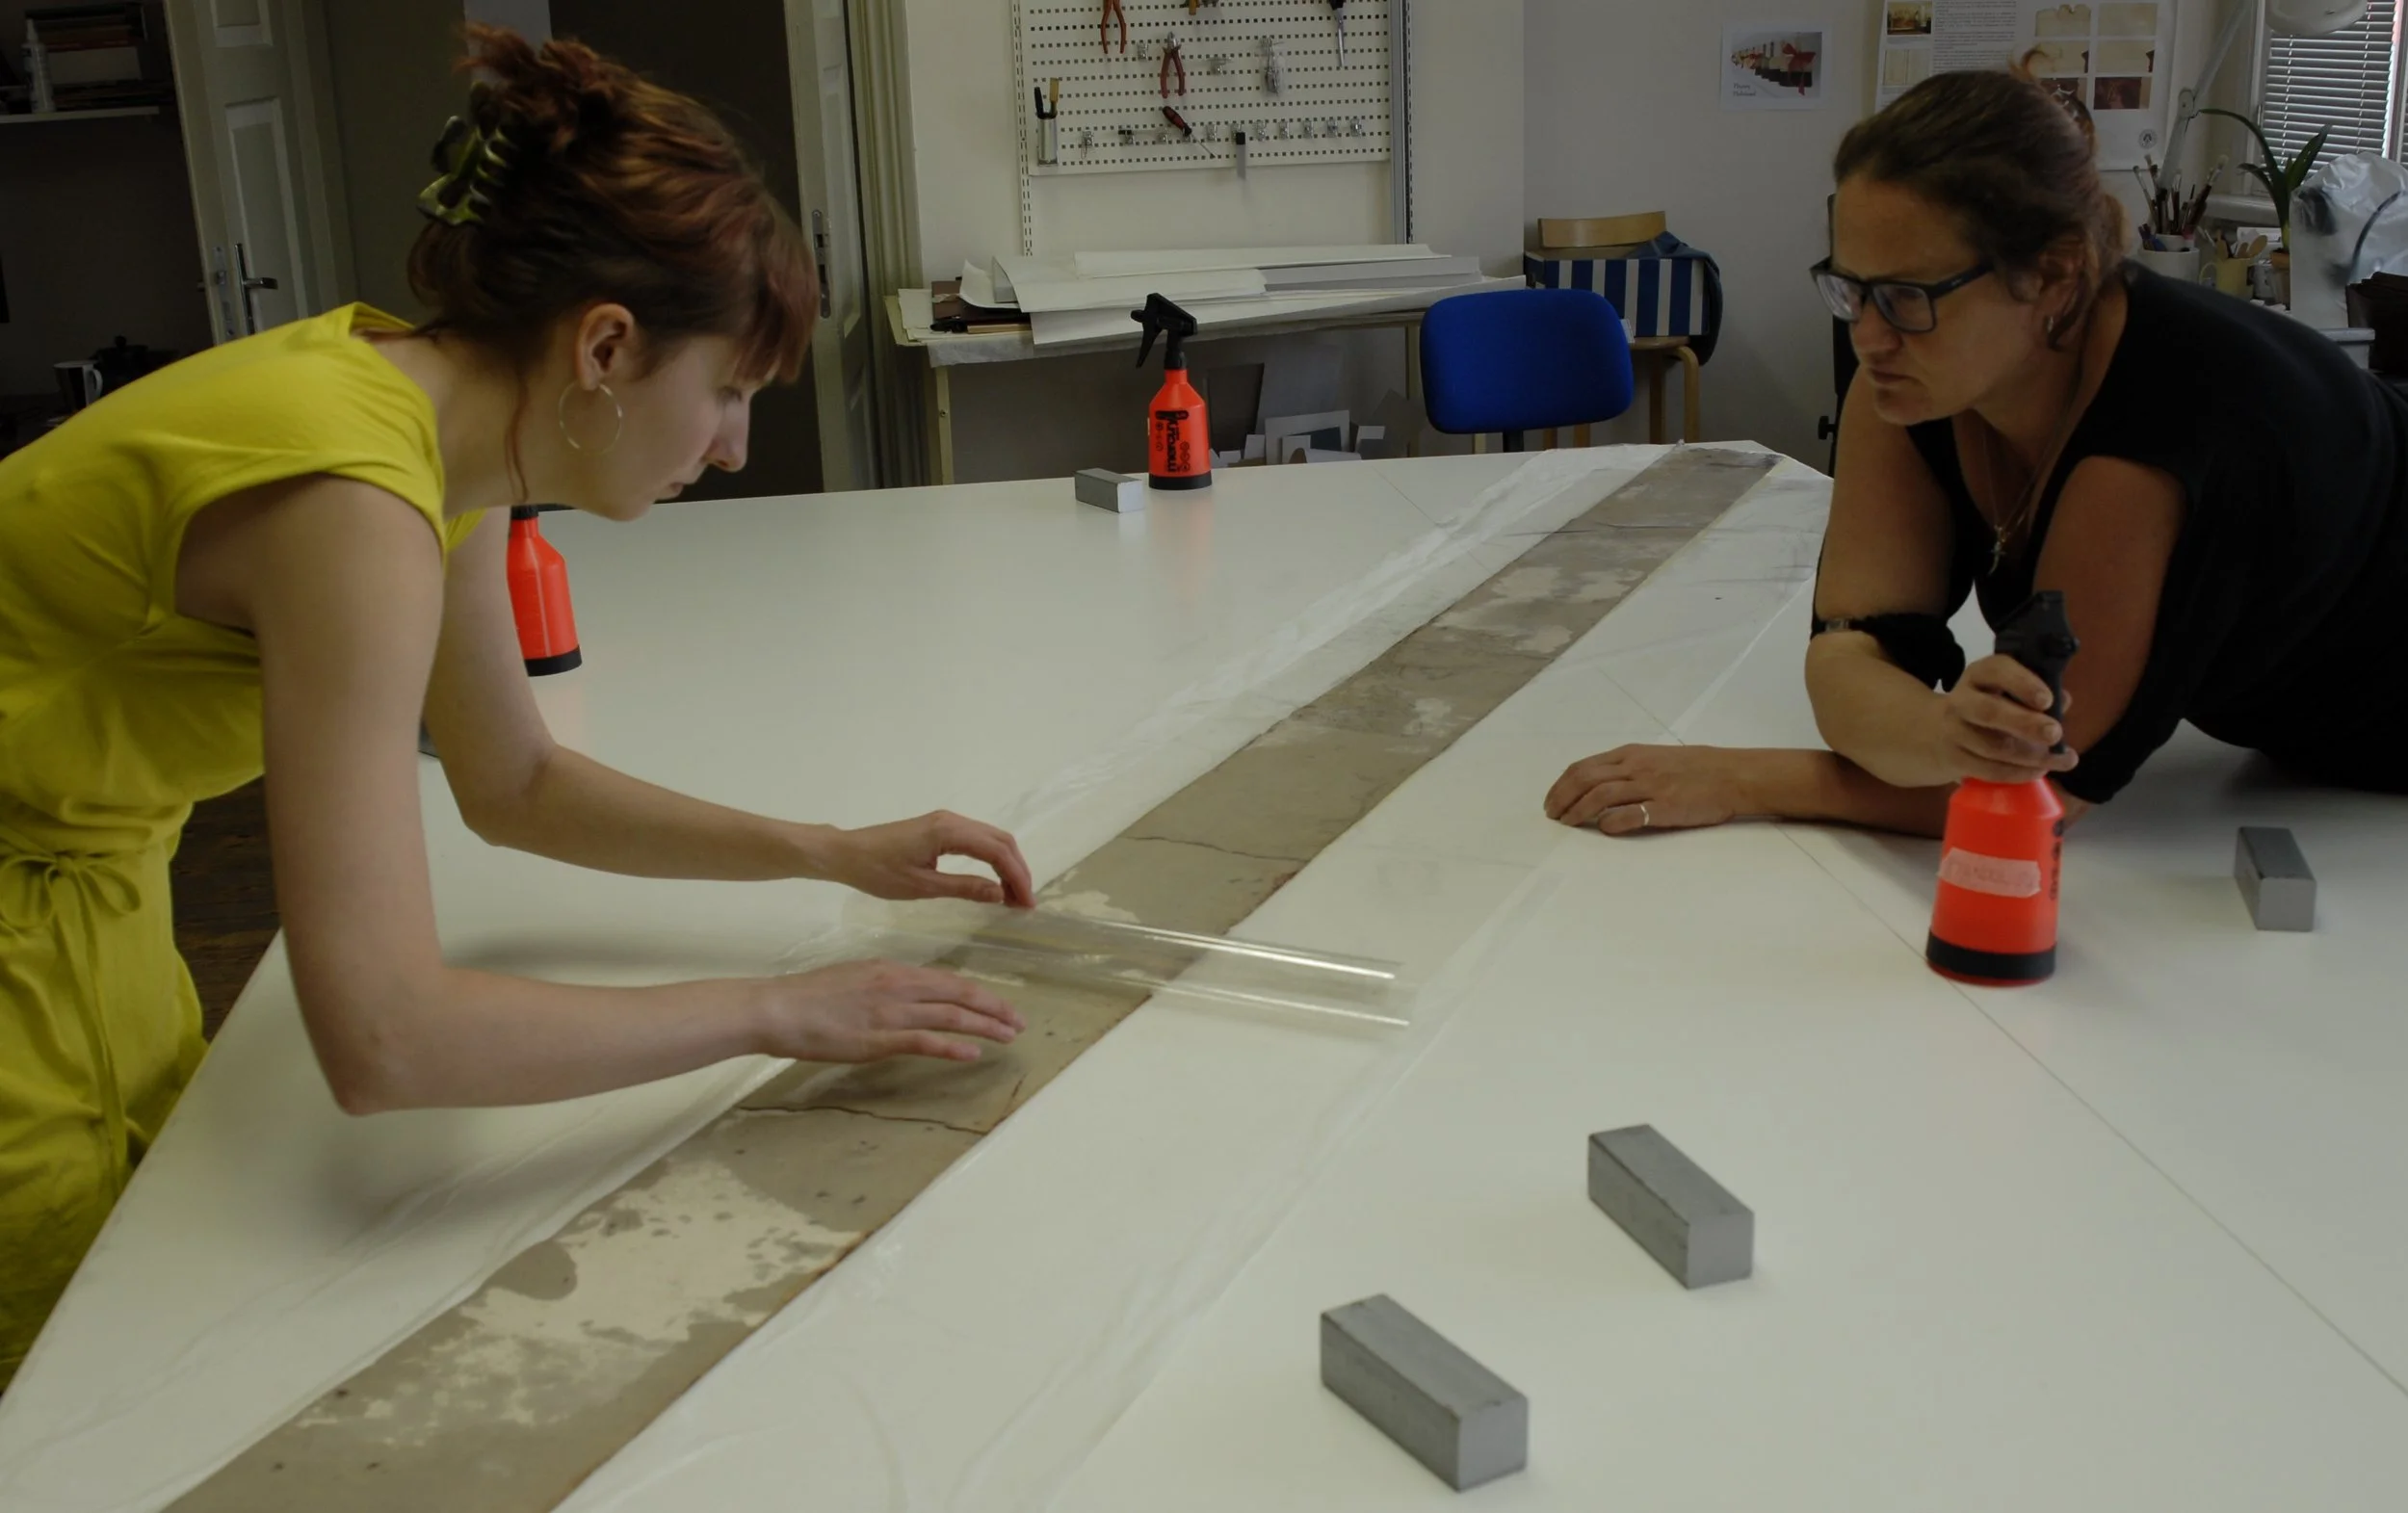
All the fragments were carefully inspected, sorted by pattern and the state of discoloration and fitted with each other to form wallpaper tiles. [fig.22], [fig.23] We were able to form six wallpaper tiles of the original material. [fig.24] Then the fragments of one tile were washed at a time to be able to mount them on a lining paper immediately after washing.
Washing is a method helpful to many paper materials for their better preserving by taking a lot of degrading compounds away from the structure of the material. The presence of acid compounds increases the speed of cellulose degradation and we can slow it down significantly by washing paper with water. It can also restore the hydrogen bonds between cellulose molecules and this way give the material more durability and strength.
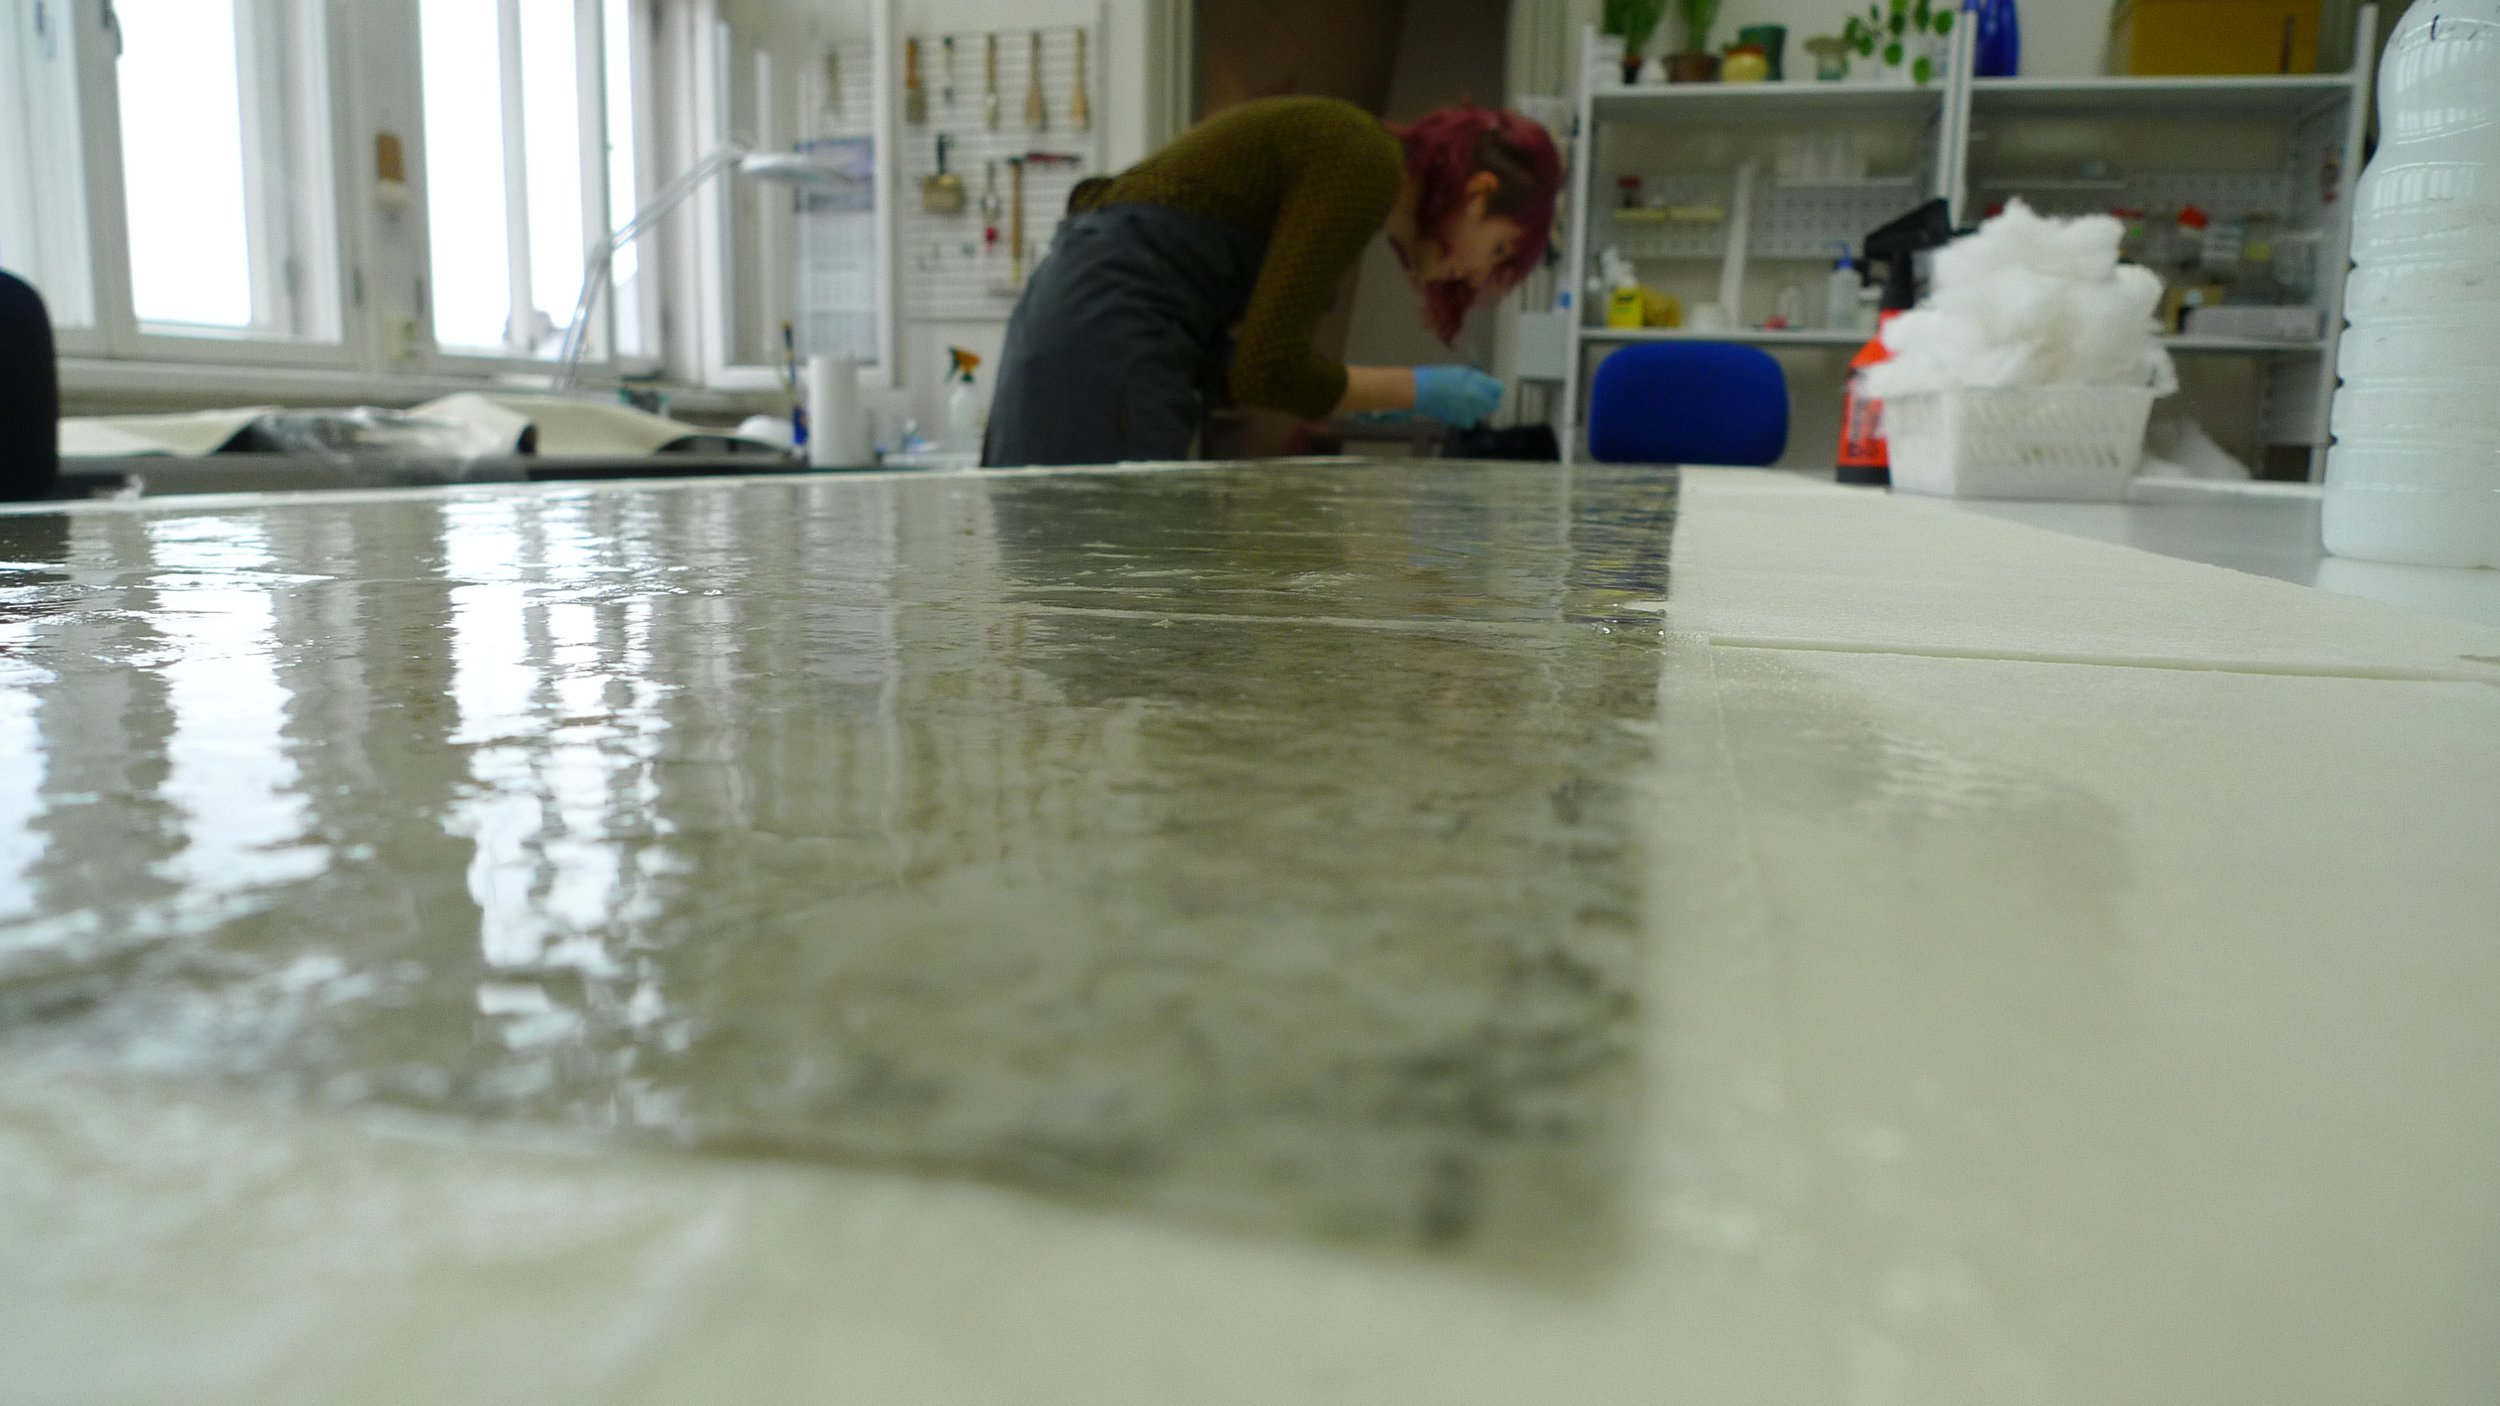
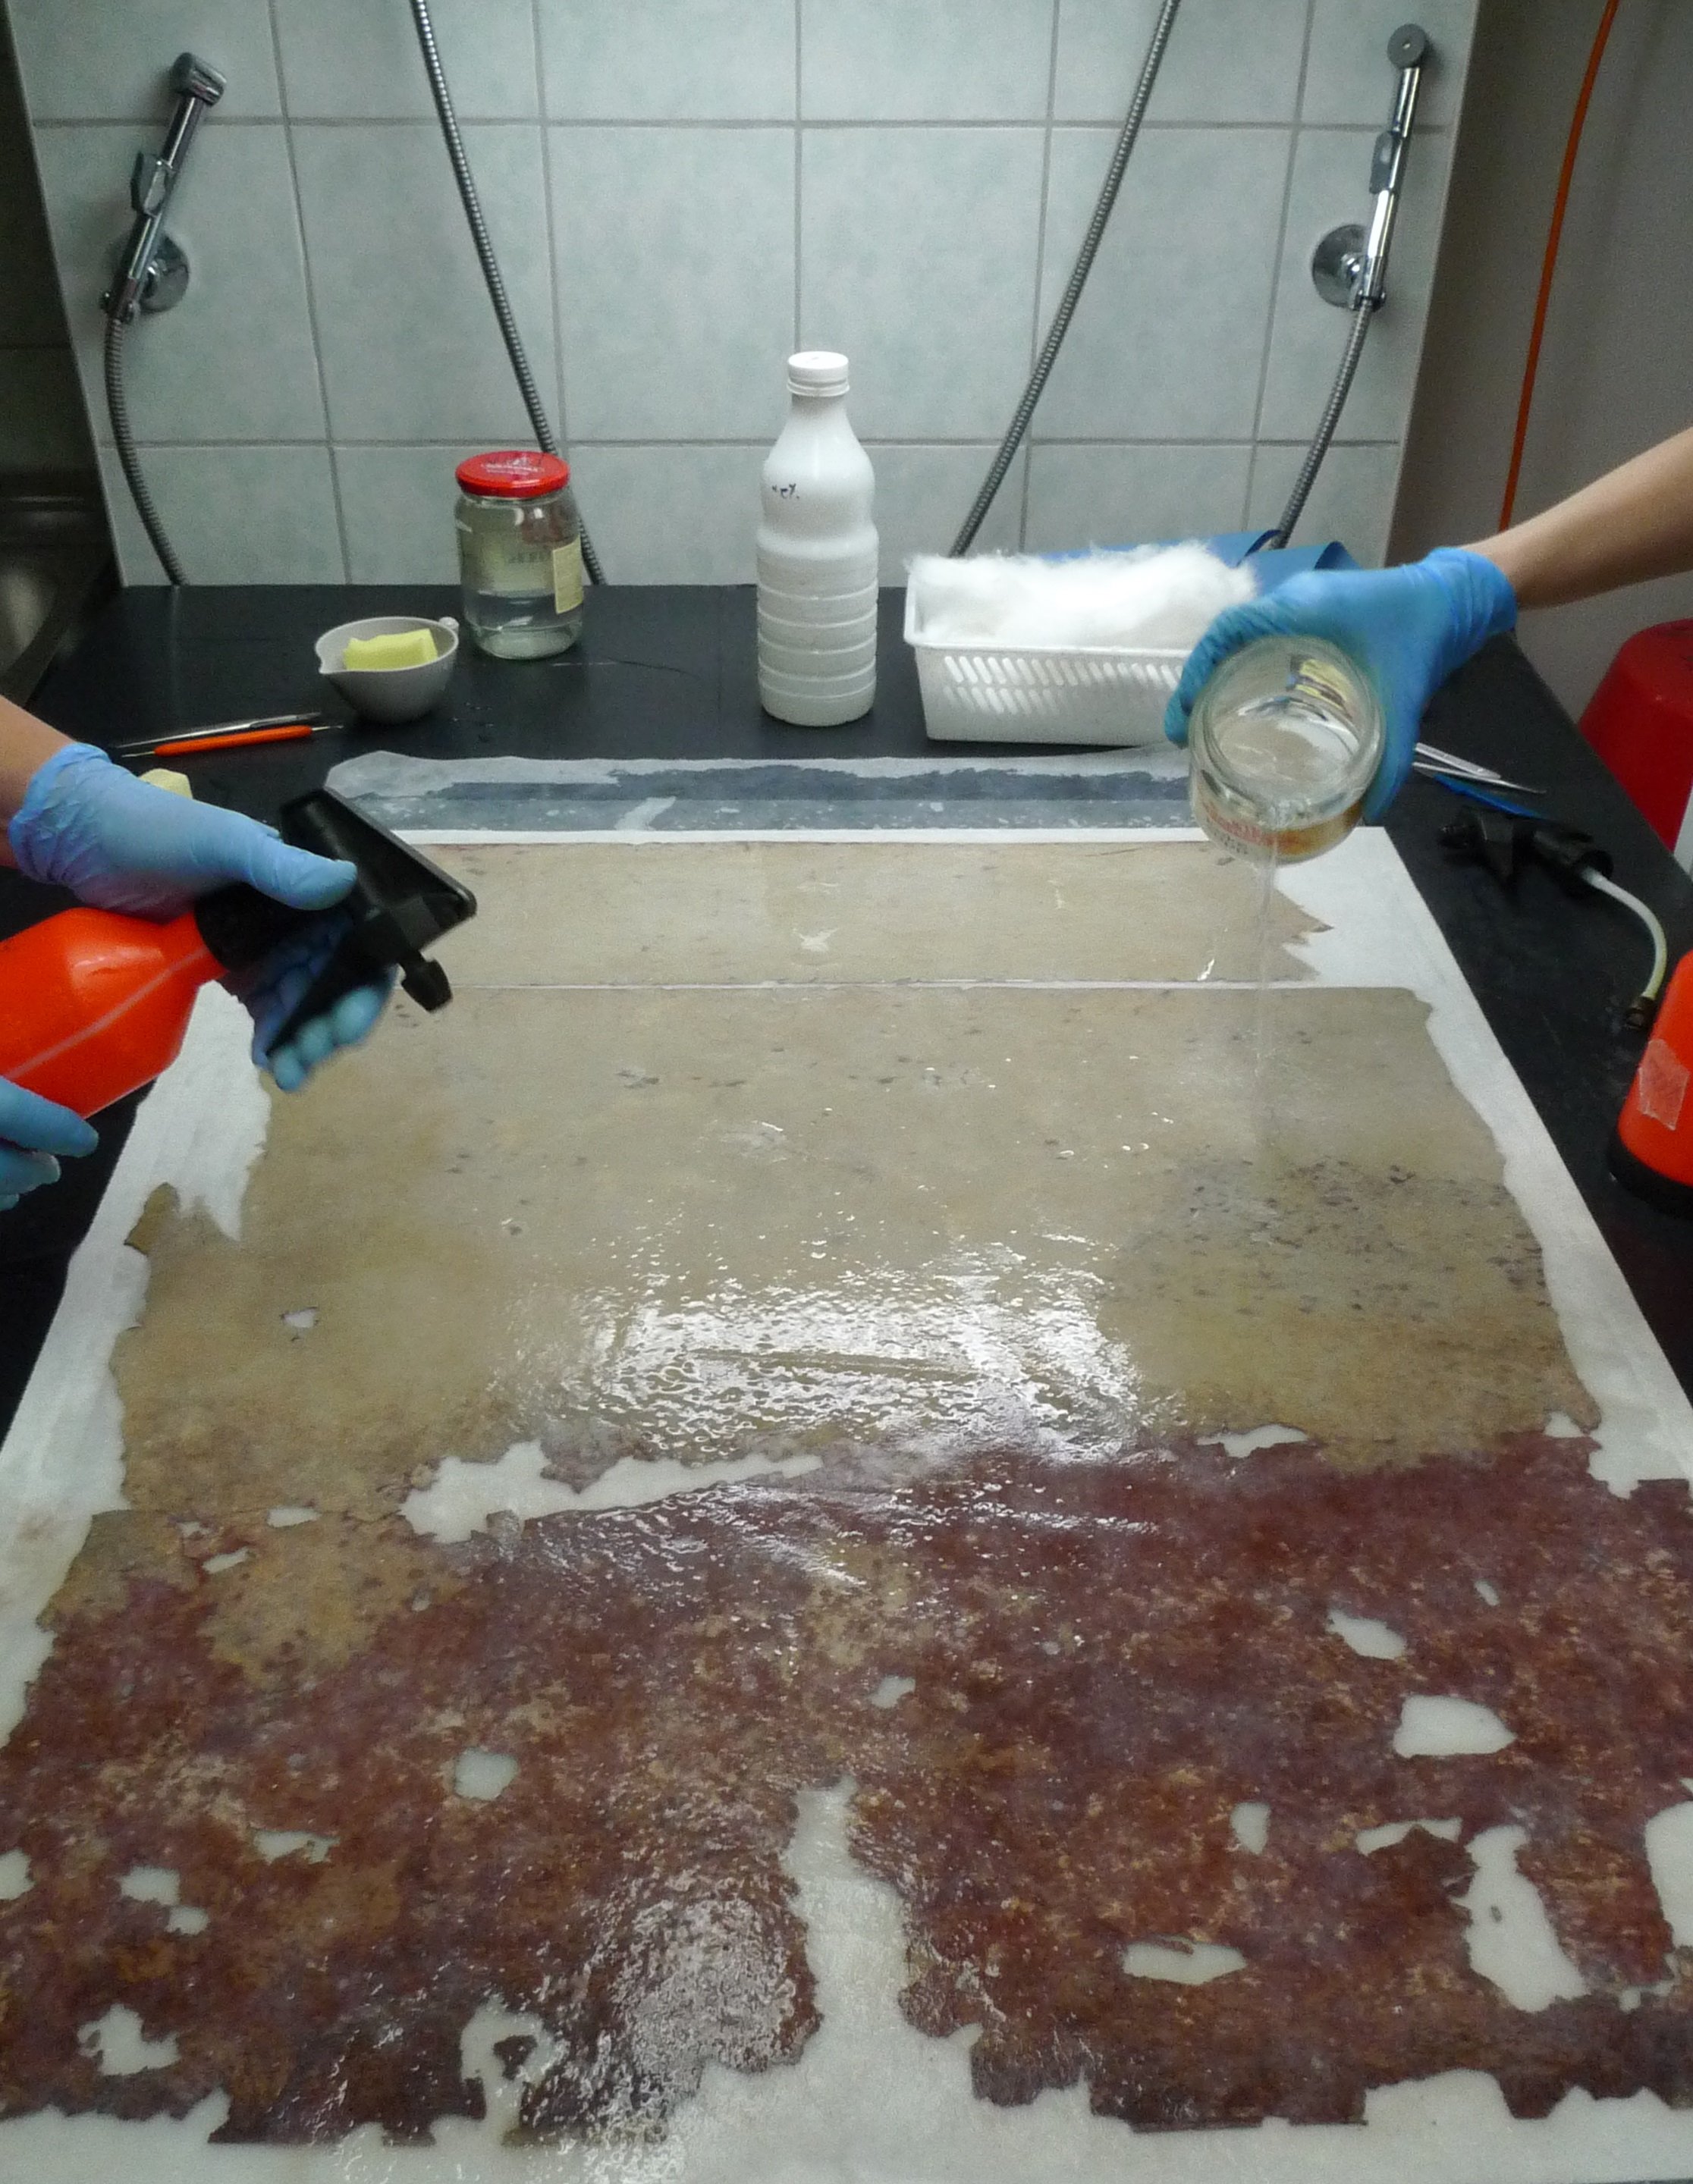
It was not possible to wash the fragments by soaking in water because of their condition, size and the decorative layers. Alternative methods can be used, like patch washing on wet blotters or washing on a vacuum table. Red flocking fragments were smaller and could be washed on the latter. [fig.37], [fig.38], [fig.39], [fig.40], [fig.41], [fig.42], [fig.43] Grey wallpaper fragments were mostly too long and were therefore washed by capillary patch method on blotters.
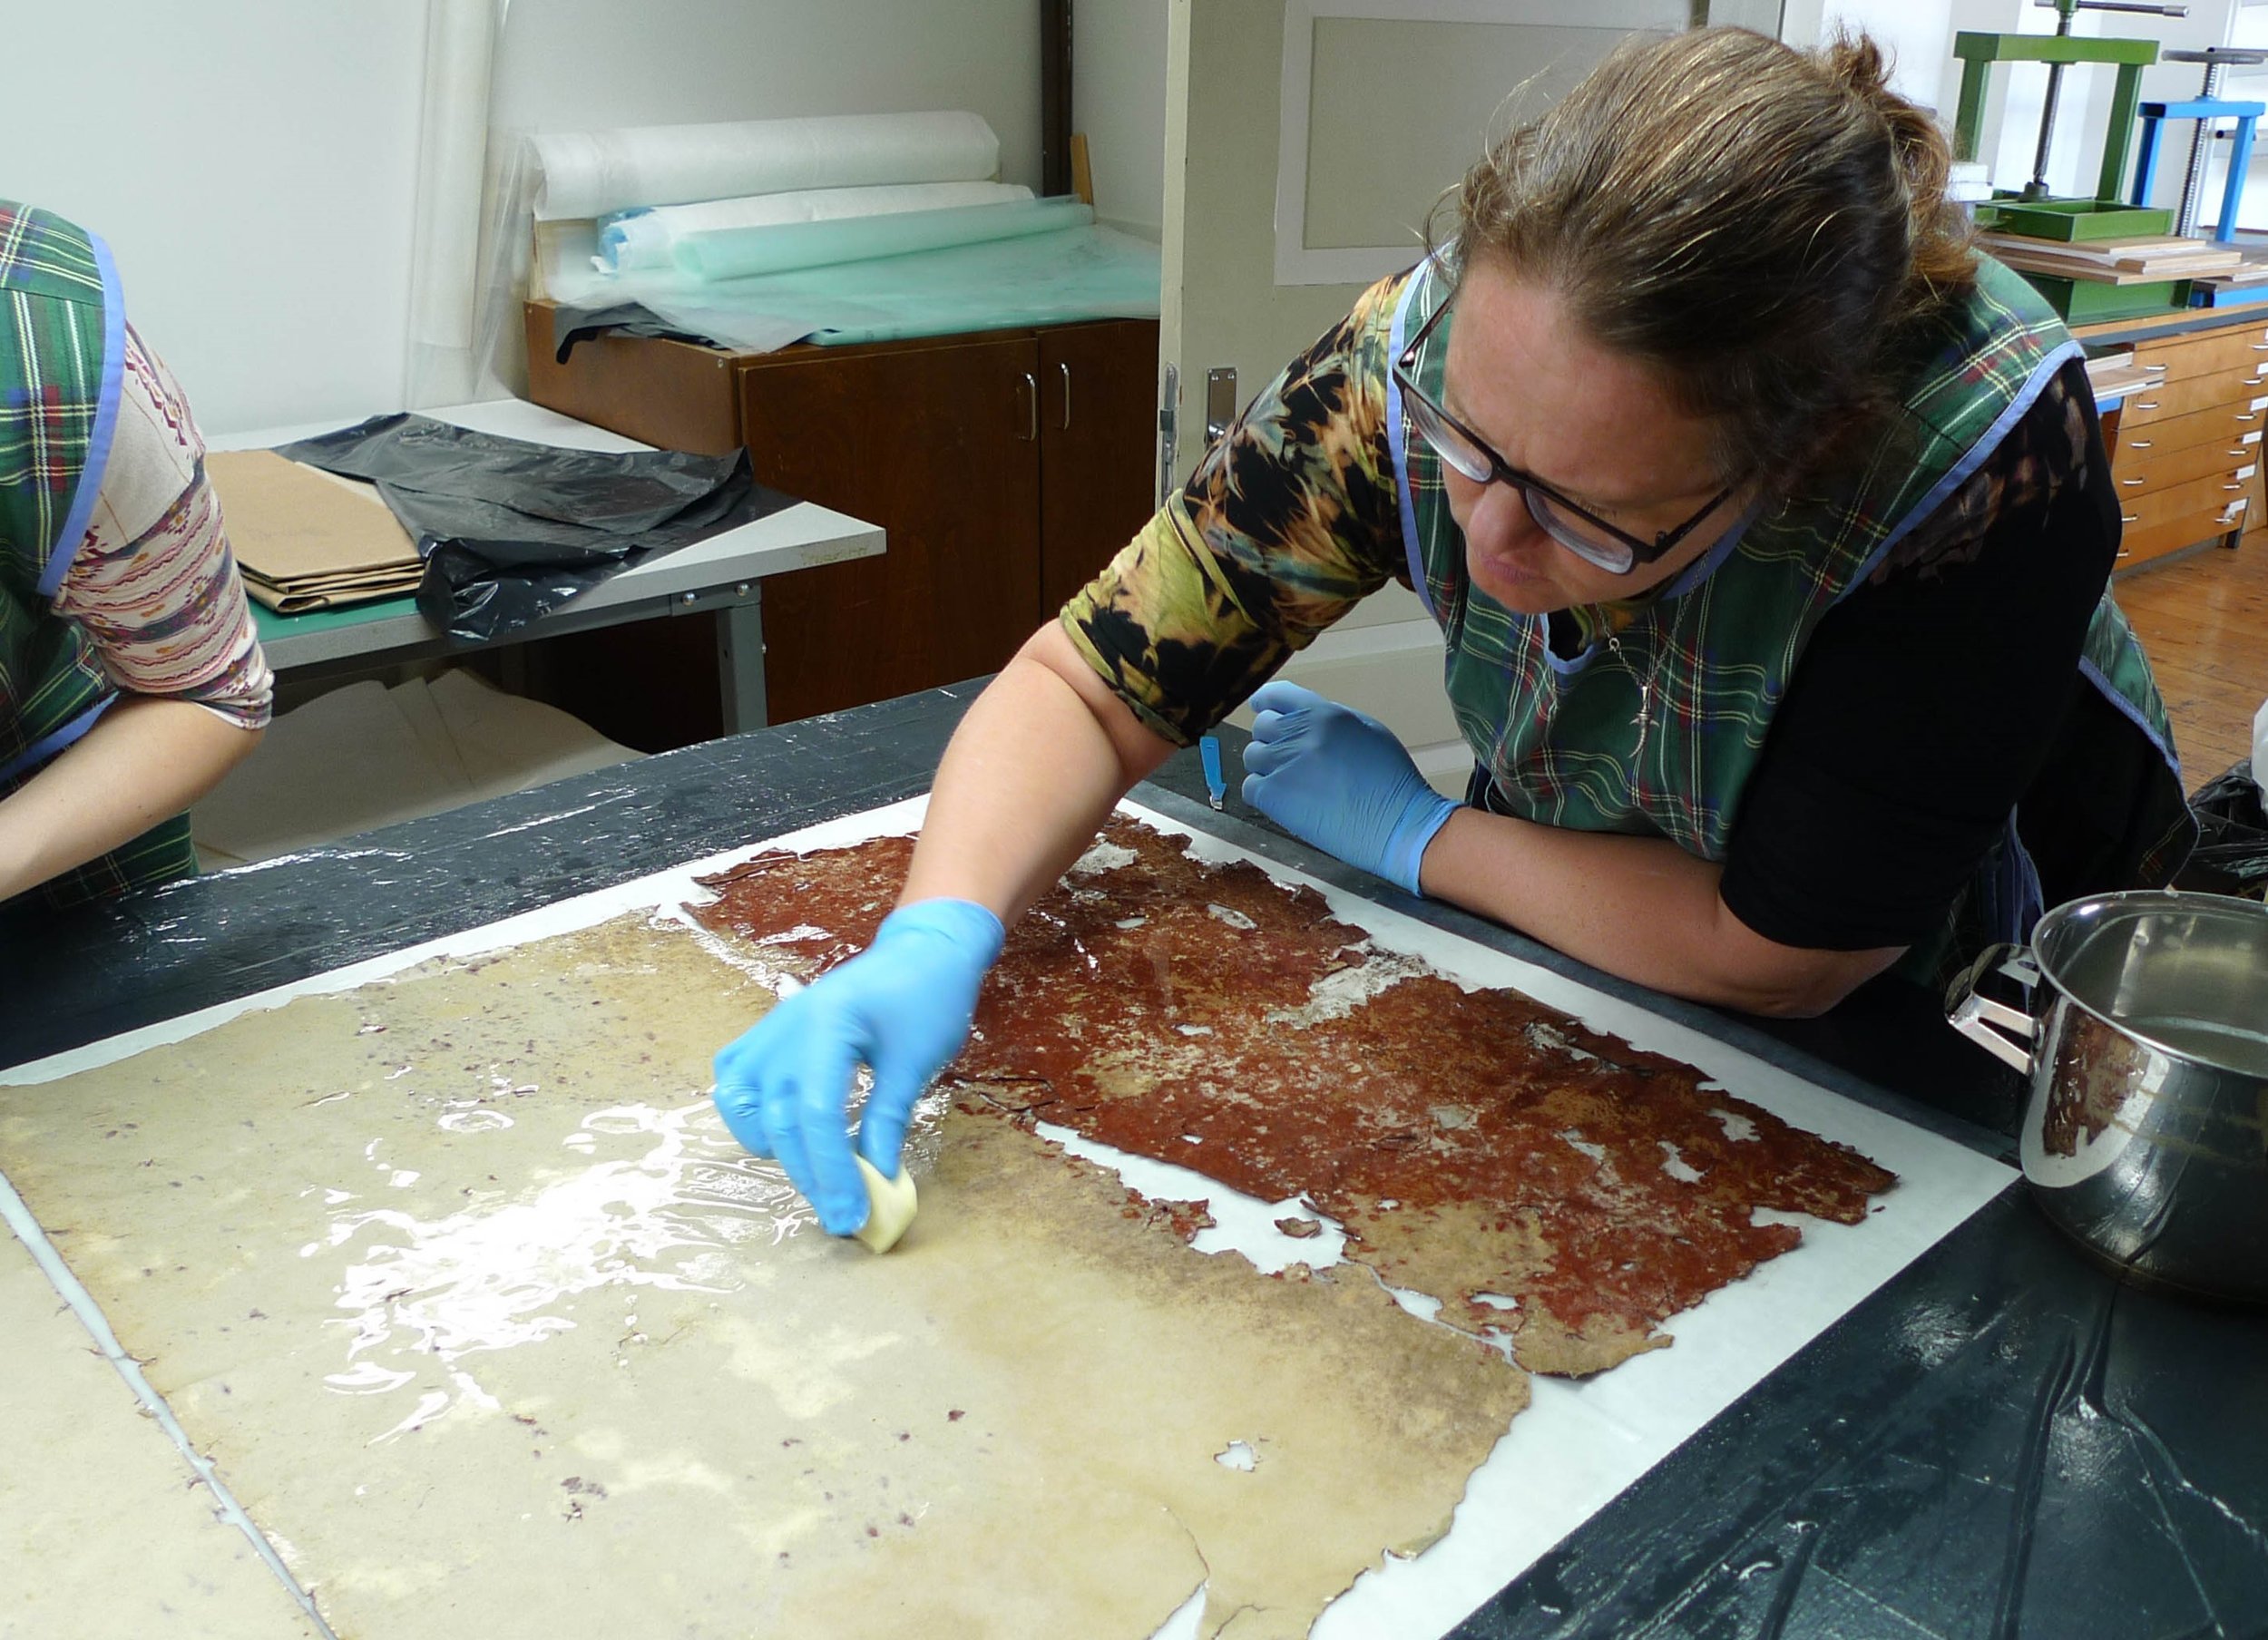
At first the fragments were placed on wet blotters face down, on a supportive sheet of holytex.This way the dirt attached to the paint layer could first be washed out into the blotters. Then the fragments were turned face up and the facing could be removed. The washing continued and blotters were changed until no more discoloration or dirt was visible on their surface, but not longer than the stability of the original allowed. [fig.25], [fig.26], [fig.27] We used light MC solution for washing and added 50% ethanol to the liquid in order to help the solution penetrate into the material and also to fasten up the drying process afterwards that would prevent mold damage to reoccur. It is important to recover the sizing of paper because washing also removes the initial sizing. For that we applied MC sizing in the end of the washing process. Methycellulose secured the painting layer and fixed the detaching fragments of gold print.
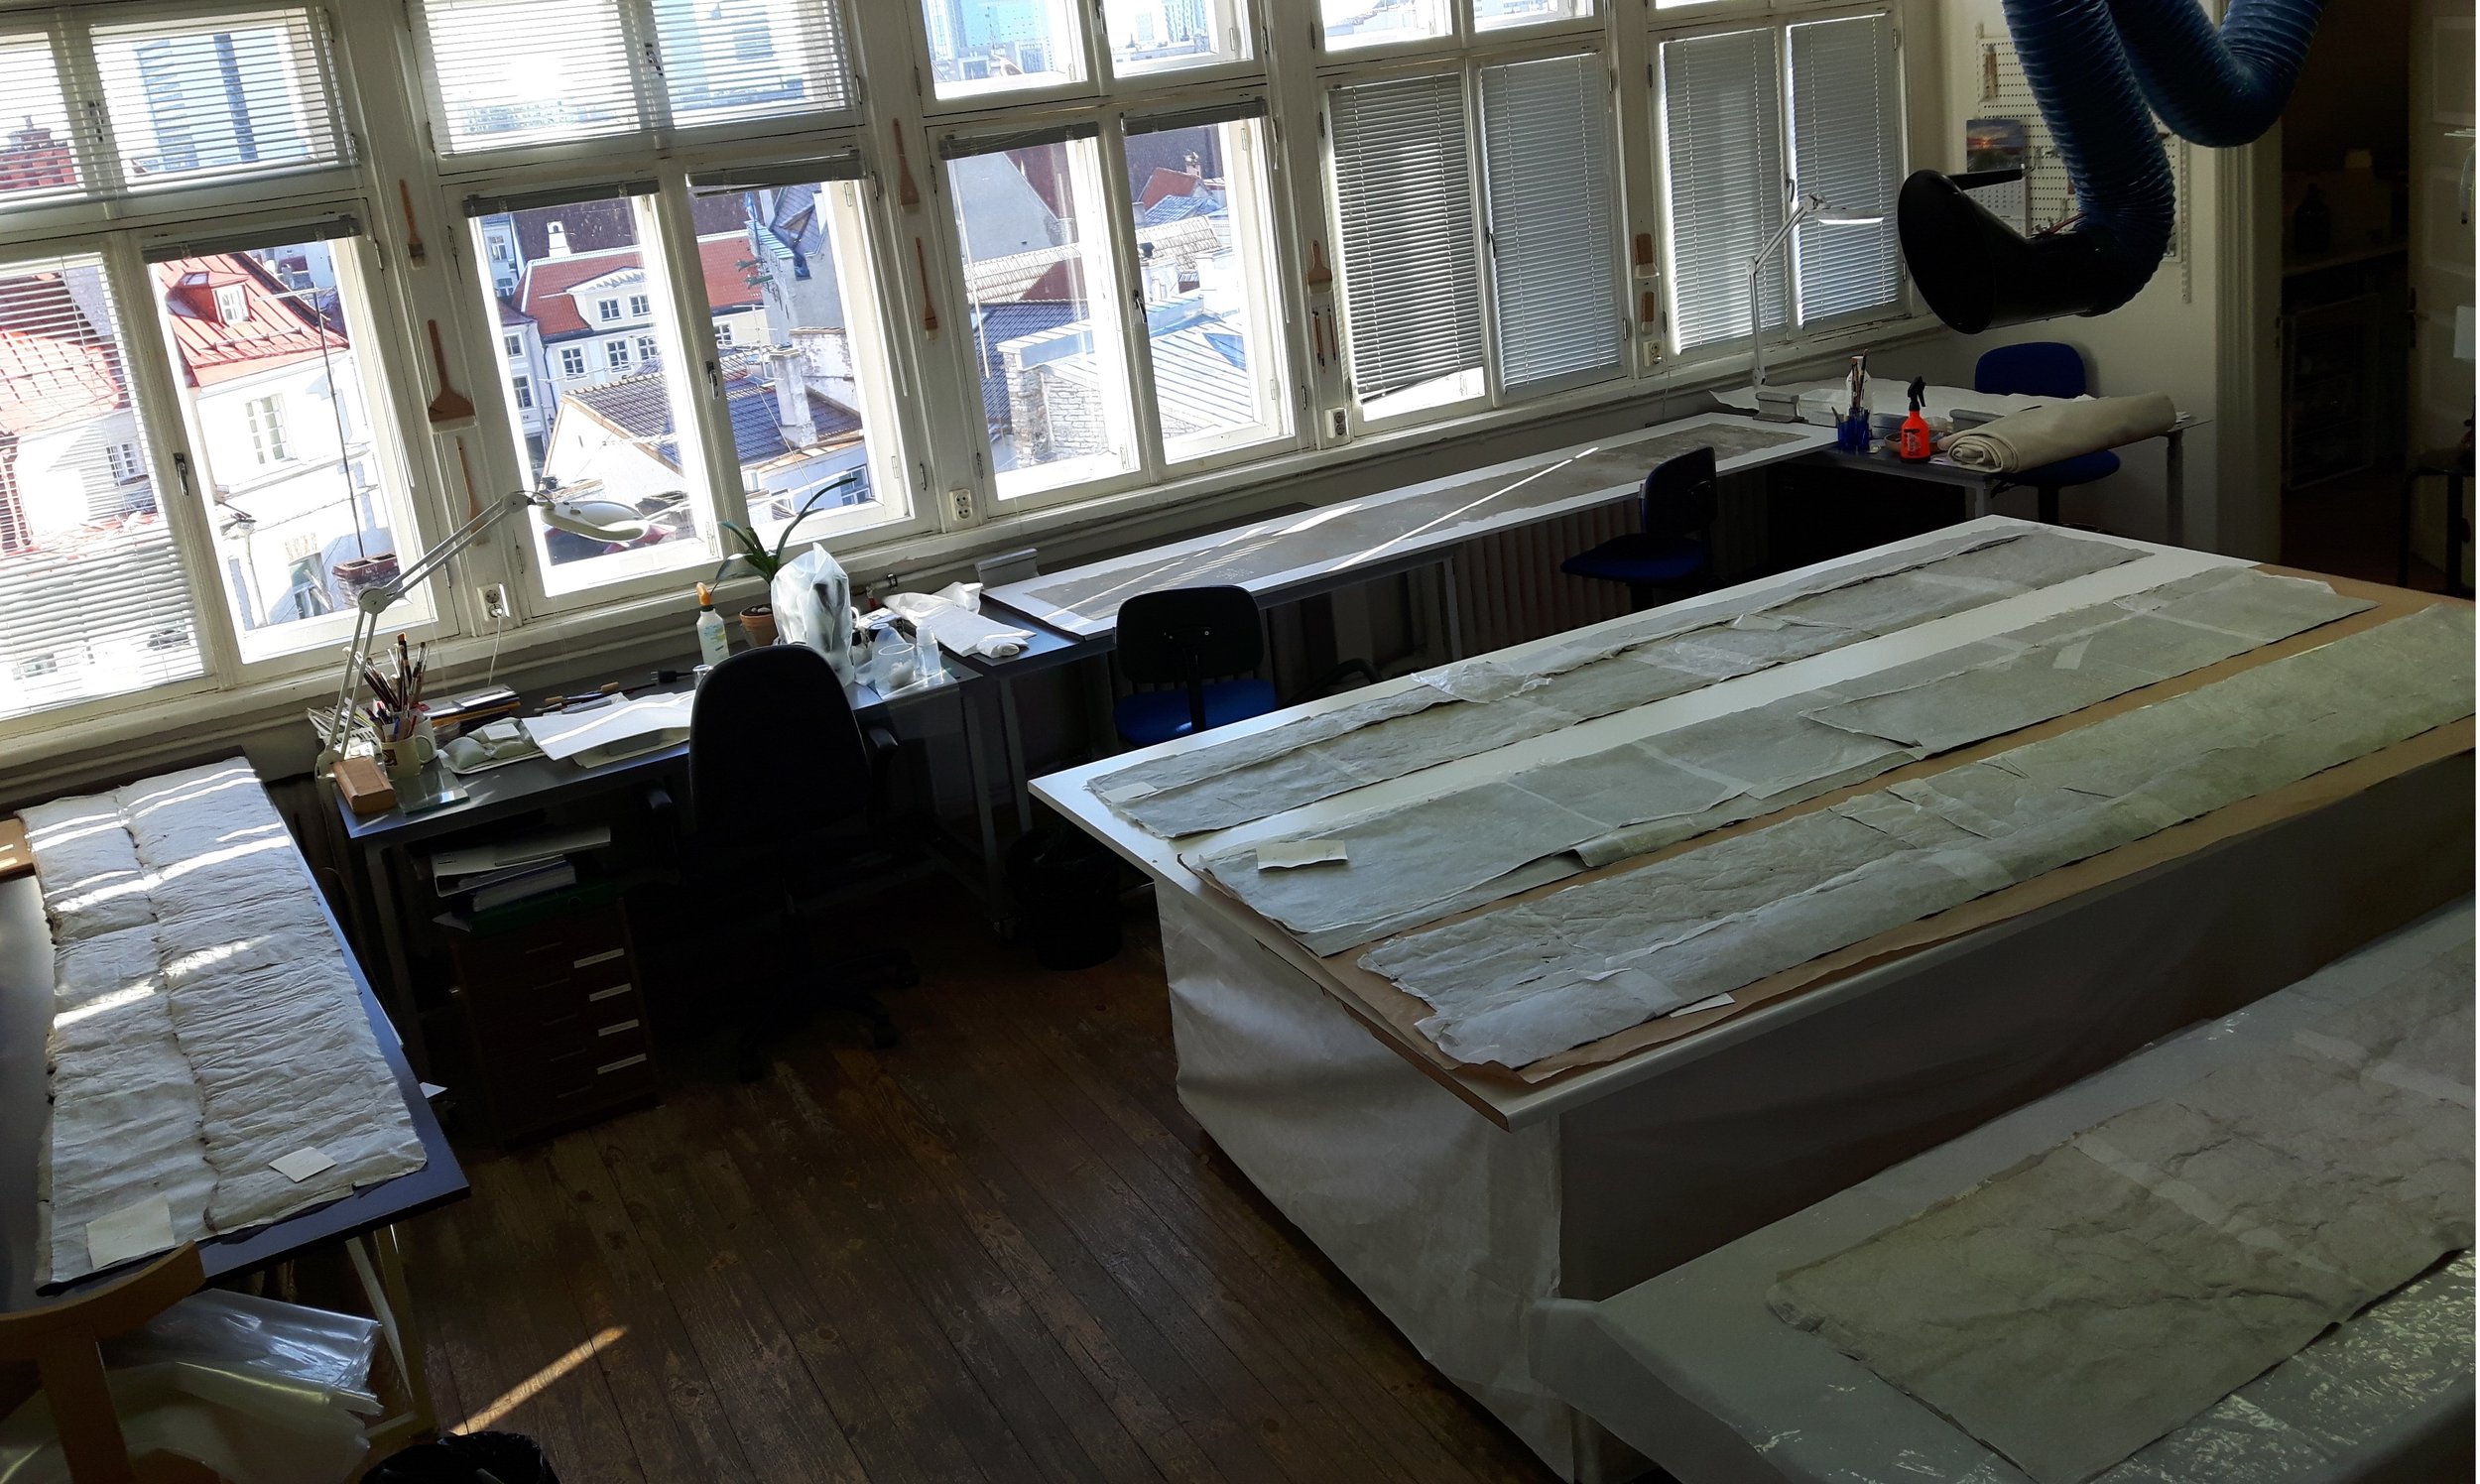
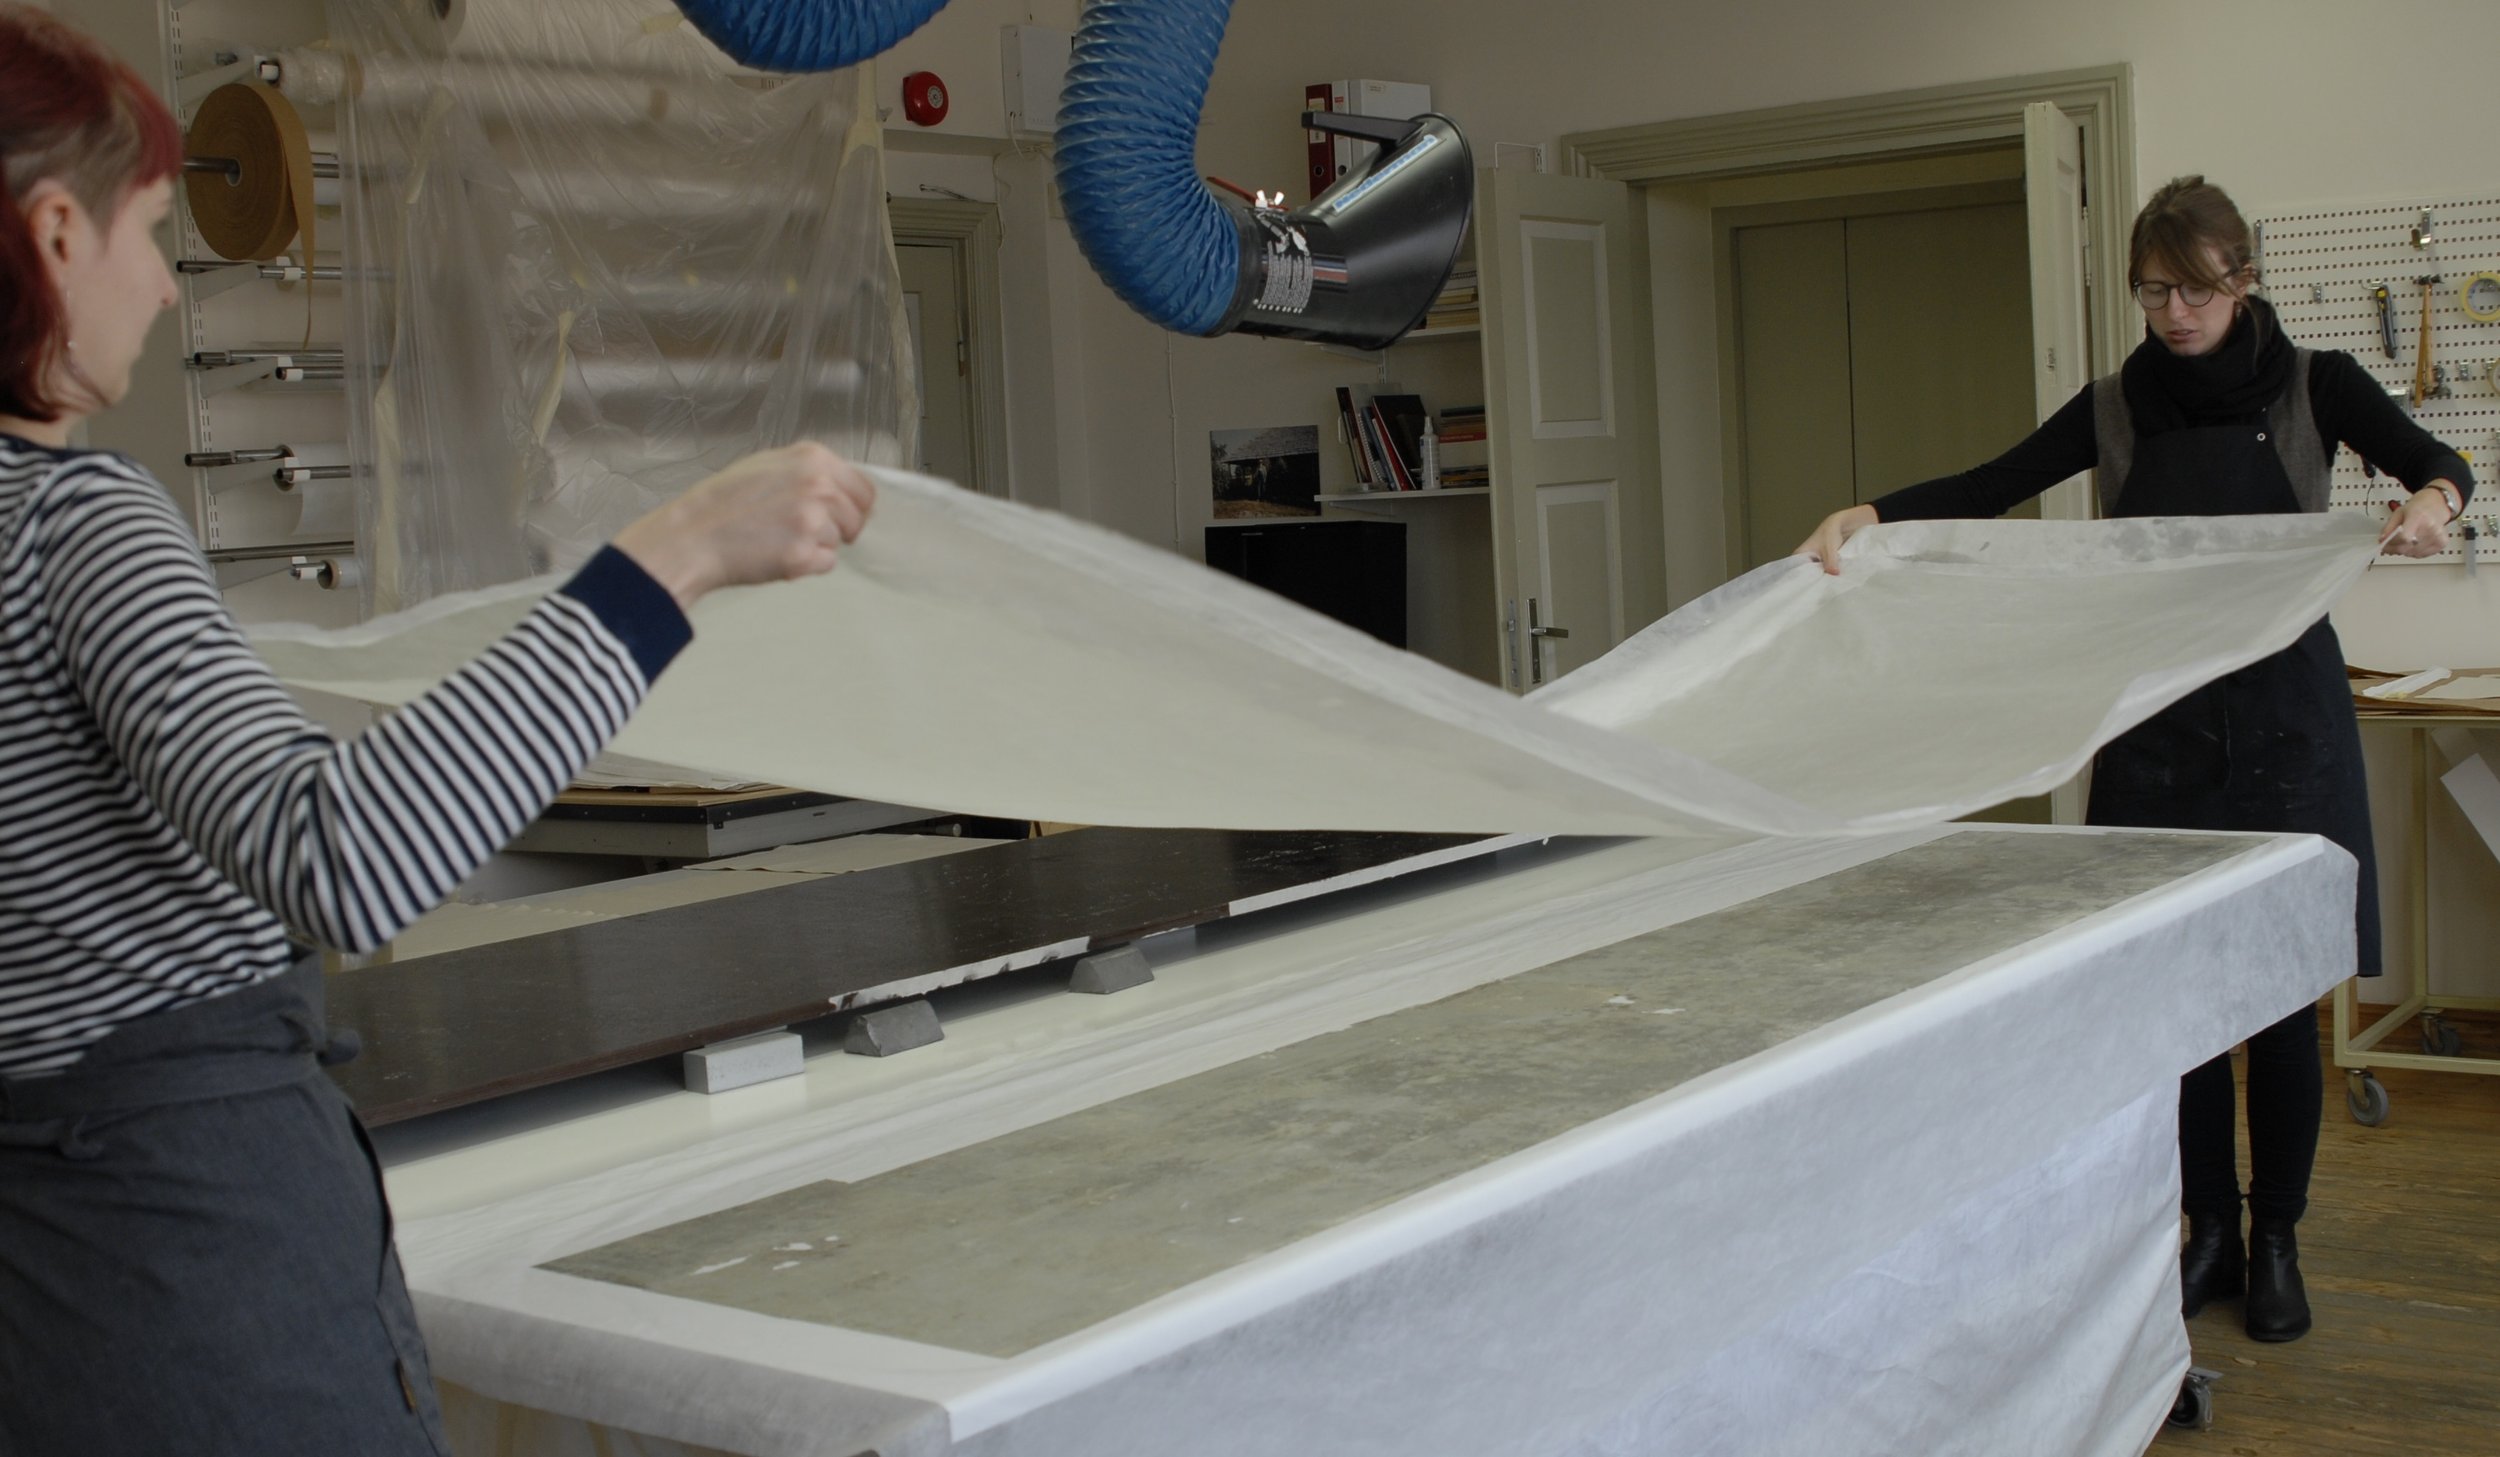
The wallpaper fragments were combined to tiles and lined on Japanese 40 gsm kozo paper. [fig.28], [fig.29], [fig.30], [fig.44] The lined tiles were flattened and dried using Karibari-method. Sadly we do not have a real Karibari-board and as an alternative we used long waterproof veneer panels.
The advantage of Karibari over a wooden drying board is in its construction, which allows the original to dry quite evenly on both sides and at the same time the board itself transforms along with the original by its expanding and shrinking during the changes in humidity concentration – a wooden panel does not have these properties and that is why using an alternative should be done with extreme care to ensure that a damp original attached to a stiff drying board will not tear itself into pieces while shrinking in the drying process.
The original was moisturized slightly on a sheet of Hollytex, just enough to let the paper relax. Now all the edges of the fragments were checked and the pattern fitted together carefully. Then the relaxed original was covered with another Hollytex, turned face down and left waiting under a sheet of Mylar.
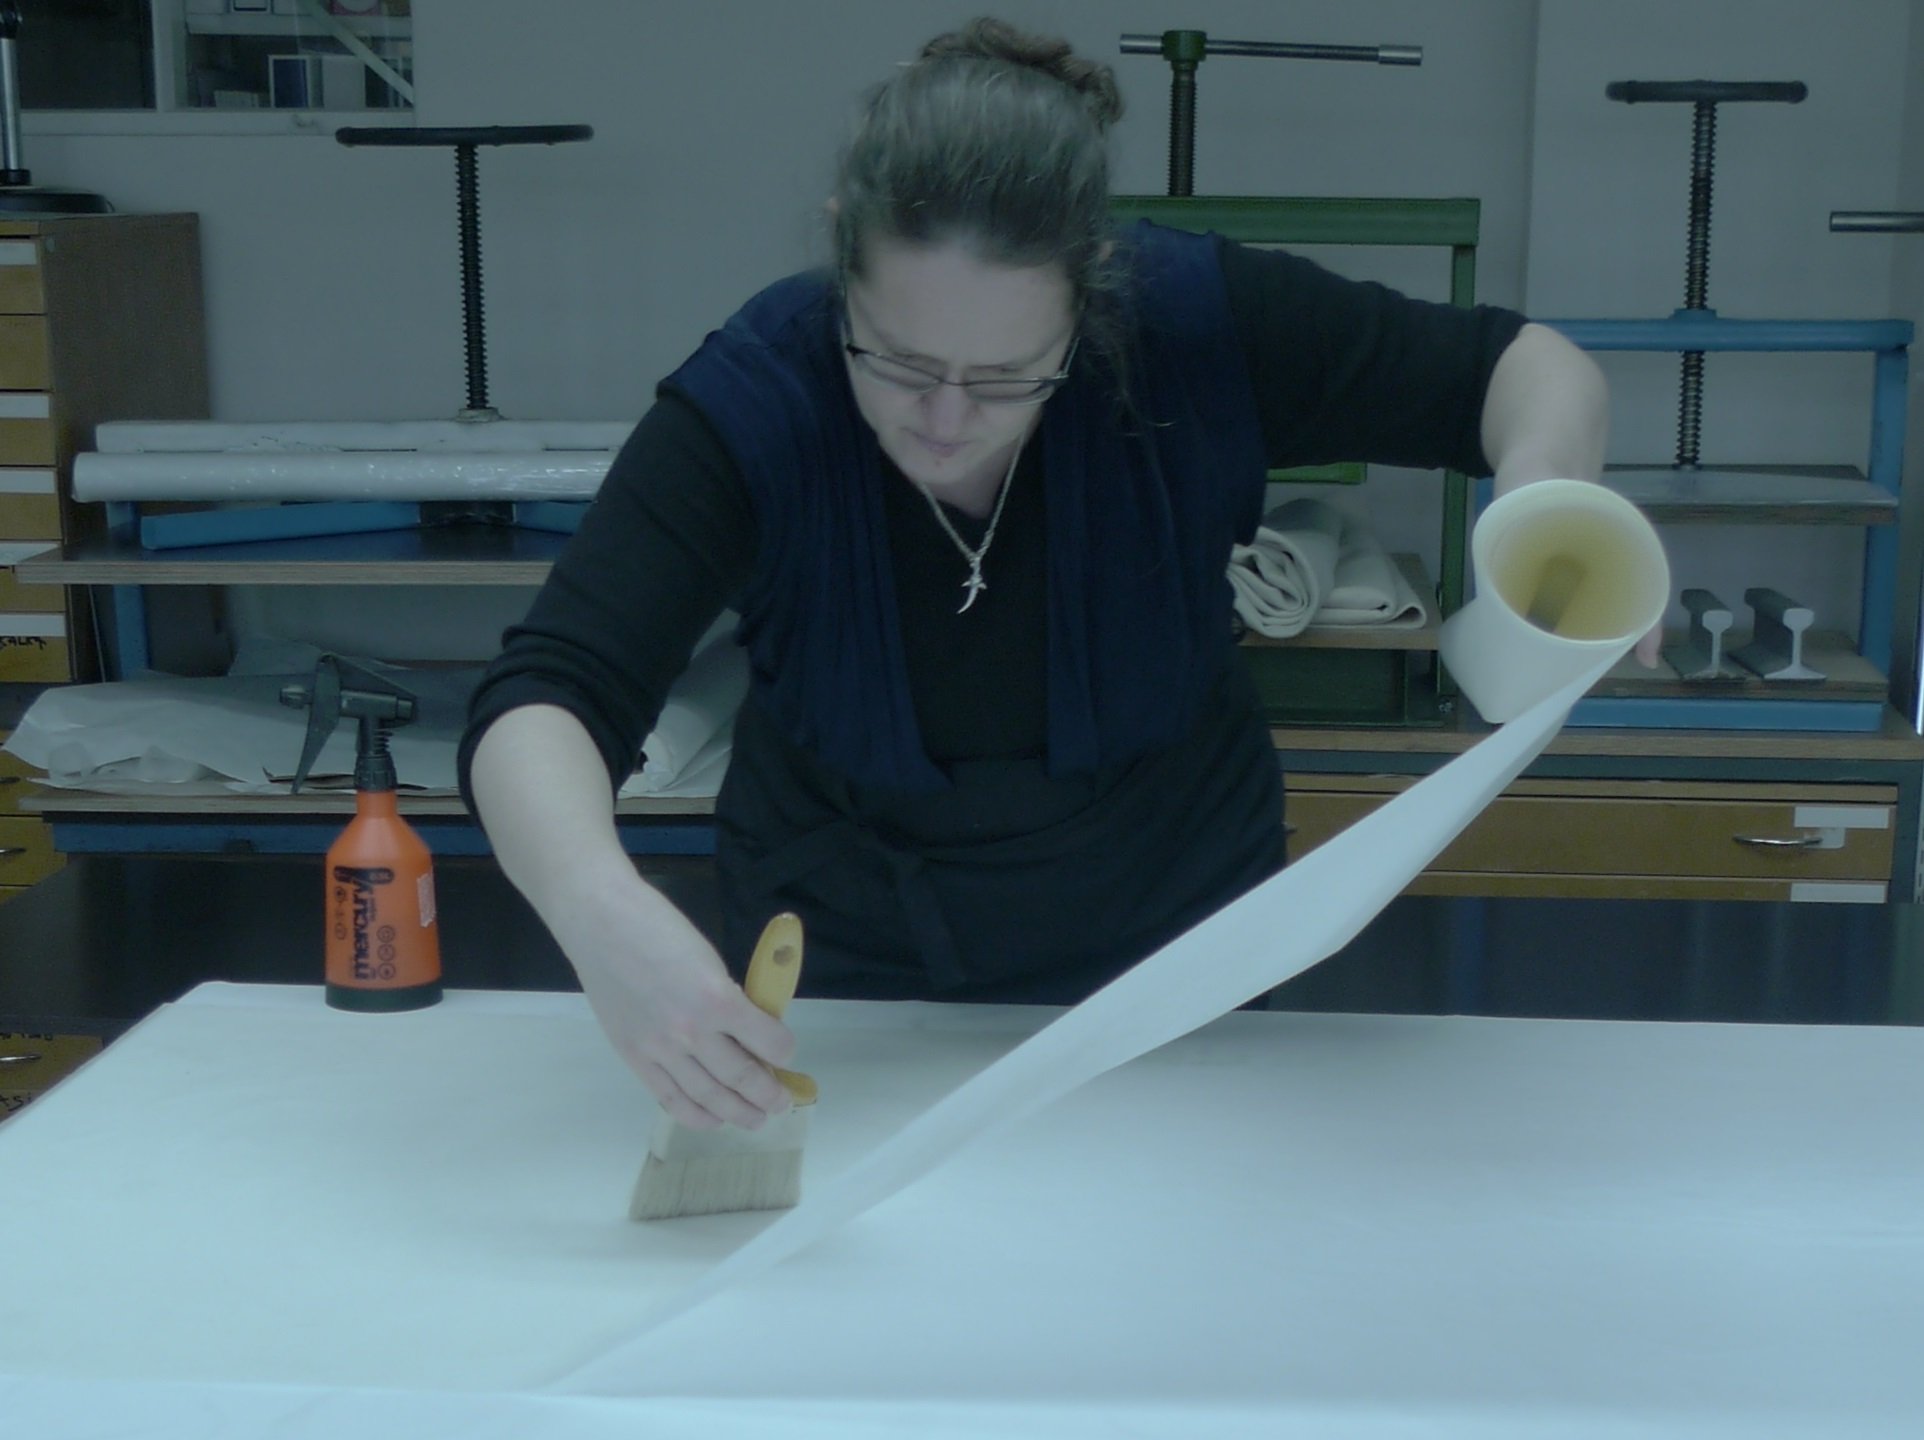
For lining on Japanese paper the paste is always applied to the the lining material: a sheet of Japanese lining paper was pasted up with thin paste and brushed down into position on the back of the damp object. [fig.28], [fig.29], [fig.30], [fig.45], [fig.46]
Only for lining a mixture of wheat starch paste and methycellulose glue was used. For all the other treatments synthetic cellulose glue and sizing proved suitable as it prevented molding and other biological damages.
It is important that the lining material is ca 10 cm larger on each edge than the original. When the lining is brushed and pounded to the verso of the original, then a sheet of Hollytex, 5 cm smaller than the lining paper but larger than the original on each edge is placed on the lining. Supported by Hollytex the whole sandwich is then turned over onto the drying board, leaving the original face up on top.
The Hollytex covering the object is then peeled off, while the one applied on the back of the lining was left between the lined object and the drying board as a buffering layer to promote the air circulation, to prevent the damp material from attaching to the wood surface, ensure even drying of the object, chemical purity and protection of the original from the wood. On a real Karibari-Board that kind of support between the original and the drying board is not necessary.
The edges of the lining paper where then attached to the dryingboard with thicker paste and the object could be left to flatten and dry naturally.
As Conservation center Kanut does not own any karibari-boards so far, we used waterproof veneer panels as drying boards and with this project the method was sucessful: we managed to apply 40gsm lining to all wallpaper tiles that were restored in our lab. Fortunately, on this object we could use quite heavy liningpaper and had enough experience to control the tensions in paper.
We can still not say, that Karibari drying board can be replaced by wood panels.
Once on a drying board, the object should not be allowed to dry too quickly. It is not always possible to control the room's humidity, so for the first days the object can be covered with a material to slow down the drying process a bit: a sheet of Sympatex for example, or in very dry conditions even a damp sheet of blotting paper. On a real Karibari board all these processes are more natural to control, because the panel has the ability to play along with the changes in the original and though resistant to moist treatments, it releases air to flow throuh the structure.
In the mounting process of the several layers of Japanese paper, that build up the karibari panel, different grades of wheat starch paste are used, depending on the tensions in the area and the strength of the materials it will attach. The same way in the lining process and drying the conservation object on a board different pastes must be used. The lining is attached to the original with diluted paste, the grade depending on the strength and properties of the papers. Stronger paste is needed to hold the object attached to the drying board by the edges of the lining material during the drying process of the paper where physical tensions can be very strong. Therefore, in cases the original needs a lightweight lining, sometimes temporary edges or temporary additional lining is added, to hold the original on the board while drying.
It is therefore also important to have enough experience on paper conservation to be familiar with the amount and strength of the contraction forces that different types of paper may have while they are drying.
Yet wet paper on a drying board should not be streched flat by force and some uneavenness is needed for the paper to be able to contract without tearing itself into peaces.
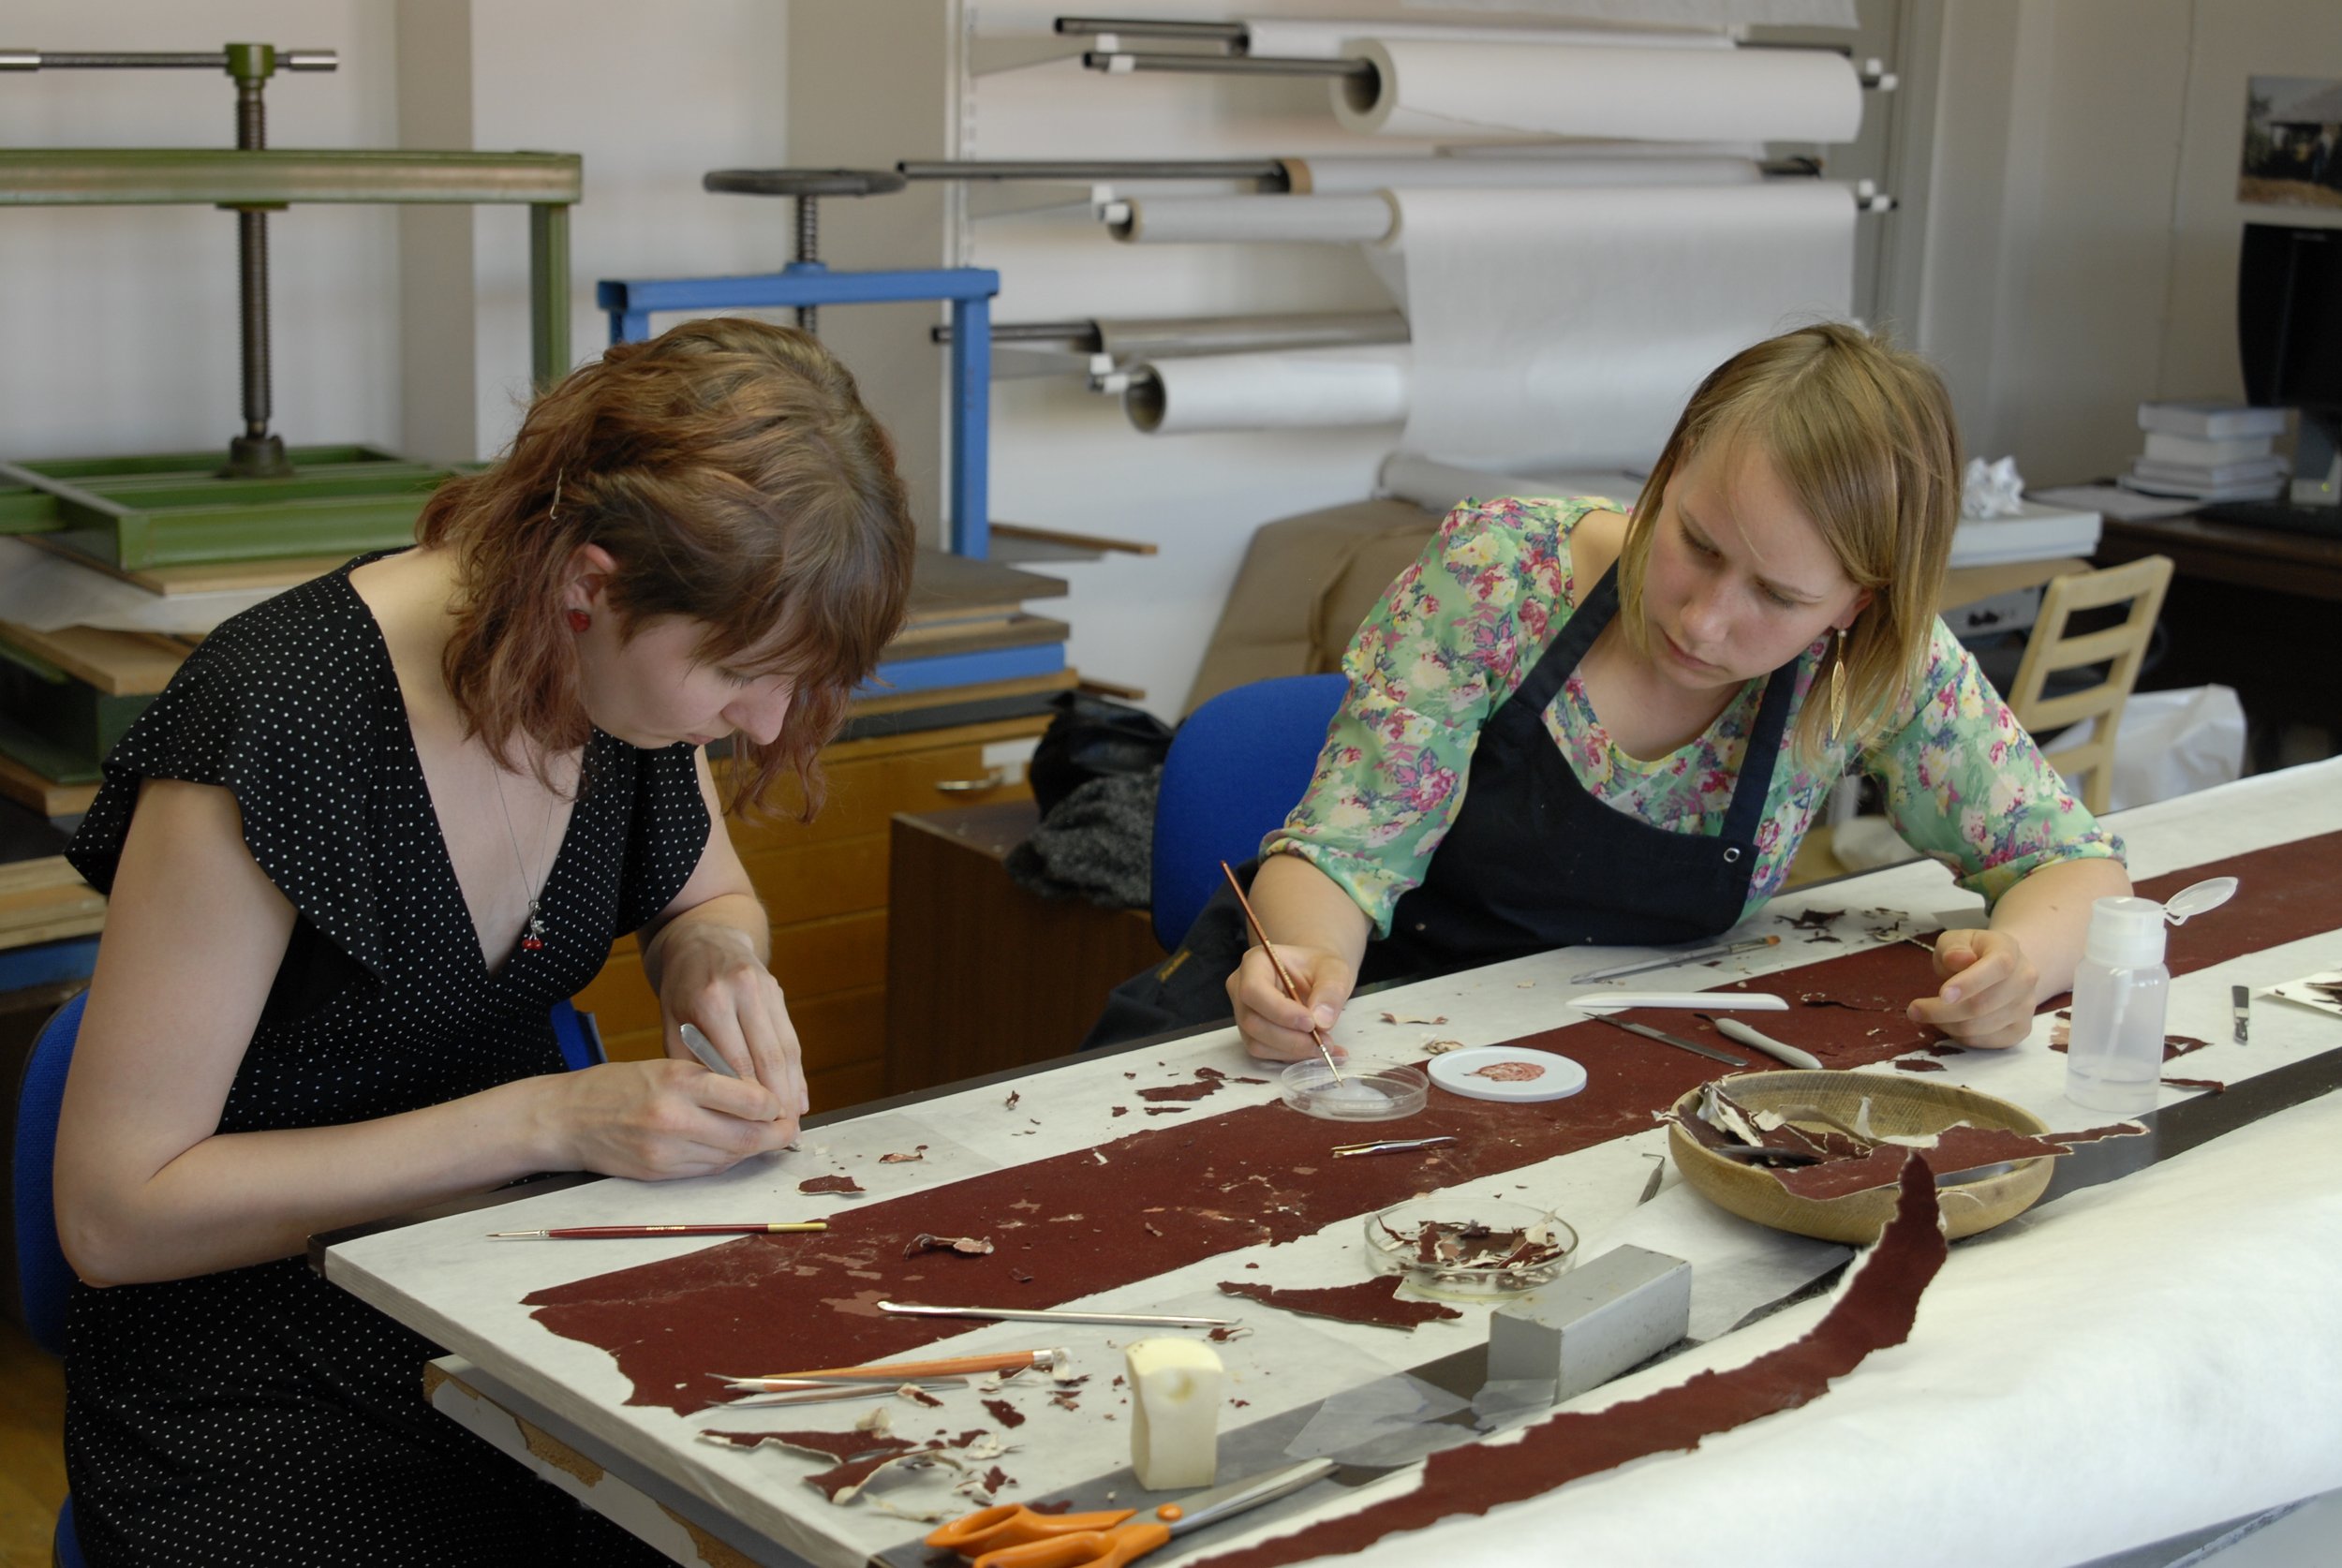
Filling in the losses can be done right away on the drying board and retouching damaged painting on the nex day. For filling in smaller losses in Kanut we used small fragments of the original that were left over. [fig.31], [fig.32], [fig.33], [fig.34], [fig.47], [fig.48], [fig.49], [fig.50]
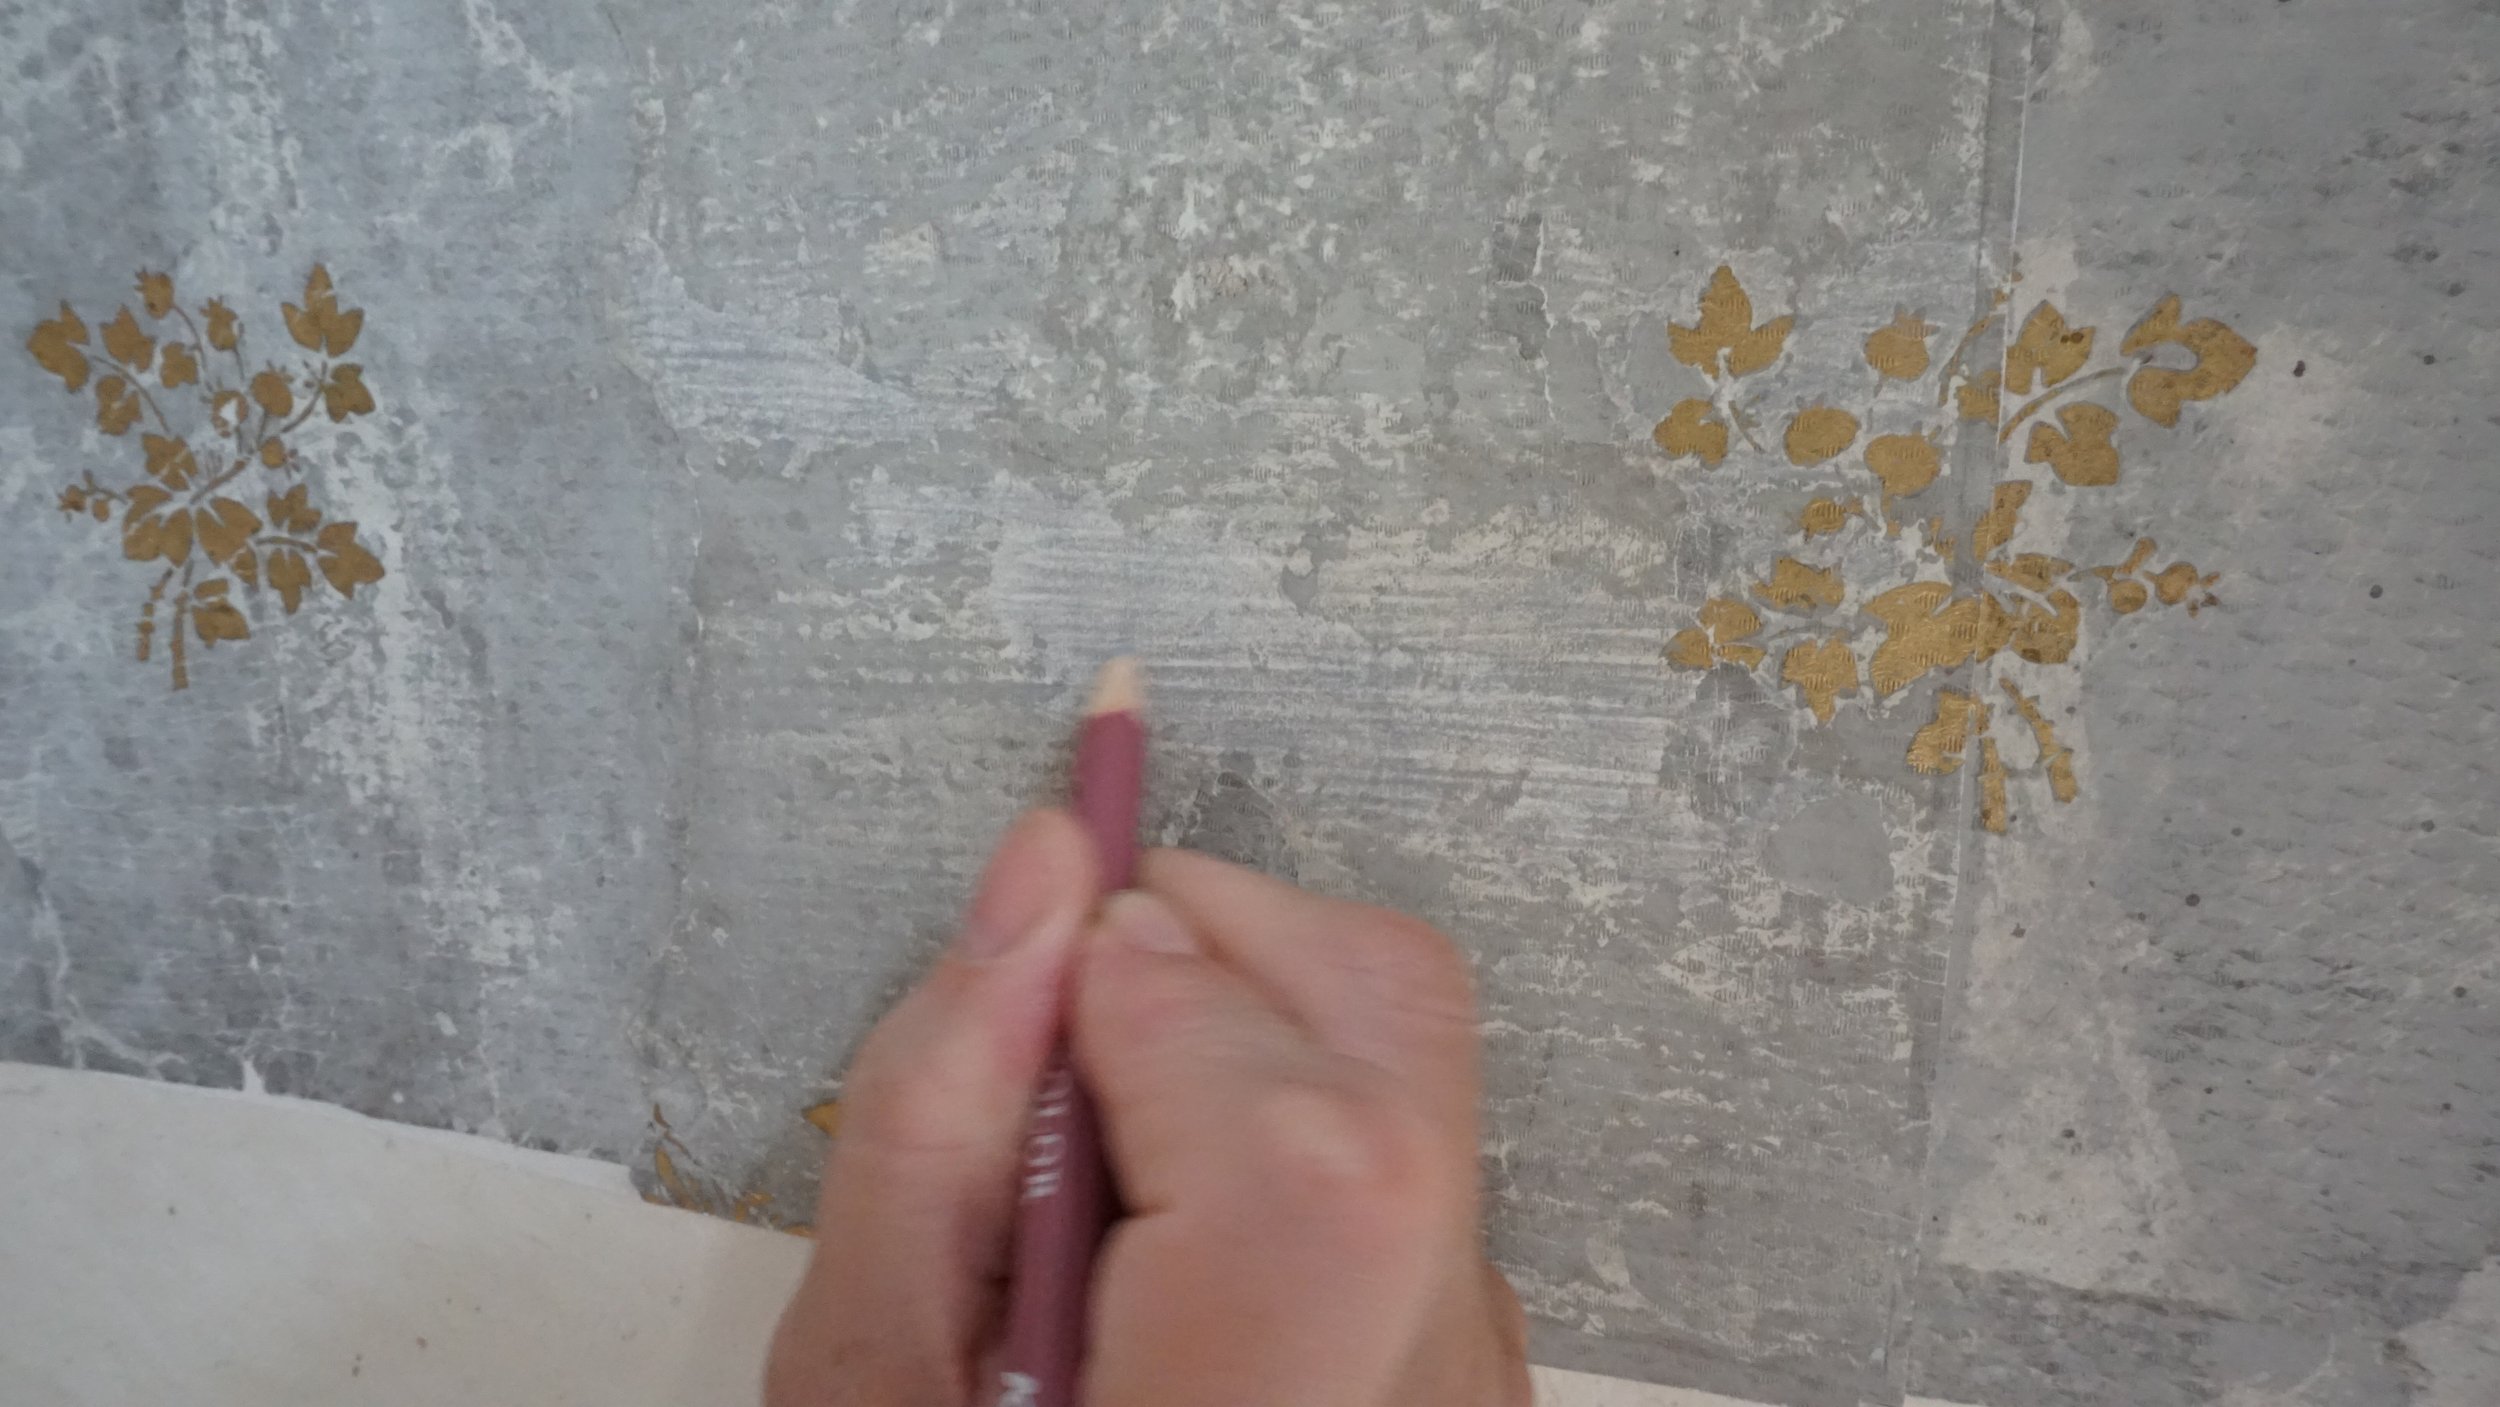
We decided to retouch grey wallpaper after it was attached to the wall on its original place and light conditions.[fig.35], [fig.36]
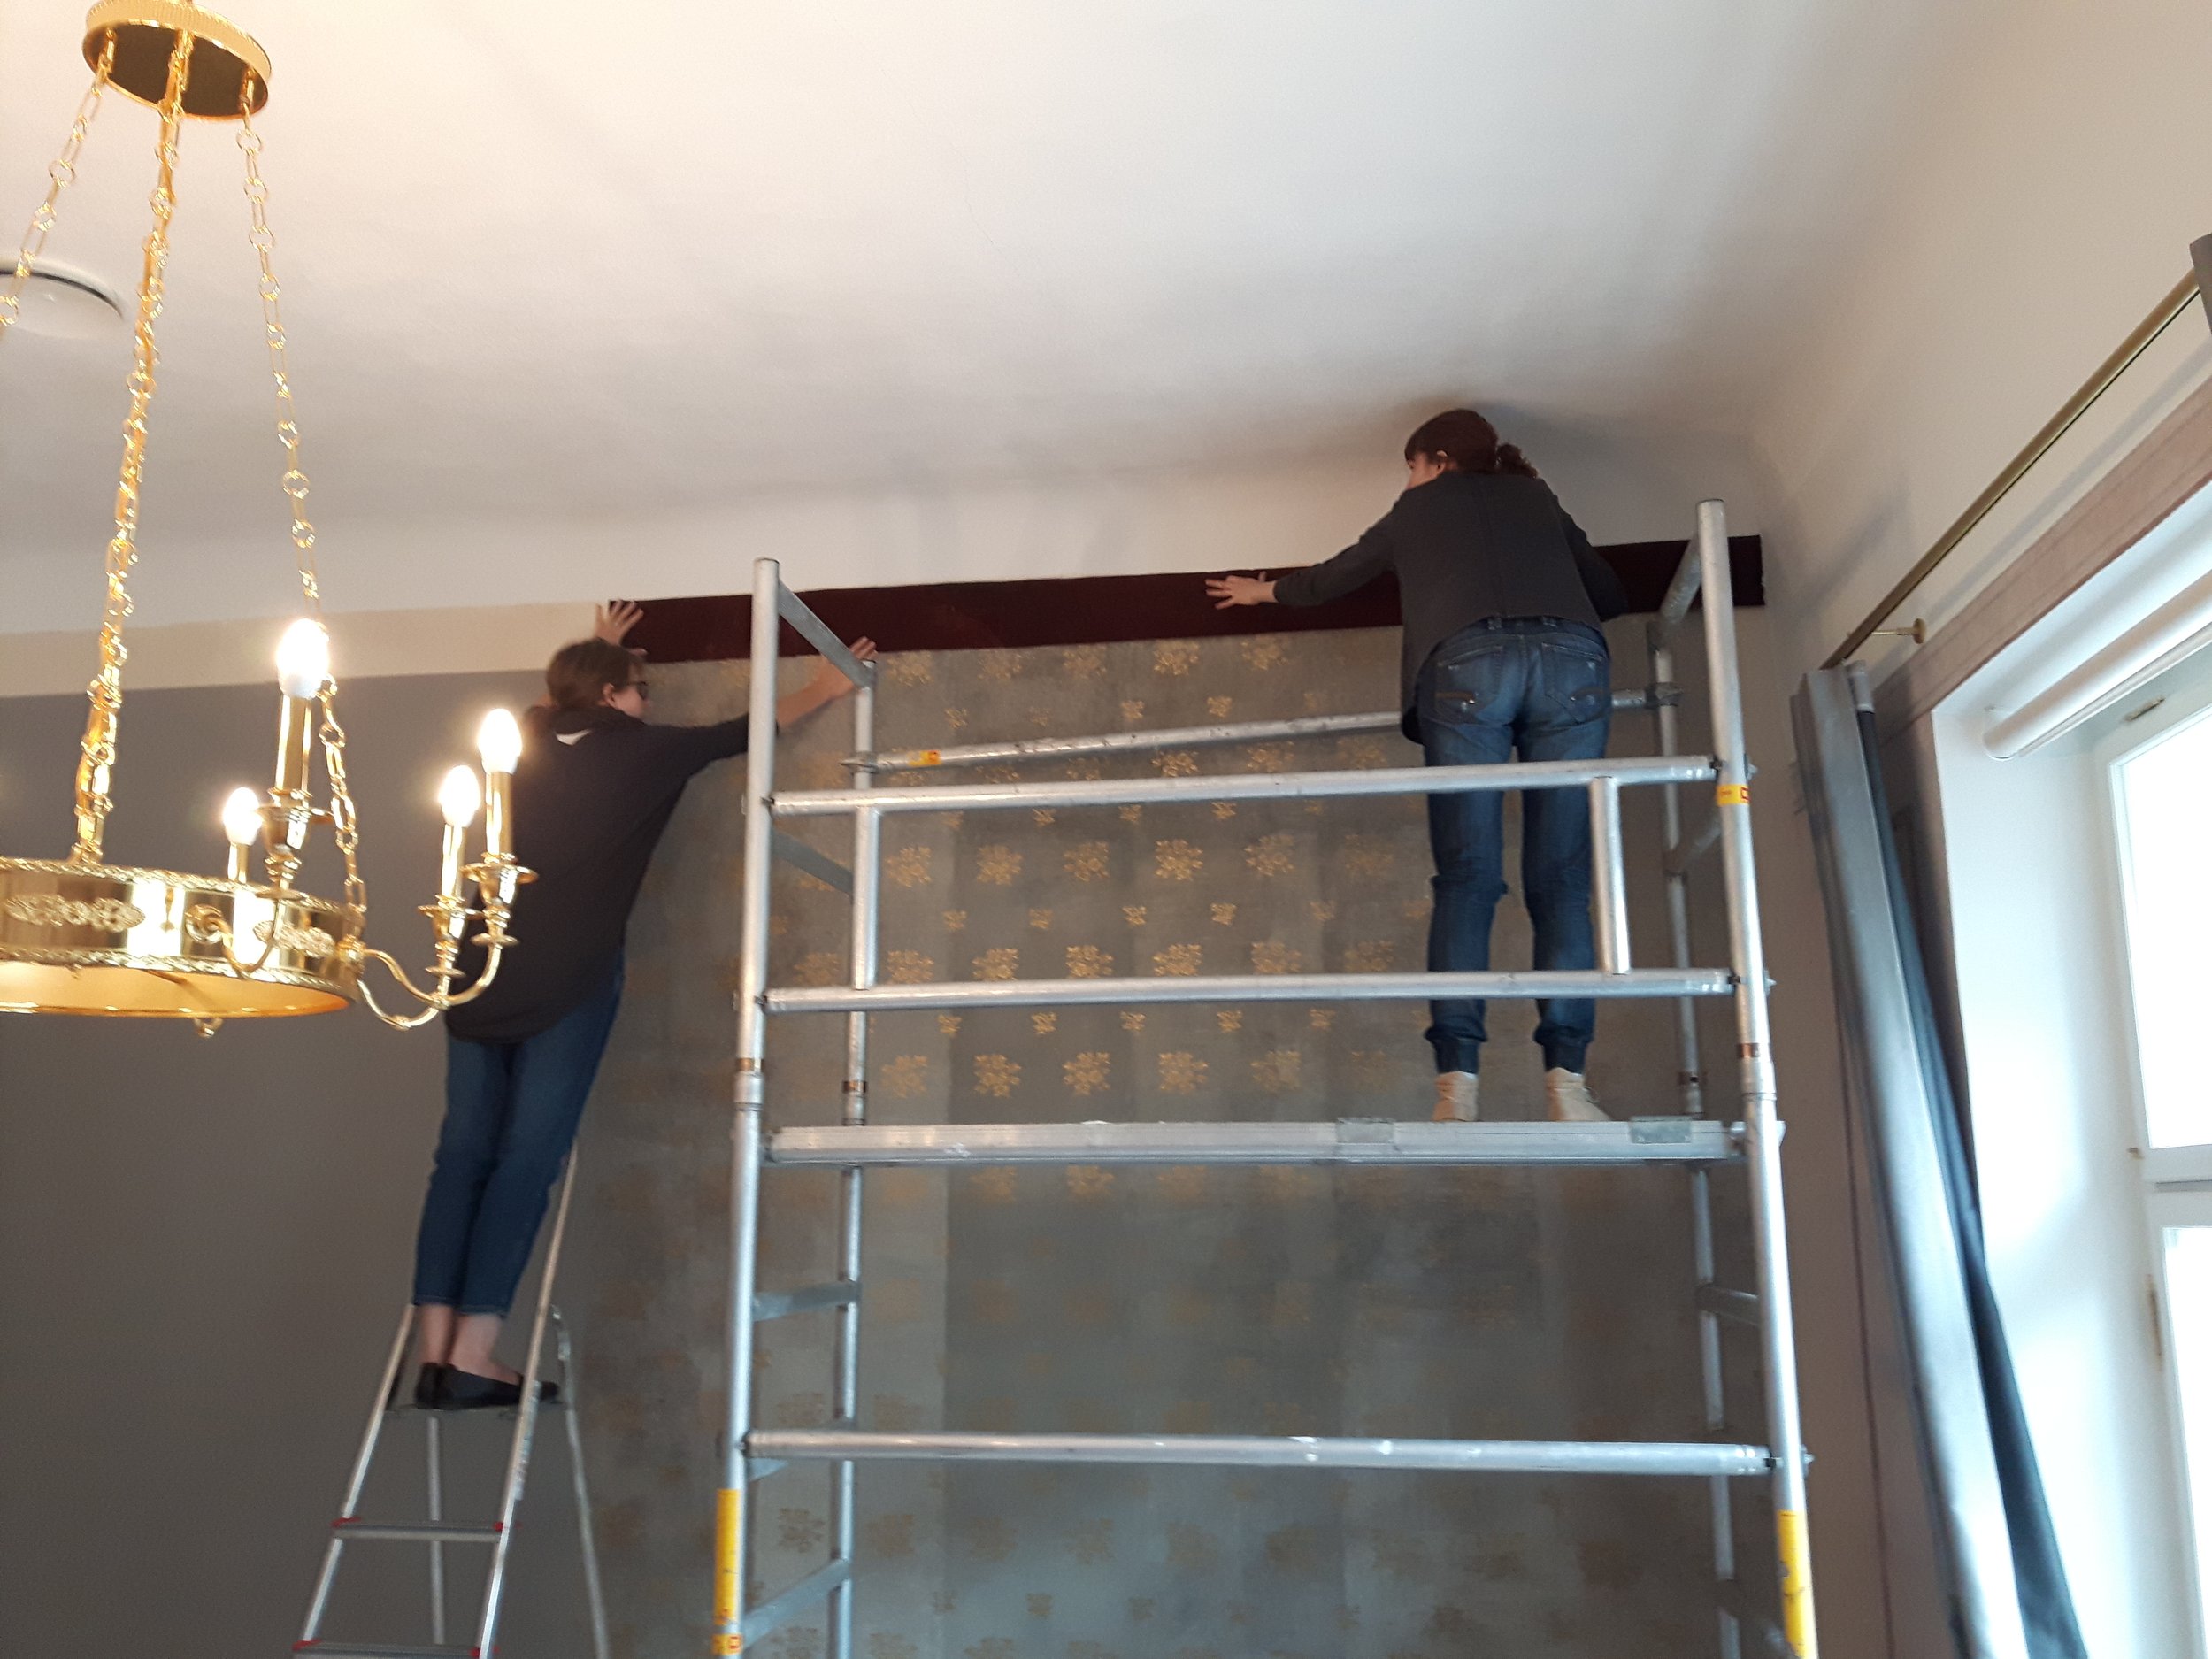
3. Kiriku 2: mounting the wall-scheme
After the renovation work of the building the wall of the baroness´s salon was disinfected, covered with waste-paper (200 gsm nepal kozo) and the wallpaper scheme was restored. First the grey original wallpaper was mounted on the wall [fig.51] then the marking area of the missing grey wallpaper was glued, next it was bordered with red flock braiding starting with the original fragments. [fig.52] Then the lambree was mounted on its place and last the golden wood slats were nailed to frame the grey wallpaper area and between the lambree and lower braiding. [fig.53]
The described project was the first of its kind in Kanut as well as in Estonia during which a wallpaper has been conserved and restored in such a large scale: dismounted from the interior, fully conserved and the wall-scheme restored as part of an interior. [fig.54], [fig.55] The conservators of Kanut acquired a priceless experience during this project and contributed to preserving the historic material as long into the future as possible and to its displaying according to its status.
MATERIALS:
• miniotsikutega tolmuimeja (Kremer-Pigmente, Saksamaa, www.kremer-pigmente.ee)
• puhastuskäsnad (cleaning sponge, Whishab käsnad; PEL kataloog, Inglismaa, www.preservationequipment.com)
• märgpuhastuskäsn Suction-Block (Deffner & Johann, Saksamaa, www.deffner-johann.de )
• jaapani liimipintslid – noribake (PEL kataloog)
• mikalent – 100% puuvillakiududest õhuke loorpaber (Venemaa)
• MC-metüültselluloos – sünteetiline tselluloos (PEL, Inglismaa).
• filterpaber (liimistamata, hea imavusega puuvillakiududest materjal; maaletooja Maksing OÜ, Eesti)
• viltriie – 100% vill (OÜ Tuul ja Kodu, Eesti)
• jõupaber (OÜ Maksing)
• erinevad jaapani paberid – Kozo 40g/m²; 10g/m² (Paper Nao, Jaapan)
• Holytex – 100% polüesterkangas (PEL, Inglismaa)
• Secol kile – polüesterkile (maaletooja OÜ Maksing)
• etanool – lahusti EAF (Tempest AS, Eesti)
• nisutärklis (amülaas, PEL)
• Parafil – 100% polüesterkangas (Deffner & Johann)
• veekindel vineer (Espak, Eesti)
• nepaali paber – käsitsivalmistatud paber, 120g/m² (maaletooja OÜ Maksing)
• tapeediliim Metylan (firma Henkel, Espak, Eesti)
• tapeet Duro (maaletooja Skandi Sisustus OÜ)
• kuivpastellid Koh-I-Noor (maaletooja AS Vunder)
• akvarellpliiatsid Nevskaya Palitra (Hammond OÜ, AS Vunder)
• veluurpaber Sadipal –kilejas materjal, millele on erimeetodiga kantud nailonpulber (Hispaania, maaletooja Maksing OÜ)
• Goldfinger kullapastad (maaletooja Galerii G)
• kattelakk Winsor & Newton (Prantsusmaa, maaletooja AS Vunder)
REFERENCES:
[Киселёв, Игорь (2014) Бумажные обои в интерьерах России XVIII-XX веков. Москва : Academia]
[EVM KDK konserveerimistööde aruanne, Töövõtuleping nr. 660 – 25 (26.nov.2015)]
[Conservation paper used for "capillary cleaning." Stronger and thinner than blotting paper so it can be used for large objects or moved while wet without tearing the original. A layer of the thinner Usukuchi Rayon paper is usually spread over the object first. Paper is laid down wet on the table, then painting is moistened and put over the wet "paper" to remove or lessen staining.[ http://store.hiromipaper.com/rayonpaperroll.aspx ] Rayon paper, unwoven cloth – refers to paper made from the partially syntethic fiber, rayon, and synthetic binder. Some of these papers have chemical wood pulp mixed in. During the process of restoration, rayon paper is used for temporary facings and linings (yõjõ). In all cases its use is transient; rayon paper never forms a lining (urauchi) that will become part of the mounting. In the past, yõjõ papers were thin mino paper, which is uniform and nicely light weight, but today rayon paper is becoming a common substitute, for it has similar properties to mino paper, but is cheap, and conveniently sold in rolls that are easy to cut to desired size.Papers and unwoven cloth (fushokufu) of other syntethic materials such as polypropylen and polyester are also used. [Universite de Paris I – Pantheon – Sorbonne, Science Economiques – Science Humanies – Science Juridiques et Politiques, Section de Conservation des Biens Cultures, Conservation course materials: From East to West : Japanese Conservation Techniques – Western Prints and Drawings; 2001]
[For large paper objects that are badly damaged and fragmented, lining is often the only way to repair.When lining very large objects there is much more control in positioning several individual smaller pasted lining sheets of Japanese paper than handling a whole expanse of lining paper. The edges of a pile (ca 10 sheets) of oriental paper can be simultaneously trimmed by watercutting. As another option endless rolls can be constructed of these individual sheets and of these rolls lining can be applied to large objects strip by strip. Anyhow, in our case we had to use one large lining, because the wallpaper had to be mounted back to the wall on its initial location and therefore moisturized and pasted one more time. That large a paper object becomes quite heavy while wet and handling it in situ is definitely safer if the lining is one piece. We used 40 gsm Japanese roll kozo paper. When the media are vulnerable to waterstainings as with matt distemper wallpapers, oriental papers have an advantage over western papers as linings, in that the actual object does not need to be pasted. Japanese paper is pasted and brushed into position on the back of the object and usually dries more quickly than a dense western paper would. It is also more flexible and responds better to being brushed in contact, is relevantly stronger, but delicately plays along with the character of the original better than most contemporary western papers]
[Gerhard Banik and Irene Brückle, Paper and Water, A Guide for Conservators, 2012, Routledge, NY, USA.- pp246, ptk 9,10]
[Gerhard Banik and Irene Brückle, Paper and Water, A Guide for Conservators, 2012, Routledge, NY, USA.- pp318 –319]
[Merryl Huxtable, Pauline Weber, Some adaptions of Oriental techniques and materials used in the prints and drawings conservation department of the Victoria and Albert Museum, Paper Conservator vol 11, 1987]
[The karibari is the traditional lightweight panel used by the hyõgushi to flatten and mount works of art on paper and silk.These boards were invented in China (where they are called`chuang-pan` which means `mounting-board`) towards the middle of the Ming dynasty (1400-1500), when the hanging scrolls increased in size and have been described as „a light wooden frame cocered with thick paper treated with persimon juice which prevents the paper being affected by moisture.“ The Japanese drying board karibari also has a lightweight wooden lattice core; it is covered in a specific way with up to seven layers of Japanese paper with wheat starch paste as the adhesive. This construction helps to prevent wraping due to changes in humidity. The surface of karibari has slight `give` which helps in the removal of an object after it has been flattened. The boards are lightweight and can be joined together to create a large drying surface if needed.[Pauline Weber and Merryl Huxtable, Karibari: the japanese drying board, Paper Conservator vol 9, 1985]